Introduction
I paid twenty-eight dollars for a spoon ring at a craft fair last spring. Twenty-eight dollars, cash.
It was a pretty thing, I'll give it that. Worn silver, an ornate floral handle, a perfect little gap at the back.
Then I flipped it over on the drive home and saw the hallmark: "1847 Rogers Bros." That's a spoon pattern. I'd bought a bent spoon.
A spoon that probably cost a dollar at a thrift store. Someone had cut it, curved it, and pocketed twenty-seven dollars of my money.
I should have been annoyed. Instead, I got curious.
How hard could this actually be?
Meet the Spoon Ring
A spoon ring is exactly what it sounds like. Take a vintage spoon, cut off the bowl, bend the handle into a circle, and wear it.
People have been doing this since the Depression, when money was tight and good silver was sitting unused in drawers.
The craft is having a comeback, and I get it. The materials are nearly free. The tools are basic. The results look expensive.
In this article I'll walk you through the whole process, mistakes included, so you don't have to make them yourself.
Why This Project Pays for Itself
Store-bought spoon rings run fifteen to forty dollars online and at craft fairs. Artisan versions cost even more.
Making your own costs under a dollar per ring once you own the tools.
Even better, most of the tools are cheap, and some you already own. I spent about thirty dollars total on my kit, and I've made dozens of rings since.
That one craft fair ring paid for my entire setup. Twice. Three times, if we're counting.
But let's be honest about why I kept going. My wife wears one of mine every single day.
Step One: Shop the Thrift Store Like a Pro
The Hallmark Test
Your whole project starts with one flip of the spoon.
Turn it over and look at the back of the handle. If you see "Sterling" or "925," you've hit the jackpot — well, the silver jackpot.
Sterling is 92.5 percent silver. It bends without cracking, and it polishes up like a mirror.
Silver-plated pieces are the other good option. They're base metal with a thin silver coating, and thrift stores are full of them.
Plated spoons make wonderful rings. You just have to treat the plating gently at the edges, which I'll show you later.
What about hollow handles? Walk away.
If the handle feels light and rattles when you tap it, it's hollow. Cut into that and you get a tube of thin metal that crumples like a soda can.
Solid handles only. The piece should feel dense and heavy in your hand.
Look for the Pretty Ones
Ornate handles make the best rings. Flowers, scrollwork, monograms, filigree — detail catches the light and hides fingerprints.
Plain flat handles work too, but you'll be polishing a lot of bare metal with nothing pretty to show for it.
Here's my rule: if a spoon looks like it belonged to someone's grandmother, buy it.
Full sets at thrift stores run two to five dollars. Estate sales are even better — I've grabbed whole silverware sets for pocket change.
My Thrift Score
For this article I hit three thrift stores and spent $4.75 total. Twelve spoons, all silver-plated or better.
Two have gorgeous grape-vine handles. One is monogrammed with an "E" that belongs to no one I know, but the ring is going to be beautiful.
That's the other joy of this craft. You're rescuing pieces that were headed for the landfill.
Every spoon you bend is a spoon that gets worn instead of thrown away.
Step Two: Gear Up (and Safety Up)
The Tools
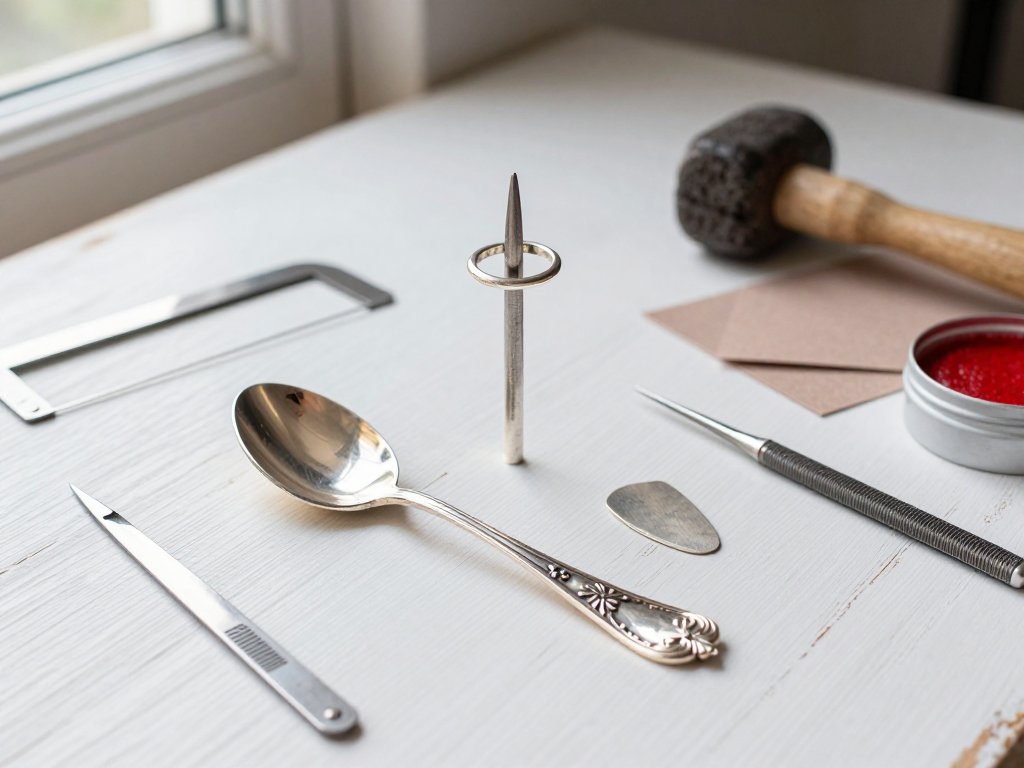
- A jeweler's saw — the ideal cutter, with thin blades for clean narrow cuts
- A ring mandrel — a tapered steel cone for shaping
- A rawhide or plastic mallet
- Needle files, flat and round
- Sandpaper from 220 grit up to 600 or 1000
- Polishing compound and a soft cloth or buffing wheel
That's the whole kit. If you're missing the saw, a hacksaw with a fine blade works. So does a rotary tool with a cutoff disc.
I used a jeweler's saw here because it makes the narrowest cut, which means less filing afterward.
No mandrel? Don't let that stop you:
- A smooth steel rod from the hardware store
- A socket from a wrench set, sized close to your finger
- A wooden dowel, for gentle shaping
I shaped my first three rings on a socket wrench socket. True story.
Safety First
Fresh-cut silver is sharp. Those edges can slice skin like paper, and I have the scar to prove it.
Wear eye protection when cutting or grinding. Tiny metal chips fly everywhere, and they do not belong in your eyes.
Work slowly. Silver is soft and forgiving; rushing is the only reliable way to ruin it.
And if you use a rotary tool, respect the spinning disc. It doesn't care how careful you thought you were being.
Step Three: Make the Cut
Where to Cut
Here's the part I got wrong the first time. I ruined a perfectly good spoon learning it, so listen up.
Your ring blank comes from the handle. The bowl becomes scrap — or a tiny serving dish, if you're creative.
Cut through the handle near the bowl end, right where the handle starts to widen. That wide end becomes the top of your ring.
Then trim the skinny end to length. For my size-9 finger, I cut blanks about two and a half inches long, plus a little extra to be safe.
Here's the geometry: your ring size is really a circumference. Bigger finger means a longer piece of handle.
When in doubt, leave extra length. You can always trim a blank down. You cannot glue silver back on.
How to Cut
With a jeweler's saw, rub a little beeswax on the blade and cut with slow, steady strokes. The blade cuts on the pull stroke.
Let the tool do the work. Muscling a saw only bends blades and ruins your cut line.
With a hacksaw, clamp the spoon in a vise first. A loose spoon will spin around and bite you. Ask me how I know.
With a rotary cutoff disc, keep the spoon clamped and let the disc kiss the metal in short, light passes. Heavy pressure makes the disc bind.
One more thing: don't practice on your grandmother's good silver. Use the forty-cent thrift spoons until you can make three clean rings in a row.
Then, and only then, touch the good stuff.
Step Four: Bend It Like a Blacksmith
The Mandrel
A ring mandrel is a tapered steel cone marked with ring sizes. You lay the metal against it and tap the metal around the curve.
No mandrel? A smooth steel rod works. A socket from a wrench set works — that's literally how I started.
A wooden dowel works for gentle bends, though it dents under hard tapping.
Whichever you use, wrap it in a little painter's tape if you want to protect a fancy spoon's finish. I do that for sterling and skip it for plated.
Tap, Check, Repeat
Place the blank against the mandrel at your size, wide end up, and tap gently with the mallet to wrap the metal around the cone.
Rawhide and plastic mallets shape silver without leaving hammer marks. A steel hammer will dent it, so save that for another project.
Work around the cone in small steps. Tap, rotate, tap, rotate. Slow circles beat one desperate slam.
Check the fit against a ring sizer or a ring that already fits you. I use my wedding band as the reference. It never lies.
The metal will fight you at first, and then suddenly it's a circle. That moment never gets old.
Open or Closed?
Here's the big fork in the road: open rings or closed rings.
An open ring keeps a small gap where the ends meet. It's the classic spoon ring look, and it's the safe choice for silver plate.
Here's the why: plating is a thin shell over base metal. Bend it too far, and the shell cracks at the bend like ice on a puddle.
Want a closed ring, ends joined tight? Use sterling. Solid silver bends without cracking.
To close a sterling ring, file the ends to meet perfectly and solder them with silver solder and a small torch.
Soldering is its own skill, honestly its own article. For your first batch, keep the gap.
Open rings look intentional, and they fit slightly different finger sizes, which makes them great gifts.
Step Five: Harden It Up
Freshly bent silver is weak and flexy. Squeeze it and it flattens in your hand. Bending has work-softened the metal.
The fix is called work-hardening, and it's wonderfully simple: hammer it.
With the ring still on the mandrel, tap around the outside edge with your rawhide mallet. Light, even taps, all the way around.
A few minutes of this firms the band so it holds its shape on your finger instead of squashing flat.
You're not pounding. You're persuading. The metal stiffens and gets a nice springy feel.
Test it: take the ring off and squeeze gently. It should hold its circle and spring back.
Still flexing? Back on the mandrel for more taps.
Step Six: Make It Look Expensive
File the Ends
Remember those razor-sharp cut edges? Time to tame them.
Use a flat needle file on the cut ends, stroking in one direction. Round every edge until it's smooth against your skin.
A round or half-round file reaches the inside curve, where the band wraps behind your finger.
Rub your finger over every edge. If it snags, file more. Your comfort is the quality test.
Sand, Sand, Sand
Next, fine sandpaper. Not the lumber section stuff — fine grits, starting around 220.
Work from 220 up to 400, then 600. Feeling fancy? Go to 1000 grit for a true mirror finish.
Sand in one direction, with even strokes, along the length of the band.
Here's a lesson I paid for: skip grits, and every scratch you thought you erased shows up the second you polish. Don't skip grits.
Polish and Clean
Now the magic step: polishing compound. It comes in small bars, red for the final shine, white for extra gloss.
Have a buffing wheel on a bench grinder or rotary tool? Apply compound and buff gently.
No wheel? Rub the compound onto a soft cloth and polish by hand. Slower, same result.
Do the whole band, including the inside. Thirty extra seconds, and it makes the ring feel like real jewelry.
When it gleams, wash it in warm water with a drop of dish soap. That removes every trace of compound, which is greasy gray stuff you don't want on your skin.
Dry it and give it one last buff with a clean cloth.
Hold it up to the light. See that shine? That's the moment the ring stops being a spoon.
When Things Go Wrong (and They Will)
Let's talk about failures, because I've made every single one of these.
The Ring That Won't Sit Flat
You bend the blank, and it looks like a ring. But on your finger, it tilts like a seesaw.
Cause: the band got twisted sideways during shaping, or the ends don't line up.
Fix: slide the ring back on the mandrel, twist it straight with your fingers, and tap the high side down with the mallet.
Check it on a flat table. A good ring stands level, like a tiny car tire.
Flaking at the Cut Edge
That's the plating lifting off at the cut. It looks like peeling paint on a wedding dress.
First, the fix: file the loose flake away cleanly, then smooth the edge with fine sandpaper before you polish.
Sharp edges catch plating and pull it loose, so rounding the edge is your real protection.
And don't force plated pieces past a full circle. Most edge cracks start at an over-bent spot, where the coating is thinnest.
Too Big or Too Small
Because the mandrel is a cone, sliding the ring up or down its length changes the size. That's your adjustment knob.
Too big? Move to a smaller spot on the cone and tap it tighter. Or trim a sliver off one end and reshape.
Too small? Ease it up to a wider spot on the cone. Gently, if it's plated.
Small tweaks are fine. Big jumps mean a new blank. A spoon costs fifty cents; your patience is worth more.
The Crack
You bent too far and heard it: a tiny snap. On plate, that's the coating giving way, sometimes straight through the metal.
If the crack is small and sits at the back of an open ring, you might file it smooth and keep going.
If it's through the metal, that ring is scrap. And don't try soldering a cracked plated ring — the heat makes the plating bubble.
Take the lesson: bend less, tap more often, keep plated rings open. Every cracked spoon taught me something, and none cost more than a dollar.
The Budget Math
Let's do the numbers, because that's how I talked myself into trying this in the first place.
- Thrift spoons: $4.75 for my batch of twelve, about forty cents each
- Tools: roughly $30 once, spread across dozens of rings
- Store-bought spoon rings: $15 to $40 each
- My cost per ring: well under $1
A dozen rings for less than six dollars in materials. Even at ten dollars apiece, that's a serious margin.
Handmade spoon rings sell for twelve to twenty-five dollars at craft fairs. I've seen plainer rings than mine go for more.
They're also the perfect gift. Housewarming, birthday, wedding, or the classic "I found this spoon and thought of you."
My sister-in-law got one for her birthday and wears it with everything. It cost me a quarter in spoon and one evening of tapping.
That, right there, is the whole point of this hobby.
The Payoff
Remember that twenty-eight-dollar ring from the craft fair? Last week I took it apart. Not to be dramatic — I wanted to study it.
Know what I found? A slightly thicker spoon than I usually buy, bent around a mandrel, polished well. Nothing magic.
I can make that ring. I have made that ring, a dozen times over, for less than I paid to park at that fair.
The tools live in a drawer now. The spoons live in a box under the bed.
And every few weeks, someone spots my wife's ring and asks where she got it.
"My husband made it," she says, like it's no big deal.
It kind of is, though. A forgotten spoon, an evening of tapping and sanding, and a piece of jewelry that actually means something.
That's upcycling at its best. Cheaper than buying, better than new, and completely, wonderfully yours.
