Introduction
Summer is here, and with it comes the familiar question: "Mom, I'm bored." If you have been hearing those two little words on repeat, you are in good company.
The good news is that you do not need a trip to the craft store or a complicated plan to fix it.
This guide gathers eight simple summer craft projects for kids using paper, popsicle sticks, and other basics you likely already have in the house. Each project takes about twenty minutes of prep, uses supplies that cost very little, and ends with something your child will be proud to show off.
These crafts are also wonderfully forgiving. If the glue drips or the paper tears, that is part of the process. The goal here is not perfection. It is a calm afternoon, a happy child, and maybe a few minutes of quiet for you.
What You'll Need: Build a Simple Craft Basket
Here is the secret to painless craft time: keep everything in one place. A shoebox or plastic bin becomes your craft basket, and when the boredom strikes, you simply pull it out. No hunting for scissors. No digging through drawers.
Here is exactly what you need to stock it:
- White and colored paper, plus scrap cardstock
- Popsicle sticks (the wide craft sticks work best for little hands)
- Child-safe scissors and a glue stick
- Washable markers, crayons, or colored pencils
- Washable paint and a few old paintbrushes
- Paper plates and cardboard tubes from empty rolls
- Egg cartons, saved from breakfast
- Yarn or string, and a hole punch
That is the whole list. Most families already have ninety percent of it. If you are missing something, a quick look in the recycling bin usually solves the problem.
One tip before you start: lay down an old tablecloth or a newspaper layer. It protects your table and makes cleanup take about thirty seconds. You will thank yourself later.
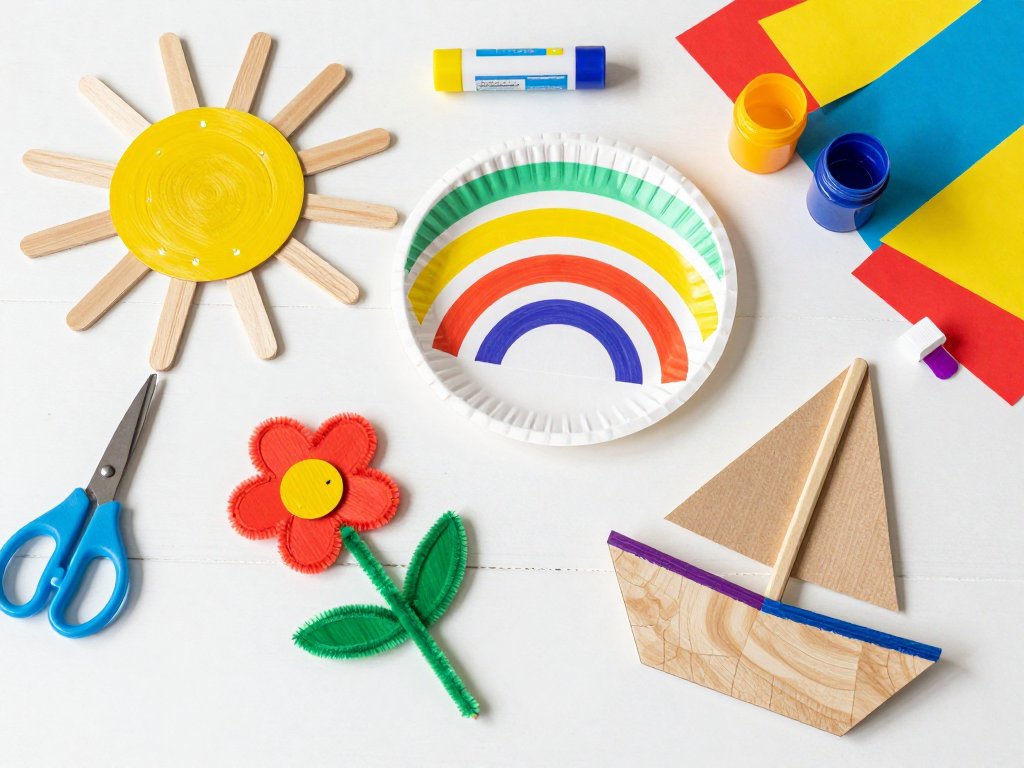
Project 1: Popsicle Stick Sunbursts
This project screams summer. All you need are popsicle sticks, glue, and paint. It is the perfect first craft because the steps are simple enough for even a preschooler to follow.
What you need: 8 to 10 popsicle sticks, glue, yellow and orange paint, a small paper plate.
Step 1: Fan the sticks out in a circle so they overlap slightly in the middle, like the rays of the sun. Glue them together at the center.
Step 2: Let the glue dry for a few minutes. Meanwhile, mix a little yellow and orange paint on the paper plate.
Step 3: Paint the fan of sticks in sunny colors. You can do all one color or alternate them.
Step 4: Once dry, glue a paper circle in the middle to finish the sun. Hang it on the fridge or thread a string through the top.
Older kids can add faces to their suns or make several in different sizes for a whole sunny family. It is a wonderful way to use up the leftover sticks from summer popsicle treats.
Project 2: Paper Plate Fans
On a hot afternoon, a paper fan is both a craft and a tool. Kids love that their artwork can actually cool them down. It takes about ten minutes from start to finish.
What you need: one paper plate per fan, markers or paint, a popsicle stick, tape, and scissors.
Step 1: Cut the paper plate in half. Each half makes one fan.
Step 2: Decorate the flat side with summery patterns: stripes, polka dots, watermelon slices, or little flowers.
Step 3: Tape a popsicle stick to the straight edge of the half-plate to make the handle.
Step 4: Fan yourself and enjoy the breeze.
These fans double as lovely handmade gifts. Grandparents and neighbors will genuinely treasure a child-made fan on a warm day, and kids love the reaction it gets.
Project 3: Cardboard Tube Binoculars
Those empty toilet paper rolls are begging to become something. Cardboard tube binoculars turn an ordinary backyard into an adventure zone. Birds, bugs, and clouds all become thrilling discoveries.
What you need: two cardboard tubes, tape, yarn, a hole punch, and markers or stickers for decorating.
Step 1: Tape the two tubes together side by side, about an inch apart.
Step 2: Decorate the tubes with markers, washi tape, or stickers. Let your child go wild.
Step 3: Punch a hole on the outer side of each tube and thread a piece of yarn through, tying the ends to make a neck strap.
Step 4: Head outside and investigate. Ask your child what they can spy: a red bird, a white cloud, a tiny ant.
This is a wonderful project for building observation skills. You can turn it into a nature scavenger hunt, and your little explorer will be busy for the whole afternoon.
Project 4: Egg Carton Flowers
Egg cartons make the sweetest painted flowers, and the process is easy enough for young children to do mostly on their own. The results look surprisingly pretty lined up on a windowsill.
What you need: a cardboard egg carton, child-safe scissors, paint, pipe cleaners or green paper strips, and a glue stick.
Step 1: Cut the egg carton apart into individual cups. An adult may need to help with this part.
Step 2: Trim the edges of each cup into petal points, snipping little V shapes around the rim.
Step 3: Paint each cup a bright color. Let them dry completely.
Step 4: Poke a small hole in the bottom of each cup and push a pipe cleaner through as the stem. Fold the end inside the cup to hold it in place.
Step 5: Add a paper leaf or two to each stem, and arrange your flowers in a jar.
For an extra flourish, press a yellow pom-pom or a crumpled paper ball into the center of each flower. The texture makes them look almost real.
Project 5: Paper Chain Summer Garland
Paper chains are a classic for a reason: they are satisfying, repetitive, and easy to make in a group. This version uses summer colors and doubles as party decor for a backyard picnic or a rainy-day room refresh.
What you need: colored paper in bright summer shades, scissors, and tape or glue.
Step 1: Cut the paper into strips about one inch wide and six inches long.
Step 2: Form the first strip into a loop and secure the ends with tape or glue.
Step 3: Thread the next strip through the first loop, then form it into its own loop and secure it.
Step 4: Keep going until your chain is as long as you like. Alternate colors for a rainbow effect.
This is the craft to pull out when siblings are squabbling, because everyone can work on the same chain together.
You can hang the finished garland across a doorway, along a shelf, or over the kitchen window.
When the season ends, it folds flat into the craft basket for next year.
Project 6: Handprint Sunflowers
Handprint crafts capture a moment in time. Your child's handprint art will be a keepsake you will not want to throw away, and sunflowers are one of the happiest designs to make with it.
What you need: yellow washable paint, a paintbrush, a sheet of blue or white paper, a paper plate, and a marker.
Step 1: Paint your child's palm and fingers with yellow paint.
Step 2: Press their hand firmly onto the paper, fingers spread wide, to make the flower petals.
Step 3: Wash hands, then repeat the print around the same center to build a full flower. Four or five prints make a lovely sunflower.
Step 4: Once the paint dries, draw a brown circle in the center and a green stem and leaves with markers.
You can make a whole field of handprint sunflowers and turn it into a card for a grandparent. The finished piece is always worth a frame, and your child will be thrilled to see their hands become art.
Project 7: Popsicle Stick Boats
If your summer involves water play, this project is a must. Popsicle stick boats actually float, which makes them endlessly entertaining in a kiddie pool, a bathtub, or even a big bowl of water on the porch.
What you need: 8 to 10 popsicle sticks, glue, a triangle of paper for the sail, a drinking straw, and tape.
Step 1: Lay six sticks side by side to form the deck of the boat. Glue two sticks across the top, perpendicular to the first six, to hold them together. Let it dry.
Step 2: Decorate the paper triangle to make the sail. Tape the straw to the back of the sail.
Step 3: Tape the straw upright to the middle of the boat deck.
Step 4: Launch the boat and test its floating skills. Add a small flag to the top of the straw if you like.
Older kids enjoy racing their boats and tweaking the design to make them faster or sturdier. That experimentation is real learning, disguised as summer fun.
Project 8: Rolled Paper Beads
Rolled paper beads look like fancy store-bought jewelry, but they are made from recycled magazine pages and scrap paper. This project is great for older kids who want something that feels grown-up.
What you need: colorful magazine pages or scrapbook paper, a glue stick, a toothpick or skewer, scissors, and yarn or elastic cord.
Step 1: Cut paper into long triangles. The longer and wider the triangle, the bigger the bead.
Step 2: Place the toothpick at the wide end of the triangle and roll the paper tightly around it, keeping the roll even.
Step 3: When you reach the pointed tip, glue it down firmly.
Step 4: Slide the bead off the toothpick and repeat until you have a good pile of beads.
Step 5: String the beads onto yarn or elastic to make a bracelet or necklace.
If you want a glossy finish, brush each bead with a thin layer of white glue and let it dry. The beads become surprisingly durable, and your child will wear their homemade jewelry with real pride.
How to Keep Craft Time Calm
Crafting with kids is wonderful, but let us be honest: it can also get messy and loud. A few small habits make the whole experience calmer for everyone.
Set up before you call the kids. Have the supplies laid out and the table covered before little hands arrive. Five minutes of prep saves twenty minutes of chaos.
Pick one project at a time. Do not put the whole craft basket on the table. Choose a single project, gather only what it needs, and put the rest away. Fewer choices mean less overwhelm for young children.
Let them do it their way. The sunburst may come out crooked, and the flower may be purple instead of yellow. That is perfectly fine. When children own the process, they build confidence. When adults take over, kids lose interest fast.
Praise the effort, not the result. Instead of "That is beautiful," try "I love how carefully you glued those pieces" or "You picked such a bright color." Effort-based praise keeps children engaged even when their project does not look like the picture.
Plan for a clean break. A project does not have to be finished in one sitting. If attention wanders, tuck everything into a zip bag labeled with the project name and pull it out again tomorrow. Half-finished crafts are not failures; they are projects in progress.
Making It a Whole Summer
Once you try a few of these projects, you will notice something: your child starts suggesting their own ideas. A paper roll becomes a telescope. A popsicle stick becomes a magic wand. That creativity is the whole point.
To keep the momentum going all season, try these simple habits:
- Keep the craft basket stocked and in a spot the kids can reach
- Rotate one or two new supplies in each week, like googly eyes or washable paint
- Dedicate one lazy afternoon a week to a longer project
- Display finished crafts where the family can see them
- Save the best pieces for grandparents, teachers, and friends
You do not need elaborate kits or expensive supplies. The best summer crafts for kids are the ones that start with a paper plate, a handful of popsicle sticks, and a child who is ready to make something. That is the whole recipe.
Final Thoughts
Summer days are long, and boredom is inevitable. But with a craft basket in the corner and a few simple ideas up your sleeve, you can turn a whiny afternoon into a memory.
The glue may end up in someone's hair and the paint may wander off the paper, and that is okay.
Start with one project this week. Pick the one that made you smile, gather the supplies, and let your child take the lead. You might be surprised by how quiet the house gets, and how proud your little maker looks holding up their finished work.
Happy crafting, and here is to a summer full of paper, popsicle sticks, and plenty of small masterpieces.