Introduction
Tatting asks very little of you. One small shuttle, one ball of cotton, and a quiet half hour at the kitchen table.
What comes off the shuttle is lace — real lace, the kind that appears in old photographs pinned to a pillow in someone's lap.
But it is lace made of knots, not woven cloth. That distinction matters more than it sounds at first.
A tatted edge cannot unravel. Cut a thread in the middle and the damage stays local, because the knots on either side simply hold.
This is an old skill, older than most of us assume, and it has survived for one practical reason. It travels well.
That is why women tatted while waiting — for a train, a birth, a letter, a husband home from sea. The work could be set down mid-picot.
It still suits modern hands. Ten minutes between school pickup and dinner is enough to close one ring and begin the next.
A Little History of a Very Old Knot
Tatting's roots are usually placed in the knotting and netting traditions of seventeenth- and eighteenth-century Europe.
Knotting meant small decorative knots used to trim cuffs and collars. Netting was its practical cousin — knotted mesh for nets and fine grounds.
Tatting grew out of that family of techniques. The exact origin is debated, and any book that names a single inventing country is overreaching.
Even the word is uncertain. One theory traces it to a French term for fussing or dithering over small details — tatillon — which would be an unkind joke about the work.
Another traces it to a plain old word for a small knot. Both stories are told; neither is proven.
What is documented is the shape of the practice. By the nineteenth century, tatting was a respectable accomplishment for women of moderate means.
And it was portable in a way that bobbin lace never was. A pillow with forty bobbins does not travel; a shuttle does.
It was the lace of the waiting room and the visiting call, worked in five-minute pieces between other duties.
It is worth separating tatting from its neighbours, because beginners meet the names together and confusion follows.
Bobbin lace is woven: many threads, many bobbins, a pillow and a pricking to follow. It is quick in experienced hands and impossible to carry.
Needle lace is stitched: a single needle builds looped stitches over a drawn pattern, then the pattern is cut away. It is sculptural and slow.
Irish crochet is crocheted: motifs worked separately, then joined with a crocheted mesh. Its texture is soft and its construction entirely different.
Tatting is knotted. One continuous thread, two half-hitches repeated, formed into rings and chains. That is the whole of it.
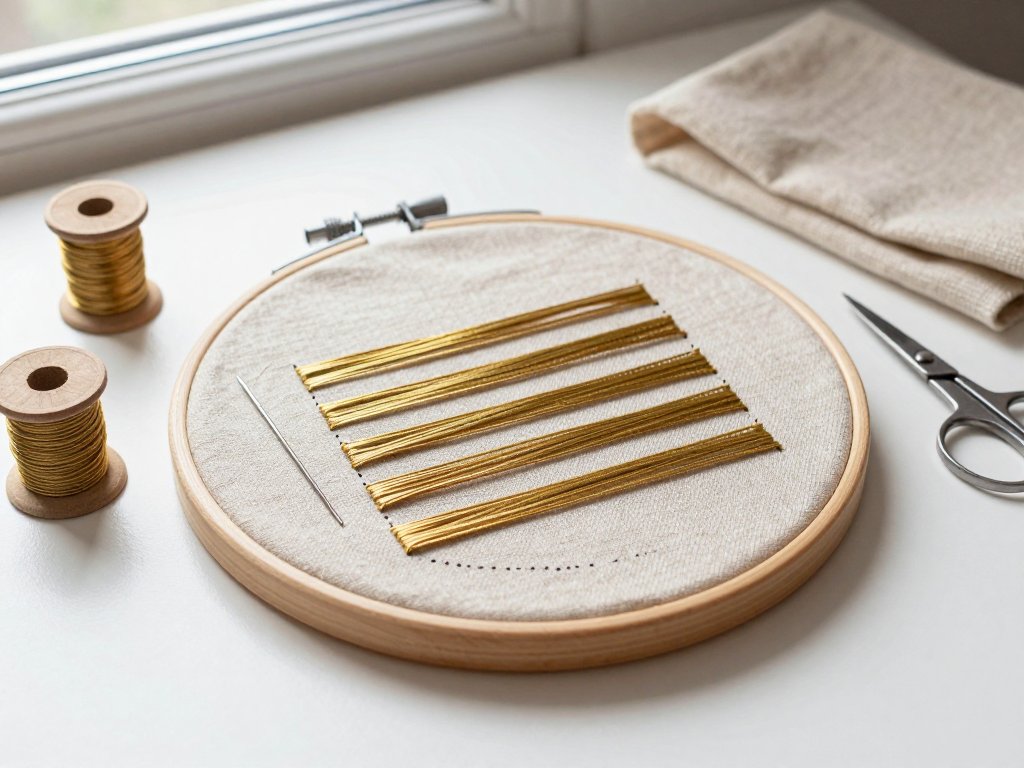
If you have ever laid a thread neatly along a surface and stitched it down — the technique we call couching stitch — you already know how much of handwork is really about controlling one thread at a time. Tatting is that instinct taken to its logical end.
What Tatting Actually Is
Every tatted fabric in the world is made from one unit: the double stitch.
A double stitch is two half-hitches worked around a core thread, one after the other, in mirror image.
Work enough of them in a line and you have a chain of knots that grips the core thread like a Chinese finger trap.
Arrange them in a circle, pulled tight and closed, and you have a ring. Work them along a bare thread between rings and you have a chain.
Join the rings and chains at small loops of thread called picots, and you can build a flower, a border, a snowflake, an edging for a pillowcase.
Here is why it does not unravel. Each double stitch is a knot tied around another thread, not a loop pulled through a loop.
Knitting and crochet are built on interlocking loops. Pull the right end and the whole fabric can run.
Tatting is built on hitches. A hitch grips. There is no free end to chase through the work.
That is also why it is stronger than it looks. The thread is doubled back on itself at every stitch, so the finished lace wears better than its gossamer appearance suggests.
The Small Kit: Tools You Will Need
You can begin tatting for the price of a shuttle and a ball of cotton. Nothing else in the kit is strictly necessary.
The shuttle
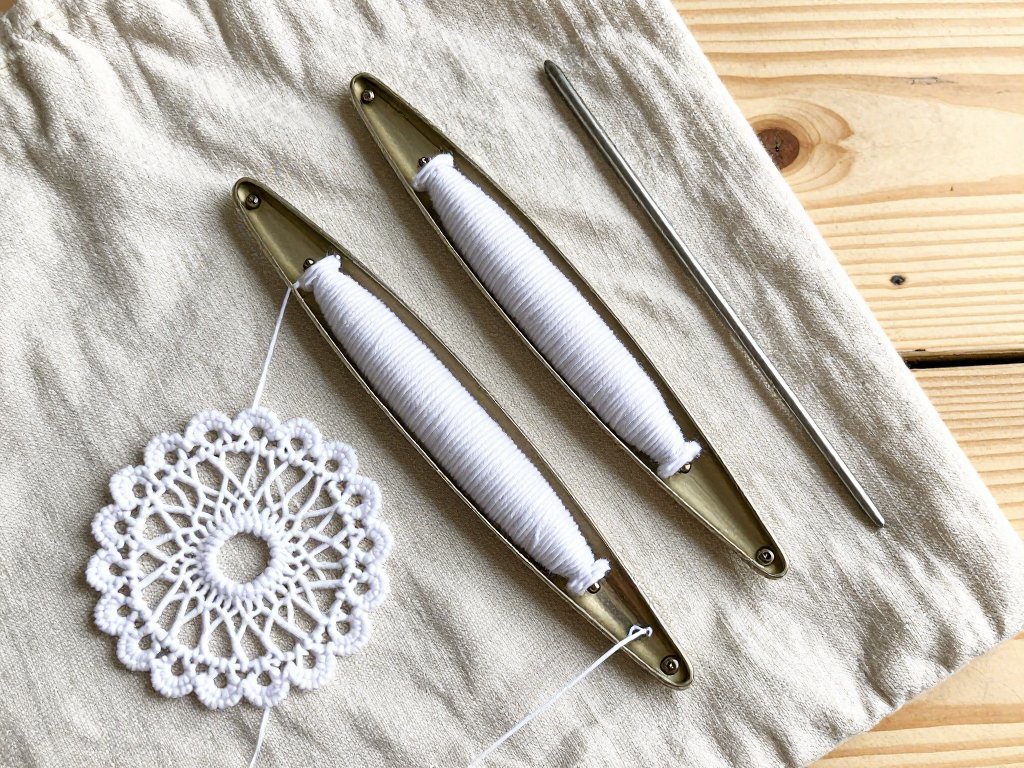
The shuttle holds the working thread and does the forming. It is a small pointed boat, two to three inches long, with a bobbin or a post inside.
Look for three things: smooth edges, a comfortable width in your hand, and a weight that does not tire your fingers.
Run your thumbnail along the inside edge before you buy. A moulding seam will fray your thread, and you will blame the cotton.
A "post" shuttle holds thread wound around a central pillar. A "bobbin" shuttle takes a removable spool, which is easier to fill and to swap.
The thread and the hook
The second half of the kit is a ball of cotton — the "ball thread," which supplies the core in chains and the tail for joins.
You will also want a small steel crochet hook for pulling thread through picots. Size 13 or 14 is usual for fine cotton.
A picot gauge, or failing that a knitting needle, keeps picots the same size. A metal ruler with marked widths works too.
Small sharp scissors. A blunt tapestry needle for hiding ends. And a small tin to keep it all together, because shuttles hide.
Needle tatting, if the shuttle fights you
Some hands find the shuttle awkward, especially with arthritis or after an injury. Needle tatting uses a long tatting needle instead.
The stitches are formed on the needle rather than in the air. The finished lace looks the same, and the joins work the same way.
Choosing Thread: Sizes 10, 20 and 80
Tatting cotton is sold by number, and the number runs backwards from what you might expect. Bigger number, finer thread.
Size 10
Size 10 is the chunky one. It works up quickly and shows every stitch clearly, which makes it forgiving while you learn.
A medallion in size 10 comes out roughly the size of a large coin or a small biscuit. Good for bookmarks and jar covers.
Size 20
Size 20 is the middle ground and the most useful number in a beginner's drawer. It is fine enough to look like lace.
Edgings, motifs, small snowflakes and handkerchief borders are all comfortable in size 20. It is my recommendation for a first purchase.
Size 80
Size 80 is heirloom work — hair-fine, slow, and beautiful. It makes lace for christening gowns and collars, and it will not forgive inattention.
Save it. Buy it later, when your hands know the stitch and your eyes know what a flipped thread looks like.
How size changes scale
The stitch count stays the same across sizes. A ring of six doubles is a ring of six doubles whether the cotton is thick or thin.
What changes is the finished measurement. The same pattern in size 10 and size 80 differs by a factor of three or more.
So a pattern is a ratio, not a size. Once you understand that, you can rescale almost any motif by changing thread alone.
Use cotton, not acrylic. Cotton holds a knot under tension and blocks flat; synthetic thread slips and springs back.
The Double Stitch, Slowly
This is the only stitch in tatting, and it is worth an unhurried evening. Everything else is arrangement.
Hold the shuttle in your right hand and the thread in your left, with three or four inches of core stretched between them.
The core thread — the one running straight — is what the knots will wrap around. Keep a little tension on it with your left fingers.
The first half
Bring the shuttle under the core, then up and over, so the working thread crosses itself and makes a loop around your left hand.
Pass the shuttle through that loop, back to front. As you pull, watch the thread near your left fingers.
It should flip — turn over on itself and slide up to sit around the core. That flip is the entire stitch.
If the thread merely tightens in place without turning, you have not made a stitch. You have made a knot that will not move.
The second half
Now mirror it. Bring the shuttle over the core, then under and back, forming the loop on the other side.
Pass the shuttle through, pull, and watch for the flip again. Two flips make one double stitch.
The test that tells you everything
Here is the check that separates a correct double stitch from a wrong one, and it never fails.
A correct double stitch can slide along the core thread when you push it. It walks. It bunches up like a curtain on a rod.
An incorrect one locks where it sits. Push it and it refuses, because the halves are not mirrored and the hitch has grabbed the core.
So: make five doubles, then push them along the core toward your left hand with your thumbnail. If they slide, you are tatting.
If one will not budge, unpick it with the hook point and try again. This single test will save you weeks.
Rings, Chains and Picots
Once doubles slide reliably, the grammar of tatting opens up. There are only three ideas: the ring, the chain, and the picot.
Closing a ring
A ring is a group of doubles worked close together on the shuttle thread, with the shuttle thread as the core.
When the ring is complete, hold the last stitch between finger and thumb and pull the shuttle thread steadily away.
The ring draws closed like a small purse, and the core disappears inside the knots. That is the whole mechanism.
Working a chain
After a ring you "reverse work" — turn the piece over in your hand, so the next element grows in the other direction.
A chain uses exactly the same double stitch, but the core is now the ball thread held along your left fingers, not the shuttle thread.
This is the one conceptual leap in tatting. Same knots, different core, and the fabric changes character completely.
Picots, and why a gauge helps
A picot is a small loop of core thread left bare between two doubles. You make it by leaving a gap before the next stitch.
Leave a quarter inch, work a double, and a little loop stands proud of the edge, waiting to be joined to something later.
A picot gauge is simply a strip of marked widths. Lay it under the gap, match the width, and your picots come out uniform.
Joining with the hook
To join, work doubles up to the point of the join, then insert the small hook through the target picot from front to back.
Catch the working thread with the hook, pull a loop through the picot, then pass the shuttle through that loop and draw it snug.
Reading a Tatting Pattern
Tatting shorthand looks like code and is really a form of musical notation. It compresses a motion into a syllable.
R means ring. CH means chain. Numbers are double stitches, always.
p means picot, and a dash or hyphen is also a picot — so 6-6-6 is six doubles, a picot, six doubles, a picot, six doubles.
+ means join, and some books use j for the same thing. A plus sign nearly always means "join here, to that picot."
rw means reverse work. cl means close the ring. Both are reminders, not new techniques.
So a line reading R 5-5-5-5, cl, rw, CH 5-5-5, rw says: a ring of five, picot, five, picot, five, picot, five; close it; turn; a chain of five, picot, five, picot, five; turn.
Say it aloud before you thread the shuttle. "Ring, five picot five picot five picot five, close, turn. Chain, five picot five picot five, turn."
Reading a pattern aloud is not childish. It moves the notation from the eye to the ear, and the hands follow the ear more easily.
Your First Project: A Small Ring-and-Chain Medallion
This is the simplest complete piece I know: six rings, six chains, one small flower about two inches across in size 20 cotton.
Set up without a slip knot
Wind about three yards of size 20 cotton onto the shuttle. Leave a six-inch tail hanging loose from the bobbin.
Do not tie a knot. Lay the tail along the shuttle thread and pinch both together between thumb and forefinger, close to the shuttle.
Work your first double stitch over both threads held together. The knot itself captures the tail, and the join is invisible.
Round one: the first ring
Work R 5-5-5-5-5: five doubles, picot, five, picot, five, picot, five, picot, five. That is four picots and five groups of five.
Keep the picots a quarter inch, gauged. Push each double snug against the last as you go, but do not haul on the thread.
Close the ring by pulling the shuttle thread away from the work, steadily, until the ring is round. Reverse work.
The chain, and the turn
Now work CH 5-5-5 — five doubles, picot, five, picot, five — with the ball thread held along your left fingers as the core.
The ball thread comes off the ball, not the shuttle. If you find yourself running out of shuttle thread, you have picked up the wrong end.
Close the chain by pulling the ball thread gently, then reverse work again. A chain is "closed" by snugging its last stitch, not by drawing a ring.
Joining the next ring
Work the second ring as R 5+5-5-5-5. The plus replaces the first picot: join into the last picot of ring one instead of making a new one.
Continue alternating ring and chain until you have six of each, joining as you go. The medallion will curl in your hand as it grows — that is normal.
Closing the round and finishing
On the sixth chain, join the final picot back to the very first picot of ring one. The circle is now closed and cannot come apart.
Cut the threads, leaving six-inch tails. Thread a tail on the blunt needle and run it under four or five doubles on the back of the work.
Do not knot the tail. A knot will work loose in washing; a tail woven under tensioned stitches will not.
Trim close. Then press the medallion face down on a towel with a warm iron, and it will lie flat as a coin.
Tension, Patience and Undoing a Bad Ring
Even tension matters far more than speed, and it is the one thing beginners try to rush.
Your doubles should sit against each other like beads on a string — touching, not compressed. If you can see gaps, you are pulling too hard.
Grip the core thread with the same light pressure every time. Inconsistency shows up as a ring that is fat on one side and thin on the other.
The remedy is not to try harder. It is to slow down and work ten doubles at a deliberately even pace, then ten more.
Now the good news: tatting is extremely forgiving. Because every stitch is a hitch, a bad ring can be unpicked.
Slide the point of the crochet hook under the first double and lift it, then pull the thread back through. The knots release in reverse.
Do not cut. There is almost no mistake in tatting that cannot be undone with a hook and a little patience.
Common Beginner Problems
Stitches that lock instead of slide
This is the classic first-week problem, and it is nearly always a missing flip in the second half.
Work one double at a time and push it along the core immediately. If it will not move, the second half did not flip.
Hold the shuttle differently — flatter against the core — and slow the pull. The flip is a turn of the wrist, not a tug.
Picots of wildly different sizes
Eyeballing a quarter inch is unreliable, especially in fine cotton. Use a gauge for the whole first round.
Lay the gauge flat under the gap, note where the thread sits, and work the next double at that exact width.
A shuttle that keeps unspooling
Thread escaping from the bobbin is usually a winding problem, not a shuttle problem. Wind firmly and evenly, side to side.
Leave the tail hooked into the notch on the shuttle's edge, and give the thread a half turn around the post if your model has one.
Running out of thread mid-ring
It happens, and it is not a disaster. Unpick back to the start of the ring rather than trying to splice inside it.
Then add thread the same way you began: lay the new tail along the core, pinch, and let the first double capture it.
Twist creeping into the ball thread
Chains put twist into the ball thread, and after a few rounds it kinks and snarls. Let the ball hang free rather than sitting it on the table.
Every few chains, stop and let the ball spin out its stored twist. Ten seconds now saves a tangled round later.
A medallion that cups instead of lying flat
Cupping almost always means the outer round is too tight for the inner one — too few doubles, or picots too small.
Check the stitch counts against the pattern first; a single missed double in each chain will pull the whole round upward.
If the counts are right, your tension is too firm. Work the outer round a shade looser, then block firmly under a damp cloth.
Care, Washing and Modern Uses
Tatted lace is more durable than it looks, but it does not want a washing machine. Hand wash in lukewarm water with a little mild soap.
Squeeze gently; never wring. Roll in a towel to remove water, then press face down on a towel with a warm — not hot — iron.
For shaped pieces, pin them out on a padded board and let them dry under the pins. That is what sets a snowflake's points.
As for what to make, the old uses have not lost their charm.
Pillowcase borders, tea towel hems, and the edge of a handkerchief all take tatting beautifully.
Bookmarks are the perfect beginner gift: one narrow strip of rings and chains, finished in an evening, used for years.
Earrings take three small motifs and a pair of findings, stiffened with fabric stiffener so they hold their shape.
And snowflakes — the great tatting tradition of the twentieth century — are still the finest thing to hang on a tree in December.
A Calm Closing
Your first medallion will be uneven. One ring will be loose, one picot will be enormous, and the whole thing will curl like a dried leaf.
Keep it anyway. Put it in the tin with the shuttle, where you will find it in a year and be quietly astonished at the difference.
Because the third one will be beautiful. Not perfect — tatting is handmade, and handmade means visible — but beautiful and flat and even.
The skill arrives the way it always does: not in a single sitting, but in ten quiet minutes repeated across a season.
So wind the shuttle, leave the tail loose, and make one double stitch that slides. That is the whole beginning.