Introduction
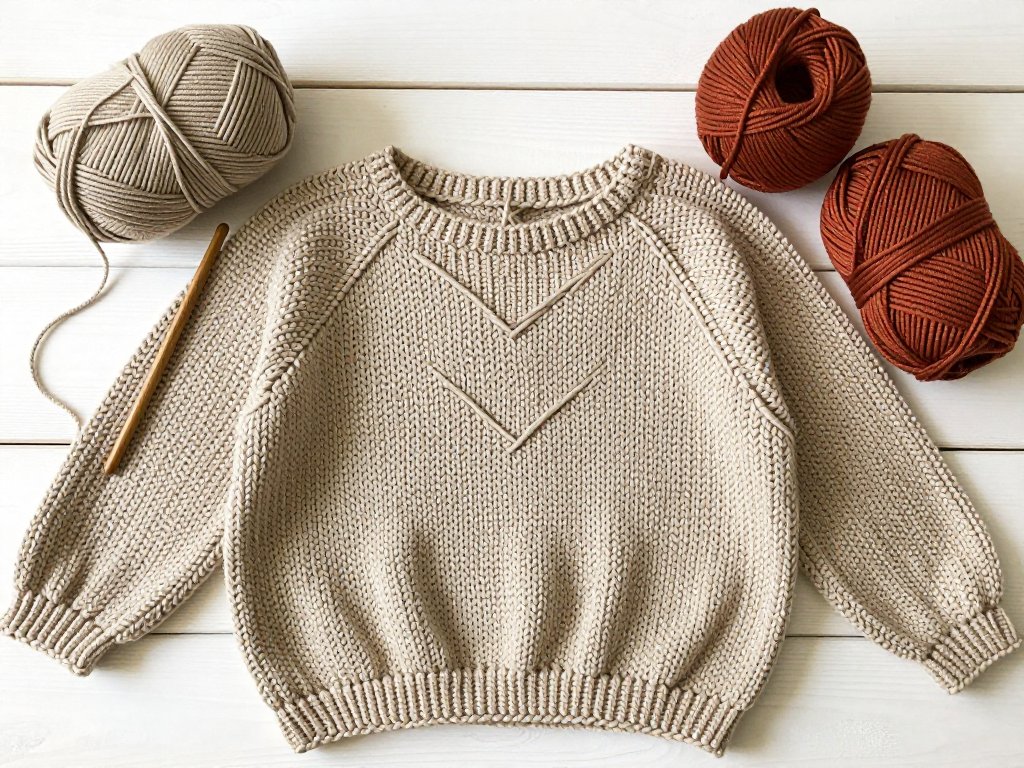
A sweater is the project most crocheters circle for years before they begin. It looks like a different order of making from scarves and blankets: shaped, fitted, with armholes and a neckline that has to sit somewhere sensible.
It is not a different order of making. A top-down raglan sweater is worked in one piece from the collar to the hem, and the shaping happens so gradually that you can watch it happen.
The garment begins at the neck. Four diagonal lines fan outward across the shoulders, carrying the yoke wider with every increase round.
When the yoke is deep enough, the sleeve stitches step aside onto holders, and the body continues downward in one uninterrupted stretch. There is no seaming at the end. There is no moment of assembling five pieces and hoping they match.
This guide walks through the whole of it: yarn and hook, the gauge swatch worked in the round, the four increase lines, the division at the underarm, and the sleeves worked from the armhole down to the cuff.
It assumes you can make a double crochet and a slip stitch. Everything else is counting, and counting is a skill that improves with use.
Why a Top-Down Raglan Suits a First Sweater
Most commercial sweater patterns were once worked flat, in pieces, then sewn together at the end: two fronts, a back, two sleeves, a seam at each shoulder and each side.
That method is not wrong. It is simply harder to learn from, because the fit only reveals itself in the final hour, after the seams are joined and the yarn is too committed to change.
Top-down raglan reverses the order of things. The sweater is begun at the neck and grown outward, so the fit reveals itself continuously instead of at the end.
The advantages are practical rather than romantic:
- One piece from neckline to hem, with nothing to sew when the last round is closed.
- You can try it on at every stage, because the yoke is a live tube of fabric, not a flat panel pinned to a table.
- Lengthening the body or the sleeves means working more plain rounds — no re-drafting, no re-cutting, no arithmetic.
- The sleeve stitches wait on holders while the body is finished, so the work follows the order in which your attention arrives.
- Fewer ends to weave in, because the yarn travels with the work instead of being cut at every seam allowance.
There is also a quieter benefit. Because the increase lines are visible, you learn to read your own fabric. You begin to see where a round was added, where the tension loosened, where a marker slipped a stitch.
That reading is the real skill of garment making. The sweater is simply the occasion for it.
Where the Raglan Line Comes From
Raglan takes its name from FitzRoy Somerset, first Baron Raglan, who commanded British forces in the Crimea in the 1850s.
The sleeve cut that carries his name replaced the set-in shoulder seam with a single diagonal line running from the underarm to the collarbone.
It was a practical invention: fewer seams at the shoulder meant more freedom for the arm and one less place for weather to enter. When handworkers later adapted the line to knitted and crocheted garments, they kept the diagonal — and turned it into a place to increase.
Materials and Preparation
Choose a worsted weight yarn, the category North American knitters call a 4. It has enough body to show a double crochet clearly and enough softness to sit against the neck without complaint.
A women's medium worked at the gauge described below uses roughly 1,000 to 1,200 yards. Buy one skein more than you think you need, and check the dye lot on every ball.
The hook is chosen to match your gauge, not the label on the yarn band. Bands offer a suggestion; your hands make the actual fabric. Most crocheters working worsted double crochet land somewhere between a 4.5 mm and a 5.5 mm hook.
You will also want a tape measure, a blunt tapestry needle for the final ends, and stitch markers in two distinct colours.
The two colours are not a fussy detail. One colour marks the four raglan lines; the other marks the beginning of the round and the boundaries of each panel.
For the sleeve stitches you will need scrap yarn in a contrasting colour or a pair of stitch holders. Smooth cotton scrap yarn is kinder than fuzzy wool, which clings to the stitches you are trying to slide off.
The Gauge Swatch, Worked in the Round
Gauge matters more here than in any flat project, because the yoke is a tube. A swatch worked flat in rows and turned at the end behaves differently from a swatch worked in joined rounds.
Work the swatch as a small tube, exactly as you will work the sweater:
- Chain 30 and join with a slip stitch to the first chain, taking care not to twist the ring.
- Chain 3, then work one double crochet into each chain around. Join with a slip stitch to the top of the chain 3. You now have 30 stitches.
- Work 12 more rounds in the same way, joining each round and chaining 3 to begin.
- Lay the tube flat without stretching it and measure across the middle with the tape. Count the stitches in 4 inches and the rounds in 4 inches.
- Write both numbers down. For worsted double crochet on a 5 mm hook, a common result is 13 stitches and 8 rounds to 4 inches.
If you count more stitches than the target, your fabric is tight: go up one hook size and swatch again. If you count fewer, go down. Change the hook, not your hands — trying to crochet looser on purpose rarely survives a whole sweater.
The Four Raglan Lines and the Number Eight
Set the sweater flat on your lap and it divides into four regions: the back, the left sleeve, the front, the right sleeve. Between them run the four raglan lines, one at each shoulder and one at each side of the spine of the work.
At every increase round, two stitches are added at each line — one on either side of it. Four lines, two stitches each, eight stitches gained per increase round.
That number is not arbitrary. Each of the four panels must grow at the same rate, or the yoke loses its balance. Two increases per line gives every panel two new stitches per round: the back widens by two, the front by two, each sleeve by two.
Increase only once per line and the yoke tightens into a dome, because the circumference cannot keep pace with the height you are adding. Increase three times and the yoke flares into a wave, because the fabric has more width than the round can support.
Eight is the number that keeps the yoke flat while it grows, and it stays eight for the whole of the yoke, whatever size you are making. Bigger sweaters are not made with more increases per round. They are made with more rounds.
That is the single most useful thing to understand before you begin. The shape is decided by the count, not by the tension of your hands.
Neckline and Yoke: From Starting Chain to Increase Schedule
The numbers below make a women's medium with a relaxed fit. They are a working example, not a rule; the logic transfers to any size once you see how the stitches are distributed.
Starting the Ring
- Chain 64. Join with a slip stitch to the first chain, then look along the ring and untwist it before working a single stitch. A twist caught here cannot be repaired later without undoing everything.
- Chain 3. This counts as the first double crochet of the round. Work one double crochet into each remaining chain around. Join with a slip stitch to the top of the chain 3. You have 64 stitches.
- Count them. If the count is off by one or two, adjust now while the round is small and forgiving.
Placing the Markers
Lay the ring flat and count around from the beginning of the round. Place markers so that each raglan line is a single stitch sitting between two markers of the same colour.
For this example: 21 stitches for the back, a raglan stitch, 9 stitches for the left sleeve, a raglan stitch, 21 stitches for the front, a raglan stitch, 9 stitches for the right sleeve, a raglan stitch, and back to the beginning of the round.
The four raglan stitches plus the four panels bring you back to 64. Use the second colour to mark the beginning of the round, so you always know where a round ends without hunting for the join.
The Increase Round
Chain 3, then double crochet to the first raglan stitch. Work two double crochet into the stitch before the line, one double crochet into the marked raglan stitch itself, and two double crochet into the stitch after it.
Continue in double crochet to the next raglan line and repeat. Do this at all four lines, then work plain double crochet to the end of the round and join.
You have added eight stitches. The count on your needle has moved from 64 to 72, and each panel has grown by two.
The Schedule
For the first several rounds, work an increase round every round. Double crochet grows tall quickly, and the circumference must keep pace or the yoke will cup over the shoulders like a helmet.
Once the yoke measures about 4 inches from the neckline, change to an increase round followed by a plain round. The fabric now has enough width to begin curving gently over the shoulder instead of fanning outward.
For a medium, expect roughly 14 to 16 increase rounds in total. Count your stitches rather than trusting the round number: 64 stitches plus eight for every increase round is the arithmetic, and it never varies.
Move your markers up as the raglan lines travel outward. A marker left behind in an old round is the most common cause of a yoke that quietly drifts out of shape.
Checking the Yoke Depth Before You Divide
Stop increasing when the yoke is deep enough, not when the stitch count looks impressive. Depth is measured from the neckline straight down to the underarm, along the line of the body rather than around the curve of the shoulder.
Lay the yoke flat and measure from the starting chain to the round you have just finished. Compare that number with the wearer's armhole depth — the distance from the top of the shoulder to the crease of the armpit, usually 7 to 9 inches for an adult woman.
The better test is to put it on. Slip the yoke over your head, settle it at the neck, and see where the lowest point of the raglan line falls. It should sit in the armpit crease, not above it and not below.
A yoke that is too shallow will pull across the chest and ride up at the underarm, and no amount of stretching will correct it.
A yoke that is too deep will bag under the arms and leave folds of extra fabric at the side of the body.
If you are between sizes, err on the shallow side. It is a simple matter to add two or three more increase rounds; it is a tedious matter to remove them.
Dividing for Sleeves and Body
The division is the moment the sweater stops being a tube and becomes a garment. It takes one round and a small act of faith.
- Work in double crochet across the back panel to the first raglan stitch.
- Chain 6. This chain becomes the underarm.
- Skip the sleeve stitches — the 9 you began with plus every increase they have received — and slip them onto a length of scrap yarn or a stitch holder. Tie the yarn loosely so the stitches cannot escape.
- Work in double crochet across the front panel to the next raglan stitch.
- Chain 6 again, skip the second sleeve onto a second holder, and join with a slip stitch to the beginning of the round.
You are now working in a single ring that runs across the back, across the new underarm chain, across the front, and across the second underarm chain. The sleeves are parked, and the body continues in plain joined rounds until it is as long as you want it.
Why the Underarm Chain Count Matters
Those six chains are not filler. They are the ease at the armpit — the small allowance of fabric that lets you raise your arm without the sweater pulling tight across the chest.
Too few chains and every reach for a high shelf will tug at the whole garment. Too many and a soft sagging gap opens under the arm, which no edging will disguise.
A workable rule for worsted weight is a chain of about 2 inches, which is 6 to 8 chains at this gauge. Another way to think of it is roughly one-sixth of the sleeve's stitch count.
Write the number down when you chain it. You will need the same count on the second side, and you will need it again when you pick up the sleeve.
From here the body is the easy part: straight double crochet, joined at the end of each round, until the hem sits where you want it. Finish with two or three rounds of single crochet, or a simple shell edging of five double crochet into every third stitch.
Sleeves Worked from the Armhole Down
Rejoin the yarn at the centre of the underarm chain with a slip stitch, chain 3, and work one double crochet into each chain and each sleeve stitch around. Join to the top of the chain 3.
The first round will feel awkward. The underarm chain is loose and the stitches along it are hard to see. Work into both loops of each chain, and if a small gap remains at the corner, it can be closed later with the tail of yarn and a tapestry needle.
Now decrease gently toward the cuff. A reliable rhythm is one decrease at the underarm on every fourth round, worked as a double crochet two together across the two stitches that sit directly under the arm.
Try the sleeve on as you go, or measure it against your own arm from armpit to wrist. Stop decreasing when the sleeve is about 2 inches short of the wrist, then work plain rounds to the cuff so the fabric does not narrow too sharply.
For the cuff, work two rounds of single crochet, then a third round of single crochet through the back loop only, which draws the edge in slightly and gives it a neat ridge. Fasten off and repeat on the second sleeve with the same round counts.
If you would rather have a three-quarter sleeve, simply stop earlier. The construction does not care where the sleeve ends.
Fit Adjustments Worth Knowing
Almost everything about this sweater can be changed after the fact, which is why it makes such a patient teacher.
Lengthening the body. Work more plain rounds before the hem edging. Two inches of worsted double crochet in the round absorbs roughly 50 grams of yarn, so plan for it when you buy.
Adjusting sleeve width. The sleeve is as wide as the panel was when you stopped increasing. One fewer increase round gives a narrower sleeve; one more gives a roomier one. Whatever you choose, do it before the division, and do it on both sides.
Raising the back neck. This is short-row shaping, and the idea is simpler than the name. Instead of working a full round, you work partway across the front, turn, and work back.
Then you turn again, each time travelling a few stitches further before turning. The back of the neck ends up higher than the front, exactly as a shirt collar does.
Worked over the first three or four rounds, it removes the tendency of a round neckline to ride up at the throat.
Narrowing the neckline. Begin with a shorter starting chain, keeping the same proportion between panels, and add one extra increase round to recover the width.
When Something Goes Wrong
Nearly every first sweater passes through one of these moments. None of them mean the project is ruined; each has a specific cause and a specific remedy.
The Yoke Cups or Domes
Cupping means the yoke has too little circumference for its height. You have most likely skipped increase rounds, worked them too tightly, or switched to every-other-round too early.
Work two extra increase rounds and try it on again. If the cupping is pronounced, rip back to the last flat round and resume with an increase on every round for a few more rounds.
The Yoke Ruffles or Waves
Ruffling is the opposite fault: more width than the round can carry. It usually comes from increasing on every round for too long, or from a hook larger than your swatch suggested.
Rip back a few rounds and resume with alternate plain rounds. A gentle wave at the very edge will block out; a standing frill will not.
The Neckline Gapes
A neckline that stands away from the collarbone is nearly always a starting chain that was too long, or a first round worked so loosely that the ring stretched.
Work the foundation chain with a hook one size smaller than the body hook. If the gaping appears after the fact, one round of single crochet around the neckline, worked slightly firmly, will draw it in without distorting the yoke.
A Gap at the Underarm Join
Small holes at the corner where the underarm chain meets the body are ordinary. They happen when the chain is loose or when the first stitch of the round is worked into the wrong loop.
Work the first round of the sleeve into both loops of each chain, and pick up one extra stitch at each corner where the chain meets the body. Any remainder can be closed from the inside with the yarn tail and a tapestry needle.
Stitch Count Drift
If your counts stop matching the arithmetic, the markers have probably moved, or a round was joined in the wrong place, or an increase was worked twice at the same line.
Count in blocks of ten rather than one long run, and count at the end of every increase round, not every fifth one. Finding a mistake three rounds late costs ten minutes; finding it thirty rounds late costs the yoke.
A Next Step in Colour
Colourwork is the natural next step: a graph crochet chart lets you carry the same yoke in two colours.
Conclusion
Your first sweater will not be your best sweater. It will be the one that taught you to read a yoke, to trust a marker, and to measure before dividing.
That is a fair exchange. The second one will take half the time and a fraction of the doubt.
Work in good light, count at every increase round, and try the thing on while it is still a strange wide collar with sleeves hanging from it. Patience, not talent, is what carries a garment from the neckline to the hem.