Introduction
There is something about an old-fashioned Halloween that a store-bought decoration simply cannot match. A pumpkin you carved yourself, glowing on the porch. A row of paper ghosts swaying in the hall. These are the crafts our grandmothers made, and their grandmothers before them.
When you make them at home, you are not just decorating. You are keeping a piece of family history alive, one cozy afternoon at a time.
October has a particular hush to it. The light turns golden, the air gets crisp, and kitchens smell of cider and cinnamon. It is the perfect month to slow down, gather the children, and make something with your hands.
I know your time is precious. Between school runs, laundry, and bedtime battles, an afternoon for crafting can feel like a luxury. That is exactly why these projects are so wonderful. They are simple, forgiving, and made from things you mostly already have.
In this article, we will travel through the traditions behind ten classic Halloween crafts. You will learn where each one came from, and how to make it with your own hands. No perfection required. Just an apron, a warm drink, and a little patience.
Pick one project, or try them all across the month. However you do it, you will be making more than decorations. You will be making memories your children will carry into their own homes one day.
The History of Halloween Handcrafts
Halloween has always been a handmade holiday. Long before plastic skeletons and inflatable ghosts, families marked the turning of the season with their own hands and whatever nature offered.
The roots reach back to Samhain, the old Celtic festival that welcomed the darker half of the year. It was a night when the veil between worlds felt thin, and people lit fires, carved root vegetables, and set out treats to honor the harvest and the spirits.
When the Romans arrived, they added their own harvest customs, including festivals honoring Pomona, the goddess of fruit and orchards. Apples became part of the season, and they have stayed ever since.
Those same Roman festivals gave us bobbing for apples, the laughing, splashing game that still delights children every October. The apple, you see, has always belonged to this season.
Later, the Victorians turned Halloween into a parlor affair. They cut silhouettes, hung paper lanterns, and played gentle games by candlelight. Frugal and clever, they made beauty from paper, thread, and the garden's last gifts.
Immigrants carried these customs across the ocean, where they mingled with new plants and new neighbors. In America, the old traditions found fresh soil and grew into the Halloween we know today.
What a comfort it is to know that every craft in this article has been made by someone's hands for generations. When you sit down to make one, you join a very long line of mothers, grandmothers, and children.
Carving the Perfect Jack-o'-Lantern
The jack-o'-lantern begins with a man named Stingy Jack. According to Irish legend, Jack tricked the devil, and when he died, neither heaven nor hell would take him. He was doomed to wander the earth, lighting his way with a coal tucked inside a hollowed-out turnip.
In Ireland and Scotland, people carved turnips and beets into lanterns to scare away wandering spirits like Jack. They called them "jack-o'-lanterns," after the poor fellow himself.
When Irish immigrants came to America, they discovered the pumpkin, a native fruit that grew in abundance. It was bigger, softer, and far easier to carve than a turnip. The pumpkin lantern was born, and it has grinned on porches ever since.
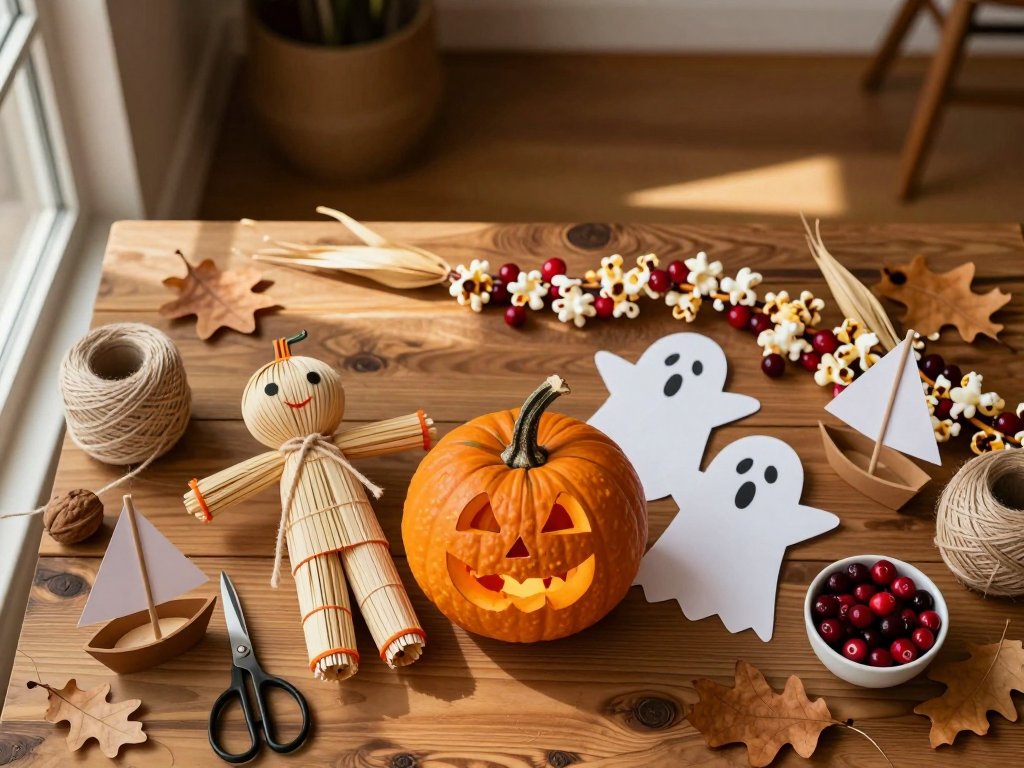
Now, let us carve one together. You will need a pumpkin, a sturdy serrated knife, a large spoon, and a marker. A clean workspace and a steady table help enormously.
- Choose a pumpkin that sits flat and feels heavy for its size. A firm stem means a fresher pumpkin.
- Cut a lid from the top at an angle, so it will not fall in. Scrape out the seeds and pulp with your spoon until the walls are about an inch thick.
- Sketch your face with a marker first. Simple triangles and crescents are forgiving and classic.
- Cut slowly along your lines, pushing the knife away from your body. Small, sawing motions work best.
- Push the shapes out gently, then place a candle inside on a small holder. Light it only with an adult present.
A few safety notes, because you matter. Let the children draw the face and scoop the seeds, but keep the knives in your own hands.
Use a battery candle for little ones or for any spot near curtains. And save those seeds, rinsed and roasted with salt, for a crunchy snack.
Your finished pumpkin does not need to be perfect. The lopsided grin and the crooked eye are part of its charm. When it glows on your porch, it carries a story that began across the ocean, centuries ago.
Corn Husk Dolls
Corn husk dolls may be the oldest craft in this whole article. Indigenous peoples of North America made them from dried corn husks, long before European settlers arrived. Children played with them, and they were treasured as toys and as symbols of the harvest.
Colonial children loved them too. With no toy shops on the frontier, a doll made from the cornfield was a small miracle. You could tie one in an afternoon, and it asked for nothing but a little string.
If you grow corn or know a farmer, save the husks at harvest time. Dry them flat for a week, and you will have a free supply of craft material that costs nothing at all.
Today, they remain one of the simplest and most satisfying crafts you can make with a child. The husks are forgiving, and the results are always a little bit wonderful.
Here is what you need: dried corn husks (available at craft stores or saved from autumn corn), cotton string or twine, a bowl of warm water, and scissors.
- Soak the husks in warm water for about ten minutes, until they are soft and pliable.
- Lay several husks in a stack and roll them tightly into a tube. Tie each end with string to form the arms.
- Fold the tube in half over a loop of string, and tie just below the fold to shape the head.
- Tie a bundle of husks around the middle for a skirt, or split the lower husks to make legs.
- Let the doll dry overnight, then trim the ends neatly. Add a ribbon sash if you like.
Encourage your children to name their dolls and give them little adventures. A corn husk doll was the beloved companion of countless colonial children, and it will happily befriend yours.
If your doll looks a little lopsided, that is exactly right. Handmade things are supposed to show the hand that made them. That is what makes each one unique, and why they become keepsakes.
Apple Head Dolls
Apple head dolls come from the Appalachian mountains, where frugal folk turned the orchard's bounty into the most charming little characters. Peel an apple, carve a face, and let it dry slowly. The fruit shrinks, wrinkles, and becomes a wise little old face, often called a witch or a grandmother.
There is real magic in the process. One day you hold a plump apple, and a week later you hold a crinkled face full of character. No two are ever alike.
Children love to watch the transformation, checking each morning to see how their little person is aging. It teaches patience, and it teaches wonder.
To begin, you need firm apples, a paring knife, lemon juice, and a warm, dry place. Small apples work best, and tart varieties hold their shape well.
- Peel the apple completely and rub it with lemon juice to keep it from browning too darkly.
- Carve a face with shallow cuts: eye sockets, a nose, a smile. Deep cuts become deep wrinkles.
- Push in two small cloves or seeds for eyes, if you wish. They stay put as the apple shrinks.
- Set the apple on a drying rack in a warm, airy spot. A cupboard above the stove works well.
- Check it every couple of days. In one to two weeks, the face will be dry, shrunken, and wonderfully wrinkled.
When your apple head is finished, it can hold a tiny broom made from a twig and a few straws. Dressed in a scrap of calico, it becomes a proper little mountain witch, full of quiet mischief.
Or let it simply sit on the mantel as a little harvest guardian. This is a slow craft, which makes it a lovely one for a busy season. A few minutes of carving, and then the apple does the rest of the work while you go about your days.
Silhouette Portraits and Paper Ghosts
Long before photographs, families captured each other's likenesses with scissors and black paper. Silhouette cutting was a beloved Victorian parlor art. A skilled cutter could snip a profile in minutes, and the results hung in frames for generations.
It is a lovely, quiet craft, and you can do it with nothing but paper, a lamp, and a pencil. Your child sits still for a moment, and you capture their profile forever.
Paper ghosts, meanwhile, are the simplest Halloween decoration ever invented. Victorian families hung them in windows and doorways, where they danced in the evening draft and gave gentle scares.
- For a silhouette, tape a sheet of black paper to the wall. Seat your child sideways, and shine a lamp so their shadow falls on the paper.
- Trace the shadow with a pencil, then cut along the line. Mount the profile on white paper for a striking portrait.
- For a paper ghost, draw a ghost shape on white paper, or fold the paper and cut a row of them holding hands.
- Cut out simple eyes, or leave the ghost blank for a softer, older look.
- Hang ghosts on thread from windows, doorways, and mantels. They will sway with every passing step.
You can also make paper lanterns, another Victorian favorite. Fold the paper, cut small windows or stars, and tape the edges into a cylinder. A battery candle inside turns it into a glowing lantern.
These are five-minute projects that look like heirlooms. Hang them high, where small hands and curious pets cannot reach, and let them catch the light.
Popcorn and Cranberry Garlands
During the Great Depression, families had little money for decorations. So they strung what they had: popcorn and cranberries, saved and threaded into garlands for the tree and the mantel. It was frugal, cheerful, and deliciously simple.
That tradition has never really gone away. There is something deeply satisfying about a long rope of red and white, made by your own hands while the kettle corn cools.
Children adore this craft, and it is wonderfully easy to set up. You need unbuttered popcorn, fresh cranberries, a long needle, and strong thread.
- Pop the corn plain, without butter or salt, so it stays sturdy and does not get greasy.
- Thread your needle with a long piece of doubled thread, and tie a knot at the end.
- Alternate popcorn and cranberries, pushing each piece gently onto the thread.
- Leave a loop at each end so you can hang the garland easily.
- Drape it over the mantel, around a mirror, or along a staircase rail.
A few tips from experience. Fresh cranberries last longer than soft ones, and they barely stain fingers. Popcorn can be strung through the fluffy part without breaking if you go slowly. And yes, a few pieces will vanish into little mouths. That is part of the tradition too.
Stringing a garland is also a wonderful way to use up an evening. Sit together, talk about your day, and let the needle find its rhythm. Before you know it, the thread is full.
When the season ends, you can toss the garland outside for the birds. A decoration that gives twice is a Depression-era lesson we would all do well to remember.
Walnut Shell Boats
Here is a craft with a story your children will love. In England, children once celebrated St. Clement's Day on November 23rd by making little boats from walnut shells, complete with paper sails.
St. Clement was the patron saint of sailors and blacksmiths, and his day came at the end of the harvest season. Children would float their tiny walnut boats on streams and puddles, sending them off with wishes.
The craft is almost absurdly simple, and that is its charm. A half walnut shell, a dab of glue, a paper sail, and you have a fleet worthy of a bathtub regatta.
- Carefully crack a walnut in half, and eat the nutmeat. Save two tidy shells.
- Cut a small triangle from paper, and glue it to a toothpick or a short twig for a mast.
- Press a small ball of modeling clay into the bottom of the shell to hold the mast.
- Set the boat on water and give it a gentle push. It will bob along like a proper little ship.
- Make a whole fleet and race them in the sink, the bathtub, or a shallow basin.
If you do not have walnuts, small acorn caps or eggshell halves work just as well. The point is not the boat itself, but the launching, the cheering, and the tiny adventures.
Your children may not know St. Clement, but they will remember the afternoon they sent a fleet of walnut boats across the bathtub. That is the kind of memory that becomes a family story.
A Family Crafting Afternoon
Now that you have a basket full of ideas, let us talk about how to actually pull off a crafting afternoon without losing your mind. It can be done, I promise. The secret is a little planning and a lot of letting go.
Choose one or two projects, not five. A single joyful hour beats a frantic afternoon every time. Save the rest of the ideas for another day.
Set up a table with everything you need before you call the children. Cover it with newspaper, put on aprons or old shirts, and have a damp cloth ready. Preparation is half the battle.
Match the project to the child. Little ones can scoop pumpkin seeds, string popcorn, and glue paper sails. Older children can trace silhouettes and carve apples with supervision. Everyone can do something real.
Let the results be imperfect. The crooked ghost and the lumpy doll are not mistakes; they are evidence of small hands at work. Praise the effort, and hang the results with pride.
Keep the mood light with music or a story. Talk about the traditions behind each craft, and let the children invent their own. Some of our best family lore started with a question at the craft table.
Keep a craft bin in the house with string, paper, glue, and scissors. Then, whenever a spare hour appears, you are ready. The hardest part of any craft is the first step, and the bin removes it.
End the afternoon with a simple treat, like warm cider or the roasted pumpkin seeds you saved. It closes the day on a sweet note and gives everyone something to look forward to.
And remember, you do not need a perfect afternoon. You need a real one. A little mess, a lot of laughter, and hands working together are the whole point.
Conclusion
Every craft in this article carries a story. The turnip lantern of Stingy Jack, the corn husk doll of a colonial child, the walnut boat of an English boy on St. Clement's Day. These traditions crossed oceans and centuries to reach your kitchen table.
When you carve a pumpkin or string a garland with your children, you become part of that long story. You are the link between the old ways and the new, and your children will carry the memory forward.
You do not need to make everything this season. Choose the one project that calls to you, set aside an hour, and let the rest go. The magic is not in the quantity; it is in the making.
Light your jack-o'-lantern, hang your paper ghosts, and send a walnut boat sailing across the bathtub. Then watch your children's faces, and know that this is how traditions are born.
Happy Halloween, dear reader. May your home be warm, your hands be busy, and your memories be sweet.