Introduction
There is a small hole in the elbow of your favorite sweater. A frayed knee on the jeans your child refuses to part with. A tear in the linen napkins your grandmother embroidered by hand.
Most of us have been taught that damage means the end of a garment. Visible mending offers a different story: the tear is not a flaw to hide but an invitation to add beauty.
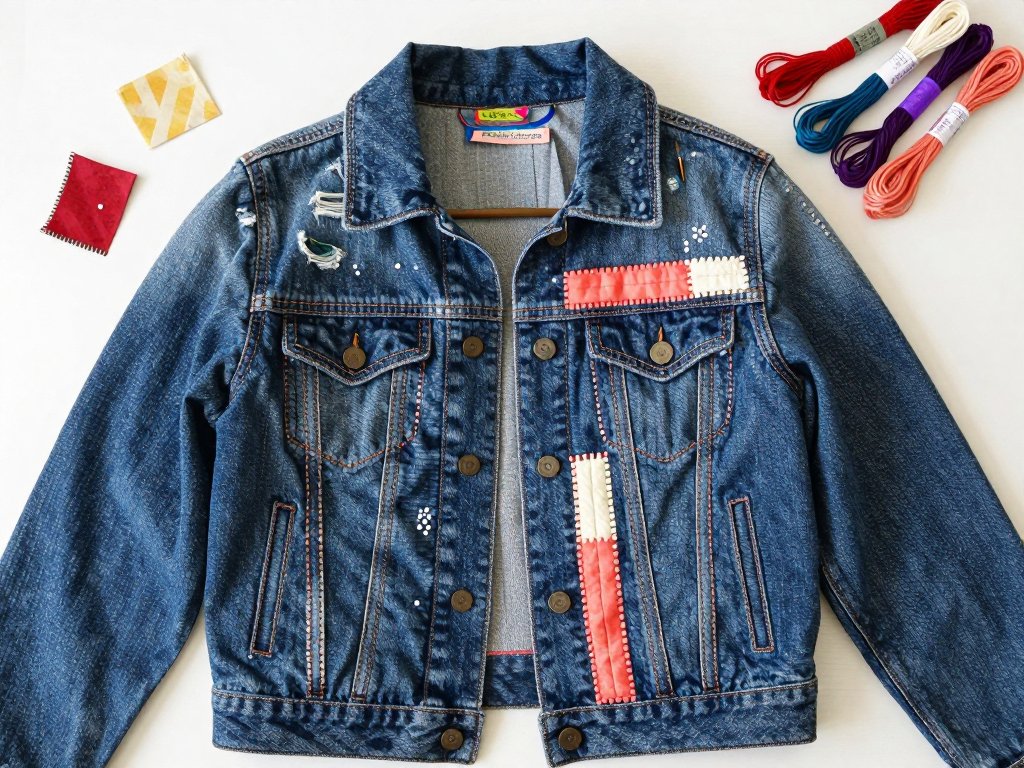
Visible mending is the craft of repairing clothes with deliberate, decorative stitches. The mend becomes part of the design, a patch of color and pattern that makes the garment more special than it was before.
In this guide, you will learn the history of this beloved craft, the simple supplies it requires, and three techniques you can master this weekend.
The Beautiful History of Visible Mending
Visible mending is not a new trend. It is one of the oldest textile traditions in the world, reborn for our modern age.
In Japan, the practice of sashiko began during the Edo period, roughly four hundred years ago. Farmers, fishermen, and laborers in the cold northern regions needed warm, hard-wearing clothing. They layered indigo-dyed cotton and secured the layers with running stitches, a technique that means "little stabs."
When a garment became worn, families patched it and stitched again. Layer upon layer of patched fabric is called boro, the Japanese word for "rags" or "tattered cloth." Some boro garments were mended and worn by three or four generations before being retired.
Across the world, the same instinct appeared. During the Second World War, the British government's "Make Do and Mend" campaign encouraged families to repair and repurpose clothing rather than buy new.
These traditions share a philosophy: cloth is precious, and caring for it is an act of love. Today, visible mending carries that spirit into a world that needs it more than ever.
Each year, millions of tons of clothing end up in landfills. A single mended garment is a small, beautiful rebellion against that waste.
What You Will Need
One of the joys of visible mending is its humble supply list. You likely have most of these items already.
- A needle. A sharp embroidery needle or darning needle, sized to match your thread. Size 5 or 7 works for most mending.
- Thread. Embroidery floss, sashiko thread, or stranded cotton in colors you love. Contrasting thread makes the mend a feature; matching thread makes it discreet.
- Scrap fabric. Small pieces of cotton, denim, or linen for patches. An old shirt or torn sheet is perfect.
- Scissors. Small, sharp scissors for trimming thread and shaping patches.
- An embroidery hoop. Optional, but it keeps your fabric taut and your stitches even.
- A thimble. Your fingertips will thank you when mending denim.
That is everything. No special machines, no expensive kits, no fancy equipment. Just needle, thread, and a little patience.
Choosing Your Thread and Patch
The choices you make before stitching shape the whole project. Here is how to choose well.
Thread weight. For most mending, a medium-weight thread works best. Embroidery floss separates into six strands; using two or three strands gives you a visible but not bulky stitch.
Color. This is the fun decision. A bright coral stitch on faded denim turns a repair into a statement. A soft cream thread on a wool sweater feels quiet and traditional.
Patch fabric. Choose fabric that is similar in weight to the garment you are mending. A cotton patch on a cotton shirt, denim on denim. Wash your patch fabric first so it does not shrink later and pucker your stitches.
Placement. Look at where the damage sits. A knee patch should sit flat when you kneel. An elbow patch should be placed with the arm slightly bent.
When in doubt, choose fabric and thread that make you smile. You will be looking at this mend for years.
Technique 1: The Running Stitch Patch
This is the classic sashiko-inspired method, and it is the best place to begin. It repairs holes and reinforces thin, worn fabric.
Start by trimming any loose threads around the hole. Cut your patch fabric about an inch larger than the damaged area on every side.
Place the patch on the inside of the garment, under the hole. Pin it in place, or use a few loose stitches to hold it.
Thread your needle and knot the end. From the outside of the garment, push the needle through both the garment and the patch, and pull the knot through to the back.
Now work running stitches: in and out, in and out, keeping each stitch the same length. Aim for stitches about a quarter of an inch long, with gaps of a similar size.
Work in neat rows, like writing lines on a page. When you reach the edge of the patch, turn and start a new row.
Cover the entire patch with evenly spaced stitches. The result is a grid of gentle lines that holds the patch firmly and looks intentional and lovely.
For a traditional sashiko look, try a simple geometric pattern. A grid of squares, a diagonal crosshatch, or a running stitch that outlines the patch all look beautiful.
If you are mending for the first time, draw your stitch lines with a water-soluble fabric pen. It washes away after you finish, and it takes all the guesswork out of keeping rows straight.
Technique 2: Darning a Hole
Darning is the technique for holes that have eaten away the fabric entirely, like the worn heel of a sock or the elbow of a wool sweater.
First, stabilize the area. Place a darning mushroom, a small bowl, or a lightbulb under the hole to give yourself a firm surface to work against.
Thread your needle with a single strand of thread or a thin yarn. Starting well outside the hole, weave the needle back and forth in one direction, creating vertical strands across the gap.
Work the vertical threads close together, like the warp of a woven cloth. Keep them slightly loose so the fabric can stretch naturally.
When the hole is covered, turn your work and weave horizontally across the vertical strands, going over and under in a basket pattern.
This creates a woven patch that sits flat in the fabric and moves with it. The mend is strong enough for socks and elbows alike.
Darning takes patience, but the rhythm is soothing. Many stitchers find it the most meditative part of mending.
Technique 3: Boro Layering
Boro is the Japanese tradition of patch upon patch, stitch upon stitch. It is the most forgiving technique because there are no rules.
Begin with a garment that has several worn areas, or one large patchwork project you love. Old denim, linen, and cotton all work beautifully.
Layer patches wherever the fabric is thin or torn, overlapping them like roof tiles. Use contrasting fabrics for a rich, quilted look.
Secure each patch with running stitches, using a different color of thread for each layer if you like.
The goal is not perfection but accumulation. Each patch tells a story: the shirt from your father, the linen from a thrift shop, the thread your friend gave you.
Boro projects grow over time. A pair of jeans can become a family heirloom, its history written in thread.
How to Mend Common Damages
Different kinds of damage call for different approaches. Here is a quick guide to the most common repairs.
Worn knees on jeans. Use a denim patch with the running stitch technique. Add a second patch inside for extra strength if the fabric is very thin.
Elbow holes in sweaters. Darn the hole with yarn, or patch with a soft fabric like felted wool. Place the patch with your arm slightly bent so it does not pull.
Frayed cuffs. Fold the frayed edge under and secure it with a blanket stitch or a row of running stitches in a contrasting color.
Torn seams. A simple whip stitch along the seam line, matching the original thread, repairs it invisibly.
Small snags and pulls. Do not cut the snag. Use a needle to pull it gently to the wrong side and secure it with a tiny stitch.
Moth holes in wool. Darn them, or patch with a small piece of matching fabric and a few neat stitches.
Getting Started: A Simple First Mend
Ready to practice? Here is a simple first project that takes about an hour and teaches every essential skill.
The project: Mend a small hole or thin spot in a well-worn cotton t-shirt, using a contrasting patch and running stitches.
Step 1: Wash and iron the shirt. Trim any loose threads around the hole, and cut a patch about an inch larger than the damaged area.
Step 2: Place the patch inside the shirt, under the hole, and pin it. Thread your needle with two strands of embroidery floss in a color you love.
Step 3: Work running stitches in rows across the patch, starting a half inch outside the damaged area so the repair is well anchored.
Step 4: When the patch is covered, knot the thread on the inside, weave in the tail, and press the mend flat.
That is it. You have completed your first visible mend. Wear the shirt with pride, and notice how the repair becomes the part of the garment people compliment most.
Common Mistakes and How to Avoid Them
Every stitcher hits a few snags when they begin. These are the most common, with the fixes that work.
My fabric puckers. This usually means you are pulling the thread too tight. Your stitches should lie flat, not gather the fabric. Loosen your tension and use an embroidery hoop for support.
My stitches are uneven. Uneven stitches are charming in their own way, but if you want them neater, mark your stitch lines with a fabric pen or chalk first.
My needle leaves holes. You may be using a needle that is too large for the fabric. Switch to a finer needle, especially for delicate cottons and linens.
My thread keeps tangling. Use a shorter length of thread, about 18 inches, and let the needle dangle to untwist the thread every few stitches.
My mend is coming loose. Anchor your thread securely at the start and finish. Take a few tiny stitches in place at the end and weave the tail through your work.
I am afraid to start. Choose a garment you wear at home, not your favorite coat. Practice on a worn t-shirt or a pair of old pajamas until you feel confident.
My patch shows through the front. If you are patching a lightweight fabric, place a second, smaller patch or a piece of interfacing behind the first so the repair looks clean from the outside.
Caring for Your Mended Clothes
A well-mended garment deserves good care. With the right habits, your repairs will last for years.
Wash mended items gently, ideally by hand in cool water with a mild detergent. If you use a machine, choose the gentle cycle and place the garment inside a mesh laundry bag.
Avoid the dryer; heat can shrink patches and distort stitches. Lay the garment flat to dry instead.
Iron mended areas on a low setting, pressing from the wrong side so you do not flatten the stitches. A pressing cloth adds extra protection.
Check your mends now and then. A loose stitch here or there is easy to reinforce before it becomes a new hole.
Store mended garments folded rather than hung when the repair is on a shoulder or seam, so the stitches do not stretch over time.
Final Thoughts
Visible mending asks us to slow down and see our clothes differently. A tear is not the end of a garment's life; it is the beginning of its next chapter.
The Japanese concept of wabi-sabi celebrates beauty in imperfection. A patched elbow, a darned heel, a boro-covered knee: these are not flaws. They are evidence of a life lived and cared for.
Start small. Mend one sock, one napkin, one pair of jeans. Feel the quiet satisfaction of making something whole with your own hands.
Every stitch is a small act of love, for the garment, for the planet, and for the person who will wear it next.
Your needle is waiting. Happy mending.
