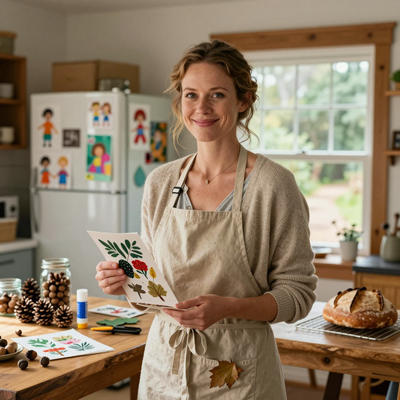
Introduction
I still remember the first time I noticed the colors of a summer sunset bleeding into each other across the sky.
I must have been seven or eight, sitting on the back steps of my grandmother's house, watching the sky turn from pale blue to peach to a deep, velvety rose.
I wanted to capture that moment, to hold onto those colors, but I did not have the words or the skill.
So I just sat there and let the memory sink in.
That feeling of trying to hold onto soft, fleeting beauty is exactly what watercolor blush painting is about.
It is a gentle art trend that has taken over social media in 2026, and for good reason.
Unlike bold, precise watercolor illustrations that require steady hands and careful planning, blush painting is intentionally soft, dreamy, and forgiving.
It is less about control and more about letting the water and pigment do their own beautiful dance on the paper.
If you have ever wanted to try watercolor but felt intimidated by the idea of painting something recognizable, this is your invitation.
In this article, I will walk you through what watercolor blush painting is, why it has become such a beloved trend, and how you can create your own soft, ethereal pieces at home.
No prior painting experience is needed — just a willingness to play with color and let go of expectations.
What Is Watercolor Blush Painting?
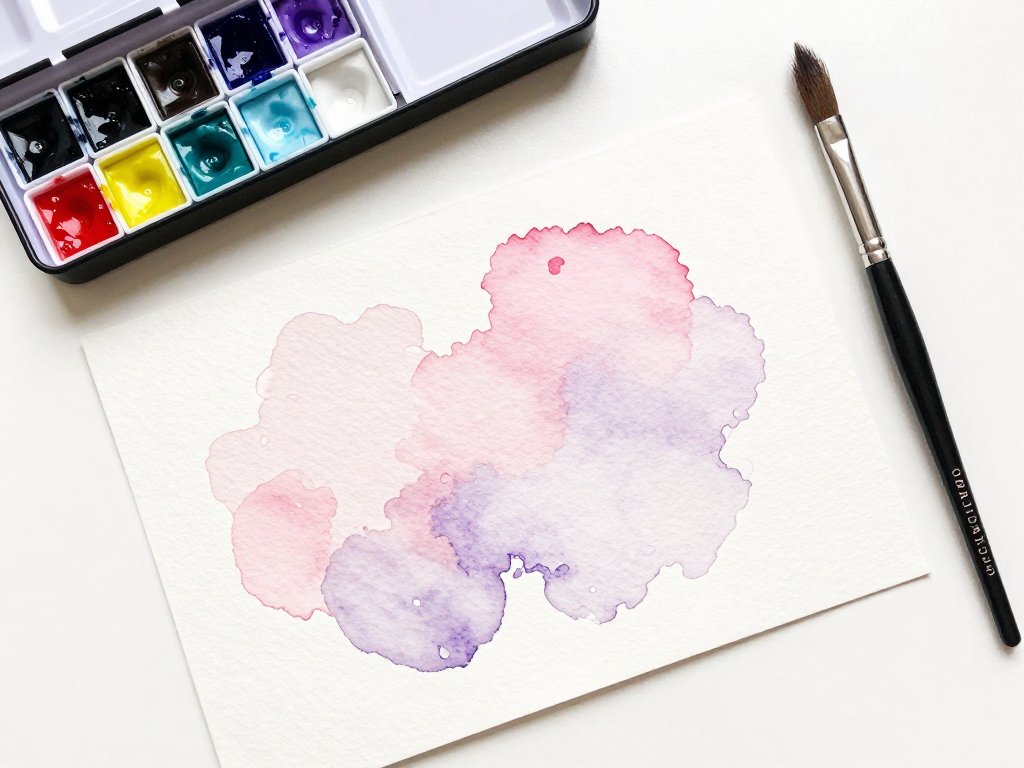
Watercolor blush painting is a style that emphasizes soft, diffused washes of color in pale, romantic tones. Think dusty rose, lavender, peach, powder blue, and barely-there mint. The paintings are often abstract or semi-abstract, focusing on the gentle interaction of colors rather than sharp lines or detailed forms.
The name "blush painting" comes from the signature color palette — those soft, skin-blush tones that evoke warmth, tenderness, and quiet beauty. But the technique extends beyond pink and peach. A blush painting can be any color, as long as the approach is soft, layered, and atmospheric.
What makes this trend so appealing, especially for beginners, is that there is very little that can go wrong.
Hard lines and crisp edges are not the goal. If your colors bleed into each other unexpectedly, that is part of the charm.
If your wash dries with interesting uneven patches, that is texture. The entire philosophy of blush painting is about embracing the unpredictability of watercolor and working with it rather than against it.
Why This Trend Resonates in 2026
After several years of maximalist decor, bold color blocking, and sharp digital aesthetics, there is a collective craving for softness.
We want things that feel gentle, warm, and human. Watercolor blush painting is a direct response to that yearning.
It is the visual equivalent of a deep breath, a cashmere blanket, a quiet afternoon with no agenda.
Social media platforms have played a huge role in popularizing this style. TikTok and Instagram are filled with satisfying videos of pigment blooming in water, colors softly merging, and the slow, meditative process of building layers.
Watching these videos is itself a form of relaxation — and actually doing the painting amplifies that calm tenfold.
There is also something deeply personal about blush painting. Because the technique is loose and abstract, every piece turns out differently.
Your painting will not look like mine, and mine will not look like anyone else's.
In a world where so much of what we consume is mass-produced and identical, creating something that is genuinely one of a kind feels almost revolutionary.
What You Will Need
One of the most welcoming things about watercolor blush painting is how little it demands of you in terms of supplies. Here is everything you need to get started:
- Watercolor paints. A basic set of watercolor pans or tubes in soft, muted colors. Look for shades like rose, coral, lavender, sky blue, and soft yellow. You do not need expensive artist-grade paints — student-grade sets from brands like Winsor & Newton Cotman or Daniel Smith Essentials work beautifully for this style. A 12-color set costs between fifteen and thirty dollars and will last you months.
- Watercolor paper. This is the one place where you should not cut corners. Watercolor paper is specially designed to handle water without buckling or tearing. For beginners, a pad of 140lb cold-press paper is ideal. Hot-press paper has a smoother surface that creates softer edges, so you may want to experiment with both. A pad of 10 sheets costs around ten to fifteen dollars.
- Brushes. You do not need a large collection. A round brush in size 6 or 8 will handle most blush painting techniques. A larger flat wash brush (size 12 or 14) is useful for wetting the paper and creating broad washes. Soft synthetic brushes work well and are more affordable than natural hair brushes.
- Two jars of water. One for cleaning your brush between colors and one for clean water to mix with your paints. Keeping them separate prevents muddy colors.
- A paper towel or soft cloth. For blotting your brush and lifting excess water from the paper.
- Masking tape. To secure your paper to a board or table so it does not curl as it dries.
That is genuinely all you need. If you have these items, you are ready to create your first blush painting.
Getting Started: The Wet-on-Wet Technique
The wet-on-wet technique is the foundation of watercolor blush painting. It involves wetting your paper with clean water first, then applying paint to the wet surface. The pigment spreads and softens as soon as it touches the water, creating those dreamy, diffused edges that define the blush style.
Step 1: Tape and Wet Your Paper
Secure your watercolor paper to a board or table using masking tape along all four edges.
This prevents the paper from buckling as it absorbs water. Using your flat wash brush, apply clean water evenly across the entire surface of the paper.
You want it damp and glistening, but not so wet that puddles form. If you see standing water, gently blot it with a paper towel.
Step 2: Apply Your First Color
Load your round brush with a pale pink or peach pigment. Touch the brush gently to the wet paper and watch the color bloom outward like a flower opening.
Do not try to control where it goes too much — part of the magic is letting it spread naturally.
If the color does not spread, your paper is not wet enough. If it spreads too far too fast, your paper is too wet.
You will find the right balance after a few tries.
Step 3: Add a Second Color
While the first color is still wet, rinse your brush and pick up a second color, such as lavender or soft blue.
Touch it to the paper near the edge of the first color. Watch as the two colors gently bleed into each other, creating a soft gradient where they meet.
This is the moment that makes blush painting so addictive — that slow, organic blending that you cannot achieve with any other medium.
Step 4: Let It Dry Completely
This is the hardest part for impatient painters. Leave your painting alone until it is completely dry.
Do not use a hairdryer — let the water evaporate naturally, which allows the pigments to settle beautifully.
Depending on humidity and how much water you used, this can take anywhere from twenty minutes to an hour.
Go make a cup of tea, step outside for a moment, and come back to see what the water and pigment have created together.
Step 5: Add Details (Optional)
Once the base layer is completely dry, you can add soft details using the dry-on-dry technique.
Mix a slightly stronger version of one of your colors and paint faint shapes on top of the dry wash.
Abstract florals, soft circles, or gentle stripes all work beautifully. Because the base layer is already there, any marks you add will sit on top with crisp edges, creating a lovely contrast between the soft background and the slightly sharper details.
Creating a Blush Floral Composition
Once you are comfortable with the wet-on-wet technique, florals are a natural next step. The blush aesthetic lends itself perfectly to soft, dreamy flowers — think peonies, roses, and cherry blossoms rendered in barely-there washes rather than detailed botanical illustrations.
Painting a Blush Peony
Start with a wet-on-wet background in pale pink or coral. While the paper is still damp, use the tip of your brush to create small circular blobs of deeper pink pigment in the center of where you want your peony to be.
These blobs will spread and soften, forming the inner petals. Add more pigment in layers, allowing each layer to dry slightly before adding the next.
The result is a flower that looks like it is emerging from a soft, hazy dream.
For the outer petals, use a lighter touch with barely any pigment on your brush.
The paler the wash, the more ethereal the flower looks. You can add a touch of yellow or gold to the center of the flower for a warm glow — just a tiny dot of concentrated pigment, touched to the still-damp surface.
Blush florals are forgiving in a way that traditional botanical watercolors are not. In traditional painting, every petal must be in the right place.
In blush painting, the petals are suggestions, impressions, memories of flowers rather than their exact likeness.
There is a beautiful freedom in that approach, and it is one of the reasons this technique appeals to so many beginners.
Adding Gold Accents
One of the defining features of the blush painting trend in 2026 is the addition of metallic accents. A touch of gold watercolor or gold leaf transforms a soft, pale painting into something that feels luxurious and intentional.
Gold watercolor is available in pans and tubes from most art supply brands. You can also use liquid gold leaf or gold ink.
Apply the gold after your watercolor layers are completely dry. Use a fine brush to paint delicate lines, tiny dots, or a subtle gold wash over part of the painting.
The contrast between the soft, matte blush colors and the bright, reflective gold is stunning.
A few ideas for incorporating gold: paint tiny gold stars scattered across the background, create a gold border around the edges of your paper, or add a single gold line through the center of a floral composition.
Less is more here — a few well-placed gold accents are more effective than covering the entire piece.
Finding Inspiration in the Everyday
The beauty of watercolor blush painting is that inspiration is all around you. The pink of a sunset, the lavender of a field in late summer, the peachy glow of morning light through sheer curtains — these are all perfect blush palettes waiting to be translated onto paper.
I keep a small notebook where I jot down color combinations I see in nature.
Last week, I was at the farmers' market and noticed the most beautiful arrangement of dusty pink peonies next to pale blue hydrangeas.
I snapped a quick photo with my phone and used it as the color reference for my next painting.
That painting now sits on my kitchen windowsill, and every time I look at it, I remember that sunny Saturday morning at the market.
That is one of the most rewarding aspects of this craft. Your paintings become visual diaries of the beauty you have noticed and the moments you have treasured.
A blush painting of soft peach and rose might remind you of the summer you spent on the coast.
A lavender and mint piece might bring back memories of your grandmother's garden. These paintings are not just decorations — they are emotional anchors, holding onto feelings and memories that might otherwise fade.
Sharing and Displaying Your Work
Blush paintings are naturally beautiful as standalone pieces, but they also lend themselves to creative framing and display. Here are a few ideas for what to do with your finished paintings:
- Simple frame. A white or light wood frame with a wide mat lets the soft colors breathe. Group three small paintings together on a wall for a gallery-style display.
- Gift tags and cards. Cut your paintings into smaller pieces and use them as one-of-a-kind gift tags or note cards. A blush painting of a simple flower on a folded card makes a heartfelt thank-you note or birthday greeting.
- Bookmarks. Cut a painting into strips, laminate them or cover them with clear contact paper, and punch a hole at the top for a ribbon. These make wonderful, personal gifts for the readers in your life.
- Phone case inserts. Trim a painting to fit the back of a clear phone case for a custom, artistic look that changes every time you make a new painting.
- Digital sharing. Scan or photograph your paintings and share them on social media. The watercolor blush community on Instagram and TikTok is thriving and wonderfully supportive. Use hashtags like watercolorblush and softwatercolor to connect with other artists.
Building a Daily Practice
The single best way to improve at watercolor blush painting is to do it regularly, even if only for fifteen minutes a day.
A daily practice does not have to mean a finished piece every time. It can mean simply playing with color, testing how different pigments behave on wet paper, or experimenting with the amount of water in your brush.
I recommend keeping a small sketchbook dedicated to your blush experiments. Label each page with the date and the colors you used.
Over time, this sketchbook becomes a record of your growth as an artist and a treasure trove of ideas for larger pieces.
Some of my favorite paintings have come from happy accidents in my practice sketchbook — a color combination I would never have planned, a bloom pattern I could never replicate intentionally.
If you are the type of person who needs structure to maintain a habit, try a "blush a day" challenge.
Paint one small piece each day for a month. The pieces do not need to be good or even complete.
The point is to show up, put brush to paper, and let yourself be surprised by what emerges.
From One Beginner to Another
I have to confess something: my first blush painting was a muddy mess. I used too much water, too many colors, and I could not resist going back to fiddle with it even after the paper had started to dry.
The result was a brownish-gray blob that looked nothing like the dreamy, pastel images I had seen online.
I almost gave up. But something made me try again the next day, and this time I used less water and only two colors: pale pink and soft lavender.
I let the first wash dry completely before adding anything else. When I peeled the tape off and held the finished piece up to the light, I caught my breath.
It was not a perfect painting by any stretch, but it was soft and pretty and unmistakably mine.
That is the thing about watercolor blush painting. It meets you where you are. It does not demand technical skill or artistic training.
It asks only that you show up with an open mind and a willingness to let the water do its work.
In return, it gives you moments of quiet beauty, the satisfaction of creating something with your own hands, and a gentle reminder that softness has its own kind of strength.
So fill your water jar, tape down your paper, and pick up your brush. The colors are waiting, and they are going to do something beautiful.