Introduction
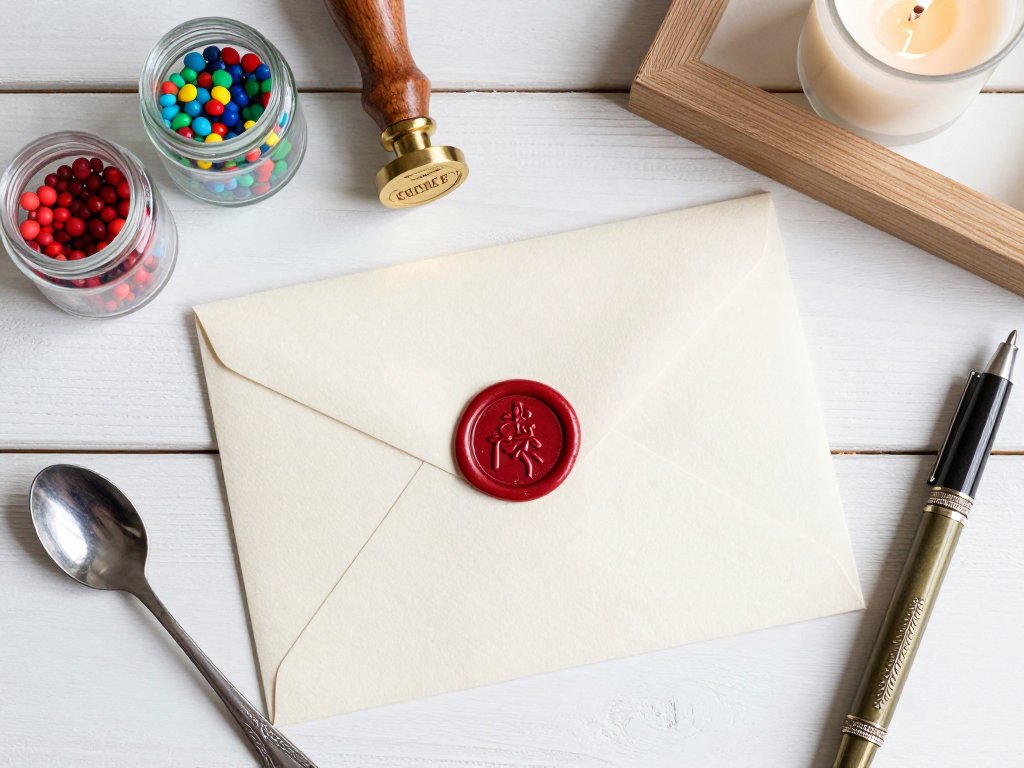
There is something quietly magical about opening an envelope and finding a glossy wax seal waiting for you.
It says that someone took their time, that your letter mattered enough to be finished with care.
In a world of quick texts and email pings, that small circle of wax feels like a tiny piece of history.
And here is the best part: you do not need to be a craft expert to make one. Wax sealing is one of the most beginner-friendly paper crafts there is. You can learn the basics in a single evening, and your very first seal will probably look wonderful.
In this guide, I will walk you through exactly what to buy, how to melt your wax, and how to press a clean, even seal every time.
We will also cover the little mistakes everyone makes at first — and how to fix them.
By the end, you will be sealing letters, gift tags, and invitations like someone who has been doing it for years.
Why Wax Sealing Feels So Special
Wax seals have been around for centuries. Before envelopes were glued shut, people used them to keep letters private and to show who they came from. A family crest pressed into red wax told the receiver everything they needed to know before they even broke the seal.
Today, we do not need seals for security. We use them because they are beautiful, and because they turn an ordinary letter into a keepsake.
There is a gentle ritual to it. You light a flame, melt the wax, let it pool into a glossy circle, and press your stamp. It takes about two minutes from start to finish. That little pause feels calming in a busy day.
Wax seals also make wonderful gifts. A set of sealing wax and a monogram stamp is a thoughtful present for a pen pal, a bride, or a friend who loves vintage things. You can even seal a birthday card and watch the recipient's face light up.
What You Need to Get Started
Here is the good news: the supply list is short. You only need three things to make your first seal.
- Sealing wax. You can buy it as beads, sticks, or glue-gun refills. Beads are the easiest to measure, so they are a great choice for beginners.
- A stamp. Brass stamps with wooden handles are the classic choice. Look for one with a design you love — a monogram, a flower, a star, or a simple heart.
- A heat source. A tea light candle works beautifully. Many kits include a small metal spoon designed just for melting wax.
That is genuinely all you need to start. A complete beginner kit with wax, a spoon, and one stamp usually costs around fifteen to twenty-five dollars.
You will also want a flat, heat-safe surface to work on, and an old plate or silicone mat to catch drips. A piece of parchment paper works in a pinch.
One more handy item: a little bowl of cold water. If you make a mistake, you can drop the misshapen wax into the water to cool it, then peel it off and try again. Wax is wonderfully forgiving.
Choosing Your Wax: Beads, Sticks, or Glue Guns
The type of wax you choose changes how you work. Here is a simple breakdown of the three main options.
Wax Beads
Beads are small, round, and easy to measure. You scoop out the amount you need, melt them in a spoon, and pour. Because you control the amount, beads give you the most consistent results.
They also make color mixing simple. Want a burgundy seal with a gold edge? Melt burgundy beads, then add a few gold ones on top before you pour.
Wax Sticks
Sticks look like glue sticks and are melted directly against a hot surface or flame. You hold the stick over your letter, let the melted wax drip down, and build up a puddle.
Sticks are convenient because there is no spoon to clean. The trade-off is less control. It takes a few tries to learn how much wax you need for a full seal.
Glue-Gun Wax
This is the modern shortcut. Special sealing wax refills fit into a low-temperature glue gun, and you squeeze out a puddle of melted wax with a trigger.
It is fast and very beginner-friendly. The downside is that you have less choice in colors and finishes, and the wax can feel a little different under the stamp.
Color is part of the fun. Classic red and deep navy look timeless on cream paper.
Gold and silver add sparkle for celebrations. Soft blush and sage green feel modern and gentle.
Many brands also sell scented wax — think vanilla, rose, or sandalwood — so your letters can smell as lovely as they look.
My advice? Start with beads and a spoon. They give you the most control while you learn, and the supplies are inexpensive. If you fall in love with the craft and want to speed things up, a wax glue gun is a lovely upgrade.
Choosing Your Stamp
Your stamp is the heart of the whole project, so pick one you truly like. Brass stamps are the most common. They hold heat well and give crisp impressions.
Stamps come in two main styles. Some have a fixed design, like a flower or a moon. Others are customizable — you can order one engraved with your initials or a family monogram.
For a first stamp, I recommend a simple, bold design. Fine details can get lost in wax, especially when you are just learning. A chunky monogram or a simple botanical shape will look fantastic even in a beginner's hands.
You will also see acrylic stamps with clear handles. These are pretty and budget-friendly, but brass stamps tend to release from the wax more cleanly. If you can afford a brass one, it is worth the few extra dollars.
Step-by-Step: Your First Wax Seal
Let us make your first seal. Find a quiet spot, set out your supplies, and give yourself ten unhurried minutes. There is no rush here.
- Prepare your surface. Lay your letter or envelope flat, and place a scrap of paper underneath to catch any stray drips. Position the area you want to seal over a firm, level surface.
- Light your candle. A tea light or a small taper works well. Hold your spoon over the flame, handle tilted so the bowl sits just above the tip.
- Melt your wax. Drop three or four beads into the warm spoon. Let them melt slowly, stirring gently with a toothpick if you like. Do not let the wax bubble or smoke — that means it is too hot.
- Pour the wax. Tilt the spoon and let the melted wax pool onto your paper in one spot. You want a circle about the size of a quarter, maybe a little larger.
- Wait a few seconds. Give the wax five to ten seconds to cool slightly. It should look dull and slightly set, not shiny and liquid.
- Press your stamp. Hold the stamp straight above the wax and press down firmly. Do not twist it — a straight press gives the cleanest impression. Hold for ten seconds.
- Lift gently. Rock the stamp slightly to release it from the wax. Admire your seal! If you pressed evenly, you will see a crisp, detailed imprint.
That is the whole process. The first seal may not be perfect, and that is completely fine. Your third will be better, and your tenth will look professional.
One tip from experience: practice on scrap paper two or three times before you seal a real letter. It takes the pressure off and lets you get a feel for the timing.
When Things Go Wrong: Easy Fixes
Every wax sealer has a drawer full of wonky first attempts. Here are the most common problems and exactly how to fix them.
The Wax Spread Too Thin
This happens when you do not use enough wax, or when you press too hard. Next time, add one more bead of wax and press a little more gently.
The Seal Is Blurry or Smudged
You pressed while the wax was still too hot. Wait a few extra seconds before pressing. The wax should look set and slightly matte on top.
The Wax Sticks to the Stamp
This usually means the wax was too hot, or you lifted the stamp too fast. Let the wax cool a little longer, and rock the stamp gently from side to side before lifting.
Air Bubbles in the Wax
Bubbles come from pouring too fast or stirring too vigorously. Pour slowly in one spot, and let the wax settle for a moment before pressing.
You Made a Real Mess
Do not panic. Wax peels off most paper cleanly if you catch it while it is still warm. And if you are sealing envelopes, you can always open a fresh one and start over. The wax itself is reusable — melt it again and try once more.
Creative Ways to Use Wax Seals
Once you have the basic technique down, you will start seeing opportunities everywhere. Here are some of my favorite uses.
Letters and Snail Mail
Seal the flap of an envelope, or seal the envelope itself so the receiver has to break the wax to open it. A monogrammed seal turns a simple letter into an event.
Invitations
Wedding invitations, baby showers, and birthday party invites all look stunning with a wax seal. Seal the inner envelope for an elegant reveal, or add a small seal to the RSVP card.
Gift Wrap
Skip the bow and finish a wrapped gift with a wax seal instead. It looks beautiful on kraft paper, and it makes the gift feel handmade even if the present came from a shop.
Jars and Tags
Seal a ribbon around a mason jar of homemade jam. Press a tiny seal onto a luggage tag. Add one to a scrapbook page or a journal cover. The possibilities are endless.
Holiday Cards
During the holidays, a wax seal in deep red or green makes every card feel extra special. Gold wax is gorgeous for New Year's wishes and anniversaries.
The best part is that each seal is one of a kind. Even with the same stamp and the same color, no two seals are ever exactly alike. That handmade quality is exactly what makes them so special to receive.
Storing and Caring for Your Supplies
Wax sealing supplies are easy to look after, which makes the hobby even more pleasant.
Keep your wax beads or sticks in a small airtight container. Moisture can make wax sputter when it melts, so a dry spot is best. A little tin or a zip-top bag works perfectly.
Clean your stamp after each session. While the wax is still warm, press the stamp onto a scrap of paper a few times to pull off the residue.
If wax builds up in the crevices, dip the stamp in hot water for a few seconds and wipe it clean with a soft cloth.
Your brass stamp will develop a lovely patina over time, which is part of its charm. If you prefer it shiny, a gentle polish with a soft cloth will restore it.
Store your spoon and candle together with your wax so everything is ready to go next time. When the mood strikes to write a letter, you will not have to hunt for your supplies.
Conclusion
Wax sealing is one of those rare crafts that is both simple and deeply satisfying. It takes almost no time, costs very little, and the results feel like a small piece of magic.
Your first few seals may be imperfect. Press them anyway. Send the letter anyway. The person on the other end will not be judging your technique — they will be delighted that you took the time to make something beautiful by hand.
Start with one letter this week. Seal it, stamp it, and drop it in the mail. I think you will find, as so many others have, that this tiny vintage ritual becomes one of your favorite little traditions.
And once you have mastered the basics, try mixing colors, experimenting with different stamps, or sealing your holiday cards. Every seal you make will be a small work of art — and a gift to someone you care about.