Introduction
My grandmother kept a dented tin of watercolor pans on the windowsill above her kitchen sink. She painted only skies, and she painted them fast, before the kettle boiled.
I remember watching blue bleed into grey and thinking she had done something clever with her brush. She hadn't. The water had done it for her.
That's the quiet magic of wet-on-wet watercolor. You stop pushing paint around and start letting it travel.
It is the friendliest technique in the medium, and also the most misunderstood. Beginners either fall in love with the softness instantly or panic when the paper dries in the wrong direction. Both reactions are normal.
By the end of this guide, you'll know how paper behaves, how wet is wet enough, and how to time your brush to the minute. You'll also learn to welcome the blooms instead of dreading them.
What Wet-on-Wet Watercolor Actually Is
Wet-on-wet means applying paint onto paper that is already damp. The pigment doesn't sit where you put it. It floats, spreads, and settles on its own terms.
This is the opposite of wet-on-dry, where wet paint meets bone-dry paper and stops almost exactly where the brush left it.
The difference isn't your skill. It's physics, and physics is patient enough to explain itself.
Water Tension: The Invisible Skin
Water sitting on paper forms a shallow film with a surface tension, like a stretched membrane across the page. That skin holds the water in place until something breaks it.
When you touch a loaded brush to that film, you puncture the membrane. Wet paint rushes sideways into the surrounding water because the film wants to equalize.
This is why a single touch can blossom into a two-inch cloud. You didn't paint a cloud. You released one.
Pigment Flow and Gravity
Pigments are tiny suspended particles, and not all of them travel at the same speed. Heavy earth colors like burnt umber settle fast and move slowly.
Light, staining colors like phthalo blue and quinacridone rose sprint across a damp surface and grab the paper fibers hard.
Gravity gets a vote too. A wash on an upright board will sag downward over minutes, pooling at the bottom edge of your damp area.
Keep your board nearly flat, tilted maybe ten degrees, and gravity becomes a gentle helper instead of a vandal.
Paper Matters More Than Paint
If you take one thing from this article, take this: wet-on-wet lives or dies by your paper. Cheap paper will fight you every step.
Student-grade pads are often made of wood pulp. They absorb water unevenly, pill up under a wet brush, and dry with harsh tide lines.
Cold Press, Hot Press, Rough
Cold press paper has a slightly bumpy, toothy surface. It holds water generously and gives colors a soft, settled look, which makes it the forgiving choice for beginners.
Hot press is smooth and slick. Paint glides beautifully, but water sits on top longer and edges form more crisply, which is less forgiving of hesitation.
Rough paper has deep dimples. It makes dramatic texture, but wet-on-wet blending can fracture across the bumps. Save it for later.
140 lb Versus 300 lb
Paper weight is measured in pounds per ream, and it describes how much water the sheet can take before it buckles.
140 lb is the everyday standard. It's affordable and fine for small wet-on-wet studies, especially if you tape or stretch it. It will still cockle a little.
300 lb is thick, stubborn, and wonderful. It stays almost flat with no stretching at all. It costs noticeably more per sheet, so many painters cut it into quarters for practice.
Why 100% Cotton Behaves Differently
Cotton paper is made from actual cotton fibers rather than wood pulp. Those fibers are long, absorbent, and springy.
Water soaks in evenly and stays available for longer, so your wet-on-wet window stretches from seconds into minutes. Cotton also lifts cleanly when you want to remove color.
Wood pulp paper grabs pigment aggressively and stains, which means your mistakes stay mistakes. Cotton lets you change your mind, and changing your mind is most of learning to paint.
Taping, Stretching, and Blocks
You have three practical options for keeping a wet sheet manageable.
- Masking tape: Simple and quick. Tape all four edges of 140 lb paper to a rigid board, overlapping the tape onto the board.
- Stretching: Soak the sheet in cool water, lay it flat, and staple or tape it while damp. It dries tight as a drum and stays that way.
- Watercolor blocks: A pad glued on all four sides. You paint directly on the top sheet, then slice it free with a dull knife once dry.
For a beginner's first wet-on-wet session, a 140 lb cotton block in a modest size is the least fussy path. No soaking, no tape, no staples.
Loading the Paper: Dampening Evenly
Dampening is a separate step from painting, and it deserves its own clean water. Cloudy rinse water will tint everything you do.
Fill two jars: one for clean dampening water, one for rinsing brushes. You will thank yourself in the first ten minutes.
Sponge or Brush?
A natural sea sponge or a large synthetic sponge covers big areas fast and evenly. It's the practical tool for a full sky.
Dab rather than drag. Press the sponge down, lift, and move. Dragging can abrade the paper surface and leave lint behind.
A large mop brush or a wide flat wash brush gives finer control and less water overall. It's better for smaller, shaped damp areas.
Many painters dampen with a sponge first, then even out the last streaks with a big soft brush. Try both and see which one your hands prefer.
The Sheen Test
Here's how to tell exactly where your paper is in its drying cycle. Tip your board toward a window and watch the light bounce off the surface.
- Wet: A visible, glossy mirror sheen. Water pools and reflects the room. Too wet, paint will explode outward.
- Damp: A satin, damp-fabric glow with no standing puddles. This is the sweet spot for soft blending.
- Dry to the touch: The sheen has vanished, but the paper still feels cool against the back of your hand. Wet-on-wet is closing.
- Bone dry: No sheen, no coolness. You're now working wet-on-dry whether you planned to or not.
Get in the habit of checking with your hand and your eyes together. The sheen tells you the truth faster than any timer.
The Tea, Milk, Honey Scale
Consistency matters more than color mixing when you're starting out. Happily, there's a kitchen scale that beginners never forget.
Tea
Tea consistency is thin, pale, and watery. It looks like weak iced tea on your palette.
Use tea for your first dampening layers, for distant, atmospheric shapes, and for building up depth in thin veils. It moves fast and dries almost without edges.
Milk
Milk consistency is the workhorse. It's opaque-ish in the brush but still fluid, about like whole milk.
This is the mix for most wet-on-wet blending, drop-in color, and controlled washes. It flows when you want it to and holds a shape when you need it.
Honey
Honey consistency is thick, syrupy, and reluctant to move. The brush leaves a raised, glossy trail.
It belongs mostly in wet-on-dry work: fine tree branches, dark foreground marks, crisp lettering-free details. On a wet surface, honey paint barely spreads at all.
When in doubt, mix tea and add a little more pigment rather than starting thick. You can always deepen a wash. Removing one is much harder.
The Timing Window
Wet-on-wet has a lifespan, and it is shorter than most beginners expect. Knowing the count saves your painting.
On 140 lb cotton in a normal room, your true damp window runs roughly two to six minutes after you dampen. Hot, dry rooms cut that in half.
On 300 lb cotton, you may get eight to twelve minutes. On thin wood-pulp paper, think thirty to sixty seconds.
Once the satin sheen disappears, paint dropped in will form a hard-edged shape instead of a soft one. That's not a failure. It's just the window closing.
Reading the Room
Humidity and airflow decide how fast you work. A fan or an open window across the table can halve your working time without warning.
Working flat instead of tilted keeps water in place longer. Working upright drains the water downward quickly and shortens everything.
If you feel rushed, damp a smaller area. Half a sky at a time is far better than a whole sky gone muddy.
When It Turns to Mud
Mud happens when you keep brushing past the damp window. Each stroke lifts pigment from below and mixes it with what's on top.
Three colors overworked together make grey-brown. Add a fourth and you get a flat, lifeless puddle that dries duller than it looked wet.
The fix is uncomfortable but simple: put the brush down and walk away. Let it dry, then decide whether it needs anything at all. It often doesn't.
Soft Blends in Practice
Two-Color Blending
This is the foundation move. Dampen an area, then touch one color at the left edge and a second color at the right edge.
Tilt the board gently and let the two colors walk toward each other. If they meet and stall, touch a clean, damp brush between them to encourage the merge.
Rinse that brush often. A dirty blender brush is the fastest route to grey mush in a worksheet you were proud of.
Drop-In Color
Drop-in means touching concentrated paint into a damp wash and letting it bloom outward on its own.
Load a round brush with milk-thick color and touch the tip to the wet surface. Count to three. The pigment will race outward in a soft-edged cloud.
Drop in while the sheen is bright but the puddle is gone. On a fully wet surface, color shoots too far. On a damp surface, it stays put beautifully.
Blooms and Backruns
A bloom, sometimes called a backrun, is that cauliflower-shaped flare that happens when wet paint meets a damper area or a drying edge.
Beginners treat blooms as accidents. Experienced painters use them deliberately to suggest clouds, distant foliage, frost, and water reflections.
To make one on purpose, let a wash sit until it's just losing its sheen, then drop in a brushful of clean water. Watch it push the pigment outward and dry into a soft ring.
To avoid one, never add wet paint to a half-dry wash. Either work wholly wet or wait for bone dry.
Lifting With a Thirsty Brush
A thirsty brush is damp but not dripping. Squeeze it firmly against a cloth until no water falls.
Press it gently onto a damp wash to open a soft highlight, or onto a dried wash to pull color back toward light. Press, hold, lift straight up.
Rubbing scrubs the paper and damages the surface. Patience lifts more pigment than pressure ever will.
Where Wet-on-Wet Ends and Wet-on-Dry Begins
Wet-on-wet is for atmosphere, not architecture. Blend it where softness serves the picture, and switch techniques where edges matter.
Use wet-on-wet for skies, distant hills, fog, reflections, shadow gradients, and the soft undersides of clouds.
Switch to wet-on-dry for tree trunks, branch lines, fence posts, rooflines, windows, foreground grass, and anything you want the viewer to recognize clearly.
The classic beginner painting structure is simple: soft, wet background first, crisp, dry foreground second.
Aerial perspective does the rest of the work for you. Distant things are pale, cool, and blended. Near things are darker, warmer, and sharply edged.
Getting that contrast right will make your painting read as deeper than it actually is.
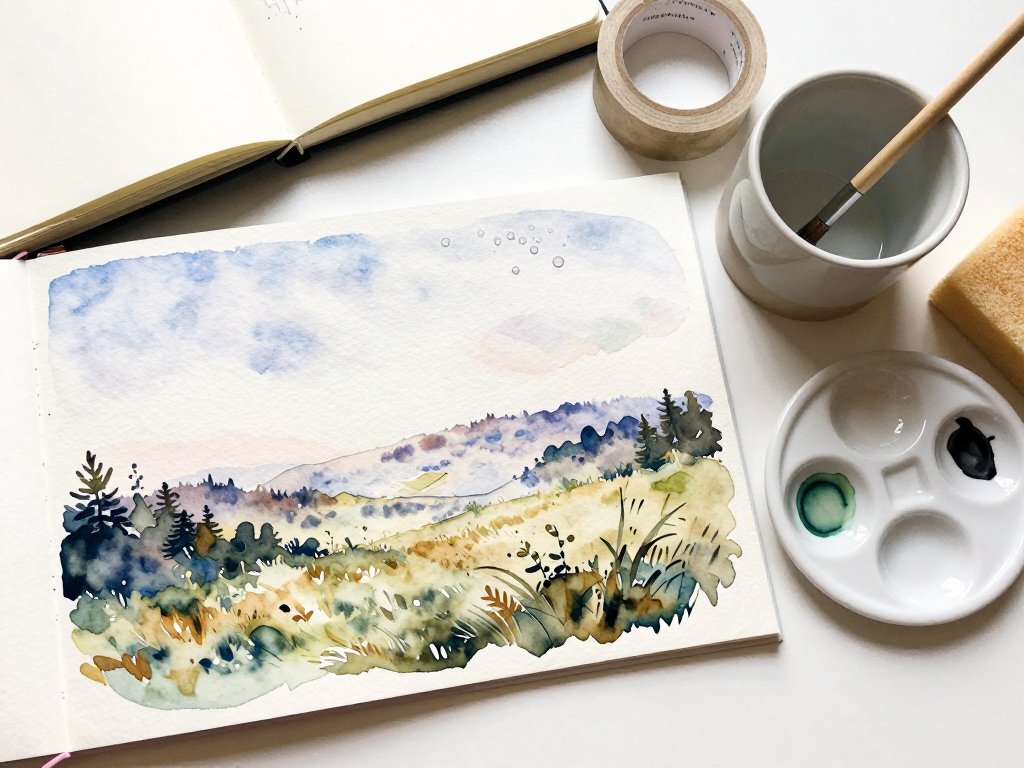
A Beginner Project: Misty Hillside at Dawn
Let's put everything together in one small painting. Use a 140 lb cold press cotton block or a taped quarter sheet, roughly nine by twelve inches.
You'll need a large round brush, a wide flat or mop for dampening, a sponge, and three colors: ultramarine blue, quinacridone rose, and a warm yellow.
- Set up: Tape your paper down if it isn't on a block. Put clean dampening water in one jar and rinse water in the other.
- Sketch lightly: With a soft pencil, draw the simplest possible horizon line about one third of the way up. One line. No detail.
- Dampen the sky: Sponge the area above the horizon evenly. Tilt the board toward the light and confirm the satin sheen.
- Lay the first color: With a large round loaded with tea-thin ultramarine, lay a horizontal stroke near the top. Let it spread downward on its own.
- Warm the horizon: Drop rose and yellow into the lower part of the damp sky, letting them merge into a pale apricot glow. Don't stir.
- Blend the middle: Touch a clean damp brush between blue and apricot where they hesitate, then stop touching anything.
- Add the hills: While the sky is still damp, paint a soft, milk-thick band of grey-violet just below the horizon for the distant ridge.
- Soften the ridge: Stroke downward from the hill into the misty area with a clean damp brush so the tops blur into the sky.
- Wait: Leave the whole piece alone until it's bone dry. This is the hardest step and the most important.
- Paint the middle hill: Wet a band across the middle, then drop in a slightly stronger blue-grey and let it bloom softly.
- Dry again: Repeat the waiting. Another ten or fifteen minutes.
- Foreground trees: Now work wet-on-dry. With honey-thick dark blue-green, paint two or three simple tree silhouettes.
- Add edges: Paint the trunks with the very tip of a small round, touching the paper only once per line.
- Foreground grass: Drag short, quick upward strokes at the base of the trees. Keep them dry and deliberate.
- Lift the mist: With a thirsty brush, gently lift a few soft patches where the hills meet the valley floor.
- Sign and rest: Let it dry fully before removing the tape. Some painters wait overnight for the most delicate edges to settle.
Common Beginner Frustrations and Fixes
Muddiness
Almost always caused by over-brushing past the damp window or mixing complementary colors carelessly. Fewer strokes, fewer colors, more waiting.
Hard Edges Appearing Unexpectedly
You touched paint to paper that had already lost its sheen. Dampen a fresh area for the next blend instead of chasing the old one.
Paper Buckling and Cockling
Thin paper and too much water. Tape the edges, use a block, stretch the sheet, or step up to heavier weight stock.
A Bloom Where You Didn't Want One
Water touched a drying wash, or you added wet paint into a settling puddle. Once it's dry, you can lift it lightly, or simply paint over and claim it as fog.
Colors Turning Grey on the Paper
Your mixing water was dirty or your brush carried dried pigment from the last color. Rinse, blot, and reload often.
Tide Lines at the Damp Boundary
Pigment pushed to the edge of the wet area and dried there. Keep the damp edge soft with a clean damp brush before it starts to dry.
Imperfect Washes Are Part of the Charm
Here's something nobody tells beginners: the softness you admire in a finished watercolor is often an accident that the painter decided to keep.
Watercolor dries lighter than it looks when wet. It also dries unpredictably, and that unpredictability is the entire reason the medium feels alive.
My grandmother's skies were never tidy. They had wandering edges and one stubborn bloom in the corner of nearly every one.
She used to say the paint knew something she didn't. After forty years of looking at those skies, I think she was right.
Your first wet-on-wet wash will probably surprise you. Let it. Then paint the next one, and the next, and watch your timing improve with every sheet.
Where to Go Next
Once soft skies feel comfortable, try the same wet-on-wet logic on autumn trees and evening skies.
If you'd like a seasonal project to practice these washes with more playful subjects, Spooky Watercolor: Easy Halloween Paintings makes a lovely follow-up, and its foggy, blended backgrounds are built on exactly these techniques.
Keep a small pad near your desk and dampen a square whenever you have five spare minutes. Repetition teaches timing better than any explanation.
And when a wash goes soft and strange in a way you didn't plan, don't throw it away. Set it on the windowsill and look at it again tomorrow.
Watercolor rewards the patient, and it forgives the beginner more generously than almost any other paint. Mix a cup of tea, wet the paper, and see what the water decides.