Introduction
I wasted about forty dollars before I painted my first decent landscape. Forty dollars on fancy paints I did not know how to use, expensive canvases I ruined in an afternoon, and brushes I treated like they were made of gold.
The worst part was not the money. It was the frustration of watching every attempt turn into a muddy brown mess while the tutorials online made it look effortless.
Here is what I learned the hard way: the secret to a good acrylic landscape has almost nothing to do with expensive supplies.
It has everything to do with three simple habits — painting in the right order, mixing colors on a palette instead of the canvas, and knowing when to stop.
This guide will save you the forty dollars and the frustration. By the end, you will paint a simple landscape with a sky, distant hills, and a few trees — using supplies that cost less than a family pizza night.
Why Acrylics Are the Smart Choice
If you are new to painting, acrylics are the sensible pick. Here is the honest breakdown:
They are cheap. A student-grade set of acrylics costs about ten to fifteen dollars and lasts for months. Oil paints, by comparison, are pricey and need expensive solvents. Watercolor is cheaper but much harder to control for beginners.
They dry fast. A layer of acrylic is dry in ten to thirty minutes. You can fix a mistake, paint over it, and try again in the same evening. Oils take days to dry, which means waiting around when you just want to finish.
They are forgiving. Made a tree that looks like a broccoli? Let it dry and paint right over it. Acrylic covers almost anything underneath it.
Cleanup is water. No turpentine, no fumes, no special thinners. Soap and water, done. If you are painting at the kitchen table after the kids go to bed, this matters more than you think.
That is the whole argument. Acrylic gives you the most results for the least money and the least fuss.
The Budget Starter Kit
Here is exactly what to buy, and more importantly, what to skip. I put the prices in rough ranges so you know what to expect.
Paints — about $10 to $15. Buy a student-grade acrylic set with the basic colors: titanium white, cadmium yellow, yellow ochre, cadmium red, ultramarine blue, cerulean blue, and burnt sienna.
That is seven colors. You can mix every landscape color you need from those. Skip the fancy fifty-dollar sets — the pigments are barely different at beginner level.
Brushes — about $8 to $12. You need three flat brushes (small, medium, large) and one round brush for details. Synthetic bristles are fine and cheap. Skip the brush sets with twelve brushes — you will use three of them.
Canvas — about $2 to $4 each. Buy cheap canvas panels or canvas boards to practice on. Save the stretched canvases for paintings you plan to keep. Cardboard with gesso primer also works in a pinch, but canvas panels are worth the two dollars.
A palette — free. A white ceramic plate from your kitchen works better than a store-bought palette, and it is free. The white surface helps you see the true color of the paint. Just wash it before anyone needs it for dinner.
Water cup and paper towels — free. You already own these.
Total cost: about twenty-five dollars. That is the entire investment, and it will last you months.
Setting Up Your Workspace
You do not need a studio. You need a flat surface, decent light, and fifteen minutes of quiet.
Set up near a window if you can. Daylight shows colors honestly — that warm yellow bulb in the living room will trick you into mixing colors that look wrong in the morning.
Tape your canvas to the table with a little painter's tape so it does not slide around while you work. Keep your water cup on the side of your non-painting hand, and change the water when it looks like tea. Muddy water makes muddy colors.
Lay your paints out on the plate in the same order every time — whites on one side, blues on the other, warm colors in the middle. Muscle memory will save you seconds on every mix, and those seconds add up over an evening of painting.
One more tip: wear an old shirt. Acrylic does not come out of fabric once it dries. I learned that one the expensive way.
The Two Techniques That Matter Most
Every landscape painting, no matter how complex, comes down to two techniques. Master these and everything else is details.
Technique one: block in big shapes first. Before you paint a single tree or cloud, divide your canvas into three big areas: sky, distant land, and foreground.
Paint those large shapes loosely, with no detail. The sky gets a wash of blue, the hills get their base green or brown, the foreground gets its earth tone.
Detail comes later, on top of dry paint. Beginners skip this step and try to paint a finished tree in the middle of a blank canvas — that is why their paintings look disconnected.
Technique two: mix on the palette, not the canvas. When you need a color, mix it on the plate first, then apply it.
Beginners drag two colors together directly on the canvas, which smears wet paint and creates mud.
Mixing on the palette keeps your canvas clean and gives you a consistent color for the whole shape.
That is it. Big shapes first, mix before you apply. Everything else in this guide builds on those two habits.
Painting the Sky First
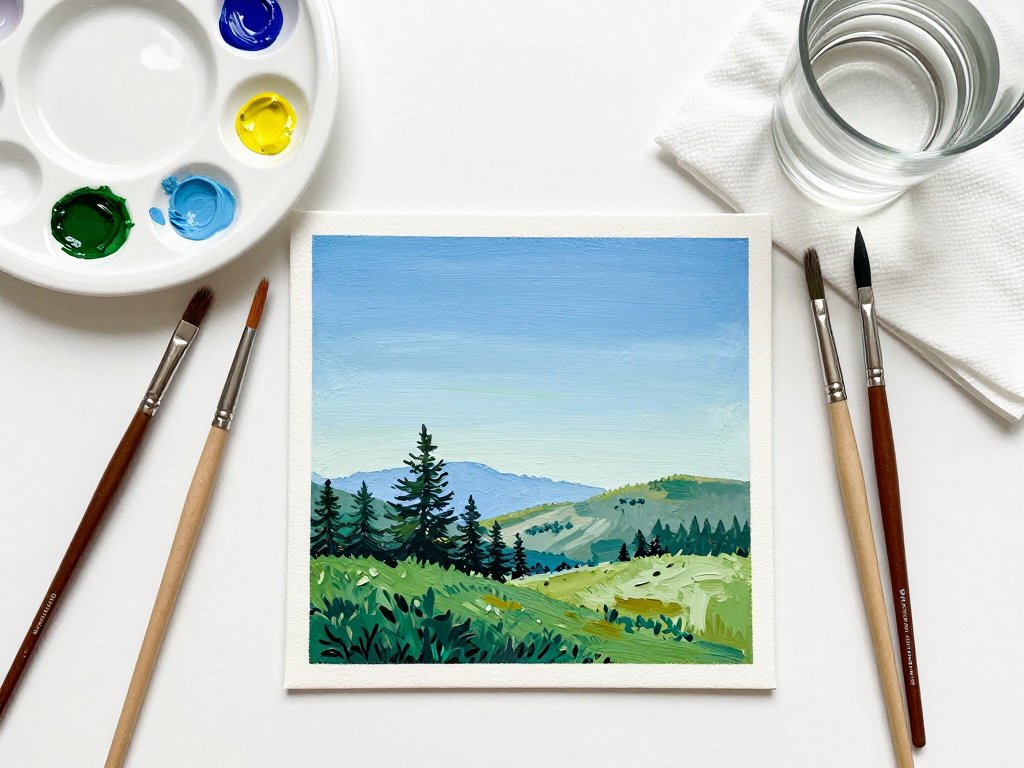
Landscapes are painted back to front — sky first, then distant hills, then the foreground, then details. The sky sets the mood for the whole painting, so it goes down first.
Start with the sky area at the top of your canvas. Mix a blue for the top of the sky — ultramarine blue with a touch of white. Apply it in smooth, horizontal strokes with your largest flat brush.
Work your way down, adding more white to your mix as you go, so the sky gets lighter toward the horizon.
Do not clean your brush between each row; the gradual blend is what you want.
This is called a gradient, and it is the difference between a flat blue wall and a believable sky.
Want a sunset instead? Start with a pale yellow near the horizon, blend through orange, and finish with a soft pink or lavender above. Same technique, warmer colors.
While the sky dries, you can already see the painting starting to come together. That is the moment that hooks you.
Adding Distant Hills and Layers
Here is the trick that makes landscapes look deep: things get lighter, grayer, and less detailed as they get farther away. Painters call this atmospheric perspective, and it is the single most useful concept in landscape painting.
For your distant hills, mix your green or blue-gray with a generous amount of white. The color should look hazy, like it is a long way off. Paint the hills as simple, smooth shapes along the horizon — no texture, no individual trees.
Let that dry. Then mix a slightly darker, more saturated green for the next layer of hills, closer to the bottom of the canvas. Paint those shapes overlapping the first layer slightly. The contrast between the pale far hills and the darker near hills creates depth automatically.
Each layer you add gets darker and more detailed than the one before it. That is the whole system. You never have to paint "depth" — you just follow the rule, and the eye does the rest.
Painting Trees and Foreground Details
Now for the fun part. Trees are the most common foreground detail, and they are easier than they look.
A tree in acrylic is three strokes: a trunk, a mass of foliage, and a shadow side.
For a distant tree, paint a simple dark silhouette — trunk and a rounded blob of foliage, no detail.
For a closer tree, add a highlight: after the base foliage dries, dab a lighter green on the top-left side of the canopy to suggest sunlight.
Do not paint individual leaves. At the scale of a landscape, your eye reads a suggestion of texture better than a hundred tiny strokes.
If you want texture, use a dry brush — load it with paint, wipe most of it off on a paper towel, and drag it lightly across the foliage.
That is called dry brushing, and it looks surprisingly professional.
For the foreground, add a few simple blades of grass or a path. A path works wonders: a lighter band of color curving from the bottom edge toward the hills pulls the viewer into the painting.
It is the oldest composition trick in the book, and it is free. Include water if you want a quick win.
A pond at the base of the hills is just a horizontal band of blue-gray, with a few vertical reflection strokes dragged downward.
Water reads instantly and makes a simple landscape feel complete.
Common Beginner Mistakes
Every beginner makes the same few mistakes. Here is how to avoid the big four:
Muddy colors. Mud happens when you overmix or mix too many colors together. Fix it by limiting each mix to two or three colors, and by cleaning your brush between colors. If the paint on your palette looks gray-brown, it is mud — start that mix again.
Overworking. Acrylic dries fast, and beginners keep dragging a brush through paint that is already drying, which tears it up. Rule of thumb: lay down a stroke and leave it alone. If it needs fixing, wait for it to dry and paint over it.
White gaps. First layers often leave little white dots of canvas showing through. Do not panic — this is normal. Let the layer dry and apply a second coat. Two thin coats beat one thick, gloopy coat every time.
Painting details too early. A tree painted on a blank white canvas always looks pasted on. Block in the big shapes first, and details will sit inside the scene instead of floating on it.
Making It Look Finished
A painting is not done when you stop painting. It is done when you do these three small things:
Sign it. Use a fine round brush and a small mix of dark paint to sign your name in the bottom corner. It takes thirty seconds and it changes how you feel about the piece.
Check the edges. Wipe any paint smudges off the sides of the canvas with a damp paper towel while the paint is still wet. Clean edges make a painting look professional.
Varnish it. When the painting is fully dry — give it a few days — brush on a thin coat of acrylic varnish. It protects the surface and makes the colors richer. A small bottle costs about eight dollars and covers dozens of paintings.
Then put it somewhere you will see it. A painting you look at every day teaches you more than a painting you hide in a drawer.
Conclusion
So here is what the whole guide comes down to: big shapes first, mix on the palette, back to front, and stop before you wreck it. Follow those four rules and you will paint a landscape you are proud of — for about twenty-five dollars in supplies.
That is the part I wish someone had told me when I was wasting forty dollars on fancy paint: the skill was never in the price tag. It was in the order of operations and the patience to let layers dry.
Your first landscape will not be perfect. Mine was not. But your second one will be better, and your fifth one will be the one you want to frame. That is how it works, for every painter who ever picked up a brush.
So tonight, when the house is quiet, set up your plate, tape down a cheap canvas, and paint a sky. Just the sky. See how good it feels.
Then come back tomorrow for the hills.