Introduction
If you have ever tried to blend two marker colors and ended up with a hard line instead of a soft fade, this guide is for you.
Alcohol markers behave differently from the markers you used in school. Learn a few simple habits, and smooth blends become completely doable.
You do not need a huge collection or expensive supplies. You need a small set, the right paper, and about twenty quiet minutes.
Below you will find the four core techniques, the mistakes to avoid, and three easy projects to start with.
Everything here is written for real life. Short sessions, budget supplies, and gentle progress are the whole plan.
What Are Alcohol Markers, and Why Do They Blend?
First, a quick look at what makes these markers special. It all comes down to the ink inside the barrel.
Alcohol markers hold dye suspended in an alcohol-based solvent. The solvent evaporates quickly, which is why the ink dries so fast.
Water-based markers behave differently. Water soaks into the paper almost at once, so the color dries where it lands.
That leaves almost no time to blend. Two water-based colors usually dry before they can melt together.
Alcohol markers have a clever advantage. The alcohol in a fresh stroke re-wets the ink you just laid down.
Re-wetting dissolves the first layer slightly. The two inks can then flow together before the solvent evaporates.
Picture wet paint meeting wet paint. Instead of a hard edge, you get a true, gradual blend.
This single property changes everything. It is why artists reach for alcohol markers for skin tones, skies, and soft shadows.
There is one trade-off to know about. The solvent also carries color through paper, so bleed-through is common.
That is why paper choice matters so much. The next sections cover supplies and surfaces in detail.
What to Buy Without Breaking the Bank
Good news: you do not need a professional-grade set to begin. Budget brands have improved enormously in recent years.
Start with a beginner set of twelve to twenty-four colors. Ohuhu, Arteza, Shuttle Art, and Arrtx are widely available budget brands.
Premium lines like Copic, Prismacolor, and Spectrum Noir are beautiful tools. You can enjoy them later, once your skills catch up.
A good starter set costs about the price of a takeout dinner. That buys hours of quiet, satisfying creative time.
Choose your colors with care. Look for light and dark versions of the same hues, not a box full of brights.
Pale pinks, soft yellows, muted grays, and a couple of deep darks will serve you far better than twelve neon shades.
Check the nibs before you buy. Two tips per marker is ideal for a beginner.
- A brush tip lays down soft, flexible strokes that are perfect for gradients and small details.
- A chisel tip covers large shapes quickly with an even, flat sweep of color.
- A fine tip is handy for tiny spaces, but you can easily skip it in your first set.
Brush and chisel together cover almost everything you will do. The brush blends; the chisel fills.
Now the extra that matters most: a colorless blender marker. Buy one the same day you buy your set.
A colorless blender holds only solvent, with no dye inside. It moves color around, lifts excess ink, and smooths seams.
Think of it as a magic wand for fixing hard edges. It is the single most useful extra you can own.
Skip the fancy accessories for now. No special bags, no light boxes, no extra markers. A blender, a small set, and good paper are plenty.
Why Paper Matters
Paper is the quiet hero of marker art. The same markers can look wonderful or terrible depending on the surface.
Marker ink needs a smooth surface that does not drink it too quickly. The color must stay wet long enough to blend.
Your best options are marker paper, bleed-proof paper, and smooth Bristol cardstock. Any of these will serve you well.
Marker paper is often sold as a pad with a protective sheet under each page. It lets you see exactly how the ink behaves.
Bleed-proof paper resists ink traveling through to the page below. It is ideal for coloring books and loose practice pages.
Smooth Bristol is a favorite for finished pieces. It is sturdy, takes layer after layer, and lets colors melt beautifully.
Now for the two surfaces to avoid:
- Regular copy paper feathers and bleeds. Ink spreads into fuzzy edges and soaks straight through to the next sheet.
- Rough watercolor paper eats ink. The bumpy texture drinks the color and destroys any chance of a smooth blend.
Even on good paper, heavy layers can bleed through. Always slip a scrap sheet under your hand and under your working page.
This habit protects the page beneath and keeps your table clean. It costs nothing and saves countless drawings.
Test any new paper with one stroke before you commit. Five seconds of testing can save a whole ruined picture.
If you use coloring books, check whether the pages are printed on one side only. That makes bleed-through a non-issue.
Four Core Blending Techniques
These four techniques build on each other. Practice them in order and give each one a few short sessions.
Keep scrap paper beside you. You will want it for every technique below.
Technique One: Layering Light to Dark
Layering means building color in thin coats instead of one heavy pass. It is the foundation of everything else.
Start with your lightest color and cover the area with a gentle, even stroke. Let it dry completely before adding anything.
Now add a second thin layer, but only over the parts you want a little deeper. Let that dry as well.
Keep going with slightly darker colors, working only at the edges and shadows. Each layer stays thin and even.
The color builds gradually, so the result reads as depth. You avoid the harsh line a single dark pass would create.
Think of stacking tissue paper. One sheet looks pale. Ten sheets in the same spot grow rich and deep.
Patience is the whole trick here. Rushing dark ink over wet color creates streaks and blotches every time.
Layering is also forgiving. A mistake in a light area can often be softened with a careful layer placed on top.
Rule of thumb: lightest color first, darkest color last, and always let each layer dry between passes.
Technique Two: Blending Two Colors
This is the classic two-color blend. It looks impressive, and it is easier than it seems.
Begin by laying down the lighter color across the whole area. Keep the stroke even and steady.
Next, add the darker color along the edge where you want the shadow or depth to sit.
Here is the key moment: while both colors are still wet, return with the lighter marker and pull the dark color into the light area.
The two inks mix where they meet. You will see the hard edge soften into a gradual fade.
Work in small sections rather than across the whole shape at once. Alcohol ink dries in seconds.
If the ink dries before you blend, simply stroke the lighter color over the area again. That re-wets the surface.
Now bring in the colorless blender. Sweep it gently along the seam where the two colors meet.
The blender smooths the transition and lifts any pooling ink. You should be left with a soft, even fade.
Here is the whole sequence in four steps:
- Cover the area with the light color.
- Add the dark color along one edge.
- Pull the dark into the light while both are wet.
- Smooth the seam with the colorless blender.
That is genuinely all there is to it. Four steps, and you have a blend.
Technique Three: The Flick or Feather Stroke
The flick stroke creates soft gradients in small areas. Skin tones and gentle shading depend on it.
Hold the marker loosely, like a pen. Make quick, light strokes that start firmly and lift off at the end.
Each stroke begins in the darker area and fades into the lighter area. The tail of the stroke disappears like a tiny dash.
Speed is the secret. A fast stroke deposits less ink at its tail, and that light tail creates the fade.
Flick from dark to light, over and over, letting each pass sit just above the last one.
You are building what artists call feathering. Tiny feathered strokes layered together melt into a smooth gradient.
Feathering is wonderful for skin, skies, and soft shadow. The marks are small, so mistakes are small too.
If you see streaks, your strokes were too slow or too heavy. Loosen your grip and flick faster.
Try a little drill: fill a rectangle with parallel flicks, each one starting at the dark edge and vanishing into the light.
Technique Four: The Gradient or Ombre
The ombre gradient takes blending one step further. It uses three or more colors in a row.
Choose colors that sit near each other on the color wheel. Neighbors melt together far more willingly than opposites.
For a sunset sky, try yellow melting into orange and then pink. For water, blend light blue into a deeper teal.
Lay your colors down side by side, overlapping the edges slightly while the ink is still wet.
Now blend each pair exactly as you did in technique two. Yellow into orange first, then orange into pink.
Work from light to dark across the whole strip. Keep your motion even and your layers thin.
Finish with the colorless blender gliding over the full gradient. One gentle sweep unifies every transition.
Ombre backgrounds appear everywhere in card making and journaling. Once three colors feel easy, five will follow.
Patience pays off here. A smooth sunset sky is simply a series of careful small blends done in order.
Practice Habits That Pay Off
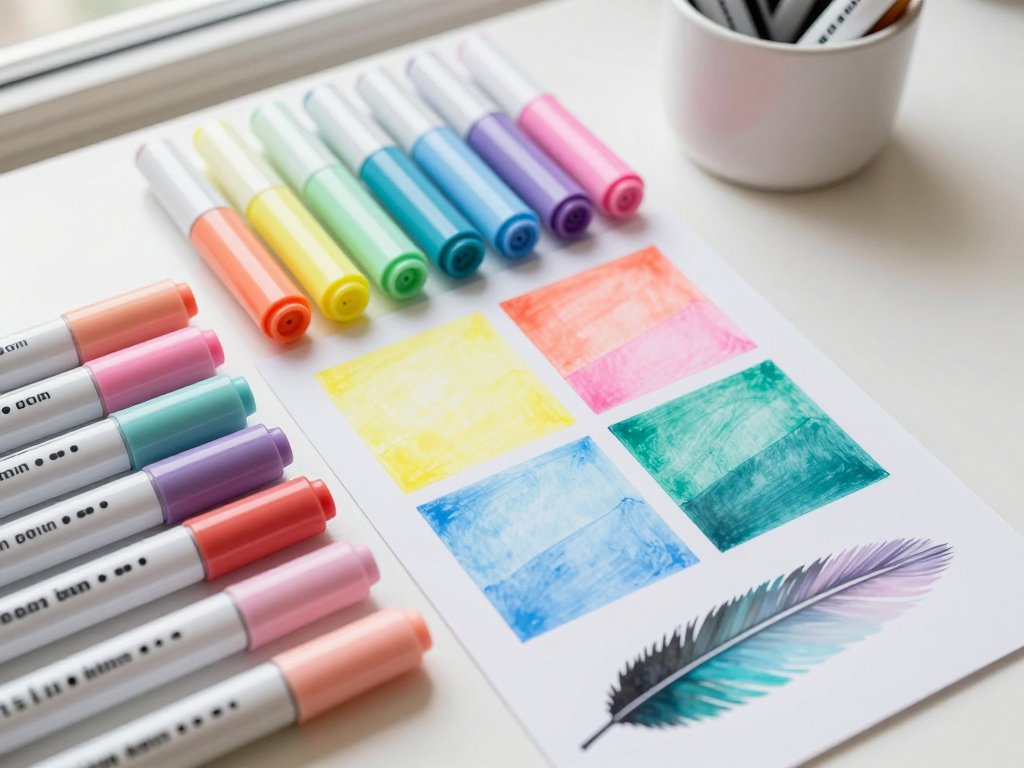
Before you start any real project, make a swatch chart of every color you own. This one habit saves endless guesswork.
Color a small square with each marker, let it dry, and write the color name or number beside the swatch.
Keep the chart where you can see it while you draw. You will finally tell similar pinks apart at a glance.
A swatch chart also shows each color's true dried value. Wet ink always looks darker than the finished color.
Organize your chart by color family if you like. Keep the pinks together, the blues together, the grays together.
Practice on inexpensive paper before you touch your good pad. Mistakes cost nothing on scrap sheets.
Keep a favorite blends list. When two colors melt into something gorgeous, write down the pair and what you used it for.
This list becomes your personal recipe book. Weeks later you can recreate a beloved blend without guessing.
Try these small drills during practice time:
- Blend one light and one dark color in a two-inch square until the seam disappears.
- Flick a gradient from dark to light across a rectangle using a single marker.
- Blend three colors into an ombre strip and compare it with yesterday's attempt.
Short sessions beat long ones. Fifteen focused minutes most days outpace one exhausting afternoon every time.
Set a timer and stop when it rings. Ending while you still enjoy yourself makes you eager to return.
Common Beginner Mistakes and Fixes
Every marker artist makes these mistakes at first. Meet them now, and you will dodge most of the frustration.
Pressing too hard. Markers should glide; you should never push. Hard pressure creates streaks and dumps too much ink.
Heavy hands also damage the nib over time. The felt flattens and frays until the tip no longer makes clean strokes.
The fix is simple: hold the marker loosely and let its own weight do the work. The nib should feel as if it is skating on ice.
Working too slowly. Alcohol ink dries in seconds. Blends must happen while the ink is still wet.
The fix is to blend each small section before moving on. Do not outline the whole shape first and return later.
Work small, work fast, and refresh a dried area with a light stroke of the lighter color before you continue.
Using too few colors. Gradients look striped when they lack intermediate tones. You cannot fade from pale pink to deep red in one jump.
The fix is to plan a light, a medium, and a dark version of each hue you intend to blend.
If a seam still looks harsh, a mid-tone between the two colors is usually the missing piece.
Skipping the swatch chart. Without swatches you will guess, and you will grab the wrong pinks again and again.
The fix is ten minutes of prep. Make your chart before the next project and keep it within reach while you draw.
One more common stumble: blending on the wrong paper. If your blends feather or bleed, review the paper section above and switch surfaces.
Notice the pattern. Most mistakes come from rushing, pressing, or guessing. Slow down, test first, and let the markers do their job.
When in doubt, remember the blender. It smooths seams, lifts mistakes, and buys you time while you learn.
Easy First Projects
Ready to use your new skills? Start with projects that forgive small errors and finish quickly.
Coloring book pages are perfect first practice. Choose pages with large, smooth areas and shade them with gentle gradients.
Pick a simple subject: a balloon, a leaf, a slice of melon. Use layering to give it depth and a two-color blend for the shadow.
Hand-lettered greeting cards are a second lovely idea. Letter one cheerful word, then add a small blended background behind it.
Keep the background small, like one corner or a soft oval. The blend does the decorating while your lettering stays the star.
Simple kawaii-style fruit is the third suggestion. Draw a strawberry or a peach with round, friendly shapes.
Add one highlight blend to each fruit. Melt a lighter pink into the red side, or a pale yellow into the orange.
These projects take less than an hour and teach real skills. As a bonus, they make thoughtful little gifts.
Whatever you choose, finish the whole piece. Beginners learn more from one completed drawing than from ten abandoned starts.
Finished work also shows you how far you have come. Keep your early pieces and compare them in a month.
Your First Practice Session
Here is your homework, and it is gentle: one twenty-minute practice session this week.
Make your swatch chart if you have not yet. Then try one two-color blend on scrap paper. Then play with the flick stroke for a few minutes.
That is the whole session. No project, no pressure, no masterpiece required.
Know this: your first blends may look patchy. That is normal, and it is expected. Every artist's early work looks exactly like this.
Alcohol markers are forgiving tools. Because the ink re-wets, you can always layer over a mistake and soften it.
Almost nothing you do is permanent. A colorless blender and one fresh layer can improve nearly any mishap.
So give yourself permission to make imperfect art. Set a timer, open your markers, and let twenty minutes be enough.
Your hands will learn faster than you expect. Each session, blending will feel a little more natural.
Small, steady practice is the whole secret. Show up once this week, and let the markers do the rest.
Happy creating.
