Introduction
Is there a pet asleep on the couch right now that you have always wanted to draw?
Or a bird at the feeder you wish you could capture on paper? Drawing animals is one of the most rewarding things a beginner can try, because the subjects are all around us — and because our hearts are already invested in them.
Here is the good news: you do not need to be a natural artist to sketch a convincing dog, cat, or bird.
Animal drawing is mostly about seeing shapes instead of subjects, and that is a skill anyone can learn.
In this guide, I will show you a simple, forgiving method that works for pets and wildlife alike.
We will start with the basic shapes every animal can be built from. Then we will move through proportion, fur and feather texture, eyes, and the little details that bring a sketch to life.
You will also find practice ideas for drawing your own pets and for sketching from photos when you cannot get close to wildlife.
Grab a pencil, find a comfortable seat, and let us draw some animals together.
Why Animal Drawing Is Perfect for Beginners
Many people assume animals are harder to draw than objects or buildings. In some ways, the opposite is true. Animals are forgiving subjects because we expect them to be soft, furry, and slightly irregular. A wonky line reads as fur; a wobbly outline reads as a living creature in motion.
Drawing animals also gives you endless practice material. Your family pet is available every day. Birds visit the feeder regardless of your skill level. Photos of animals are everywhere — in books, magazines, and online — so you will never run out of subjects.
And there is an emotional payoff that keeps you motivated. When you sketch your own dog or cat, you are not just practicing technique.
You are making a little portrait of a creature you love. That warmth carries you through the wobbly first attempts, and it makes every finished sketch feel special.
Finally, animal drawing is a wonderful activity to share with children. Kids are naturally drawn to animals, and sketching a pet together creates calm, connected family time. You will find a section on drawing with kids later in this guide.
The Simple Shapes Behind Every Animal
Every animal drawing begins with basic shapes. This is the single most helpful idea in beginner art, so let us sit with it for a moment.
Look at a cat curled up on a cushion. Can you see the circle of its body?
The smaller circle of its head? The triangle of its ears? Now look at a standing dog.
There is an oval for the chest, a longer oval for the rear, and a rounded rectangle for the muzzle.
A bird at rest is a teardrop for the body and a small circle for the head.
Here is how to use shapes in your own drawing:
- Start light. Use a soft pencil with gentle pressure so your shapes stay easy to erase.
- Draw the big shapes first. Get the overall body, head, and limbs in place before you worry about any detail.
- Check the relationships. Is the head about a third of the body size? Are the ears roughly the length of the face? These comparisons will make your drawing look like the actual animal.
- Refine gradually. Once the big shapes feel right, round off corners, add the neck, and connect the parts.
When you look at an animal this way, the fear of drawing disappears. You are never drawing a complicated creature. You are arranging a few simple shapes and then refining them, one small step at a time.
Proportions: Getting the Animal to Look Like Itself
Proportion is what makes a sketch look like a golden retriever instead of a generic dog, or a barn owl instead of a generic bird. The good news is that you do not need to memorize measurements — you just need to compare one part of the animal to another.
Start with the head-to-body ratio. On a dog, the head is usually about one-quarter to one-third of the body length, depending on the breed.
On a cat, the head is smaller in proportion than many people think. On a bird, the head is small relative to the body, and the tail adds surprising length.
Here are some proportion tricks that help right away:
- Eyes on the halfway line. For most animals, the eyes sit roughly halfway down the head, not at the top. Placing them too high is a classic beginner mistake.
- Legs have joints. An animal's leg is not a single smooth tube. Look for the shoulder, elbow, hip, and knee, and bend the leg at those points.
- Feet face forward. Most mammals stand on toes and heels, and their feet point forward. Drawing feet sideways makes animals look unstable.
- Ears mirror the head. For cats and dogs, the ears line up with the eyes or the back of the head, not the middle of the skull.
If a drawing looks "off" but you cannot say why, check the proportions first. Compare sizes, compare angles, and compare spacing. Usually, a small adjustment to one relationship fixes the whole drawing.
Building a Dog or Cat from Start to Finish
Let us walk through a complete pet sketch, step by step. We will use a sitting dog as our example, but the same process works for a cat with just a few shape changes.
Step 1: Draw the basic shapes. Lightly sketch an oval for the body and a circle for the head. Add a smaller oval for the muzzle and two small triangles for ears. Keep everything light and loose.
Step 2: Connect the shapes. With gentle curved lines, join the head to the body, add the neck, and sketch the front legs as rounded columns. Add a suggestion of the back legs where they fold against the body.
Step 3: Place the features. Draw a light horizontal line across the head at the halfway point. Set the eyes on that line. Add the nose at the front of the muzzle and the mouth line below it.
Step 4: Refine the outline. Erase the construction lines you no longer need. Round the shapes, smooth the connections, and adjust the outline until the silhouette feels like your dog.
Step 5: Add the details. Draw the eyes with their highlight, sketch the nose with a soft shade, and add the fur direction with a few short strokes along the body.
Step 6: Finish with shading. Use your pencil to add soft shading under the chin, along the belly, and beneath the tail. Then step back and admire your work.
Take your time with each step. A pet sketch does not need to be finished in one sitting. Many artists draw the shapes one day and finish the details the next.
Drawing Fur and Feathers
Texture is what makes an animal drawing feel touchable. But here is a secret: you do not draw every hair or every feather. You draw a few suggestions of them, and your viewer's brain fills in the rest.
For fur, use short strokes that follow the direction the fur grows. On a dog's back, fur flows from the neck toward the tail.
On a cat, it flows down from the spine and out along the sides. Look at your pet and notice which way the fur lies, then let your pencil follow that flow.
A few texture tips:
- Short fur needs fewer strokes. A few confident strokes read as short hair; dozens of tiny lines read as scruffy.
- Long fur needs longer, curved strokes. Draw them in layers, starting from the base and working outward.
- Leave highlights white. The shine on a dog's nose or a cat's back is often just the white paper showing through.
- Feathers follow the wing. On a bird, draw layered curves that flow from the shoulder toward the wing tip, like roof shingles.
For feathers specifically, start with the large contour of the wing, then add a few layered curves inside it. Resist the urge to draw every feather. Two or three layers of suggested feathers look far more realistic than a scribble of dozens.
Eyes, Noses, and the Details That Bring Life
An animal's face is where the personality lives, and a few well-drawn details can make the difference between a flat sketch and a living portrait.
Eyes are the most important detail. Here is a simple approach that works for most animals:
- Draw the eye shape. Most animal eyes are almond-shaped or round. Study your reference and match the shape.
- Add the iris and pupil. Darken the pupil, then add a lighter ring for the iris. Leave a tiny white spot for the highlight — this is what makes the eye look wet and alive.
- Shade around the eye. The area around an animal's eye is often darker, especially in dogs and cats. Soft shading there makes the eye feel set into the face.
Noses are simpler than they look. Most are a soft triangle or rounded shape with two nostril openings. Shade the whole nose lightly, then darken the nostrils and the outline. A highlight on the tip of the nose adds that familiar moist shine.
Whiskers are the finishing touch. Draw them with a sharp pencil or a very light hand, using one quick stroke each. Whiskers should be sparse, not numerous, and they should curve naturally away from the face.
Sketching Wildlife from Photos
Wild animals rarely sit still for a sketch, which is why most wildlife artists work from photographs. This is not cheating — it is standard practice, and it is the best way to learn.
Here is how to get the most from wildlife photo sketching:
- Choose clear, well-lit photos. Look for a side view or three-quarter view with the animal's whole body visible.
- Sketch the big shapes first. Even a deer or bear can be reduced to ovals, circles, and triangles. Build the framework before any detail.
- Study the proportions. Notice the length of the legs relative to the body, the size of the head, and the shape of the ears or antlers.
- Simplify the background. You do not need to draw every tree. A few suggested lines are enough.
- Draw from several photos. Each photo teaches you something new about how the animal moves and stands.
For birds, photos are especially useful because they freeze the wing positions you could never capture from life. Use them generously, and your bird sketches will improve quickly.
Easy Wildlife Subjects to Start With
Some animals are friendlier to beginners than others. Start with subjects whose shapes are simple and whose proportions are forgiving, and you will build confidence fast.
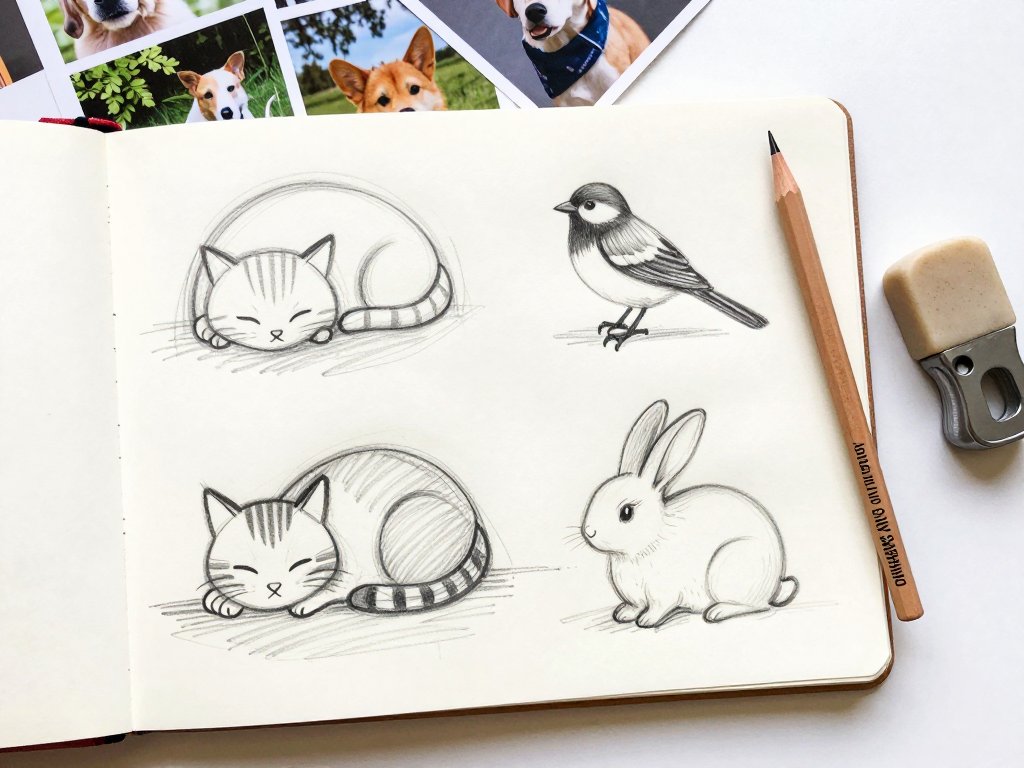
Cats and dogs. Your own pets are the best teachers. They are familiar, available, and their shapes are simple. Start with a sleeping pet — they hold still longer than anything else.
Rabbits. A rabbit is basically two ovals (body and head), two long ears, and a fluffy tail. They are one of the easiest animals to draw well, and their proportions are very forgiving.
Birds. A sitting bird is a teardrop body, a circle head, and a triangle beak. Pigeons, robins, and sparrows are excellent practice because they are common and their shapes are clear.
Squirrels. A squirrel is a series of curved shapes: the arched back, the bushy tail, and the small head. They make charming sketches and great practice for curved line work.
Horses. Horses are more challenging because of their long legs and complex joints, but they are wonderful once you master basic shapes. Save them for your third or fourth animal.
Pick one animal and draw it several times. Repeat practice is how your eye learns, and you will see real improvement by the fifth sketch.
Drawing Animals with Kids
Animal drawing is a wonderful family activity, and children usually love it. Here is how to make it a calm, happy experience for everyone.
Start with the same simple shapes you use yourself. Show your child how a cat is a circle and two triangles, then let them try. Keep your own drawing simple too — a parent sketching alongside a child is far more encouraging than a parent showing off.
A few tips for drawing with kids:
- Keep sessions short. Ten to fifteen minutes is plenty for young children.
- Praise the effort, not the result. Comment on their focus and their brave lines, not on whether the animal looks realistic.
- Let them choose the animal. A child who loves horses will draw horses over and over, and that repetition builds real skill.
- Use photos as references. Print a few clear pictures of your child's favorite animals so they can study them.
- Frame their favorites. A framed child's sketch of the family dog is a gift grandparents will treasure.
Drawing together is also a lovely screen-free activity for a rainy afternoon. Put on some quiet music, set out the pencils, and let everyone draw their own version of the family pet.
Building a Drawing Habit
Like any skill, animal drawing improves with regular practice. You do not need hours — a few minutes most days will transform your sketches within a few weeks.
Here is a simple habit plan that fits a busy life:
- Keep supplies ready. A sketchbook and pencil in a visible spot make it easy to draw for five minutes.
- Draw one sketch a day. It can be a quick shape study of a sleeping pet or a bird at the feeder. The subject matters less than the practice.
- Sketch from life when you can. Pets, birds, and even squirrels at the park are free, moving models.
- Use photos when life is busy. A photo lets you practice the same animal repeatedly until you get it right.
- Keep your old sketches. In a month, compare them with your newest work. The progress will surprise and encourage you.
Remember that every artist's early sketches are wobbly. The artists whose work you admire simply kept going past the wobbly stage. You are allowed to be a beginner. You are allowed to draw the same squirrel five times. That is exactly how improvement happens.
Conclusion
Animal drawing is a gentle, joyful skill that connects you to the creatures around you.
With nothing more than a pencil and some paper, you can sketch the dog curled at your feet, the birds at the feeder, or the rabbits in the meadow — and every sketch teaches you something new.
Start small. Draw a sleeping pet from basic shapes. Add a bird from a photo. Practice fur and feathers a little at a time. Be kind to yourself when a drawing does not work out, because every attempt is practice, and practice is the whole secret.
Before you know it, you will have a sketchbook full of the animals you love, each one a little more confident than the last. So pick up a pencil, choose an animal, and let your first wobbly lines be the beginning of something wonderful. Happy sketching!