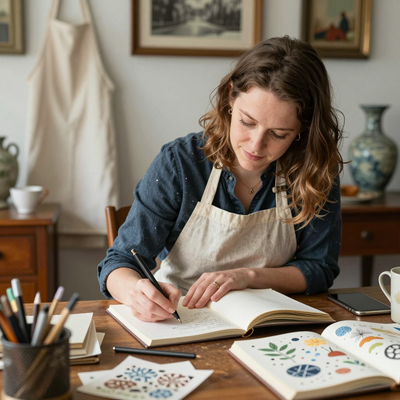
Introduction
There is something quietly magical about the moment a loop of thread and beads resolves into a bracelet.
The process — repetitive, rhythmic, almost meditative — transforms a scatter of tiny glass cylinders, a length of cord, and a patient afternoon into something that fastens around a wrist and stays.
Friendship bracelets, in their many iterations, have long served as small emissaries of care: given, traded, worn until the threads fray.
Adding beads to the tradition elevates the practice without complicating it. A seed bead here, a pony bead there, and suddenly a simple knotting pattern becomes a textured, tactile object with weight, shimmer, and personality.
This tutorial is designed for the absolute beginner and the returning maker alike. We will walk through the essential materials, the foundational knotting techniques that underpin most beaded bracelet patterns, and three complete projects that you can finish in a single weekend.
By the end, you will have not only a finished bracelet on your wrist but also the vocabulary and confidence to design your own patterns.
Whether you are drawn to the clean geometry of a chevron, the organic fullness of a cluster, or the earthy restraint of a minimalist biophilic palette, there is a pattern here that will speak to you.
Understanding Your Materials: What You Will Need
Before the first knot is tied, it pays to understand the materials at hand. The choices you make at the supply table determine how your bracelet behaves, how it drapes, and how it endures.
For the patterns in this tutorial, you will need surprisingly little, and most items are available at any craft supply store or online bead retailer for a modest investment.
Cord and Thread
The most versatile foundation for beaded friendship bracelets is standard six-strand embroidery floss. DMC remains the gold standard for its consistent thickness, colour range, and resistance to fraying during knotting.
You will use between two and six strands depending on the pattern; for most designs, separating the full six-strand skein into two bundles of three strands each, or using the full six, works well.
The floss serves as both the structural backbone and the visible warp of your bracelet.
For bead-only designs that forgo knotting visible thread, stretch cord in 0.5-millimetre or 1-millimetre thickness is ideal.
Stretch cord eliminates the need for clasps, making it the truest "friendship" material — pull it over the hand and it is secure.
For sturdier beaded bracelets that will see daily wear without stretching out, beading wire (such as Soft Flex or Accu-Flex) paired with crimp beads and a lobster clasp offers a more permanent solution.
For the patterns in this tutorial, we will focus on embroidery floss and stretch cord, as these are the most beginner-friendly and budget-conscious options.
Beads
Seed beads are the workhorses of beaded bracelet making. Size 11/0 seed beads — the most common — are small enough to create dense, intricate patterns yet large enough to thread without a magnifying lens.
For a uniform, almost fabric-like look, Miyuki Delicas are worth the slight premium: their cylindrical shape means they stack evenly, producing straight, tidy rows.
Cheaper round seed beads (sometimes labelled "E beads") have a slight curve that can introduce wobble into patterns, though for casual wear this is seldom noticeable.
Pony beads, larger and more colourful, are excellent for children's bracelets or designs where you want the beads themselves to be the focal point rather than the thread.
For the biophilic bracelet in this tutorial, wooden beads, lava stone beads in matte charcoal, and honey-amber glass beads create the warm, grounded palette that is defining jewellery trends in 2025 and 2026.
When selecting beads, pay attention to hole size: most embroidery floss passes comfortably through a standard 11/0 seed bead, but thicker cords or multiple thread passes require a bead with a larger aperture, typically labelled a "Toho" or "pony" size.
Tools and Notions
The tools list is mercifully short. You will need a pair of sharp, fine-pointed scissors; a tape measure or flexible ruler; small binder clips or a piece of washi tape to secure your work to a surface; and a beading needle or two if your fingers struggle to thread floss through seed beads.
Needles sized 10 or 12 are appropriate for 11/0 seed beads. A bead mat or a shallow tray with a lip — even a repurposed baking sheet lined with felt — prevents beads from rolling off your workspace.
Finally, a small dab of clear-drying craft glue or clear nail polish finishes the ends of your knots and prevents fraying.
Foundational Techniques: Knots and Stitches
Every beaded friendship bracelet, no matter how elaborate, is built from a small repertoire of knots and stitching patterns. Master these three foundations, and you can construct virtually any pattern you encounter.
The Forward Knot and the Backward Knot
All friendship bracelet knotting reduces to two movements: the forward knot and the backward knot.
To tie a forward knot, take your working thread (the colour you are knotting with) and form a "4" shape over the base thread: the working thread crosses over, loops behind, and pulls through the triangle created.
Tighten gently — do not yank, or your tension will warp the row. The backward knot is simply the mirror image: form a reverse "4" with the working thread crossing under and around the base thread.
Practice these two knots until they feel fluid. Consistency of tension — not speed — is what produces a professional-looking bracelet.
The War Knot (Also Called the Spiral Stitch)
One of the most popular techniques for integrating beads into a knotted pattern is the war knot, sometimes referred to as spiral stitch or figure-eight stitch.
To execute it, thread a bead onto your working cord, then pass the needle or thread back through the bead from the opposite side, forming a loop that wraps around the base cord.
Pull tight, and the bead sits snugly against its neighbour. Repeating this process creates a dense, spiral-like column of beads that feels substantial on the wrist.
The war knot is especially effective with Miyuki Delicas because their flat sides eliminate gaps between beads, yielding a surface that resembles bead weaving without a loom.
For the beginner, the war knot offers instant gratification: each stitch produces a visible, satisfying result, and the rhythm of "thread, loop, pull" is easy to maintain even while watching a film or sitting in conversation.
The spiral stitch also uses less thread per centimetre than many other beading stitches, making it economical for longer bracelets.
The Candy Stripe and Chevron Patterns
These two patterns are the foundation of virtually every knotted friendship bracelet. The candy stripe is the simplest: using two or more colours of floss, you tie a row of forward knots in a single colour across all base strands, then switch colours.
The result is a diagonal stripe that repeats across the width of the bracelet. To turn a candy stripe into a chevron — the V-shaped arrow pattern that remains the most recognisable friendship bracelet design — you simply reverse direction at the centre.
Work a forward knot from left to right, then a backward knot from right to left, so that the two sides meet in a point.
Add beads to a chevron by threading a bead onto the centre strands before tying the meeting knot; the bead becomes the tip of the arrow.
The beauty of these patterns lies in their modularity. Once you understand the candy stripe and chevron structures, you can modify them endlessly: change the colour sequence, add beads at regular intervals, increase the number of strands, or introduce a third colour.
Each variation produces a distinctly different bracelet without requiring a new technique.
Project 1: Chevron Friendship Bracelet with Seed Beads
This first project is the classic entry point: a four-strand chevron bracelet interspersed with 11/0 seed beads. The finished bracelet is approximately 7.5 inches long, suitable for an average adult wrist, with an additional 4 inches of braided closure.
Materials
You will need two colours of DMC embroidery floss (we suggest a warm coral and a soft cream), approximately 60 seed beads in a coordinating shade (a matte gold works beautifully with coral and cream), scissors, tape or a clipboard, and a beading needle if desired.
Cut four strands of floss, each 36 inches long — two strands in coral, two in cream.
Fold the bundle in half and tie an overhand knot at the fold, leaving a 1-inch loop.
Tape the loop to your work surface or clip it to a clipboard.
Instructions
Arrange your strands in alternating order: coral, cream, coral, cream. The outermost left strand will be your working thread for the first row.
Tie a forward knot with the leftmost coral strand over the cream strand immediately to its right.
Then tie a forward knot with the same coral strand over the next coral strand, and another over the final cream strand.
You should now have a row of three coral knots slanting to the right, and the coral working thread now sits at the far right position.
For the second half of the chevron, take the leftmost strand (now cream) and tie a backward knot over the strand to its right.
Continue backward knots until you reach the centre. The two halves should meet in the middle.
Thread a seed bead onto the left centre strand, then tie the two centre strands together with a forward knot, trapping the bead at the apex of the chevron.
Repeat this sequence — forward knots from left, backward knots from right, bead at centre — until the bracelet reaches your desired length.
Finish by braiding the remaining strands into a simple three-strand braid, knotting the end and trimming excess floss.
A dab of clear glue on the finishing knot prevents unravelling.
Troubleshooting
If your chevron points are drifting to one side, your tension is uneven between the forward and backward knots.
Slow down and focus on pulling each knot with the same firmness. If the beads sit crookedly, verify that you are threading the bead onto the centre strand before the meeting knot, not after.
With practice, the chevron will form clean, symmetrical V shapes that march down the length of the bracelet like a steady heartbeat.
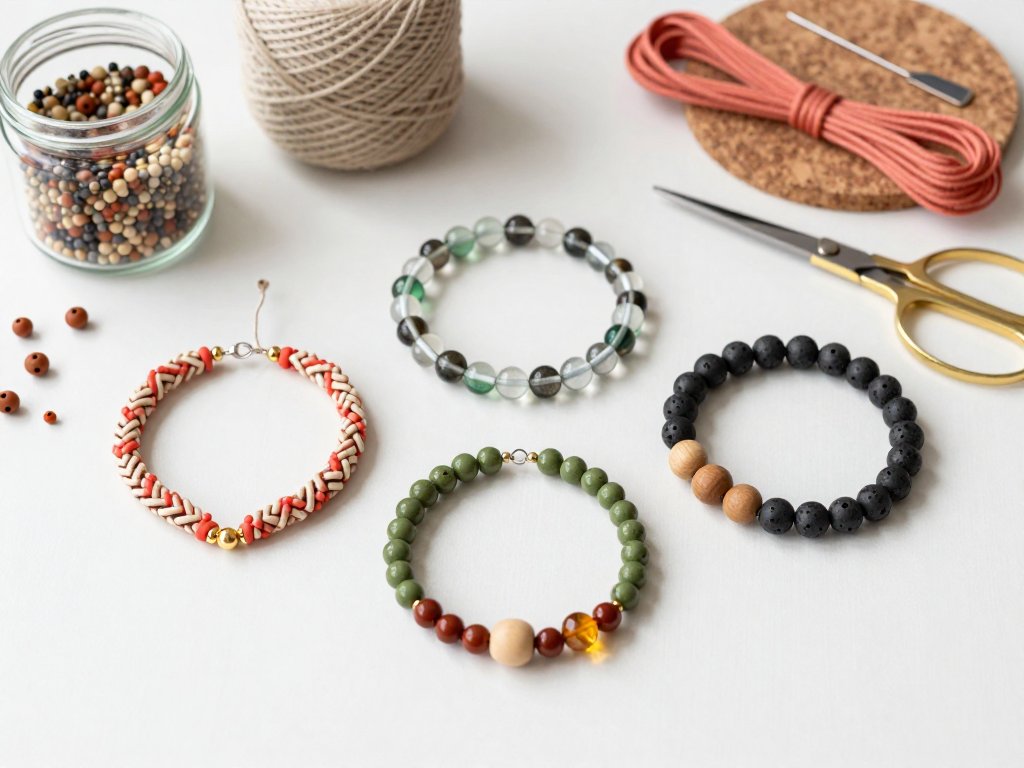
Project 2: Cluster Bracelet on Stretch Cord
The cluster bracelet is a no-sew, no-knot design that relies solely on bead arrangement and stretch cord. It is the single fastest project in this tutorial and an ideal entry point for children, for those with limited dexterity, or for anyone who wants a finished bracelet in under an hour.
Materials
You will need 0.5-millimetre clear stretch cord, approximately 24 inches; a mix of beads in three sizes: 6-millimetre round glass beads in your primary colour, 4-millimetre Czech glass fire-polished beads in a complementary tone, and 3-millimetre metallic spacer beads; scissors; and a small dab of clear craft glue.
The cluster effect comes from grouping beads of different sizes together rather than distributing them evenly, so do not worry about exact bead counts — aim for roughly twenty of the 6-millimetre beads, thirty of the 4-millimetre beads, and forty of the spacers.
Instructions
String a single spacer bead onto the cord and slide it to the centre. This will be your starting point.
Now work outward in both directions to create symmetrical clusters: on one side, string a grouping of one large bead, two small beads, and one spacer; on the other side, mirror the grouping exactly.
Continue adding mirrored clusters — alternating the order of bead sizes within each cluster — until the bracelet measures approximately 7 inches when gently stretched.
Tie the two ends of the cord together with a surgeon's knot: cross the ends, loop one end around twice (not once), and pull tight.
Dab the knot with clear glue and trim the tails to 2 millimetres. Gently tug the knot inside a neighbouring bead to conceal it.
The cluster bracelet's appeal lies in its irregularity: clusters of different sizes and colours create a dense, textural band that catches light from every angle.
Because there is no knotting pattern to maintain, you can experiment freely with bead combinations — try mixing matte and glossy finishes, or introducing a single wooden focal bead at the centre.
Project 3: Minimalist Biophilic Bracelet with War Knot Stitch
This project embraces the 2025–2026 trend toward biophilic design — jewellery that incorporates natural materials, earthy colour palettes, and organic textures.
The war knot stitch creates a dense column of beads that feels substantial yet flexible, and the restrained palette of moss green, terracotta, and honey amber produces a bracelet that complements neutral wardrobes without shouting for attention.
Materials
You will need approximately 80 Miyuki Delica beads in moss green (size 11/0), 40 terracotta-coloured round seed beads (size 8/0 for contrast), 10 honey-amber glass faceted beads (4 millimetre), 6 small wooden beads (approximately 5 millimetre), and 6 lava stone beads (matte finish, 6 millimetre).
For the cord, use a 1-millimetre waxed cotton cord in natural beige, approximately 36 inches long.
A beading needle (size 10) is recommended. You will also need scissors and clear glue.
Instructions
Fold the waxed cotton cord in half and tie an overhand knot at the fold, leaving a 1.5-inch loop.
Secure the loop to your work surface. Thread a 24-inch length of your working thread — a single strand of DMC floss in a matching neutral — and tie it to the folded cord near the loop using a lark's head knot.
This floss will carry your beads in the war knot stitch.
Thread one moss green Delica onto the floss. Pass the needle under the waxed cotton core, then back up through the Delica bead, pulling snug.
The bead should sit upright against the core. Repeat: thread a bead, pass under the core, pass back through the bead.
After ten consecutive moss green beads, introduce a terracotta round seed bead, then return to moss green.
At intervals of approximately fifteen stitches, substitute a honey-amber faceted bead for the moss green.
Every thirty stitches, thread a wooden bead directly onto the waxed cotton core (not the floss) and continue the war knot around it, letting the wooden bead sit as a focal point.
The lava stone beads are incorporated similarly: thread each onto the core at roughly equidistant intervals, and continue stitching around them.
Continue until the beaded section measures 6.5 inches. End by tying the working floss to the core with three half-hitch knots, trimming, and applying a dot of clear glue. Braid the remaining core tails into a simple closure.
The finished bracelet has a subtle, rhythmic texture: the moss green Delicas form a dense ground, the terracotta beads punctuate like dried seeds, and the amber and stone elements catch the eye at intervals.
It is a bracelet that rewards close inspection without demanding it — precisely the quality that makes biophilic design so compelling in contemporary jewellery.
Design Variations and Personalisation
Once you have completed one or more of these projects, the natural next step is to begin improvising. The patterns above are not prescriptions but starting points. Consider these avenues for personalisation.
Colour is the most powerful lever. Swap the coral and cream of the chevron bracelet for indigo and ochre, and the sentiment shifts from cheerful to contemplative.
Replace the terracotta in the biophilic bracelet with sky blue, and the earthiness gives way to a coastal feel.
The same technique, different palette, entirely different bracelet. Mixing metal finishes — combining antique brass spacers with matte silver clasps — nods to the mixed-metal trend gaining momentum through 2026 and adds a contemporary edge to otherwise traditional patterns.
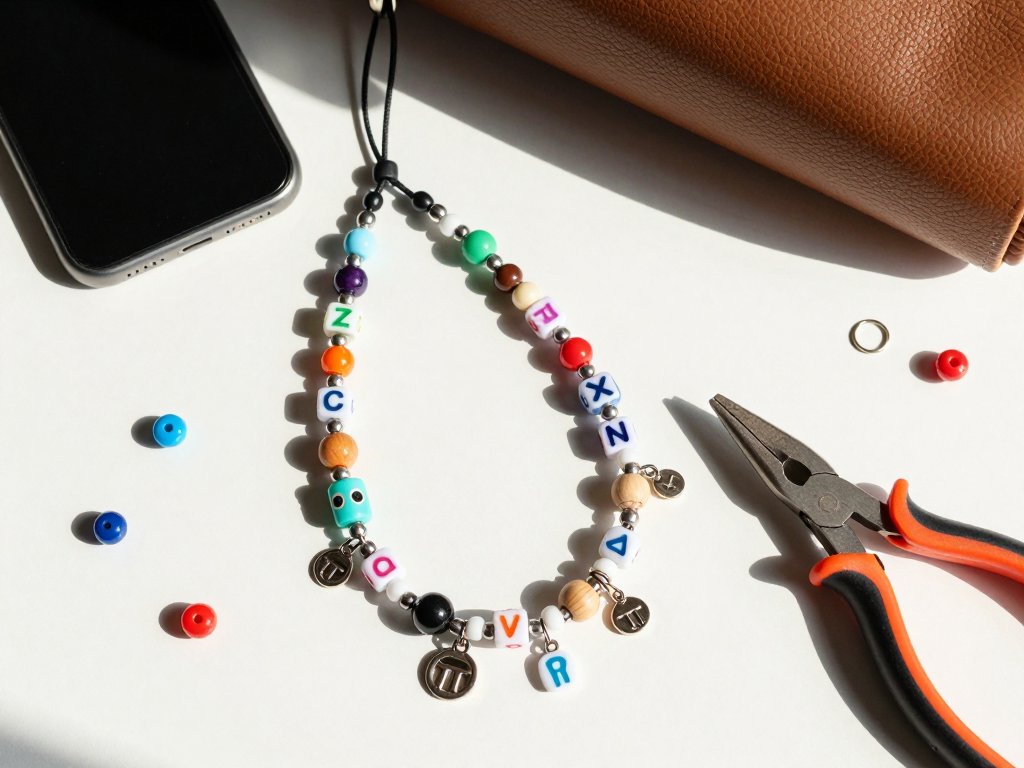
Initial charm bracelets remain a perennial favourite and are simple to integrate: attach a small metal letter charm to the closure loop or thread it onto the stretch cord before tying the surgeon's knot.
For zero-waste makers, consider using upcycled materials: cut beads from discarded plastic bottles (available from specialty suppliers), reuse broken jewellery components, or incorporate fabric scraps as tassels at the bracelet ends.
Upcycled designs carry the added meaning of intentional repurposing, a value that resonates deeply with the friendship bracelet tradition of giving something made by hand.
Pattern complexity can increase gradually. Once the single chevron is comfortable, try a double chevron using six strands of floss instead of four.
Introduce a third colour by working it into the centre of the chevron as an accent bead cluster.
The war knot stitch adapts well to graduated colour transitions — what beaders call a "ombre" or "colour fade" — by gradually replacing one bead colour with another over the length of the bracelet.
Simply shift the ratio: for every ten moss green beads, substitute first one terracotta, then two, then five, until the entire palette has shifted.
Finishing and Wearing Your Bracelets
A well-finished bracelet is a joy to wear; a sloppy finish undoes hours of careful knotting.
For knotted bracelets, always seal the final knot with a dot of clear-drying craft glue.
Allow it to dry fully — at least fifteen minutes — before trimming the tails to 3 millimetres.
For stretch cord bracelets, the surgeon's knot (double loop) is non-negotiable; a single knot will slip within hours.
Test the knot by tugging firmly before gluing and trimming.
To store your growing collection, a small fabric-lined box or a repurposed tin keeps bracelets from tangling.
Beaded bracelets should be kept away from direct sunlight for extended periods, as some seed beads — particularly translucent and dyed finishes — can fade over time.
Avoid exposing stretch cord bracelets to lotions, perfumes, or prolonged water immersion; the elastic will degrade more quickly with chemical exposure.
Wearing multiple beaded bracelets together — stacking three or four on the same wrist — creates a cumulative visual effect that is greater than the sum of its parts.
Mix textures and techniques: pair the dense war knot of the biophilic bracelet with the open, airy clusters of the stretch cord design, and add the graphic geometry of the chevron.
The interplay of materials and patterns tells a story of experimentation and care.
Conclusion
Beaded friendship bracelets occupy a rare intersection of craft traditions: they are simultaneously ancient — beadwork being among the oldest human decorative arts — and thoroughly contemporary, responsive to trends, materials, and personal expression.
The three projects in this tutorial represent a progression from structured pattern work to intuitive arrangement to intentional material selection, each building on the skills of the last.
Yet they share a common promise: that with modest materials, a few hours of focused attention, and a willingness to learn through repetition, anyone can create something beautiful to wear or to give.
The true pleasure of bracelet making, perhaps, lies not in the finished object but in the process itself — the quiet rhythm of thread passing through bead, the small satisfaction of a knot pulled evenly, the gradual emergence of a pattern from chaos.
It is a practice that rewards patience and invites play. Whether you make one bracelet or one hundred, whether you follow these patterns exactly or diverge into your own designs, you are participating in a tradition of handmade connection that stretches across cultures and generations.
The bracelet on your wrist is not just an accessory; it is a small record of time spent creating, and that is a gift worth giving — to others and to yourself.