Introduction
There is a small, quiet magic in the moment a string of beads finally becomes a piece of jewelry. Loose glass and a length of cord, and then suddenly — something wearable. Something yours.
If you have been saving beads in a tin, or you simply love the idea of making a gift that took real thought, you are in the right place. This is a guide written slowly, for absolute beginners, by someone who still remembers her own first wobbly bracelet.
Here is the first thing to know: you do not need a studio, a craft room, or hours of uninterrupted time.
A corner of the kitchen table, a tray to keep beads from wandering, and twenty quiet minutes after the children are in bed are plenty.
This is a craft that fits itself around a life.
By the end of this article you will know your beads, your cords, and your tools well enough to string a simple necklace or bracelet with confidence. More importantly, you will have learned to enjoy the making more than the perfection of it.
Getting to Know Your Beads
Walk into any bead shop and you will understand why beginners feel dizzy. Aisles of color, a thousand shapes, sizes that seem to be written in a secret code. The code is simpler than it looks.
Seed bead sizes look like fractions — 11/0, 8/0, 6/0 — and they work like shoe sizes in reverse: the larger the first number, the smaller the bead.
An 11/0 seed bead is a tiny glass dot, about two millimeters across, the kind that glitters inside woven flower patterns.
An 8/0 is a little larger, closer to three millimeters, and a 6/0 is a chunky round bead around four millimeters — big enough to see clearly and thread easily.
For your first projects, 8/0 and 6/0 are wonderfully forgiving.
Beyond seed beads, the bead world divides into a few friendly families. Glass beads — Czech and Japanese especially — catch the light beautifully and come in consistent sizes, which makes them a pleasure to design with.
Wood beads are light, warm, and natural, with generous holes that accept almost any cord; they smell faintly of cedar or sandalwood and age gracefully.
Acrylic and resin beads are affordable, cheerful, and nearly weightless, which makes them perfect for everyday wear and for bracelets made with children.
Gemstone beads — agate, jade, rose quartz, turquoise — are the most alluring and the most demanding: they are heavier, pricier, and their holes can be irregular.
Save them for your second or third project, when your hands know their way around a strand.
One more thing to check before you buy or string: the hole. Beads with very small holes need fine thread or thin wire; beads with generous holes accept leather cord happily.
Hold a bead up to the light and look through it — that little tunnel decides which stringing material you can use.
Which beads are already living in your house? Look at them with new eyes tonight. Every beader's collection begins with a few odd beads and a what-if.
Choosing the Right Stringing Material
The stringing material is the quiet backbone of every piece — invisible, but responsible for everything: how the jewelry hangs, how it feels, how long it lasts. Choose it with the same care you give your beads.
Stretchy cord (elastic)
Stretchy cord, often sold as Stretch Magic, is clear, springy elastic that lets a bracelet slip over the hand without a clasp.
It comes in thicknesses from about half a millimeter to a full millimeter; use 0.7mm for light glass or acrylic beads and 1.0mm for heavier ones.
Two rules matter: never crush elastic with metal crimp beads, which cut it like a knife, and never pull it taut while you work — it should lie relaxed, or it will snap later.
Finish with knots instead, and a dot of glue.
Beading wire
Beading wire — and SoftFlex is the name you will see most often — is not wire in the stiff sense.
It is fine stainless steel strands wrapped in a smooth nylon coating: flexible as thread, strong as wire.
It comes in weights measured in thousandths of an inch and in break strengths measured in pounds.
A medium weight, around .015 or .018 inch, suits most beginner necklaces and bracelets, and a 14-pound rating will hold everyday glass and acrylic beads easily.
Use it with crimp beads and a clasp, and it will carry a design for years.
Beading thread
Beading thread — nylon like Nymo, or the sturdier braided FireLine — is the traditional material for seed bead work: weaving, netting, and patterns where beads sit cheek by jowl.
It is thin enough to pass through an 11/0 bead several times, which no wire can do.
You will need a beading needle, and you will finish your work with knots or small crimps.
Leather cord
Leather cord is the material of the boho shelf: soft, sturdy, and instantly warm. It pairs beautifully with wood, bone, and large-hole stones. You finish it with knots or with leather cord ends rather than standard crimps, and it develops a lovely patina with wear.
A quick rule of thumb:
- Stretchy cord for bracelets that need no clasp.
- Beading wire for necklaces and any piece with a clasp.
- Beading thread for tiny seed beads.
- Leather cord for chunky, earthy designs.
Ask yourself what you are making before you buy a single spool. The project decides the cord — not the other way around.
The Tools You Actually Need
Here is good news: you can string your first bracelet with nothing but cord, beads, and scissors.
But a handful of small tools will save you frustration and make your finished pieces look quietly professional.
None of them are expensive, and a starter kit costs about as much as a nice lunch out.
The bead mat is a soft, felted tray with slightly raised edges. Beads roll; the mat catches them. It also gives you a workspace where you can lay out a whole design before you string a single bead — which is half the art.
Flush wire cutters are small pliers that snip wire and cord cleanly, leaving a flat cut instead of a sharp point. Scissors dull quickly on beading wire and leave ragged ends on elastic; cutters are worth every cent.
Crimping pliers are the tool that makes clasps look professional. They have two notches: one that presses a crimp bead into a U shape, and a rounded one that folds it into a neat little tube.
The two-step crimp is the difference between a clasp that holds and a clasp that slides loose — we will practice it shortly.
A beading needle is long and flexible, built for threading seed beads and for finishing work.
Bead stoppers are tiny plastic or silicone clips that clamp onto your wire and hold your beads in place while you work — the unsung hero of the craft, and the reason experienced beaders never seem to drop a strand.
Finally, the consumables: crimp beads, which are small soft metal tubes that you flatten to lock a clasp onto wire, and crimp covers, little half-round beads that snap over a finished crimp to hide it. Buy a mixed pack; you will use more than you expect.
You do not need the fanciest version of any of these. A simple kit, a good light, and a cup of tea will do.
How to String a Simple Necklace or Bracelet, Step by Step
Let us walk through the whole process once, slowly, so the steps feel familiar before you try them yourself. We will use beading wire here, because it teaches you the skills — crimps, clasps, finishing — that every other project builds on.
First, prepare. Spread your bead mat, pour your beads into a shallow tray or an egg carton, and sit somewhere with good light. Lay out your design on the mat first: this is the moment to arrange, rearrange, and fall in love with a pattern before it becomes permanent.
Second, cut your wire. Measure the finished length you want — wrap a soft measuring tape around your wrist, or around your neck for a necklace — and add about six inches of working room. It is easier to trim extra wire than to wish you had more.
Third, secure the start. Slide a bead stopper onto one end of the wire, or string a plain stop bead and crimp it gently. This keeps your beads from sliding off while you work. A small binder clip works in a pinch.
Fourth, string your beads in order. Work from the middle of the wire outward for long necklaces, which keeps the design balanced and prevents tangling; work from one end for short bracelets. Let the beads lie loose — no pulling.
Fifth, check the drape. Hold both ends of the wire and let the strand hang in a gentle U. Does it fall the way you imagined? Shift beads now; once the clasp is on, changes mean starting over.
Sixth, finish. Thread a crimp bead onto one end, then the clasp, then back through the crimp bead.
Slide the crimp down until it sits snug against the clasp, and crimp it — twice.
Repeat on the other end, trim the tail wires close, and tuck the trimmed ends back through a bead or two so no sharp point finds your wrist.
Seventh, wear. Put it on immediately, even if it is crooked, even if the colors argue. Your first piece will not be perfect, and that is exactly right. It is the first one. Wear it anyway, and let it teach you.
Attaching Clasps: Lobster, Toggle, and Magnetic
The clasp is the handshake of your jewelry — the first thing fingers meet, the last thing they remember. There are three friendly options for beginners, and each has a character of its own.
The lobster clasp is the classic: a small, curved hook that snaps into a jump ring on the opposite end.
It is quiet, secure, and goes with everything. To attach it, thread your wire through a crimp bead, then through the clasp's little loop, then back through the crimp bead.
Slide everything snug, and crimp.
And crimp properly, with the technique to remember: press the crimp with the back notch of your crimping pliers to form a U, then turn the pliers and press the rounded notch to fold the U into a neat cylinder.
Crimping twice — once to shape, once to finish — is what keeps the crimp from slipping later.
When you are unsure, add a second crimp bead a few millimeters behind the first as a belt-and-braces backup, then hide the pair under a crimp cover.
Crimp covers are those little half-round beads mentioned earlier. They snap over a finished crimp like a tiny clamshell, hiding the mechanics and giving your clasp end a polished, professional look. They come in silver, gold, and antique finishes; keep a small mixed pack in your kit.
The toggle clasp is a bar and a ring. You slip the bar through the ring and let it settle sideways.
It is easy to fasten one-handed, forgiving of tired fingers, and has a folk-art charm that suits wood and stone beads beautifully.
It also makes a lovely design feature, since the bar can dangle like a tiny pendant.
The magnetic clasp is the easiest of all — the two halves simply find each other. Use it only for lightweight pieces: a heavy strand of gemstones will pull a magnetic clasp apart. And keep magnets away from phones, cards, and pacemakers, a small caution that matters.
Which clasp sounds like you? The lobster is classic and quiet; the toggle, warm and handmade; the magnetic, practical to a fault. Any of them will serve a first project well.
Design Basics: Making It Look Intentional
Design sounds like a big word, but at its heart it is simply deciding, on purpose, where each bead goes. You have been making design decisions all your life — choosing what to wear, arranging flowers, setting a table. Beading is the same instinct, with smaller pieces.
Symmetry versus asymmetry is the first fork in the road. A symmetrical design mirrors itself around a center point — a focal bead in the middle, the same beads echoing out to either side.
It reads as calm, classic, and quietly formal; it is also wonderfully easy to plan, which makes it perfect for early projects.
Asymmetry — beads that wander, clusters that gather on one side — reads as modern and organic, like something found on a beach.
The trick with asymmetry is balance: the two sides need not match, but the total weight of color and size should feel even.
Hold the strand up and let your eye judge.
Color is where most of us hesitate, and the color wheel is a patient friend.
Neighboring colors, called analogous — blues with greens, roses with peaches — always harmonize; you can hardly go wrong.
Opposite colors, called complementary — teal with coral, violet with gold — vibrate against each other and feel lively.
And a single color in several shades, from deep to pale, looks sophisticated with almost no effort at all.
Then choose your focal bead: one special bead the eye can rest on. A larger glass flower, a carved wooden disc, a smooth river stone. Let everything else be the supporting cast, and place the focal slightly off-center for a more interesting rhythm.
Spacing gives a design its pulse. Large beads separated by small spacer beads — a silver round, a single seed bead, a trio of tiny ones — read as intentional; beads jammed together read as accidental.
A classic trick: string three small beads between every large one, and the whole strand starts to hum.
Finally, balance. Hold the finished strand up before you close it, and look at it the way you would look at a friend. Shift beads until the color and weight feel even. Your eye is better than you think — trust it.
What colors do you already wear? What do you reach for in your closet? Start there. Jewelry that matches your own taste will always look right.
Common Beginner Mistakes (and How to Fix Them)
Every mistake in beading has happened to every beader, including the ones whose work you admire. Here are the four you are most likely to meet, and the simple fixes that turn them into learning moments.
Stretchy cord fraying. You knot your elastic bracelet, trim the ends, and within a week the cord is fuzzy, then broken.
The usual culprits: rough bead holes sawing at the cord, metal crimps cutting it, and elastic pulled too tight while you work.
The fix: double your cord for heavier beads, use 1.0mm elastic when the beads are weighty, knot with a surgeon's knot — pass the cord through the loop twice before pulling — add a dot of glue to the knot, and tuck it into a bead hole so it cannot be seen.
And let the bracelet lie relaxed while you make it; tension is the enemy.
Crimps slipping. You finish a necklace, and the clasp slides off the end, or the crimp wanders down the wire.
This almost always means the crimp was not fully closed. The fix is the two-step crimp: shape it with the back notch first, then fold it with the rounded notch, and give the finished crimp a firm tug before you trim the tail.
If it still moves, add a second crimp bead behind the first.
Beads too heavy for the cord. A strand of gemstones sags, or the cord snaps under its own weight.
The fix is choosing the right material for the job: check the break strength of your beading wire — SoftFlex is rated in pounds, from about 10 to 21 — and pick one that comfortably exceeds the weight of your beads.
For elastic, double the cord or size up to 1.0mm. For big-hole stones, consider leather cord, which carries weight beautifully.
Tangling. The classic kitchen-table struggle: you look away for one moment and your carefully strung beads have become a bird's nest.
The fix: work on a bead mat, keep your working length reasonable, clip a bead stopper to the end you are not using, and string long necklaces from the middle outward.
Tangle prevention is mostly about keeping one end of the wire always in your hand or under a clip.
And the fifth mistake, the one nobody writes down: quitting because the first attempt is wonky. Every experienced beader has a drawer of crooked first pieces. The fix is not talent; it is patience. Keep the drawer, and keep going.
Your First Project: A Simple Stretch Bracelet
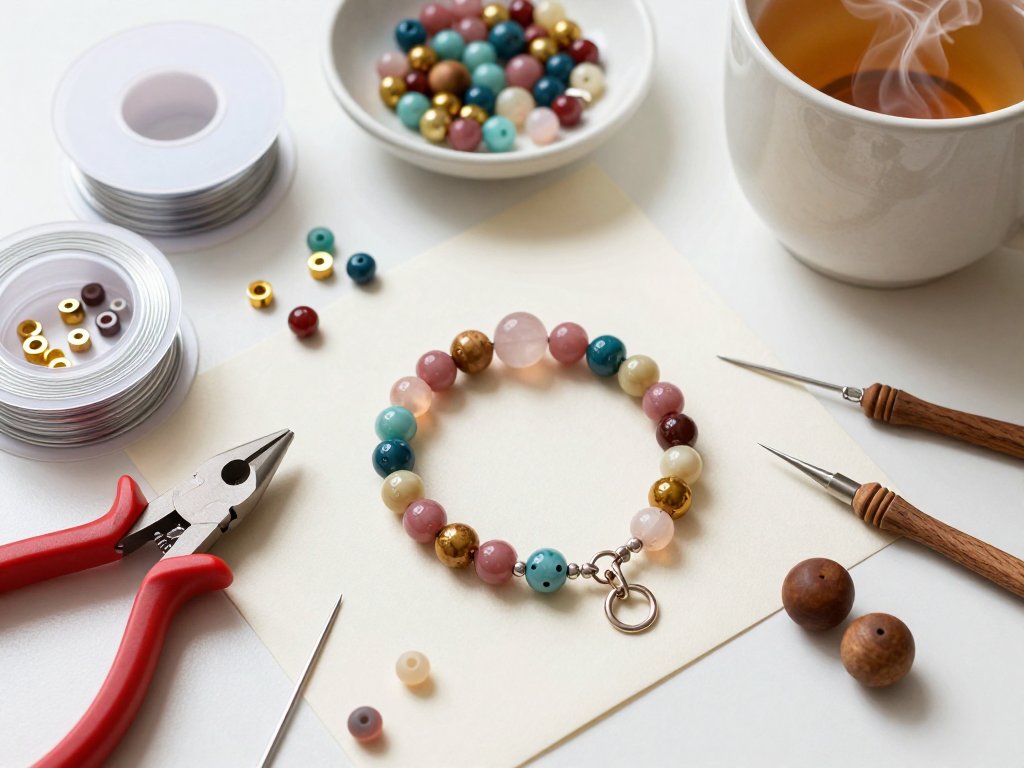
Now the part you came for: making something. This first project needs no clasp, no crimps, no wire cutters — just beads, elastic, scissors, and about twenty minutes. It is the perfect first piece, and it makes a wonderful gift.
Gather, and this is the whole list:
- About thirty beads in 8/0 or 6/0 — glass or acrylic, in two or three colors you love.
- A handful of small spacer beads.
- One spool of Stretch Magic elastic cord, 0.7 or 1.0 millimeter.
- Sharp scissors, and a tiny drop of jewelry glue if you have it.
Measure your wrist with a soft tape, or wrap a piece of string around it and mark the spot.
Add half an inch for comfort — the bracelet should slip over your hand but not spin on your wrist.
Cut about six inches more cord than you need, and thread your beads in the design you laid out on your mat, slipping a spacer between every third or fourth bead.
When the bracelet is full, hold the two ends together and check the fit once more.
Then tie a surgeon's knot: cross the ends, wrap once, pull snug, then wrap again through the same loop and pull.
This double wrap is what keeps elastic knots from undoing themselves. Add a dot of glue to the knot, pull it tight, and snip the tails close.
Now — gently — tuck the knot into the hole of a neighboring bead, and let the glue dry overnight.
That is it. You have made a bracelet.
When you are ready for project two, string the same beads onto SoftFlex wire with a lobster clasp and crimp covers.
You already know how: the steps above are the whole recipe. And if the first bracelet sits crooked, pull it apart and string it again — beads are patient, and so are you.
A Final Word
You now know your beads, your cords, your tools, and the small rituals of finishing — enough to make, to mend, and to design. Everything else is practice, and practice is the pleasant part.
Beads are patient teachers. They reward slow hands, and they forgive mistakes that can simply be unstrung and tried again. Few crafts are so gentle with beginners.
So make something imperfect this week. Slip it on, feel it catch the light, and know that you made it with your own two hands. Then make another. That is how every jewelry maker you have ever admired began — one bead at a time.