Introduction
There is something quietly magical about a tiny enamel pin. It catches the light, it makes a statement, and it tells a story without saying a word.
If you have ever admired a friend's pin collection or scrolled past handmade pins online and thought, "I could never make that," this guide is for you.
The truth is, you absolutely can. Making your own enamel-style pins at home is more accessible than it looks, and it does not require a factory, expensive molds, or years of experience.
With a few simple supplies and a little patience, you can design, shrink, and finish custom pins that look surprisingly professional.
In this guide, we will explore the whole process: designing your artwork, choosing your materials, working with shrink plastic, adding a glossy finish, and attaching pin backs.
Along the way, I will share the small technique details that make the difference between a pin that looks homemade and one that looks like it came from a boutique.
So gather your pencils, clear a corner of the kitchen table, and let's make something small, shiny, and entirely yours.
Why Make Your Own Pins?
Before we dive into the how, it is worth pausing on the why. Enamel pins have become a beloved form of self-expression, and making your own takes that joy one step further.
Here is what you gain when you make pins at home:
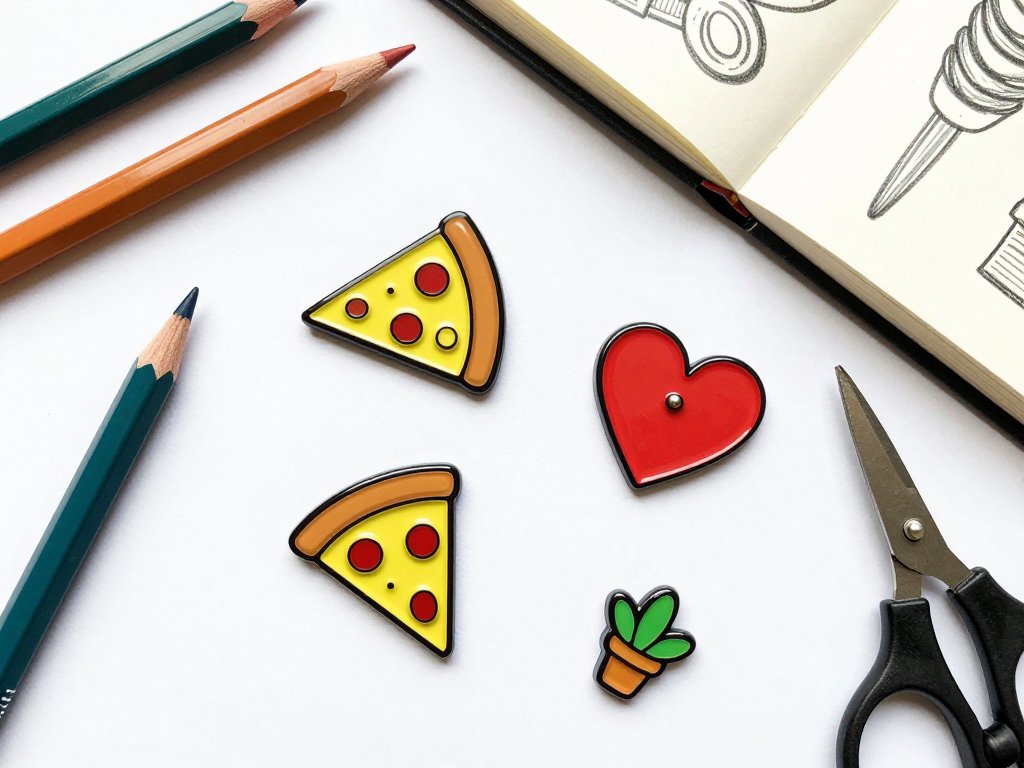
- Total creative freedom. Your favorite houseplant, a slice of pizza, a tiny version of your dog — anything you can draw can become a pin.
- Perfect gifts. A pin made by hand says more than a store-bought present ever could. It is personal, thoughtful, and one of a kind.
- A satisfying craft. The process is meditative, and the finished result is instant gratification you can wear.
- Endless possibilities. Once you master one technique, you can experiment with colors, shapes, and finishes for months.
There is also a lovely honesty to the handmade pin. It does not need to be flawless to be wonderful. In fact, the tiny quirks and imperfections are what make it unmistakably yours.
Gathering Your Supplies
The materials for this project are modest, and most of them you may already own. Let's walk through what you will need for the shrink plastic method, which is the friendliest place to begin.
Shrink plastic. Look for printable or plain shrink plastic sheets, sometimes sold as shrink film or shrinky dink paper. Frosted sheets are easiest to draw on because they take pencil and marker beautifully. A single sheet makes several pins, so one pack goes a long way.
Pencils and markers. Use a soft pencil, like a 2B, to sketch your design. For color, permanent markers and alcohol-based markers work well on shrink plastic. Test your markers on a scrap piece first, because some inks smear when the plastic shrinks.
Scissors. Small, sharp scissors are best for cutting out your pin shapes. Craft scissors with a fine point give you more control around curves and corners.
A toaster oven or heat tool. Shrink plastic needs heat to do its magic. A dedicated toaster oven is ideal, but a heat tool designed for embossing also works beautifully. Never use the same oven you cook with, because the plastic can leave a residue and a lingering smell.
Epoxy resin or a glossy sealant. This is the secret to that enamel-like shine. A small bottle of two-part epoxy resin, or a brush-on resin sealer, will give your pins their glossy, jewelry-quality finish.
Pin backs. You can buy pin backs, brooch findings, or bar pin clasps at any craft store or online. The flat pad style with a small hole is easiest to attach.
A few extras. Cardboard or a silicone mat to shrink on, a hole punch for tiny openings, and fine sandpaper to rough up the surface if your plastic is glossy.
That is the whole list. Nothing exotic, nothing expensive — just the basics, which is exactly how a beginner-friendly craft should begin.
Designing Your Pin Artwork
Now for the fun part: designing what your pin will look like. This is where you get to be an artist, and the good news is that a few simple principles will carry you a long way.
Keep it bold and simple. Enamel pins read best when the design has a clear silhouette.
Think of the pins you admire: they usually have one strong shape, a few details, and a limited color palette.
If you can squint at your drawing and still recognize it, you are on the right track.
Think about size. Your design will shrink to roughly one-third of its original size. If you draw a pin that is three inches tall, it will come out about one inch tall. So draw bigger than you think you need, and remember that fine details will disappear in the shrink.
Outline everything. A thick, dark outline around each shape gives pins their classic enamel look. It also hides small imperfections in your coloring, so embrace the outline. You can draw it in fine black marker or use a thin black paint pen.
Limit your palette. Two to four colors is plenty for a striking pin. Try one bold main color, one accent color, and a neutral. This keeps your design crisp and makes the finished pin feel intentional.
If you are not sure what to draw, start with something you love: a fruit, a flower, a favorite animal, a tiny rainbow, or your initial in a pretty frame. Simple shapes like hearts, stars, and moons are wonderful first subjects and make lovely gifts.
Transferring Your Design
Once your artwork is ready, it is time to get it onto the shrink plastic. This step is simple, but a little care here pays off later.
Place the shrink plastic over your drawing with the frosted side facing up. Use a pencil to trace the outline directly onto the plastic. The frosted surface grips the pencil nicely, so your lines come out clean and visible.
If you want to make multiple pins from the same design, trace each one separately. This is also a lovely way to make a matching set for friends or family.
Next, color in your design with markers. Work gently and build up the color in layers if you want it richer. Try to stay inside the lines, but do not stress about perfection — remember, the outline covers a multitude of small slips.
When your coloring is done, cut out the shape with scissors. Cut just outside the outline so you leave a small border. This border will shrink down and become the pin's edge, and it keeps your artwork from running right to the edge of the pin.
If your design has a hole, like a donut or a ring, punch it now with a small hole punch. It is much easier to punch the hole before shrinking, when the plastic is still large and flexible.
The Magic of Shrinking
This is the moment that feels like a tiny science experiment: watching your artwork curl, wiggle, and shrink into a hard, glossy charm. It never stops being delightful.
Preheat your toaster oven to about 300 degrees Fahrenheit, or follow the temperature on your shrink plastic package. Different brands have slightly different heat requirements, and it is worth checking the label.
Place your cut shapes on a piece of cardboard or a silicone mat lined with parchment paper. Make sure the pieces are not touching, because they will move as they shrink.
Slide the tray into the oven and watch. The plastic will curl and ripple first — this is normal and a little nerve-wracking the first time. Do not touch it! It will flatten back out on its own as it finishes shrinking.
Once the pieces are flat and small, remove them carefully with tongs and place them on a flat, heat-safe surface. Press them gently with a flat tool or a book wrapped in parchment if they have any curl, then let them cool completely.
Here is a tip from experience: do not rush the cooling. Warm plastic is still soft, and pressing too soon can leave fingerprints or bend your design. A few minutes of patience gives you a perfectly flat, glossy charm.
Adding That Enamel Gloss
A plain shrink plastic charm is cute, but the glossy finish is what makes it read as an enamel pin. This is the step where your pin goes from craft project to jewelry.
Mix your two-part epoxy resin according to the package directions. Use small amounts, and stir slowly to avoid creating bubbles. Let the mixed resin sit for a few minutes so any bubbles can rise to the surface and pop.
Place your shrunk charm on a flat, level surface, and use a toothpick or a small craft stick to apply a thin, even layer of resin over the top. Work from the center outward, letting the resin spread itself as much as possible.
Leave the pin to cure somewhere dust-free and out of reach of curious pets and little hands. A cardboard box with the sides folded down makes an excellent dust cover. Depending on your resin, curing can take anywhere from a few hours to overnight — check the label.
If resin feels like too much of a commitment, you can use a brush-on glossy sealant or even a few careful coats of clear nail polish.
The finish will not be quite as thick or glassy, but it is a perfectly good beginner alternative, and you can always upgrade to resin on your next batch.
Attaching the Pin Back
Your glossy charm is finished, and now it needs a way to attach to a jacket, a bag, or a lanyard. Attaching the pin back is quick and gives your pin its final purpose.
Use a strong craft glue or a hot glue gun to attach the pin back to the center of the charm's reverse side. A flat pad pin back sits well and gives the pin a stable base.
Apply a small dab of glue to the pad, press the back into place, and hold it for a few seconds while the glue sets. Then let the pin rest face-down for several minutes so the glue can cure fully.
Here is a practical tip: position the pin back slightly above the center, not exactly in the middle.
Pins naturally sit a little top-heavy when worn, and a slightly higher back keeps the design from tipping forward.
This is one of those small details that makes handmade pins feel professionally made.
Once the glue is dry, your pin is ready to wear. Clip it onto a denim jacket, a canvas tote, a backpack, or a lanyard, and enjoy the small delight of wearing something you designed and made yourself.
Troubleshooting Your First Pins
Every new technique has a learning curve, and shrink plastic is no exception. If your first pin is not perfect, you are in good company — every pin maker I know has a drawer full of practice pieces. Here are the common hiccups and how to fix them.
The plastic did not shrink flat. This usually means your heat was not high enough, or the piece was removed too early. Make sure the oven is fully preheated and let the piece finish shrinking completely before you take it out.
My colors smeared. Some markers react to the heat of shrinking. Test your markers on a scrap piece first, and consider using alcohol-based markers, which tend to be more stable.
The pin is slightly warped. Press it flat with a flat, heavy object while it is still warm, then let it cool completely before moving it. A book wrapped in parchment paper works well.
My outline disappeared. If your design is too small or your outline too thin, it will shrink away to nothing. Draw bigger and outline thicker next time — thick outlines are your friend in the world of tiny pins.
The pin back fell off. This happens when the glue has not cured fully, or the surface was too smooth. Lightly sand the back of the charm before gluing, and give the glue a full cure time before wearing the pin.
Treat every imperfect pin as a data point, not a failure. Each one teaches you something that makes the next one better.
Ways to Use Your Pins
Once you have made a few pins, you will probably find yourself looking for places to put them. That is half the fun. Pins are small, but they bring a lot of joy to everyday objects.
Here are some of my favorite ways to use handmade pins:
- Jackets and coats. A small cluster of pins on a lapel or collar is a classic, timeless look.
- Bags and backpacks. Give an everyday bag a personal touch with a pin that makes you smile.
- Beanies and caps. Pins attach beautifully to knit hats and baseball caps.
- Bullet journals and planners. Tuck a pin onto a notebook cover or use it to mark your place in a journal.
- Gift wrap and cards. A pin attached to a present is a gift on top of a gift.
- Magnet conversions. Glue a small magnet to the back instead of a pin back, and turn your designs into fridge magnets.
Matching sets also make wonderful gifts. Make a batch of fruit pins, a set of tiny flowers, or a collection of stars, and wrap them up for friends. Handmade pins are the kind of gift that people keep for years.
Making a Matching Set
Once you are comfortable with the basics, try making a small collection of pins in the same style. A matching set feels especially intentional and is a beautiful gift.
Choose a theme and a limited color palette, and draw three or four designs that share those colors. A set of four seasonal leaves, three little animals, or four different houseplants in the same colors will look cohesive and charming together.
Keep the same outline thickness across all the designs, and use the same finishing technique. Consistency is what turns a handful of individual pins into a proper collection.
You can also create coordinating pins for a family: one for each person's favorite color or animal. It is a sweet, personal project that everyone will treasure.
Conclusion
Making your own enamel-style pins at home is one of those crafts that looks far more complicated than it is. With a pencil, some shrink plastic, and a little heat, you can transform your doodles into tiny works of art that you can wear, gift, and share.
Remember, the goal is not perfection — it is the joy of making something with your own hands. Your first pin might be a little wonky, and that is okay. It is proof that you tried, and the next one will be even better.
So pick up a pencil, draw something you love, and give it a try. Whether you make one pin or a whole collection, you are creating something that did not exist before, and that is a small kind of magic.
Happy pin making!