Introduction
Let me tell you about my first candle. I melted a full pound of soy wax, dumped in twice the recommended fragrance, poured it into a jar with a wick I picked because it looked nice, and waited.
The result looked fine for about an hour. Then it tunneled down the middle, drowned its own wick, and turned into a sad wax bowl with a burnt smell.
I wasted maybe twelve dollars of materials to learn what a five-minute read would have taught me.
That is the thing about candle making: it looks simple, and it is simple, but the details are merciless.
Get the math right and your candles burn clean, even, and long. Guess at it and you are literally burning money.
This guide covers the basics — soy versus beeswax, wicks, temperatures, fragrance — and the numbers that keep you from wasting a single ounce.
I co-built the tools on this site, including the candle calculator, specifically because I got tired of watching people (including me) throw wax away.
Why My First Candles Failed
Every beginner candle failure comes down to one of four things: too much or too little wax, the wrong wick, the wrong pour temperature, or way too much fragrance.
Notice that none of these are "you did it wrong" in a creative sense. They are all math and measurement problems, which means they are all fixable.
My tunneling disaster was a wick problem. A wick that is too small for the jar creates a narrow melt pool, the flame tunnels down the middle, and the candle self-destructs.
A wick that is too big creates a huge, sooty flame and a melted edge that leaks wax everywhere.
The wick has to match the diameter of your container, and that is a number you can actually look up.
The fragrance overload was a ratio problem, and it taught me the most important habit in this craft: measure everything, every time, no exceptions.
The moment you start eyeballing, you are gambling with materials you paid for. Candle making rewards the boring stuff — scales, thermometers, and a few seconds of arithmetic.
Soy Wax vs. Beeswax: The Honest Comparison
You have two sensible starting waxes, and they are genuinely different materials, not marketing categories. Here is the straight comparison.
Soy wax is cheap, forgiving, and takes fragrance beautifully. It is a soft wax with a lower melting point, which makes it ideal for container candles — candles poured into jars.
It also has a few quirks: it can frost (those white spots that look like frost on glass), and it can sink around the wick after cooling.
Both are cosmetic, not fatal, and easy to fix with a second pour or a heat gun.
Beeswax is the premium option. It burns longer, smells naturally like honey, and releases negative ions that some people swear make the air feel fresher.
It is harder, has a higher melting point, and works best as pillars or molded candles rather than in jars.
It is also roughly three to five times the price of soy, so beginners usually practice with soy first.
My honest advice: start with soy. It is cheap enough that mistakes cost a dollar instead of a grocery trip, and it teaches you the process. Graduate to beeswax once you have a few clean burns under your belt. Your wallet will thank you.
The Supplies That Matter
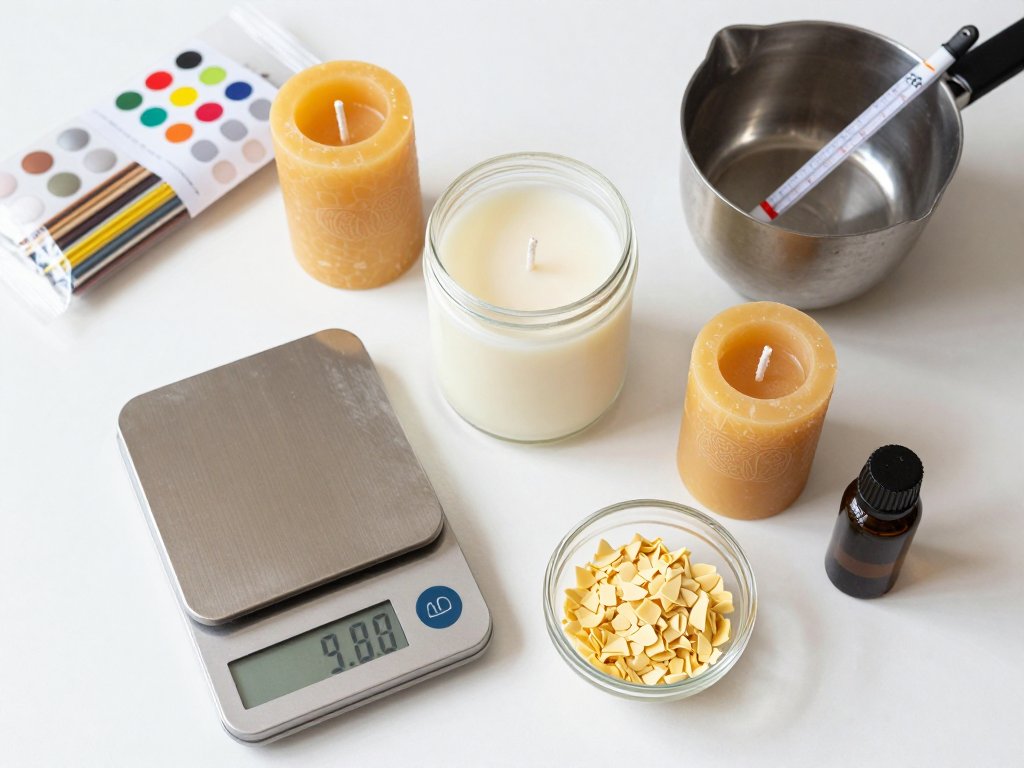
Here is the short list. You do not need a candle-making starter kit with seventeen gadgets. You need five things, and three of them are probably already in your kitchen.
- A kitchen scale. Digital, measures grams. This is non-negotiable — wax is measured by weight, not volume.
- A thermometer. A simple candy thermometer works. Pour temperature is the difference between a smooth candle and a cracked one.
- A double boiler or melting pitcher. A pouring pitcher inside a pot of simmering water melts wax gently. Never melt wax directly on the stove.
- Wicks and wick stickers. Start with pre-tabbed wicks in the size recommended for your container.
- Containers. Clean glass jars, tins, or molds. Reuse jam jars if you want — just make sure the wick size matches the new diameter.
Everything else — pouring pitchers with spouts, centering devices, curing racks — is convenience, not necessity. Buy the scale and thermometer first. They do more for your success than any gadget on the shelf.
Why Volume Lies: Understanding Wax Weight
Here is the number one beginner mistake, and it is a sneaky one. People measure wax by volume — a "cup" of wax — because cups are what they have.
But melted wax and solid wax have different volumes, and a cup measurement on one brand's flakes is not the same as another's.
If you measure by volume, your candle weight is a guess, and your fragrance ratio (which is calculated by weight) is a guess on top of a guess.
The fix is brutally simple: weigh your wax in grams. Fill your container with water to measure its volume, multiply by 0.85 for the approximate wax weight in ounces, or just weigh the wax directly after melting.
That number is your target. It is the single most important figure in your whole batch, because every other calculation hangs off it.
And here is where the tool I mentioned saves real money. The candle calculator takes your container size and wax type and tells you exactly how many grams of wax you need, with a sensible buffer built in.
No more melting a pound to fill four jars and having half of it left over.
No more running short in the middle of a pour.
Picking the Right Wick
The wick is the engine of your candle, and choosing it is a matching problem, not a vibe problem. Three factors matter: container diameter, wax type, and fragrance load.
As a rule, a container about three inches wide needs a medium wick, while a wide jar needs a larger wick to create a full melt pool.
Soy wax, being soft, usually needs a slightly larger wick than paraffin of the same diameter.
And heavy fragrance loads make the flame work harder, so highly scented candles often need one wick size up.
Rather than memorizing tables, buy a small variety pack and test. Pour two identical candles with different wicks, burn them side by side, and watch which one melts all the way to the edges without smoking.
A candle that tunnels needs a bigger wick; one that soots needs a smaller one.
That test costs a few dollars and answers every future wick question you will ever have.
The Temperature Game: Melt, Pour, Cure
Temperature is where beginners lose the most candles, and it is also the easiest variable to control. You need three numbers: melt temperature, pour temperature, and cure time.
Melt soy wax to about 180 to 185 degrees Fahrenheit, but never above 200 — overheated wax degrades and can become a fire risk.
Let it cool to your pour temperature, which for soy is usually 135 to 145 degrees, depending on your wax's instructions.
Pouring too hot causes sinkholes, cracking, and poor fragrance binding. Pouring too cool causes lumpy surfaces and poor adhesion to the jar.
Add fragrance at the pour temperature, around 140 degrees, and stir for a full two minutes so it binds evenly.
Then pour, let the candle sit undisturbed for twenty-four to forty-eight hours, and resist the urge to light it early.
A candle that cures properly burns better, smells better, and lasts noticeably longer. Rushing the cure is like eating cookie dough straight from the bowl — tasty, but not the finished product.
Fragrance Loads: How Much Is Too Much
Here is the ratio that matters: fragrance is measured as a percentage of wax weight, and most soy waxes handle 6 to 10 percent.
That means for 100 grams of wax, you add 6 to 10 grams of fragrance oil.
Past that, the wax cannot hold the oil, and you get sweating — oily droplets on the surface, poor burning, and wasted fragrance.
My first candle had a fragrance load of about 20 percent. It smelled incredible in the jar and terrible while burning, because all that extra oil was smothering the flame. More fragrance is not a stronger candle. It is a broken candle.
Start at 6 percent for your first batch. That is a strong, clean scent throw for most oils.
If it is too subtle after a proper cure, bump to 7 or 8 percent on the next batch and compare.
Changing one variable at a time is how you learn this craft without burning through your materials budget.
Troubleshooting: Sinkholes, Frosting, and Tunneling
Every candle maker meets these three gremlins. Here is what they are and how to beat them.
Sinkholes are the craters that form around the wick as the wax cools and contracts.
The fix is a second pour: save a little melted wax, wait for the first pour to set, and top off the crater.
Professionals call this a "touch-up pour," and it makes the surface look flawless.
Frosting is the white, frost-like pattern on soy candles. It is a natural property of soy and completely harmless.
You can minimize it by pouring at the lower end of your temperature range, and you can disguise it with labels or a matte finish, but chasing it away entirely is a fool's errand.
Learn to live with it.
Tunneling is the wick-drowning problem from my first candle. The fix is wick size, plus one habit: always burn your candle long enough on the first burn to melt the wax all the way to the jar's edge.
That first full melt pool "primes" the candle and prevents the tunnel from forming.
Wet spots are the pale patches where wax pulls away from the glass. They happen when the jar is cold and the wax cools unevenly.
Warm your containers slightly before pouring and pour at the lower end of your range. Wet spots are cosmetic — the candle burns fine — but a warm jar avoids them almost entirely.
What Your Candles Really Cost
If you are making candles for yourself, this section is about how to keep the hobby cheap. If you are selling at craft fairs or on Etsy — and I know a lot of you reading this are — this section is about your profit margin.
Let us do the math on a simple 8-ounce soy candle. The jar costs about a dollar in bulk, the wick and sticker a few cents, and the wax about a dollar and a half for the eight ounces you actually use.
Fragrance at a 6 percent load is another fifty cents or so. Your materials total is roughly three dollars, plus a tiny share of your equipment cost.
That is the number you need to know before you price anything.
The trap is overbuying. A five-pound bag of wax seems economical until you realize you only need eight ounces per candle.
Buy wax by the pound only after you know your recipe, and use a calculator to plan batch sizes so nothing sits on a shelf going stale.
The candle calculator doubles as a batch planner — enter how many candles you want to make, and it tells you the exact wax and fragrance to buy.
That is how you keep your cost per candle honest and your shelves free of half-used bags.
Conclusion: Make Your Next Batch Count
Candle making rewards the people who respect the numbers. Weigh the wax, match the wick, mind the temperature, and measure the fragrance, and you will produce candles that burn clean, even, and long — on the very first batch, if you follow the steps.
My first candle was a twelve-dollar lesson in what not to do. Yours can be a beautiful, fragrant success because you learned from mine.
Start with a small batch: four identical soy candles in jars you already own. Weigh everything, pour at the right temperature, let them cure for two days, and burn the first one all the way to the edges.
Then you will know the process from end to end, and you can start experimenting — with beeswax, with colors, with gift sets for the holidays.
Before you melt anything, run your numbers through the candle calculator so you buy exactly what you need and pour exactly what you planned.
It took me a wasted pound of wax to learn that habit. Take the shortcut — your wallet and your first candle will both be better for it.