Introduction
There is something almost meditative about rolling a rope of clay between your palms and slowly building it upward, coil by coil, into a vessel that did not exist an hour ago.
Coil pottery is one of the oldest hand-building techniques in human history — civilizations have shaped pots this way for thousands of years — and it remains one of the most accessible ways to begin working with clay.
You do not need a pottery wheel, a kiln in your garage, or years of training.
With a few pounds of clay, a couple of simple tools, and a quiet afternoon, you can build a finished coil pot with your own two hands.
It is a craft that rewards patience, forgives mistakes, and teaches you to see form in a way no other technique quite matches.
Whether you dream of making planters, mugs, or sculptural vases, the coil method is the foundation everything else builds on. Let us gather our materials and begin.
Why Coil Pots Are the Perfect First Pottery Project
Coil building is the ideal gateway into ceramics for a handful of reasons. First, it requires no specialized equipment — no wheel, no throwing skills, just your hands and a flat surface.
Second, it is forgiving: if a coil wanders or a wall wobbles, you can pinch, add, or smooth until it is right.
The clay itself does most of the teaching.
Third, the technique builds genuine skill. Rolling consistent coils trains your hands in even pressure and rhythm. Joining them teaches you about moisture, texture, and how clay bonds to itself. And because the process is slow and deliberate, you have time to observe each stage and understand why it matters.
Finally, there is the quiet satisfaction of the finished piece. A coil pot carries the visible record of its making in its ridges — or not, if you smooth them away. Either way, it is unmistakably handmade, and that is exactly what makes it precious.
Understanding Your Clay
Before you shape anything, you need clay that behaves well in your hands. For beginners, a mid-range stoneware or a smooth earthenware clay is ideal. These clays are plastic enough to coil easily, sturdy enough to hold their shape, and widely available at craft stores and pottery suppliers.
If you are working without a kiln at home, look for a clay that can be fired at a community studio or a local kiln service, and ask what temperature it needs.
Alternatively, air-dry clay offers a kiln-free path for practicing the technique — your pot will not be food-safe or waterproof, but it will be beautifully made and completely yours.
Whichever clay you choose, the golden rule is moisture. Clay that is too dry cracks and crumbles; clay that is too wet slumps and sticks.
You want it soft enough to press a fingerprint into without it sticking to your finger.
If your clay feels stiff, mist it with water and knead it. If it feels sticky, let it sit out for a while to firm up.
Tools and Workspace Setup
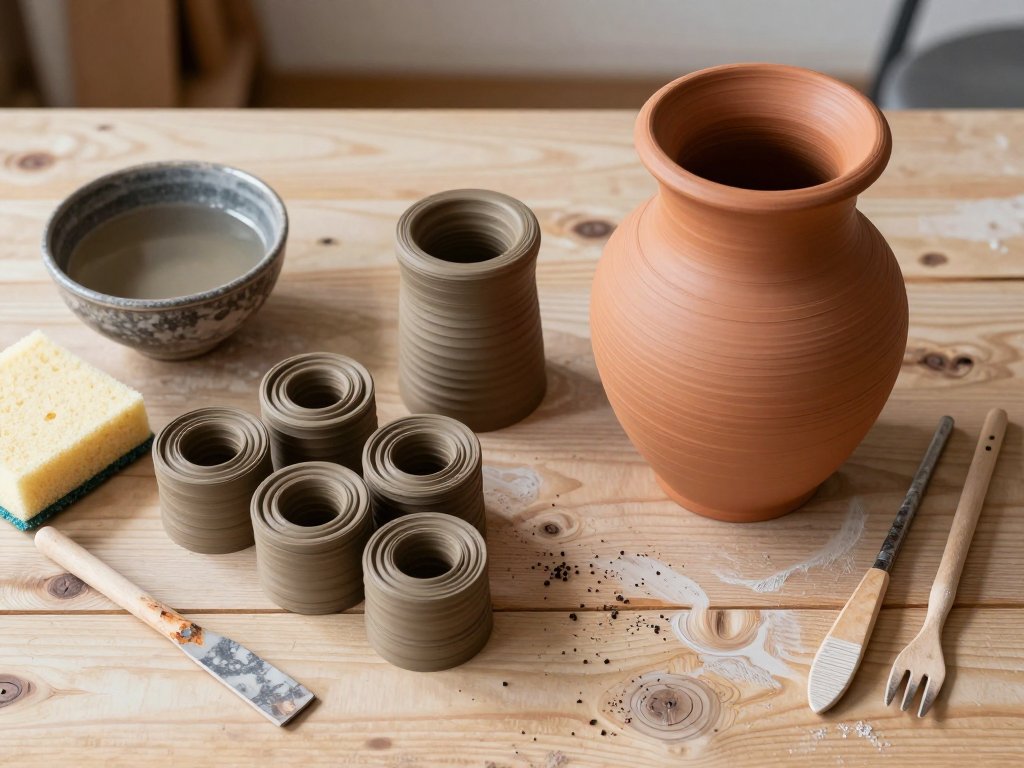
One of the joys of coil pottery is how little you need. Gather a rolling pin or your palms for coils, a small bowl of water, a sponge, a wooden or metal rib for smoothing, and a fork or needle tool for scoring.
A banding wheel is a lovely luxury — it lets you rotate your pot as you work — but a piece of cardboard on your table works almost as well.
Set up your workspace somewhere you do not mind getting dusty. A kitchen table covered with canvas or a plastic tablecloth works beautifully.
Keep a bowl of water nearby and a spray bottle for misting the clay as you work.
Have paper towels ready, and wear an apron or old clothes — clay is wonderfully messy.
Before you begin, wedge your clay. Wedging is the potter's way of kneading: press the clay down and forward with the heels of your hands, fold it, and repeat for a couple of minutes.
This removes air bubbles, which can cause explosions in the kiln, and makes the clay perfectly even in consistency.
Think of it as warming up before exercise.
Rolling Even Coils
The coil is the building block of your pot, and rolling good ones is a skill worth practicing. Tear off a lump of clay about the size of a large egg, roll it into a rough sausage, and then roll it out on your table with flat, even hands.
Start with your palms flat and press down gently as you roll from the center outward.
Move your hands apart gradually as the coil lengthens, keeping even pressure so the thickness stays consistent — aim for a coil about as thick as your thumb, roughly 1 to 1.5 centimeters in diameter.
If a coil gets thin in the middle, press it back together and reroll rather than stretching it.
Do not worry if your first coils are uneven. Perfectly uniform coils come with practice, and the slight variations in handmade coils give your pot character.
Roll a generous pile of coils before you start building — having ten or twelve ready means you can focus on assembly without breaking your rhythm.
Building the Base
Every pot begins with a foundation. Take a lump of clay and press it into a flat circle about a quarter-inch (6 millimeters) thick and slightly larger than you want the bottom of your pot to be.
You can pat it with your palm or roll it with a rolling pin, turning it frequently so it stays even.
Trim the base into a clean circle using a needle tool or a knife, or simply pinch it into shape with your fingers.
Smooth the edges with a damp sponge so there are no rough bits. Some potters like to score the edge lightly at this stage; if your base and your first coil are both fresh and moist, they will join easily, but a little scoring never hurts.
Place your base on your banding wheel or cardboard, and take a moment to look at it. This circle is the promise of the pot to come. Take a breath, and let us begin the walls.
Coiling Up the Walls
Now comes the satisfying part. Take your first coil, lay it along the edge of the base, and press it gently into place.
To make the joint strong, score both surfaces with your fork or needle tool — scratch them in a crosshatch pattern — then add a little slip, a creamy mixture of clay and water, and press the coil firmly onto the base.
Continue adding coils, one on top of another, following the circle. Place each coil slightly inward to build a narrow neck, straight up for straight walls, or slightly outward for a rounded belly.
Press each new coil onto the one below it, and use your fingers to blend the inside seam as you go, keeping the interior smooth.
Work slowly and let the pot grow. If a coil begins to dry out, mist it lightly.
If the walls start to lean or sag, let the pot rest for a few minutes to firm up before continuing.
Patience is not just a virtue here — it is the technique itself.
Smoothing and Refining the Surface
Once your pot reaches its full height, you have a choice to make. You can leave the coils visible, celebrating the texture of the process, or you can smooth the surface into a seamless, elegant form.
Many potters do a little of both — smoothing the outside while leaving subtle ridge lines as a record of the making.
To smooth, use a damp sponge or a wooden rib, working in small circular motions from the bottom of the pot upward.
Blend the coils together until the surface feels continuous, then go over it once more with a nearly dry sponge to even out the texture.
Keep one hand inside the pot for support while the other works the outside, pressing gently so the walls hold their shape.
This refining stage is where your pot truly becomes yours. Take your time with it.
Run your fingers over the surface and feel for dips or bumps, filling small gaps with tiny coils of clay and smoothing them in.
A few extra minutes here transform a wobbly beginner piece into something genuinely beautiful.
Adding Decorative Details
With the basic form complete, you can decorate. This is the playful stage, and the options are nearly endless.
Press textures into the surface with a fork, a leaf, lace, a shell, or a textured roller.
Carve patterns with a needle tool. Add small coils or balls of clay as raised decoration, or attach a simple handle.
If you add anything to the pot — a handle, a rim, a decorative knob — remember the golden rule of joining: score, slip, and press firmly.
Smooth the joint with your finger or a rib so the addition becomes part of the pot rather than a separate piece waiting to snap off.
Consider the overall rhythm of your decoration. A single band of texture around the middle, a spiral of pressed dots, or a few carved lines can be more striking than covering every surface. Step back, turn the pot on your wheel, and let your eye decide what feels finished.
Drying, Firing, and Glazing
Your finished pot needs to dry completely before it is fired. This takes longer than most beginners expect — usually five to ten days, depending on size and humidity.
Cover the pot loosely with plastic for the first few days so it dries slowly and evenly, then uncover it to finish drying.
A pot that dries too fast can crack, so resist the urge to rush it.
When the pot is bone dry — cool to the touch and no longer cold on your lips — it is ready for its first firing.
This bisque firing hardens the clay into a porous, chalky state. If you work in a community studio, your instructor will guide you through the kiln schedule; if you use air-dry clay, your pot simply needs its final drying time and needs no firing at all.
Once bisqued, your pot can be glazed. Glaze adds color, texture, and waterproofing, and it is where many potters find their deepest satisfaction.
Apply glaze with a brush, by dipping, or by pouring, following your studio's guidance, and fire it again to the glaze temperature.
When it emerges from the kiln, you will hold a piece that is truly finished — made by your hands, from a lump of earth.
Common Beginner Mistakes and How to Fix Them
Every potter — including the ones whose work hangs in galleries — has made crooked pots, collapsed walls, and cracked bases. Mistakes are part of the medium, and most of them are fixable. Here are the ones beginners meet most often, and what to do about them.
If your coils are falling apart at the joints, you are probably not scoring and slipping enough.
Go back to the crosshatch-and-slip routine and press firmly. If your walls are collapsing, your clay is too wet or your coils too thick — let the pot firm up a bit and use lighter, smaller coils.
If cracks appear, the clay was drying unevenly; cover your work when you step away and keep the moisture consistent.
And if a pot simply refuses to cooperate, that is not failure — it is information. Smoosh the clay back into a ball, wedge it fresh, and begin again. Clay is infinitely forgiving. Every lump you reshape is a lesson you get to keep.
Conclusion
Coil pottery connects you to one of the oldest making traditions in human history. With nothing but your hands, a little clay, and time, you can build vessels that hold flowers, pencils, tea, or simply the quiet satisfaction of having made something real.
Start with a small pot — a pinch of ambition, a pile of coils, and an afternoon.
Let the walls grow slowly, smooth them with care, and do not hurry the drying.
When your first coil pot is finished, hold it in your hands and feel its weight.
You built that, from the ground up, one coil at a time.
The clay is waiting. Roll your first coil tonight, and let the ancient rhythm of making begin.
