Introduction
A cardigan is the kindest first wearable you can choose. It has no fiddly zipper, no tailored waist, and no neckline to wrestle into shape. It simply wraps around you and hangs open, which means small mistakes soften into the drape.
If your crochet so far has been blankets, washcloths, and scarves, a cardigan is a natural next step. Here is the reassuring truth: easy fall layers do not require complex shaping.
Most of what makes a cardigan fit well is width and length. Both of those are simply rows of stitches, repeated until the piece is long enough to wrap around you.
Crochet cardigans have a warm history worth knowing. When granny squares swept through home craft in the 1960s and 1970s, the same era that gave us the celebrated "coat sweater", the cardigan became the ultimate statement of handmade comfort.
Those boxy, patchwork layers were worn over turtlenecks at kitchen tables and dorm rooms alike. They proved that a garment built from simple squares could still feel stylish and deeply personal.
We are, in a lovely way, returning to that idea. The difference is that today's patterns are simpler, the yarns are softer, and you have a step-by-step guide like this one to walk beside you.
This article is written for the busy mom who crochets in twenty-minute pockets. Nothing here demands a weekend retreat or a specialty class. If you can make a rectangle, you can make a cardigan. You can start today, and you can finish it before the first real chill arrives.
When you are ready for a quick, cozy project to warm up your hands first, try this How to Knit a Hooded Cowl for instant gratification between bigger projects.
Choosing Your Yarn
The yarn you pick decides how quickly you finish. Thicker yarn means taller, wider stitches, and taller, wider stitches mean fewer of them cover your body. A chunky weight cardigan can come together in a few evenings; the same cardigan in fine yarn could take a month.
For a first cardigan, look for worsted weight (sometimes called aran) or bulky weight. Worsted works up on a 5.0mm/H-8 to 6.0mm/J-10 hook. Chunky or bulky yarn is happiest on a 6.5mm/K-10.5 to 8.0mm/L-11 hook. The bigger the hook, the faster each row grows.
Fiber matters less than you think at this stage. An acrylic yarn is forgiving, machine washable, and inexpensive, which makes it ideal for a learning project. A wool blend, or a wool-and-acrylic blend, adds warmth and holds its shape a little better over time.
Avoid anything fuzzy, slippery, or heavily textured for your first try. Novelty yarns hide your stitch definition, and you want to see your stitches clearly while you learn to read them.
How much yarn will you need? For a simple adult cardigan, plan on roughly 900 to 1200 yards. In practical terms, that is about four to six skeins of a standard worsted or bulky ball.
Buy all your yarn at once, from the same dye lot, so your color stays even across the whole garment. Dye lots vary slightly, and a late skein can read as an entirely different shade beside its neighbors.
If you fall in love with a thinner yarn, you can still keep the project quick by holding two strands together throughout. Two strands of sport weight behave much like one strand of worsted, and the doubled fabric feels wonderfully dense.
One quiet tip: always purchase one skein more than you think you need. Running short near the final border is the most common heartbreak in a beginning cardigan, and a spare skein saves you a color-matching nightmare.
Reading a Simple Pattern and Understanding Construction
Most beginner cardigans fall into two families: top-down raglan and drop-shoulder rectangle construction. Knowing which one you are holding changes how the pattern reads.
A top-down raglan begins at the neck and grows outward in one piece. You increase at four diagonal lines, creating the shoulders and sleeves as you go. It is elegant, but it asks you to track increase rows carefully and try the piece on as you work.
The rectangle cardigan is the gentler path. You crochet two large flat rectangles, one for the back and one for the front, or sometimes a single folded piece. You seam the shoulders, seam the sides, and leave openings for the arms.
That is genuinely the whole structure. The "arms" are usually separate rectangles worked into those openings, or rectangles seamed on afterward. There is no curved armhole to calculate and no set-in sleeve to ease into place.
Because the pieces are flat, you can work them anywhere. You can stop mid-row when a child needs you, put the hook down, and pick it up hours later without losing your place. Flat pieces are also easy to measure against your own body as you go.
Ease is the extra room built into a garment beyond your body measurements. A boxy cardigan is designed with generous positive ease, so if your bust is 40 inches and the finished garment is 46 inches, those six inches are intentional breathing room, not a sizing error.
If you want a snugger fit, simply reduce your panel width by a few inches. It is the easiest pattern adjustment in all of crochet, and it needs no redrawing of curves.
When you open a pattern, read it fully before you chain a single stitch. Note the hook size, the gauge, the finished measurements, and the abbreviations. Then read it once more. A pattern you understand in advance is a pattern that rarely surprises you.
The Basic Stitches You Need
Only five stitches carry this entire project. If you already know a few, you are further along than you feel.
- Chain (ch): Yarn over, pull the loop through the loop on your hook. This is the foundation, the row of little Vs from which everything rises.
- Slip stitch (sl st): Insert the hook, yarn over, pull through both the stitch and the loop on your hook in one motion. Tiny and flat, it is perfect for joining and for firm borders.
- Single crochet (sc): Insert the hook, yarn over, pull up a loop, yarn over again, and pull through both loops. Dense and sturdy, it makes a firm, warm fabric and a tidy edge.
- Half double crochet (hdc): Yarn over first, insert the hook, yarn over, pull up a loop, then yarn over and pull through all three loops. It sits between single and double in height, giving soft drape with decent speed.
- Double crochet (dc): Yarn over, insert the hook, yarn over, pull up a loop, yarn over and pull through two loops, yarn over and pull through the last two. Tall, quick, and airy, it is the workhorse of fast cardigans.
Gauge is the quiet hero of a wearable. Gauge simply means how many stitches and rows fit into a square of fabric. Work a swatch about 4 by 4 inches (10 by 10 cm) in your chosen stitch, then measure the middle of it, never the edges.
Watch your turning chain at the start of each row. It counts as your first stitch in most patterns, so skipping it shrinks your work and adding one too many widens it. Establish the habit early and your edges will stay straight.
If your swatch has more stitches than the pattern lists, your tension is tight; try a hook one size larger. If it has fewer, your tension is loose; size down. Two minutes of measuring here saves you from a cardigan that fits a different person.
Step-by-Step: The Easy Rectangle Cardigan
Follow these steps in order. Read the whole list once before you begin, then work at your own pace.
- Measure yourself. Use a soft tape to find your bust or chest circumference, your shoulder width, and the length you want from shoulder to hem. Write these down; they are your target.
- Make a gauge swatch. Work a 4 by 4 inch (10 by 10 cm) swatch in your main stitch. Count the stitches and rows, and adjust your hook until your numbers match the pattern.
- Chain the back panel width. Using your gauge, chain enough stitches to reach your desired back width, usually half your bust circumference plus a little ease. For example, a 40-inch bust suggests a back panel near 20 inches wide.
- Work in rows to armhole height. Crochet straight rows, turning at the end of each, until the back panel measures from your shoulder down to where the armhole should begin, roughly 8 to 10 inches for many adults.
- Split for armholes. For the back, continue straight to the shoulder. For the front panels, work separate narrower rectangles and stop short in the middle to leave the neck opening.
- Seam shoulders and sides. Join the front panels to the back at the shoulder edges, then seam down each side, leaving a gap of about 7 to 9 inches open for the armholes.
- Add the sleeves. Work directly around the armhole opening in rounds, or crochet simple rectangles and seam them into place. Taper gently by decreasing every few rounds if you want a narrower cuff.
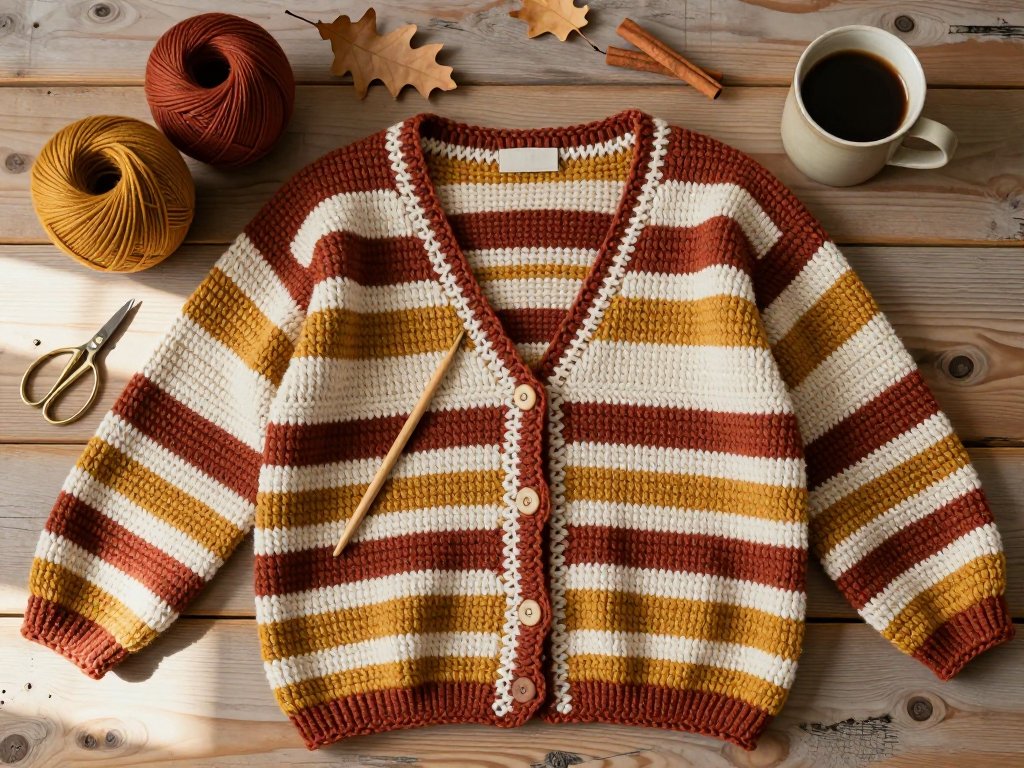
You now have a cardigan. Take a moment to hold it up before you fuss over details. The shape is honest, boxy, and comfortable, exactly as a first wearable should be.
Adding Simple Shaping and a Border
Two small touches turn a rough rectangle into something that looks intentional: a border and a closure.
A border is the friendliest gift you can give a beginner garment. Because it is worked along the outside edge, it visibly straightens wobbly sides, evens any uneven tension, and gives the whole piece a finished frame. It hides a great many sins.
Work a round of single crochet evenly along the entire outer edge, front opening, hem, and neckline together. If you want a softer, more textured finish, follow with a moss stitch border, alternating single crochet and chain in a repeating rhythm.
Instead of wrestling with buttons and buttonholes on your first try, consider a simple closure. A fabric belt, a wide ribbon, or a long crocheted tie wrapped at the waist keeps the cardigan closed without a single buttonhole to align.
You can always add buttons to your second cardigan. For now, let the border do the finishing work and the ribbon do the fastening.
Work the border slightly more firmly than the body. A border in the same loose tension as the panels can ripple instead of lying flat, so drop one hook size for this final round and watch the edge settle.
Troubleshooting Common Beginner Problems
Every first cardigan teaches something. Here are the troubles you are most likely to meet, and what to do about them.
- Tension too tight or too loose. Compare your swatch to the pattern gauge and change hook size by one step. Tight tension usually comes from gripping the hook hard; loosen your grip and let the yarn flow.
- Wavy, ruffled edges. Usually this means you added stitches by accident at the row ends. Count your stitches every few rows, and place a marker in the first and last stitch of each row to keep yourself honest.
- Armholes too small or too large. This is a measurement issue, not a skill issue. The armhole opening should comfortably circle your upper arm plus a little ease. Measure your gap and adjust the number of open inches next time.
- Sleeves that feel too tight. Sleeves worked tightly around the armhole can bind. Add a few extra stitches at the start of the sleeve, or work the sleeve slightly looser than the body for easy movement.
- "Why does my cardigan look like a rectangle?" Because it is one, and that is entirely fine. The boxy drop-shoulder silhouette is a deliberate, flattering style, not a mistake. Drape it on and let it hang before you judge it.
Styling and Care
A boxy fall cardigan is one of the easiest things to wear. Layer it over a fitted tee or a long-sleeve turtleneck with jeans for errands. Belt it over a dress to define a waist. Throw it over pajamas on a cold school morning and call it cottagecore.
Because the shape is relaxed, it flatters nearly every body without fussing. Choose warm seasonal tones, rust, mustard, olive, and cream, and the piece will read as intentional even on the days you got dressed in ninety seconds.
Washing depends on your fiber. Acrylic can usually go in a cold, gentle machine cycle and a low dryer. Wool and wool blends prefer a cool hand wash and flat drying to keep their shape.
Blocking is simply shaping a finished piece while it is damp. Lay your cardigan flat, smooth the edges, pin the front opening straight, and let it dry fully. Blocking evens out your stitches and softens the whole garment.
If pilling appears after a few wears, do not panic. Small fiber balls are normal on wool and blends, especially where sleeves rub against your sides. Gently lift them away with a fabric shaver or a fine comb, and the surface looks new again.
Store your cardigan folded, never hung. A crocheted cardigan is heavy, and a hanger will stretch the shoulders out of shape over time. Fold it, tuck a sachet nearby if you like, and keep it where you will actually reach for it.
Conclusion
You have just learned everything a beginner needs to make a cardigan: how to choose yarn, read a simple pattern, work five essential stitches, and build a wearable from two honest rectangles.
Your first one will not be perfect, and it should not be. The slight waviness in one edge, the sleeve that drapes a touch differently, the stitch count you fixed halfway up, all of it is proof that your hands did the work.
Wear it anyway. Wear it to the mailbox, to the school pickup line, to the couch with a mug in hand. Then choose your next project, because the second cardigan is always easier, faster, and just a little braver than the first.