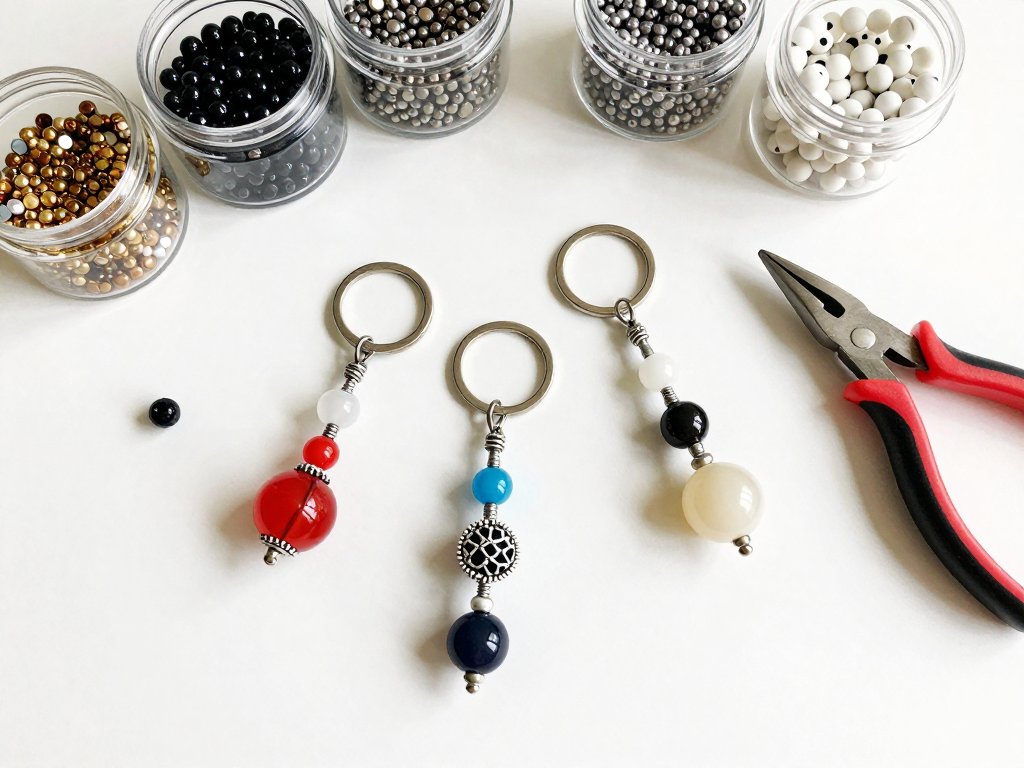
Why Beaded Bag Charms Are the Accessory Moment
There is something about a little bag charm dangling from your favorite tote that makes an outfit feel intentional. It is a small detail, yes, but details are what turn a practical bag into a personal statement. Over the past couple of years, I have watched beaded bag charms take over social feeds and runway-adjacent street style. And honestly? I am here for it. They are playful, endlessly customizable, and—best of all—you can make them yourself in under an hour.
I still remember the first bag charm I ever made. I was sitting at my kitchen table with a bowl of seed beads my grandmother had left behind, a spool of elastic cord, and absolutely no idea what I was doing. The result was a lopsided, charmingly wonky little tassel that I attached to my every-day crossbody. That charm stayed on for three years. Every time I looked at it, I remembered the afternoon I spent sorting those beads into color families, the way the afternoon light caught the little glass facets, and the surprising satisfaction of finishing something with my own hands.
That is the magic of beadwork. It is meditative. It is forgiving. And it rewards patience with something genuinely beautiful. Whether you are new to jewelry-making or you have a bead stash already threatening to overflow its storage box, these DIY beaded bag charms are a wonderful place to pour your creativity.
What You Will Need: Materials and Tools
Before we dive into the designs, let's talk about materials. Beading is one of those crafts where the quality of your supplies really does matter—not in an intimidating way, but in the sense that good materials make the process smoother and the result more durable. Here is what I recommend keeping on hand.
Beads
Seed beads are the backbone of most bag charms. They come in three common sizes: 6/0 (about 4 mm, the largest and easiest to handle), 8/0 (about 3 mm, a good all-around size), and 11/0 (about 2 mm, delicate and detailed). For a first project, I suggest starting with 8/0 seed beads. They are large enough to thread easily but small enough to create a refined finished look.
There is a meaningful difference between Czech and Japanese seed beads. Czech beads (often labeled Preciosa or Czech Republic) are slightly more irregular in shape. Some bead artists dislike this, but I find it gives handmade pieces a subtle, organic texture. Japanese seed beads—Miyuki and Toho are the big names—are more uniformly shaped and have larger holes relative to their size, which makes them easier to work with on multiple passes of thread. Delicas are a special kind of Japanese seed bead with a tubular shape and a flat profile. They line up like little bricks, which makes them ideal for patterns that need precision, like lettering or geometric motifs.
Accent beads add personality. Look for Czech glass fire-polished beads (they catch light beautifully), crystal rondelles or bicones (Swarovski or Czech crystal), natural stone chips (howlite, rose quartz, or jasper), or metal beads in brass, silver, or gold-toned finish. I also love using vintage glass beads from estate sales or Etsy shops—they have a warmth that mass-produced beads just cannot replicate.
Findings and Hardware
Your charm needs a way to attach to a bag. The most common options are:
- Lobster clasp — The classic jewelry closure. Easy to clip onto a bag handle, zipper pull, or D-ring. Look for ones in the 12 mm to 15 mm range for bag charms.
- Split ring — Like a miniature keyring, very secure. I use these for charms with heavier beads because the split ring distributes weight better than a thin clasp.
- Chain — A short length of chain (3 to 6 inches) between the clasp and the beadwork gives the charm a graceful drape. Cable chain in 3 mm or 4 mm link size works beautifully.
You will also need crimp beads (2 mm or 3 mm) for finishing wire ends, jump rings (4 mm to 6 mm, 20-gauge or 22-gauge) for connecting components, and head pins or eye pins if you plan to make dangles or charms that hang individually.
Wire and Cord Choices
This is where many beginners get overwhelmed, so let me simplify it. You have three main options:
- Beading wire (cable-style) — SoftFlex, Beadalon, or similar. Look for 49-strand or 7-strand wire in 0.018 to 0.024 inch diameter. It is flexible but does not kink, and it holds crimps well. I use 0.024-inch Beadalon for most bag charms because they get a fair amount of jostling.
- Elastic cord — Stretch magic or similar. Great for slip-on bead designs, but less durable for daily use because the elastic degrades over time. If you use elastic, choose a thicker diameter (0.8 mm or 1.0 mm) and double-knot securely.
- Beading thread — Nymo, Fireline, or One G. Best for intricate stitching patterns where you pass through beads multiple times. Fireline is my favorite because it does not fray or stretch.
Tools
The tool list is blessedly short. You need:
- Chain-nose pliers — For opening and closing jump rings, flattening crimps, and manipulating wire. I recommend a pair with a comfortable grip; you will use them in nearly every beading project.
- Wire cutters — Flush-cut side cutters are ideal. They make clean, sharp cuts without leaving a sharp wire edge.
- Crimping pliers — Optional but highly recommended if you are using crimp beads. They fold the crimp into a neat, professional tube shape instead of the squashed-flat look you get from chain-nose pliers.
- Bead mat — A soft, felted bead mat keeps your beads from rolling off the table. It is one of those small investments that saves an enormous amount of frustration.
- Good lighting — A small desk lamp with a daylight bulb makes a world of difference when you are working with 11/0 seed beads.
The Basic Technique: Stringing and Securing
Before we get to the three designs, let me walk you through the fundamental technique. Once you have this down, you can adapt it to virtually any beaded charm pattern.
Design Planning
I always start by sketching my bead layout on paper or simply laying beads out on my bead mat in the order I plan to string them. This step is especially important for patterned designs like stripes or color gradients. Take a photo with your phone once you are happy with the arrangement—it saves you from second-guessing mid-stringing.
For a standard bag charm, you will want the finished bead segment to be about 2 to 4 inches long. The total finished charm (including findings) should land between 4 and 7 inches. Any longer and it starts to look bulky; any shorter and it gets lost against the bag.
Stringing the Pattern
Thread your chosen wire or cord through the first finding. If you are using a lobster clasp, thread the wire through the loop at the base of the clasp, leaving a 2-inch tail. Start stringing your beads in the planned order. Hold the wire taut as you work, but do not pull so tight that the beads lock up—allow a tiny bit of movement so the finished charm drapes naturally.
When you string seed beads, you may notice that they like to flip and twist on the wire. This is normal. A gentle roll between your fingers will realign them. If you are using multiple sizes of beads, thread larger accent beads first and let the smaller seed beads fill the gaps. The overall flow of the charm should feel balanced—heavier beads near the bottom or evenly distributed, not all clustered at one end.
Securing the Ends
Once all your beads are strung, thread the wire tail through a crimp bead, then back through the loop of your end finding (a split ring or jump ring), and then back through the crimp bead in the opposite direction. Slide the crimp bead down until it is snug against the findings loop, but not so tight that it pinches the beads. Use your crimping pliers to fold the crimp bead into a neat cylinder. Trim the excess wire tail flush with the crimp using your wire cutters.
For elastic cord, tie a surgeon's knot (pass one end through the loop twice before pulling tight) and dab a tiny drop of superglue or jewelry glue onto the knot. Let it dry completely before trimming the tails to about 3 mm.
Give the finished charm a gentle tug to make sure everything is secure. If a bead feels loose or the crimp slides, it is better to redo that step now than to lose beads on your bag later.
Attaching the Hardware
If your design includes a chain between the clasp and the beadwork, use a jump ring to connect the chain to the clasp on one end and to the beadwork's finding loop on the other. To open a jump ring properly, twist the ends sideways with two pairs of pliers (or one pair and your fingernail)—do not pull them apart, as that weakens the metal. Close the jump ring by twisting back in the opposite direction until the gap is completely flush.
Design Idea #1: Monogram Initial Charm
This is the project I suggest for every beginner. A single letter dangles from your bag and announces your initials with understated charm. It is also a wonderful gift idea—think bridesmaid gifts, teacher appreciation, or a thoughtful handmade birthday present.
Materials for this design:
- Letter bead (10 mm to 16 mm, available in metal, acrylic, or ceramic)
- 8/0 seed beads in two coordinating colors (about 60 beads)
- 2 accent beads (crystal rounds or fire-polished beads, 4 mm)
- Beadalon 0.024-inch wire, 12 inches
- 1 lobster clasp (12 mm)
- 1 split ring (8 mm)
- 2 crimp beads (3 mm)
- 1 jump ring (5 mm)
Steps:
String the wire through the lobster clasp loop. Add one crimp bead, then thread the short tail back through the crimp bead and tighten. String your seed beads in a pattern of alternating colors—for example, five of Color A, then three of Color B, repeating until the strand measures about 1.5 inches. String your first accent bead, then the letter bead, then the second accent bead. Continue the seed bead pattern for another 1.5 inches on the opposite side. The letter bead should sit at the center, balanced.
Finish with the split ring: thread the wire through a crimp bead, through the split ring, back through the crimp bead, crimp, and trim. Use the jump ring to attach the lobster clasp to the chain if you want extra drop. Clip your monogram charm to a bag handle or zipper pull and step back to admire your work.
Design Idea #2: Charm Cluster
A charm cluster is exactly what it sounds like: a collection of small dangles and pendants gathered at the end of a chain or directly on a split ring. This design has a slightly boho, collected-over-time feel that I adore. It also lets you use up those single accent beads and small charms you have been saving.
Materials for this design:
- 3 to 5 small charms or pendants (6 mm to 12 mm each)
- Seed beads in 2 or 3 complementary colors (about 100 beads total)
- 3 to 5 head pins (2 inches long, 22-gauge)
- 1 split ring (10 mm)
- 1 lobster clasp (15 mm)
- Chain, 3 inches (optional, for extra drop)
- 4 jump rings (5 mm)
- 2 crimp beads (3 mm)
Steps:
Start by making the individual dangles. Thread a head pin through one small charm, then add a few seed beads above it—enough to create a neat stem. Use your chain-nose pliers to bend the head pin at a right angle just above the last seed bead, then wrap the wire around the pliers to form a simple loop. Trim any excess and close the loop. Repeat this for each charm.
Now create a seed bead base strand. Thread your wire through a crimp bead, through the split ring, back through the crimp bead, and crimp. String seed beads along the full length of the wire (about 2.5 inches) until you reach the end. Then, instead of finishing with a finding, thread the wire through one more crimp bead, then through the jump ring that will hold the dangles, back through the crimp bead, and crimp.
Open the jump ring at the bottom of the strand and attach each of your charm dangles. Close the ring securely. Attach the lobster clasp to the split ring at the top (or add a chain segment between them for a longer drop). The result is a gorgeous little cluster of personal treasures that catches light and attention with every step.
Design Idea #3: Tassel Style Charm
Tassels are timeless. A beaded tassel has a beautiful weight to it—it swings and sways with a satisfying movement that a fabric tassel cannot quite match. This design takes a bit more patience, but the result is striking.
Materials for this design:
- 11/0 seed beads in your main color (about 200 beads for a medium tassel)
- Contrast accent beads (6 to 8 beads for the tassel cap)
- Beading thread (Fireline or Nymo, size D)
- 1 bead cap or large-hole bead (10 mm to 14 mm, for the tassel top)
- 1 head pin (2 inches, 22-gauge)
- 1 split ring (8 mm)
- 1 lobster clasp (12 mm)
- Beading needle (size 10 or 12)
Steps:
Cut a 24-inch length of beading thread and thread your needle. String approximately 50 seed beads, then slide them to the bottom of the thread so the thread is doubled. Pass the needle back through the first bead you strung to form a loop. Continue stringing beads in groups of 50, making a total of 4 to 6 loops of equal length. The loops should hang freely from the bead cap area—this is the body of your tassel.
Once all tassel loops are made, gather them together and thread them through the bead cap or large-hole bead from the bottom so the cap sits at the top, covering the thread ends. Thread the head pin through the bead cap and tassel loops from the top down, then back up through the cap. The head pin should emerge from the top with about 1 cm exposed. Form a loop with the head pin wire, attach a jump ring, and then attach the split ring and lobster clasp.
Gently fluff the tassel loops with your fingers. If any loops are noticeably longer than others, trim them carefully with sharp scissors. The tassel should look full and even. Add a few accent beads between the bead cap and the clasp for an extra decorative touch.
General Tips for Beautiful, Durable Bag Charms
Over the years, I have made more bag charms than I can count. Some have held up for years; others have shed beads in parking lots. Here is what I have learned the hard way so you do not have to.
- Use wire for daily-wear charms. Elastic cord is convenient, but it snaps eventually. For a bag charm you plan to use regularly, beading wire is the better choice.
- Double-check your crimps. A poorly crimped bead is the number one reason beadwork falls apart. Take the extra thirty seconds to ensure your crimp is tight and the wire is secure.
- Consider the bag's hardware. If your bag has gold-toned zippers or hardware, choose gold-toned findings for your charm. Silver with silver. Mixed metals can look intentional, but a near-miss is more obvious than a deliberate contrast.
- Keep a bead journal. I photograph each charm I make and jot down the bead colors and brand. When I inevitably want to recreate a favorite combination, I do not have to guess.
- Watch the weight. A charm made entirely of glass beads and metal findings can get heavy. If you are attaching it to a delicate bag or a thin strap, use lighter materials like acrylic or ceramic beads and keep the design compact.
- Test before gifting. Attach the charm to your own bag for a day or two to make sure nothing rattles loose. This gives you peace of mind and a chance to tweak the design if needed.
Creative Variations to Explore
Once you feel comfortable with the basics, the possibilities are nearly endless. Here are a few directions you might take your bag charms.
Troubleshooting Common Beginner Issues
Every beader encounters a few hiccups along the way. Here is how to handle the most common ones.
Beads are sliding off the wire. You likely forgot to add the final crimp bead, or the crimp bead is not tight enough. Go back and check your finishing steps. If the crimp is genuinely closed but still letting beads slip, replace it with a slightly larger crimp bead (2.5 mm instead of 2 mm, for example).
The charm does not hang straight. Your bead distribution may be uneven. Heavier beads tend to pull the charm to one side. Try re-stringing with the heavier beads positioned near the bottom center, and balance the weight on both sides.
The jump ring keeps opening. This is almost always because you pulled the jump ring ends apart instead of twisting them sideways. Pulling distorts the round shape, making it easier for the ring to slip open. Use two pairs of pliers to twist the ends in opposite directions for a clean, secure closure.
My thread keeps knotting. Run your thread or wire through a piece of beeswax (for thread) or a wire straightener (for beading wire). A straight, smooth strand tangle far less often than one fresh off the spool.
The colors look different in natural light. Seed bead dye lots can vary significantly. Always check your bead colors in the lighting conditions where the charm will most often be seen. I make it a rule to lay out my bead palette by a sunny window before committing to a pattern.
Caring for Your Beaded Bag Charms
A well-made bag charm can last for years with reasonable care. Here is how to keep yours looking its best.
Avoid exposing your charm to water for extended periods. If you get caught in the rain, simply dab the beads dry with a soft cloth. Store the charm in a small cloth pouch or a compartment in your purse when it is not attached to a bag—this prevents the wire from being bent out of shape or the beads being scratched by keys and coins.
If your seed beads start to look dull, a gentle wipe with a slightly damp microfiber cloth will restore their shine. Avoid soaking the charm or using harsh cleaners. The beads themselves are glass and will not be harmed, but the findings and wire can tarnish or corrode.
Over time, the wire may develop a slight curve from the natural resting position of the charm. This is normal and usually harmless. If the wire starts to poke out from a crimp, that is a sign that the crimp needs to be replaced—a quick fix with fresh crimp bead and five minutes of work.
Building Your Bead Stash Over Time
One of the wonderful things about beading is that you do not need to buy everything at once. Start with a small selection of seed beads in a few colors you love—maybe a neutral like ivory or gray, a pop color like coral or turquoise, and a metallic like gold or silver for accents. Add to your collection as you find beads that speak to you.
Craft store sales are your friend. Many big-box craft retailers run regular 40% off coupons on single items. Use them for findings and tools, which are often the priciest components per unit. Online bead shops like Fire Mountain Gems, Beadaholique, and Artbeads offer bulk pricing that brings the per-bead cost down significantly.
Estate sales and thrift stores are treasure troves for beaders. Older jewelry often uses higher-quality glass and metal components than modern mass-produced pieces. I have found vintage Czechoslovakian glass beads, genuine mother-of-pearl pendants, and handcrafted silver findings for pennies on the dollar. The hunt is part of the fun.
Why Handmade Charms Matter
There is a reason handmade accessories feel different from store-bought ones. When you make a bag charm yourself, you set the color palette, choose every bead, and decide exactly how it should hang. The result is an accessory that reflects your taste in a way that nothing off the shelf can match.
Beyond the aesthetic, there is a quiet satisfaction in carrying something you made. Every time I reach for my keys and see a little beaded charm I crafted at my kitchen table, I feel a small spark of pride. It is a reminder that I am not just a consumer of beautiful things—I am a maker of them. And that is a feeling worth collecting.
I hope this guide inspires you to pull out some beads and give it a try. Start with a simple monogram charm or dive straight into a tassel if you are feeling ambitious. Make one for yourself, make one for a friend, and enjoy every step of the process. If you do, I would love to hear about it. Share your creations, ask questions, and keep making the world a little more colorful, one bead at a time.
Happy beading, friends.
