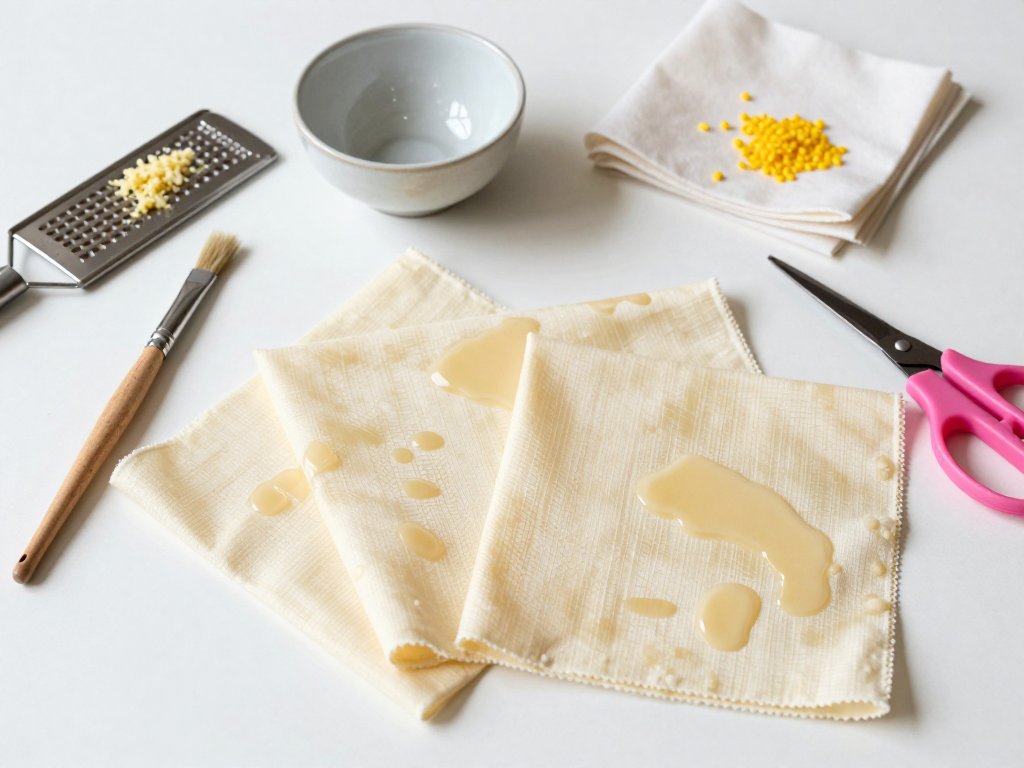
Introduction
I once spent $34 and most of a Saturday making five very expensive doorstops.
That was my first batch of beeswax wraps. I bought a pound of wax, grabbed a "cotton blend" remnant without reading the label, and poured the coating on thick because thick felt sturdier.
Every one of those wraps failed. The wax slid off in stiff sheets while they cooled, because the fabric was mostly polyester. And the ones that did hold were so heavily coated they cracked instead of folding.
Here is the mechanism I wish someone had explained first. Cotton is porous and absorbent. Melted wax wicks into the fiber and locks in place as it hardens. Polyester has no pores to wick into, so the wax just sits on the surface like a separate skin.
One label check and one thinner coat would have saved me $20 in wax and a whole afternoon.
So let's do the math first, then the method. Neither takes long, and both decide whether your wraps last a year or end up in the bin.
Why Beeswax Wraps Are Worth Making
A beeswax wrap is just cloth plus wax. You press it over a bowl with warm hands, the wax softens slightly, and the wrap holds its own shape.
It replaces plastic cling film for roughly a year of everyday kitchen use. At the end of that run, it goes into the compost and breaks down.
Cling film lasts a few hours on a sandwich and then outlives you in a landfill. That imbalance is the whole reason this craft exists.
The wraps also behave better than film in a few practical ways. They breathe, so bread and cheese don't sweat the way they do under plastic. They grip a bowl rim without adhesive.
And you can make them from fabric you already own — an old shirt, a thrifted pillowcase, the remnant left over from a quilting project.
Why does a plastic-free wrap even cling? Because beeswax is soft at body temperature. Your hand is the fastener.
- Reusable for about a year before the tack fades
- Compostable at the end of its life
- No sewing machine, no hemming, no patterns
- A batch takes about an hour once your fabric is cut
Fabric, Wax, and Tools: The Shopping List
Buy the right fabric and the right wax and the project is nearly impossible to ruin. Get either one wrong and no technique will save you.
The Fabric
You want 100% cotton in a tight weave — quilting cotton is the standard choice. Secondhand cotton bedsheets and pillowcases work beautifully and cost almost nothing.
Read the label every single time. "Cotton blend," "cotton-rich," and "60% cotton" all mean the wax will flake off. Natural fibers hold wax; synthetics reject it.
Thin cotton is easier to work with than heavy canvas. Canvas drinks wax and turns into something closer to a cutting board than a wrap.
The Wax
Beeswax pellets are the easy route because they melt evenly and need no prep. A one-pound bag is enough for roughly sixteen ten-inch wraps.
If you buy a solid block instead, freeze it for twenty minutes and grate it on a box grater you keep for crafts. Warm wax gums up the grater instantly.
The Optional Add-Ins
A teaspoon of jojoba oil per ounce of wax keeps the coating pliable so it folds instead of cracking. Skip cooking oil — it oxidizes and turns rancid in the fabric.
Food-grade pine resin, about a teaspoon per ounce of wax, adds serious grip. It also makes the wrap stiffer, so start without it and add it only if you need more tack.
The Tools
- Pinking shears or a rotary cutter and mat — pinking edges resist fraying so you never sew a hem
- A baking sheet and parchment paper
- A dedicated cheese grater for the wax
- A clean, cheap paintbrush or pastry brush
- Clothespins and a drying line or rack
- Tongs for lifting hot fabric
Prepping and Cutting Your Fabric
Wash and dry your fabric before anything else. New quilting cotton carries a sizing finish — a starch or PVA coating that seals the fibers.
That finish blocks wax absorption, which is exactly the failure you don't want. One wash cycle with no fabric softener removes it. Skip the softener, which leaves its own coating.
Press the fabric flat after drying. Wrinkles become wax ridges that never lie smooth again.
Cut three useful sizes:
- 8 x 8 inches — small bowls, cut fruit, a half avocado, snack portions
- 10 x 10 inches — sandwiches, cheese blocks, a small plate
- 12 to 14 inches — large mixing bowls, a loaf of bread, a bunch of greens
Cut with pinking shears or a rotary cutter with a pinking blade. Straight-cut cotton edges fray in the wash, and a fraying edge sheds lint into your food.
From one thrifted pillowcase you can usually get six wraps across those three sizes. That is a very cheap starting point.
The Cost Math: Per Wrap vs. a Year of Cling Film
Let's put real numbers on it, because this is where the craft either makes sense for your kitchen or doesn't.
Roughly one ounce of wax covers a 10 x 10 wrap with a proper thin coat. That is the number to plan around, not the amount you feel like sprinkling.
Pellets in bulk run about $12 a pound, or $0.75 an ounce. A thrifted cotton pillowcase costs a couple of dollars and yields about six wraps.
So a ten-inch wrap breaks down to about $0.75 in wax and $0.20 in fabric. Call it a dollar per wrap, with the brush and pan as one-time purchases.
A six-wrap batch lands near $7.50. A 200-square-foot roll of cling film costs about $3.50, and a household that wraps lunches most days goes through one to two rolls a year.
Which means year one is roughly a wash. I'd rather tell you that than pretend you'll get rich.
Year two is where you win. Refreshing a wrap takes a teaspoon of wax, and the leftover half-pound in your bag covers every refresh for the next twelve months.
After that, your cost per use is effectively zero, and you have restocked nothing.
If you like the idea of building something useful out of material already headed for the bin, this is the same instinct behind upcycled crafts that turn trash into treasure.
Method One: The Oven Method
This is the method I recommend for a first batch. It's even, forgiving, and lets you work on several squares.
- Preheat the oven to 200°F (93°C). Hotter than that and the wax darkens and your kitchen smells like a candle factory.
- Line a baking sheet with parchment paper. Wax migrates slightly, so use a fresh sheet each batch or keep a dedicated craft pan.
- Lay one fabric square flat on the parchment.
- Sprinkle grated wax or pellets evenly across the fabric — about two teaspoons for an 8 x 8, four teaspoons for a 10 x 10. Even coverage matters more than quantity.
- Slide the pan into the oven for 5 to 8 minutes, until the wax is fully melted and the fabric looks glossy and wet all over.
- Pull the pan out and spread the melted wax with a clean brush, working from the center out toward the edges. This step is what turns a lumpy coat into a thin, even one.
- Lift the wrap by a corner with tongs and hang it on a line with clothespins. It sets in two to three minutes.
- Repeat for each square, then stack only after everything has cooled.
One pass with the brush beats three. If you see daylight through a dry patch, add a pinch of wax and return the pan to the oven for a minute.
Method Two: The Iron Method
The iron method is faster for one or two wraps and it uses less wax, but it needs more attention. It's also the better choice if you don't want to heat a whole oven.
- Set the iron to low or medium heat with the steam turned off. Steam and wax make a cloudy, gummy mess.
- Lay a long sheet of parchment on the ironing board and set the fabric square on top of it.
- Sprinkle wax or pellets evenly over the fabric, using the same amounts as the oven method.
- Lay a second sheet of parchment over the top so the iron never touches wax directly. A bare iron will pick up wax you can never fully clean off.
- Press and hold, moving the iron slowly across the whole square for 30 to 60 seconds. Press, don't slide — sliding drags the wax into a corner.
- Lift the top parchment and check for dry patches. Add a pinch of wax and press again if you find any.
- Peel the wrap off the parchment while it's still slightly warm and hang it to finish cooling.
Irregular edges are normal here. Pinking shears hide small variations much better than a straight blade does.
Curing, Testing, and the Cling Check
Let the wraps cool fully — about ten minutes on the line — before you judge them. Warm wax feels tacky for reasons that won't survive the cool-down.
Then test one. Press it over a bowl with both hands for twenty seconds, letting your body heat soften the coating.
If it holds its own shape for half a minute, it's cured. If it springs back or slides off, you have too little wax or the wrong fabric.
Look closely for dry, matte patches while you test. Those spots will never cling, and they're easy to fix now rather than later.
To repair a dry patch, sprinkle a little wax over it and re-melt it in the oven for three to five minutes. One light top-up coat is all it takes.
Store finished wraps flat or loosely rolled, away from the stove and any radiator. Heat is the only thing that shortens their life indoors.
Care, Refresh, and What Never to Wrap
Everyday Care
Clean wraps with cool water, mild soap, and a sponge. Rinse and hang to air dry over a rack or a line.
Never use hot water, and never put a wrap in the dishwasher. Hot water strips the coating, and melted wax going down a drain hardens as it cools — a genuine clog risk.
Fold and store them in a drawer once dry. Don't fold a wet wrap; trapped moisture is what encourages mildew in the fabric.
Refreshing the Wax
After roughly two to four months of regular use, the tack fades. The wax has worn thin where you handle the wrap most.
Refresh it by grating a teaspoon of wax over the flat wrap, then re-melting it in the oven at 200°F for three to five minutes.
That single refresh buys you several more months. Most wraps reach a full year with one or two top-ups.
Never Wrap These
- Raw meat and fish — you can't sanitize a wrap with the cool water it requires
- Hot food straight from the pan — the wax melts on contact
- Wet or very greasy items — water and oil break the seal
- Anything going in the microwave — the wax melts and the coating is ruined
Troubleshooting: Five Common Problems
Crumbly, flaking wrap. This is too much wax. A thick coat has no flexibility, so it cracks instead of folding. Scrape off the excess with a butter knife while cold, then re-melt and brush it thin.
No cling at all. Either too little wax or the wrong fabric. Test the cloth by dripping water on it — if the drop beads and rolls off, there's too much synthetic fiber and no amount of wax will fix it.
Waxy residue on your food. Over-waxing again, or wrapping something warm. Trim the coating with a paper towel while the wrap is just warm, and let food cool first.
A sour or waxy smell. Someone used cooking oil instead of jojoba. Olive and vegetable oils oxidize in the fabric and go rancid within weeks. Beeswax alone never does this, so remake those wraps with jojoba or none at all.
Wax pooling at the edges. Your sprinkle was uneven, or you brushed outward with too much wax in the center. Re-melt and redistribute with the brush, then let it set flat.
None of these failures waste the materials. Every fix here is a re-melt, which is the quiet advantage of working with a material that never really cures.
What My First Batch Taught Me
The $34 lesson was two things: read the fiber label, and trust a thin coat over a thick one.
My second batch came from a thrifted cotton pillowcase and about three ounces of wax. Six wraps for under eight dollars, and they clung on the first try.
Two years later I have not bought a box of cling film. The wraps get a teaspoon of wax every few months and go back to work.
Start small. Cut one 10 x 10 square, use a fabric you're certain is cotton, and brush the coat thinner than feels right.
Your first wrap will tell you everything the second one needs to know.

