A Little Craft That Fits in Any Day
Every parent knows the feeling: you need a project that is simple enough for little hands, doesn't create a mountain of cleanup, and keeps the kids engaged for more than five minutes. These mini wooden magnets check all those boxes—they're inexpensive, quick to make, and give children a genuine sense of accomplishment when they see their finished work holding a drawing on the fridge.
All you need is a trip to the dollar store or a quick search through your craft stash. The supplies are truly minimal: wooden discs (often sold in bags of 30 for a dollar), acrylic paint in a few bright colors, small brushes, and adhesive magnet strips or dots. That's it. The whole project costs less than a fancy coffee, and the result is a set of cheerful, functional magnets your kids will be proud to show off.
What You'll Need
Gather these supplies before you start—having everything ready makes the process smoother for little artists.
- Wooden discs – 1–2 inches in diameter, available at dollar stores or craft stores in bulk
- Acrylic paint – non‑toxic, child‑safe paints in bright colors (yellow, blue, red, green, pink)
- Paintbrushes – small‑ to medium‑sized brushes for easy handling
- Adhesive magnet strips or dots – self‑adhesive, cut to fit the back of the discs
- Paper plates or palette – for paint mixing and easy cleanup
- Water cup and paper towels – for rinsing brushes
- Clear sealant (optional) – Mod Podge or a clear acrylic spray to protect the paint
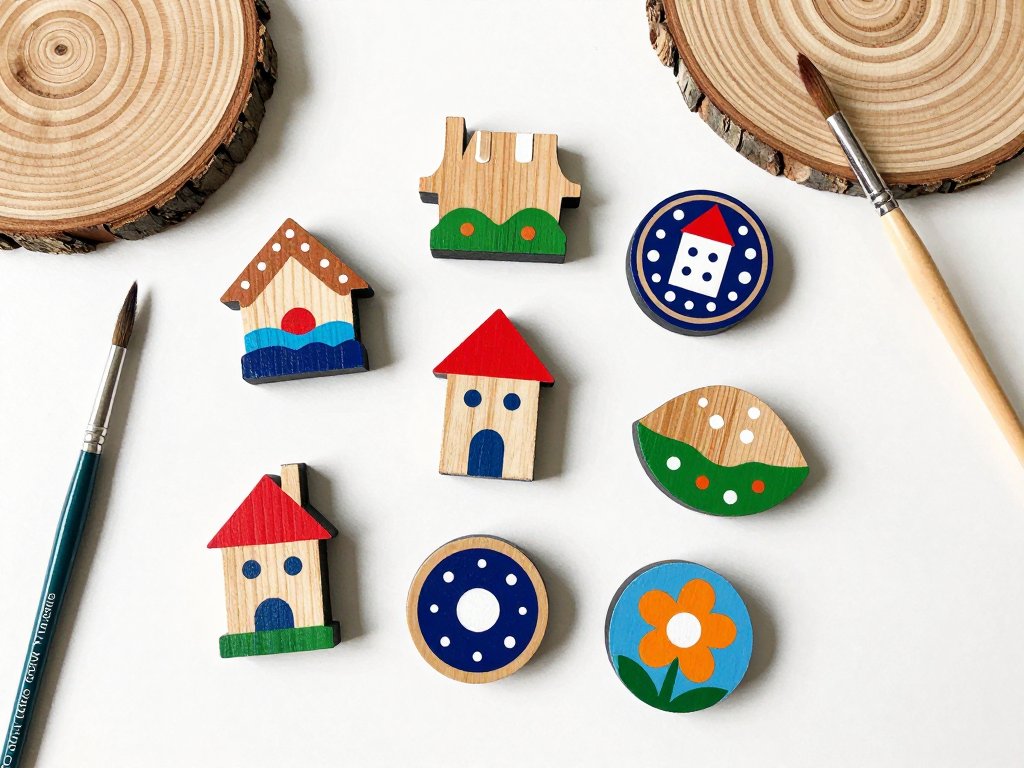
If you don't have wooden discs, look for other flat wooden shapes—hearts, stars, circles—anything that will fit a magnet on the back. The dollar‑store craft aisle is full of possibilities.
Step‑by‑Step: Painting Day with Kids
Set up your workspace at a table covered with newspaper or a plastic tablecloth. Give each child their own wooden discs, a paint palette (a paper plate works perfectly), and a brush.
1. Start with a Base Coat
Let your child pick their favorite color for the background. Paint the entire front of the wooden disc with a smooth, even layer. This base coat will make any designs painted on top pop. If the wood is a little rough, a second coat after the first dries can give a nicer finish.
2. Add Simple Designs
Once the base coat is dry to the touch (about 15–20 minutes), it's time for the fun part—decorating! Encourage your child to think of simple shapes:
- Polka dots – Use the end of a paintbrush or a cotton swab to dip and stamp perfect little dots.
- Stripes or zigzags – A small brush can create cheerful patterns across the disc.
- Flowers – A dot in the center, then five smaller dots around it for petals.
- Animals – Two dots for eyes, a curved line for a smile—instant happy face magnet.
- Hearts or stars – These classic shapes are always a hit.
Remember, perfection isn't the goal. A slightly wobbly line or an off‑center dot adds charm and makes the magnet uniquely theirs.
3. Let Them Dry Completely
Place the painted discs on a piece of wax paper or a drying rack. Let them dry for at least an hour—overnight is even better if you have the time. Rushing this step can smudge the paint when you attach the magnets.
4. Seal the Paint (Optional but Recommended)
If you plan to use these magnets often, a coat of clear sealant will protect the paint from chipping or fading. Use a brush‑on sealant like Mod Podge or, for older children under supervision, a quick spray of clear acrylic outside. This step adds durability and a nice finished look.
5. Attach the Magnets
Once the paint (and sealant, if used) is completely dry, peel the backing off the adhesive magnet strips. Cut them to fit the back of the disc—a single strip or a couple of small dots will hold firmly to the fridge. Press firmly for 10–15 seconds to ensure a good bond.
Why This Craft Works So Well
As a former elementary‑school art teacher, I've seen firsthand how small, achievable projects build confidence in young creators. These magnets are the perfect example:
- Quick results – From start to finish, the project takes about two hours (including drying time), which matches a child's attention span.
- High success rate – There's no wrong way to paint a wooden disc. Every design is valid.
- Functional outcome – Kids love seeing their artwork actually do something—holding up a picture or a grocery list feels important.
- Inexpensive materials – If a magnet gets lost or a design doesn't turn out as hoped, you're out just a few cents, not a whole craft kit.
Plus, the skills practiced here—fine motor control with the brush, color mixing, pattern recognition—are foundational for future art projects.
Beyond the Basics: Creative Variations
Once you've mastered the simple painted magnets, try these fun ideas:
- Seasonal magnets – Orange pumpkins for fall, snowflakes for winter, flowers for spring.
- Photo magnets – Glue a small printed photo of your child's face or a favorite pet onto the disc, then seal with Mod Podge.
- Glitter accents – Add a sprinkle of glitter to wet paint for a little sparkle.
- Word magnets – Paint letters on individual discs to create a fridge‑message board.
- Gift‑giving sets – Make a set of six magnets as a handmade gift for grandparents or teachers.
A Gentle Reminder for Parents
Crafting with children isn't about the final product looking perfect. It's about the time spent together, the conversations that happen while painting, and the pride in their eyes when they say, "I made that." If your child's magnet has paint drips, uneven lines, or colors that blended into a muddy brown, that's okay. What matters is that they tried, they created, and they learned that making something with their own hands feels good.
Keep a few of your child's early magnets tucked away—years from now, you'll pull them out and remember the afternoon you sat at the kitchen table, paint on both your hands, making something small and wonderful together.
Ready to Start?
Grab those wooden discs, pour a little paint onto a plate, and hand your child a brush. In about an hour, you'll have a fridge full of color and a child full of confidence. And the next time you need to hang a grocery list or a piece of school art, you'll reach for a magnet that carries a memory—a tiny, painted reminder of creativity shared.