Introduction
Two Septembers ago I filled a trash bag with pinecones from a park near my house. They were damp from a week of rain, and I was proud of myself. Free decor, right?
I dumped them into a sealed plastic bin and left it in the garage. Two weeks later I cracked the lid and something moved inside.
The cones were fuzzy with white mold. Tiny insects had hatched and were crawling up the rim of the bin. I carried the whole mess to the curb and washed the garage floor twice.
That was forty minutes of foraging, a five-dollar bin, and a Saturday morning of cleanup — for nothing. The cones went in the trash, and I started over.
What I learned is that free decor isn't free until you prep it. Pinecones arrive holding sap, moisture, and whatever else is living inside them. Treat them first and they last for years.
This guide covers the prep that actually matters, then walks through projects from a wreath to a kid-friendly bird feeder. No special tools. Just glue, twine, and a free afternoon.
Preparing Pinecones the Right Way
Every pinecone you pick up outside is wet, even when it feels dry. The scales are closed against damp air, and that moisture is what feeds mold and insects.
The fix is a bake. Heat does two jobs at once: it kills anything living, and it dries the scales so they open fully.
Preheat your oven to 200°F (93°C) and line a rimmed baking sheet with foil. Spread the pinecones in a single layer with a little space between them.
Bake for 30 minutes with the door shut, and stay in the kitchen while they're in. If your oven runs hot, start checking at the 20-minute mark.
When they come out, the scales should sit wide open and the cones should feel noticeably light. Let them cool completely on the sheet before you handle anything else.
No oven, or a batch too big to fit? Use the vinegar soak method instead. Fill a bucket with one part white vinegar to three parts water.
Submerge the pinecones and weigh them down with a plate so they stay under. Let them soak 20 to 30 minutes to drown out anything hiding in the scales.
Drain them and spread the cones on layers of newspaper in a warm, dry room. Turn them once a day for three to five days until fully open and dry.
Two numbers to remember. Never bake above 250°F (121°C), because thin resinous scales scorch fast. And never glue a cone that still feels cool or damp to the touch.
Glue grabs a wet surface for about a day, then lets go. That's the single most common reason a wreath sheds apart by Thanksgiving.
Some cones will never be worth the trouble, and you should know them on sight. Check each one before it earns a spot in your batch.
- Scales locked shut after a full bake, not opening at all
- Feels heavy and dense for its size, like a rock
- Your fingers come away sticky with pitch after a touch
Those closed, pitchy cones baked for an hour for me and still stayed shut. They're fine for a fire pit, but don't build a wreath out of them.
Removing Sticky Sap
Sap is the reason pinecones stick to your hands, your table, and each other. Fresh sap never fully dries, so a wreath glued with it will gum up and shed.
The gentlest fix is a second short bake. Set the cone on parchment on a baking sheet at 200°F for 10 minutes, then wipe the outside with a paper towel while it's warm.
For spot treatment, dampen a rag with rubbing alcohol and wipe the sticky patches. Alcohol cuts resin fast and evaporates clean, leaving no residue behind.
Skip the soap-and-water bath. Water drives sap deeper into the scales and locks the cone closed again, undoing the work your bake just did.
Do this sap step before painting, gluing, or wiring. Sap under a coat of gold spray paint bubbles and lifts the finish within a week.
Pinecone Wreath on a Wire or Straw Form
A wreath is the project people ask about most, and the one most likely to fall apart by Thanksgiving. The form matters, and so does the order you work in.
Start with an 18-inch wire or straw wreath form. Wire forms are lighter and cheaper. Straw holds glue better and won't poke through the front.
Sort your pinecones by size into three piles: large, medium, and small. Plan on roughly 40 to 60 cones for one 18-inch wreath.
Work big to small. Glue the largest cones first around the outer edge, then medium ones over the gaps, and small cones last to fill the center.
Always fill the back rim before the front. That inner ring gives the front layer something to nestle against, so the wreath reads full from the side too.
Hot glue alone works, but reinforce every large cone with floral wire. Wrap 22-gauge wire through the base of the cone and twist it around the form's frame.
Twist the wire tight and tuck the ends underneath, out of sight. Glue is strong in shear but weak in peel — a bump against a door pops an unwired cone right off.
Think about hanging weight before you commit. A glued-and-wired 18-inch wreath can weigh two to three pounds, and a flimsy over-the-door hook won't hold it.
Use an over-the-door hanger rated for five pounds, or drive a nail into a stud. Hang the bare form once first to test before you cover it in cones.
Pinecone Garland
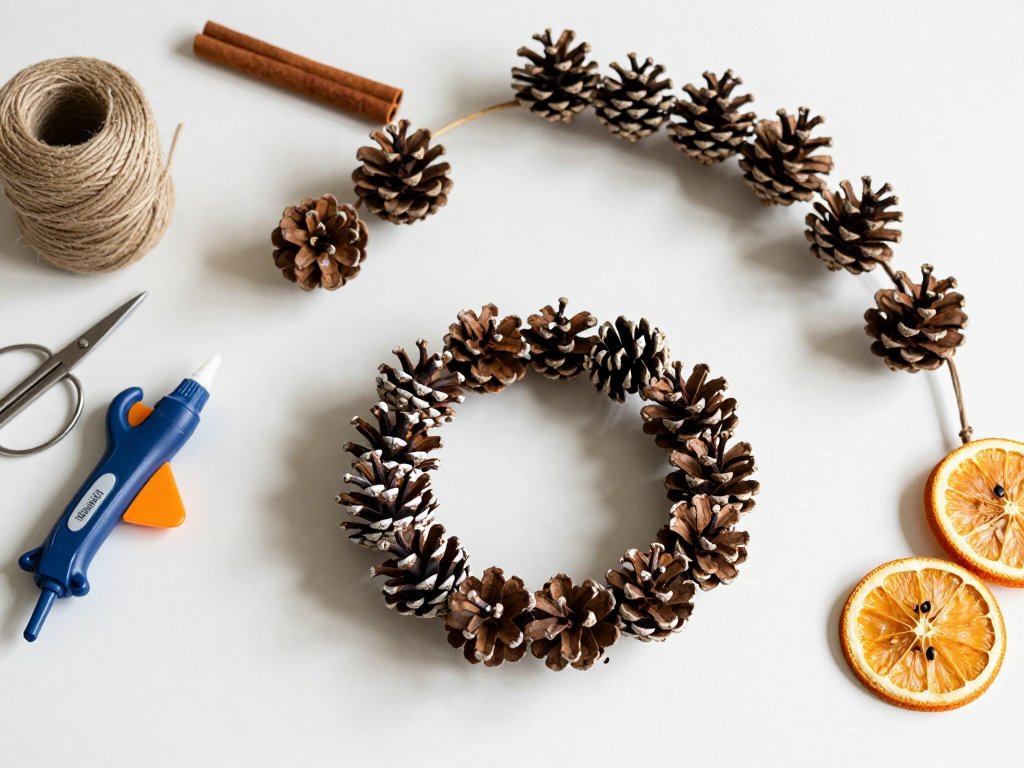
Garland is the fastest win on this list. Figure about an hour for eight feet, and it uses almost nothing but twine and glue.
Cut a length of jute twine three inches longer than you need. Eight feet of garland looks right draped across a standard mantel.
Screw a small screw eye into the top of each pinecone, near the base. Twist it in by hand, then add a drop of glue on the threads so it stays for good.
Space the cones 6 to 8 inches apart and tie or glue each one to the twine at its screw eye. Keep the twine slightly slack so the garland drapes instead of pulling straight.
Alternate pinecones with faux berries or dried orange slices. That color break keeps a long line of brown cones from reading as one dark smear.
A budget note, since this is where people overspend. A large spool of jute twine runs about five to eight dollars and covers 200 feet — enough for three mantels or a staircase.
A Bowl or Centerpiece
The easiest centerpiece on earth is a shallow dough bowl filled with pinecones. Dough bowls are long, low, and built to hold loose material without tipping.
If you'd rather build a fuller dining display, this same bowl pairs well with other fall tablescape ideas — think candles, mini pumpkins, and dried stems.
Fill the bowl about two-thirds full with large cones as the base layer. Tuck mini pumpkins into the gaps, then set two or three candles on top.
Keep every candle's flame below the bowl's rim. A tall candle standing in a bed of dry cones is a fire waiting for a draft to find it.
Thrift stores and estate sales are the cheap source for the vessel. Dough bowls show up for five to fifteen dollars, and glass cake stands for three or four.
A cake stand lifts the whole arrangement off the table and gives you height without stacking anything flammable. Use the footed base as your platform.
Shop in early October, before the fall displays clear out. Check the kitchenware aisle rather than the decor aisle — that's where the good bowls actually hide.
Cinnamon Pinecones and Fire Starters
Cinnamon pinecones smell like the season and cost almost nothing to make. You need cinnamon powder and a bottle of apple-cinnamon fragrance oil.
Mix two tablespoons of cinnamon with about ten drops of oil in a zip bag. Add a handful of baked cones and shake until every one is coated.
Spread them on parchment and give them a brief bake at 200°F for 10 to 15 minutes. Low heat sets the scent without scorching the spice into bitterness.
Store them in a paper bag, not plastic, and the scent holds for weeks. Refresh with a few more drops of oil whenever it starts to fade.
For fire starters, melt paraffin or leftover candle wax in a double boiler. Dip each cone in the wax, then set it in a paper muffin liner to cool.
Tuck a short piece of cotton wick into the wax before it sets. One finished cone burns ten to fifteen minutes and gets damp kindling going fast.
Safety first, and this rule isn't optional: never leave a fire unattended, and never burn these in a fireplace you don't maintain.
Waxy fire starters build creosote in a chimney over time. If you burn them regularly, get the flue cleaned once a year — that's the difference between cozy and a chimney fire.
Painted Pinecones
My first attempt at painted pinecones was a disaster. I sprayed them solid white and got gumball-sized blobs with no texture left at all.
The problem is coverage. Spray paint fills the gaps between the scales, and the shape that makes a pinecone interesting disappears under a flat coat.
Dry-brushing is the fix. Load a flat brush with white or gold acrylic, wipe most of it off on a paper towel, then drag the brush lightly across the scale tips.
Only the raised edges catch the paint. The recesses stay brown, which is exactly the frosted look you're after — texture first, color second.
To dry them, poke a bamboo skewer into the cone's base and stand it in a cup. The skewer doubles as a handle while you paint and a stand while it dries.
Space the painted cones on wax paper and don't touch them for an hour. Acrylic dries fast; gold craft paint needs a bit longer to set hard.
Kid-Friendly Pinecone Projects
Pinecones are a great kid material because there's no wrong answer and nothing sharp. Two projects work for almost any age group.
For pinecone creatures, glue on felt scraps, googly eyes, and pipe cleaners. A cone plus a felt triangle makes a fox; add tiny antlers and it's a reindeer.
Low-temp glue guns are safer for kids, but a bottle of tacky glue works just as well and can't burn anyone. Let glued pieces sit an hour before play.
Bird feeders are the classic. Mix peanut butter with cornmeal until it's thick, then press the mixture into the cone's open scales.
Roll the coated cone in birdseed and hang it by a loop of twine. Hang it away from where kids play — feeders attract more than just birds.
Peanut allergies are common, so check before a feeder goes to school. A classroom with a nut-free rule shouldn't have these anywhere near the table.
The allergy-safe swap is suet or vegetable shortening. Mix shortening with cornmeal and a little flour until it holds together, then pack it into the cones.
Shortening feeders soften in warm weather, so hang them in shade during an early-fall warm spell. In a normal cool week they hold up just fine.
Where to Forage Responsibly
You don't need to buy pinecones. Your own yard, a public park, or a roadside pull-off will supply more than you can use in a season.
Take only fallen cones, never ones still attached to the tree. Picked cones aren't fully ripe, and wildlife depends on the ones that drop.
Take a handful from any one spot, then move on. Cracking open every cone under one tree strips food and shelter that other things need through winter.
Shake each cone out outdoors before it goes in your bag. This drops seeds, dirt, and most of the small crawlers still living inside the scales.
Check your local rules for parks and public land. Some places allow foraging, some don't, and collecting in a state park without permission can carry a fine.
Neighbors are the best source of all. Ask before you gather from someone's property — most people are glad to have the yard cleared for free.
Storage and Next Year
How you store pinecones in November decides whether they're usable next fall. The wrong container undoes every bit of your prep work.
Use a breathable paper bag, a cardboard box, or an open crate. Never seal them in plastic bins or zip bags — trapped moisture brings the mold straight back.
Add a few cedar blocks or a small sachet of dried lavender to the container. Cedar repels moths, and it smells a lot better than the alternative.
Keep the whole container in a dry basement, garage, or closet that stays cool and doesn't flood. Humidity is the enemy here, more than cold.
Label the bag with the date you baked them. A batch that's sat in a dry box for a year is still perfectly good the following October.
Free Decor, Ninety Minutes, One Project
Add up the real cost of a finished project and it lands close to nothing. A bag of free cones, a spool of twine, and a glue stick you already own.
The ninety minutes people are afraid of is mostly waiting — thirty minutes in the oven, an hour for paint or glue to dry. Actual hands-on time is about twenty.
That's the trade free decor asks for. Not money, not special tools. Just a little patience on the front end so the mold story never happens to you.
Start with one project. The garland is the fastest, the wreath is the most impressive, and the centerpiece takes five minutes if you have a bowl.
Pick one this weekend while the cones are still dropping. Bake them, store them right, and next fall you'll have decor that cost you nothing but time.