Introduction
Let me tell you about the cookout that almost broke my budget. I walked into a party supply store two summers ago planning to spend maybe forty dollars on decorations.
I walked out with a receipt for $187. Paper lanterns, a table runner, pre-made centerpieces, a foil banner, napkin rings shaped like pineapples, and a tablecloth that ripped the first time someone set a plate down on it.
Here is the part that really stung. The banner? My daughter could have cut those letters out of construction paper in an afternoon.
The centerpieces? Two dollars' worth of mason jars and grocery store flowers would have looked better.
And those napkin rings? They were just pieces of ribbon glued into a circle. I paid eighteen dollars for a loop of ribbon.
I am not a person who enjoys wasting money, and I am guessing you are not either.
So this summer I decided to do things differently. Everything on the table at our Fourth of July cookout, and I mean everything, was made by hand.
The whole setup cost me about thirty-five dollars, it took one relaxed afternoon to put together, and honestly?
It looked better than anything I have ever bought.
That is what this guide is about. Not Pinterest-perfect decor that takes a weekend and a dedicated craft room.
Real, doable decorations and table crafts that look expensive, survive actual use, and leave money in your pocket for the food.
Whether you are hosting a birthday, a barbecue, a baby shower, or just a Tuesday dinner that deserves better than paper plates, these projects are for you.
Why Store-Bought Party Decor Costs So Much
Before we get to the fun part, let us talk about the math, because understanding why party supplies are so expensive is the first step to beating the system.
When you buy a pre-made centerpiece for twenty-five dollars, you are paying for more than the materials.
You are paying for the plastic vase, the packaging, the shipping from a warehouse, the shelf space in the store, and the retailer's profit margin.
The actual materials inside, the filler and the flowers, might be worth three dollars. You are paying twenty-two dollars for convenience and a cardboard box.
Party stores know that people buy decorations under time pressure. You are hosting on Saturday, it is Thursday, and the "SUMMER" banner is right there on the shelf.
The panic tax is real. The moment you give yourself permission to make things instead, you take the pressure off and the markup goes away with it.
Here is the rule I now live by: if a decoration can be made in under thirty minutes with supplies from the dollar store or the recycling bin, I make it.
If it genuinely cannot, I rent it or skip it. That single rule has cut my party budget in half every summer since.
Start With a Color Story Before You Buy Anything
The biggest secret of expensive-looking parties has nothing to do with money. It is color discipline. Walk into any catalog-perfect party and count the colors. You will usually find two, maybe three. That is it.
Here is what I do before buying a single supply. I pick a base color (white or kraft brown), one main color (coral, lemon yellow, or navy all scream summer), and one accent (a green from fresh herbs or leaves).
Then I refuse to buy anything that is not one of those three colors. It sounds strict, but it makes every other decision automatic.
The same discipline works with dollar store shopping. A table with red, white, and blue plates, napkins, and cups looks intentional. The same table with red, white, blue, orange, green, and purple looks like a clearance rack exploded. Restraint is free, and it does more work than any expensive centerpiece.
One more trick: gather your color inspiration from nature before you shop. A handful of wildflowers, a citrus fruit, a sprig of mint. Photograph it, then match your supplies to the photo. You will be amazed at how cohesive everything looks when the colors come from one source.
Paper Decorations That Cost Pennies
Paper is the best friend of the budget party host. It is cheap, forgiving, and it folds, cuts, and hangs like a dream. Here are the three paper projects that show up at every party I throw now.
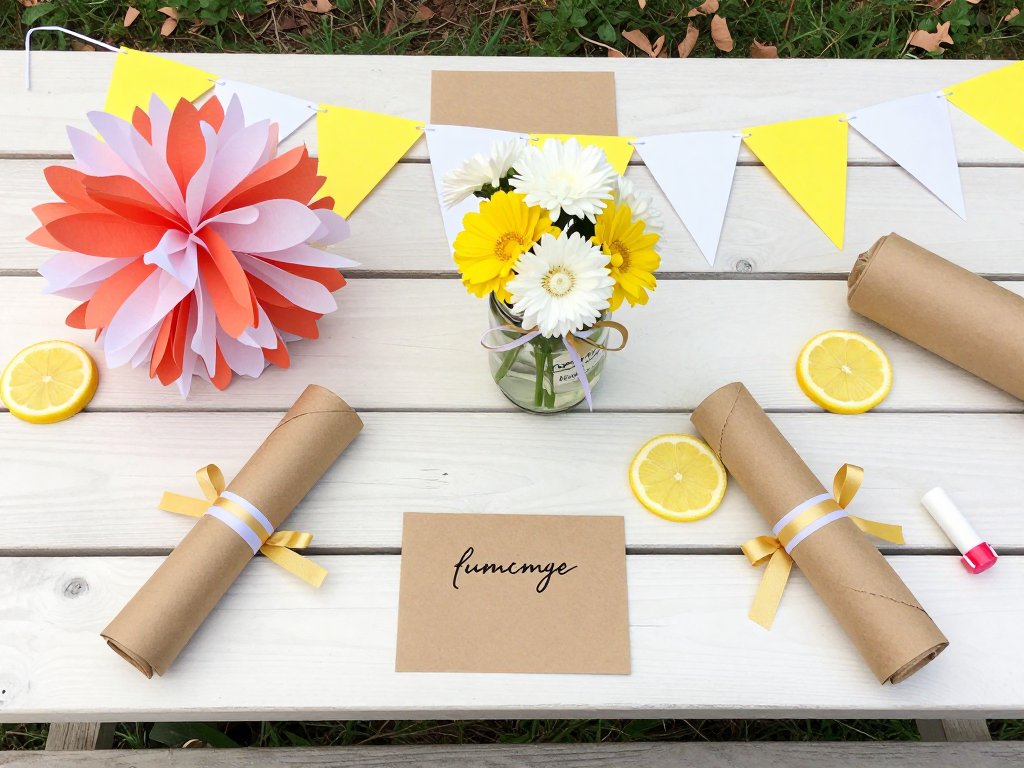
First, the triangle garland. Cut triangles from cardstock or scrapbook paper, fold the top edge over a piece of string or twine, and glue or tape it down.
That is the whole project. Twenty minutes and five dollars of paper makes a garland that would cost fifteen dollars online.
Hang it over the buffet, along the fence, or above the gift table. For a more polished look, use a paper cutter and keep every triangle the same size.
Second, tissue paper pom poms. Stack six sheets of tissue paper, fold them accordion-style, tie the center with pipe cleaner or string, and fan out the layers.
Fluff each layer gently and you have a fluffy ball of color that costs about fifty cents in supplies.
Hang three or four at different heights and suddenly the porch looks like a party venue.
Third, the letter banner. Cut out letters, or trace them from a printed template, and string them on twine with clothespins.
Spell out a name, a greeting, or just the word "SUMMER." This is the project that replaces the eighteen-dollar store banner, and it costs about two dollars in cardstock.
Keep the letters simple and large. Small, fiddly letters take twice as long and read worse from across the yard.
A quick tip on paper quality: the cheap stuff works, but a slightly heavier cardstock (65 to 80 pound) hangs better and does not droop in humid summer air. It is worth the extra dollar or two.
Centerpieces: The Mason Jar Method
Centerpieces are where stores make the biggest profit, so they are also where you save the most by making your own. My default summer centerpiece uses mason jars, and I have never paid more than a few dollars for one.
Here is the basic recipe. Wash a mason jar, remove the label, and fill it one of three ways: with grocery store flowers, with a floating candle and water, or with a tea light nestled in sand or pebbles.
Group three jars of different heights in the middle of the table and you have a centerpiece.
That is it.
If you want to dress the jars up, here are the upgrades that take about five minutes each.
Tie a ribbon or a strip of scrap fabric around the neck. Wrap the jar in twine and glue on a small flower or a sprig of herbs.
Or paint the outside with a single coat of chalk paint for a matte, expensive-looking finish.
Dollar store vases painted in one color look custom for the price of a bottle of paint.
My favorite summer twist is the citrus jar. Slice a lemon or lime into rounds, press them against the inside of the jar, and fill the center with water and flowers.
The fruit keeps the flowers upright and adds a pop of color that matches the color story perfectly.
It looks like a florist did it, and it costs about four dollars total.
One practical note: if your table is small, one tall jar in the middle beats three short ones. You want guests to be able to see each other across the table, so keep the arrangement below eye level for seated guests.
Table Settings That Look Thoughtful
The place setting is where handmade touches get noticed up close. Guests may not inspect your garland, but they will sit down and look at their plate. This is where you get maximum compliments per minute of effort.
Napkin rings are the easiest win. Cut a strip of ribbon about eight inches long, fold it into a loop, and glue or stitch the ends together.
Slide a rolled napkin through and you are done. One roll of ribbon makes a dozen napkin rings for less than the price of one store-bought set.
For a fancier look, add a single bead, a small wooden star, or a sprig of dried lavender to each ring.
Place cards do double duty as decor and seating guidance. Cut small rectangles of cardstock, fold them in half, and write each guest's name with a marker.
Tuck one into each napkin ring or lean it against the glass. If handwriting is not your strength, print the names on plain paper and glue them to the cards.
Nobody will know.
For the table itself, a fabric runner beats a paper tablecloth every time. A length of inexpensive cotton or linen, hemmed or even just fringed at the ends, can be washed and reused for years.
If fabric is not in the budget, a roll of kraft paper laid down the middle doubles as a runner and a canvas for kids to draw on.
That one doubles as entertainment, which we will get to in a minute.
Do not forget the serving side. Write the name of each dish on a small tag and prop it next to the serving bowl. It looks organized, helps guests with allergies, and costs nothing but a few minutes and a marker.
Lighting Sets the Whole Mood
Here is a trick that costs almost nothing and changes everything: after the sun goes down, turn off the porch light and let candles and string lights carry the party.
Warm, low light makes food look better, faces look better, and cheap decorations look intentional.
It is the cheapest upgrade in the history of entertaining.
Battery-operated tea lights are my go-to. A pack of twenty costs a few dollars, they last for hours, and they are safe to scatter on tables, along the fence, and inside the mason jar centerpieces. No open flames near kids or tablecloths, no smoke smell, no melting plastic.
String lights are worth the investment because they last for years. Drape them along the fence, across the patio ceiling, or through tree branches. Even a single strand of warm white lights transforms a backyard. If you use solar-powered lights, charge them in the sun all day before the party.
A quick safety note: keep any real candles away from paper decorations and never leave them burning when the table is unattended. Battery lights give you the glow without the worry, which matters when half the guests are chasing kids around the yard.
Keep the Kids Busy With Table Crafts
Every parent knows the real challenge of a summer party is not the decor. It is keeping small humans occupied while the adults talk. A craft table solves this, and it doubles as decoration.
The simplest version: a roll of kraft paper on a low table with a cup of markers and crayons. Kids draw, color, and leave their masterpieces behind as a de facto guestbook. You will want to keep those drawings. They are better than any store-bought centerpiece.
Paper flower making is the next level. Pre-cut a stack of petals, circles, and stems from scrapbook paper or cardstock, and let the kids assemble their own flowers with glue sticks.
The results are charmingly wobbly, which is exactly the point. Collect the best ones and tuck them into the mason jar centerpieces for an instant, kid-approved bouquet.
For slightly older kids, a simple friendship bracelet station with embroidery floss keeps hands busy for a surprisingly long time.
Pre-cut the floss into arm-length bundles and tape the ends to the table so kids can braid without tangling.
This works best at birthday parties where the guests all know each other.
Set the craft table up with a sign that says something like "Make a flower for the table" and let the kids run it themselves. They will be proud, the parents will be grateful, and you will have one more conversation piece that cost you almost nothing.
The Budget Breakdown: What Everything Actually Costs
Let us put real numbers on this, because I am a numbers person and I suspect you are too. Here is what my last summer cookout cost in supplies, compared with what the same setup would have run me at a party supply store.
The handmade version: cardstock and scrapbook paper for garlands and banners, about eight dollars. Two rolls of ribbon for napkin rings and jar dressing, six dollars.
Mason jars from the recycling bin plus a dollar-store pack of tea lights, four dollars.
Grocery store flowers for three centerpieces, twelve dollars. A roll of kraft paper for the runner and the kids' table, five dollars.
Total: about thirty-five dollars.
The store-bought version: one pre-made banner, eighteen dollars. A table runner, fifteen dollars. Three pre-made centerpieces, seventy-five dollars. A dozen napkin rings, eighteen dollars. Paper lanterns, twenty dollars. Place cards, ten dollars. Total: one hundred and fifty-six dollars, before tax.
That is a difference of about one hundred and twenty dollars, for a setup that took me a single afternoon.
And here is the part the stores do not want you to know: the handmade version looks better, because it matches your color story, your table, and your actual party instead of a catalog photo.
One hundred and twenty dollars is a lot of burgers, a lot of watermelon, or a nice bottle of something to share. That is the real point of all this. Party decor should never be the most expensive part of your party.
Final Thoughts
Remember the cookout that cost me $187? This year's version cost me thirty-five dollars, and honestly, it was the best party we have hosted.
The handmade banner had one slightly crooked letter that my daughter cut herself, and I would not trade it for a perfect foil one.
The centerpieces got more compliments than any store arrangement ever did, mostly because everyone asked, "Wait, you made those?"
Here is what I want you to take away. You do not need a big budget, a craft room, or a lot of talent to host a beautiful summer party.
You need one afternoon, a few dollars, and the willingness to make things with your own hands.
Every project in this guide is beginner-friendly, and every one of them can be finished in thirty minutes or less.
Start with one project. Pick the garland, the mason jars, or the napkin rings, and make just that one thing for your next get-together.
See how it feels to set something you made on the table. I will bet you a dollar that you will want to make the next one too, and that is the whole point.
Your party, your table, your hands. That is what makes it special, and it costs a fraction of what the store charges.