Introduction
There is a particular magic in watching two colors of wool become a pattern beneath your hands. Fair Isle knitting — more broadly called stranded colorwork — is one of the oldest and most forgiving traditions in our craft.
These stranded colorwork basics are written for the absolute beginner. You need only the knit stitch, a comfortable purl, two colors of yarn, and a willingness to trust the process.
Nothing here requires complicated math. Within a few evenings you can produce a two-color band of knitting that looks far more intricate than the stitches you actually worked.
In stranded colorwork you carry one color loosely across the back of the fabric while working the other. There is no seaming and no intarsia bobbins — just two strands traveling together around the round.
Fair Isle is a tiny island in Shetland, north of Scotland, home to fewer than sixty people. Its knitters gave the world a vocabulary of small, repeating motifs that still looks entirely modern.
We will move slowly and in order. First yarn and needles, then how to hold the strands, then charts, floats, and gauge, and finally a small project you can finish in a weekend.
Through all of it, hold one idea close: stranded colorwork asks for loose, calm hands. Tight hands pucker the fabric; relaxed hands make smooth, even cloth.
What Stranded Colorwork Really Is
Stranded colorwork is the technique of knitting with two or more colors in a single round, switching between them stitch by stitch to build a pattern. Only one color is worked at a time; the other waits, carried behind the work.
Those carried strands are called floats. They run horizontally across the wrong side of the fabric, which is why stranded knitting is also called Fair Isle or simply "two-color knitting."
Because the floats join the colors across the back, the fabric is double-thick and wonderfully warm. This is why traditional Fair Isle jumpers were prized for cold, damp island weather.
The alternative, intarsia, uses separate bobbins for separate blocks of color. Stranded work is different: the colors travel continuously, so small motifs can repeat around the whole round without interruption.
This is why stranded colorwork is almost always knitted in the round. Working flat means purling with floats, which is slower, and the floats sit on alternate rows — awkward for beginners.
In the round, the right side always faces you. Every round is plain knitting, and every float falls neatly onto the inside where it belongs.
Fair Isle patterns favor small motifs — diamonds, zigzags, stars, and cross shapes — usually no more than five or seven stitches wide. These tiny repeats are what give the style its rhythm and its forgiving nature.
You can absolutely begin here. If you can knit, you can learn this, and the learning curve is gentler than most knitters expect.
A Short History of the Fair Isle Jumper
Knitting reached Shetland by the sixteenth century, carried north along trade routes from Scandinavia and the Low Countries. Shetland wool was fine, plentiful, and perfectly suited to fine-gauge garments.
By the early nineteenth century, patterned knitting was a genuine industry on the islands. Women knitted socks, gloves, and lace for export, often paid in goods rather than coins.
Fair Isle itself was famous for its own style of knitting, worked at a fine gauge with many small motifs stacked in bands. The island's name eventually became shorthand for the whole technique.
Traditional Fair Isle had a strict discipline of color: only a handful of shades, and never more than two used in any single row. That restraint is exactly what makes the style readable.
Shetland dyers used what the land and sea could give them — madder root for red, indigo for blue, lichens for browns and golds, and the undyed fleece for white and fawn.
The style reached the wider world in the 1920s, when the Prince of Wales was photographed in Fair Isle pullovers. Demand exploded almost overnight, and the "Fair Isle jumper" became a wardrobe staple.
It has never really left us. Every winter shop windows fill with stranded colorwork again, and the motifs on them are cousins of the ones knitted on Shetland two centuries ago.
When you knit a small repeating motif today, you are joining a very long line of patient hands. That lineage is worth pausing over before you cast on.
Yarn and Needles for a First Project
For a first stranded project, choose a smooth, springy wool in fingering or DK weight. Wool has a slight grippy halo that helps the strands stay put instead of sliding away from you.
Acrylic and slick cotton are the usual beginner trap. Their smooth, slippery surfaces let floats slide loose, tension sags, and the finished fabric never quite evens out the way wool does.
Two or three colors are plenty. Fingering-weight Shetland-style yarns such as Jamieson's of Shetland Spindrift or Jamieson & Smith 2-ply jumper weight are ideal and come in dozens of traditional shades.
If you prefer something slightly thicker and quicker, a DK wool like Drops Karisma or Cascade 220 works beautifully. It shows motifs clearly without needing a magnifier.
For needles, use circulars, not straights. A 16-inch circular is perfect for a headband or cowl, while a 32- or 40-inch circular lets you use the magic loop method on the same projects.
Fingering weight typically wants a US 2 to US 4 needle — that is 2.75 mm to 3.5 mm. DK weight usually settles around US 5 or US 6, or 3.75 mm to 4 mm.
Add locking stitch markers, a row counter or a scrap of paper, a small pair of scissors, and a blunt tapestry needle for finishing. That is genuinely your whole kit.
Markers matter more than beginners expect. They separate pattern repeats and let you check immediately whether a round went wrong, rather than ten rounds later.
How to Hold Two Colors
There are two classic ways to manage two strands, and both are worth learning eventually. The first is one color in each hand, and the second is both colors in the left hand.
In the two-handed method, you hold one color English-style in your right hand and the other Continental-style in your left. The strands never tangle because they live in different places.
This approach also solves a subtle problem called color dominance. The color carried lower or from the left tends to sit slightly forward, making it the natural choice for your motif.
Keep your motif color in the same hand throughout the whole project. Swap hands mid-piece and you will see the pattern shift its brightness in a visible line.
If you already knit Continental, hold both colors in your left hand, one over the index finger and one over the middle finger. It feels cramped for an hour, then becomes automatic.
For most brand-new colorwork knitters, the two-handed method is easier. Each hand does what it already knows, and the muscle memory arrives quickly.
Try both on a scrap swatch before committing. Ten minutes of experimenting now saves a whole project of awkwardness later.
Reading a Colorwork Chart
A colorwork chart is simply a picture of the fabric, seen from the right side. Each square on the grid equals exactly one stitch, and each horizontal row of squares equals one round of knitting.
Read the chart from right to left, the direction you knit. Within each round you work the squares in order, changing colors as the picture tells you to.
The first stitch of every round is the rightmost square of that round's row. If the chart shows a round beginning with two dark squares, knit two dark stitches, then continue across.
Because you are working in the round, every chart row is read the same direction — right to left, no exceptions. Flat knitting charts alternate direction, but round knitting keeps one rhythm. This is one more reason colorwork belongs in the round.
Track your place with a magnetic board, a sticky note, a highlighter, or a printed chart inside a plastic sleeve marked with a dry-erase pen. Any method works as long as it is honest.
Most patterns also include a legend mapping each symbol to a color. Some charts show motifs in symbols rather than shades, which is friendlier when your chosen palette differs from the sample.
Check your work every few rounds. Count the repeat — usually eight or twelve stitches — and confirm it looks like the chart before moving on.
Strand Tension and Floats
Floats are the horizontal strands the unused color leaves on the back. They should be loose enough to lie flat, but not so loose that they loop and snag on fingers and jewelry.
The classic rule is simple: never carry a float across more than three or four stitches without catching it. Longer floats are the ones that catch, pull, and wear through.
To catch a float, hold the working yarn, bring the resting color up over or under it, and knit the next stitch. This secretly anchors the strand into the fabric.
Alternate whether you catch over or under as you move across the row. Catching the same way every time makes the hidden color peek through as a dotted line on the right side.
Puckering is the beginner's most common complaint. It happens when floats are pulled too tight, and the fabric contracts around them like a gathered waistband.
The fix is wonderfully physical. Before knitting the next stitch in a new color, gently stretch the just-finished stitch out on the right-hand needle tip. Give the float that extra slack.
Keep the knitting spread across the full circumference of the needle rather than bunched up. Bunched work always tightens floats without your noticing.
Remember that blocking hides a great deal. Small tension irregularities in wool relax, bloom, and settle after a warm bath, vanishing into the finished fabric.
Choosing a Color Palette
Absolute beginners should work with two or three colors, no more. Every extra shade is one more strand to manage, and one more chance for tangles.
Contrast matters far more than color choice. A motif only reads clearly when it sits against a background noticeably different in lightness — dark against light, or vice versa.
Test candidate combinations by photographing the yarns together in black and white. If the motif color and the background turn into the same gray, the pattern will disappear, however lovely the colors are.
Traditional Shetland combinations are a superb starting point. Undyed white or fawn as the background, with indigo blue, madder red, moorit brown, or a warm gold as the motifs.
These shades were dyed from plants and lichens, and they were designed to sit beside one another. That is why the classic palette always feels balanced and never clashes.
One reliable formula: a light neutral background, one strong dark motif color, and one accent used sparingly for single rounds or tiny highlights.
Buy enough yarn at the start. Dye lots vary, and running out mid-project in a subtly different shade is a heartbreak no knitter needs.
Why You Must Swatch in the Round
Gauge saving is essential, and for colorwork it must be done in the round. A flat swatch lies to you, and the lie is predictable.
When you knit flat, you alternate knit and purl rows. Purl stitches sit differently from knit stitches, so the fabric behaves differently — and your floats land only on alternate rows.
In the round, you knit every stitch and floats fall evenly on every round. The fabric is slightly denser, and your round gauge is usually tighter than your flat gauge.
The traditional trick is a tubed swatch. Cast on roughly sixty stitches, join in the round, and knit a colorwork tube about four inches deep on a 16-inch circular.
If you need to measure gauge honestly, cut the tube open and lay it flat to dry. Cutting a swatch feels dramatic, but it costs almost nothing and tells the truth.
Measure a four-inch section in the middle, never at the edges. For fingering weight expect roughly 32 stitches and 40 rounds; for DK, around 22 stitches and 28 rounds.
Compare your numbers to the pattern and change needle size if needed. A difference of even two stitches per four inches will change the finished size of a cowl noticeably.
Swatching also serves as your practice ground for holding two colors, reading the chart, and catching floats, all before the real project begins.
Your First Project: A Two-Color Headband
For a first stranded piece, make a headband or a short cowl in a small repeating motif. Both are worked in the round, both need only two colors, and both take an evening or two.
Choose a simple motif: a four-by-four checkerboard of alternating colors, or a small diamond repeated eight times around. Both read beautifully and teach floats without stress.
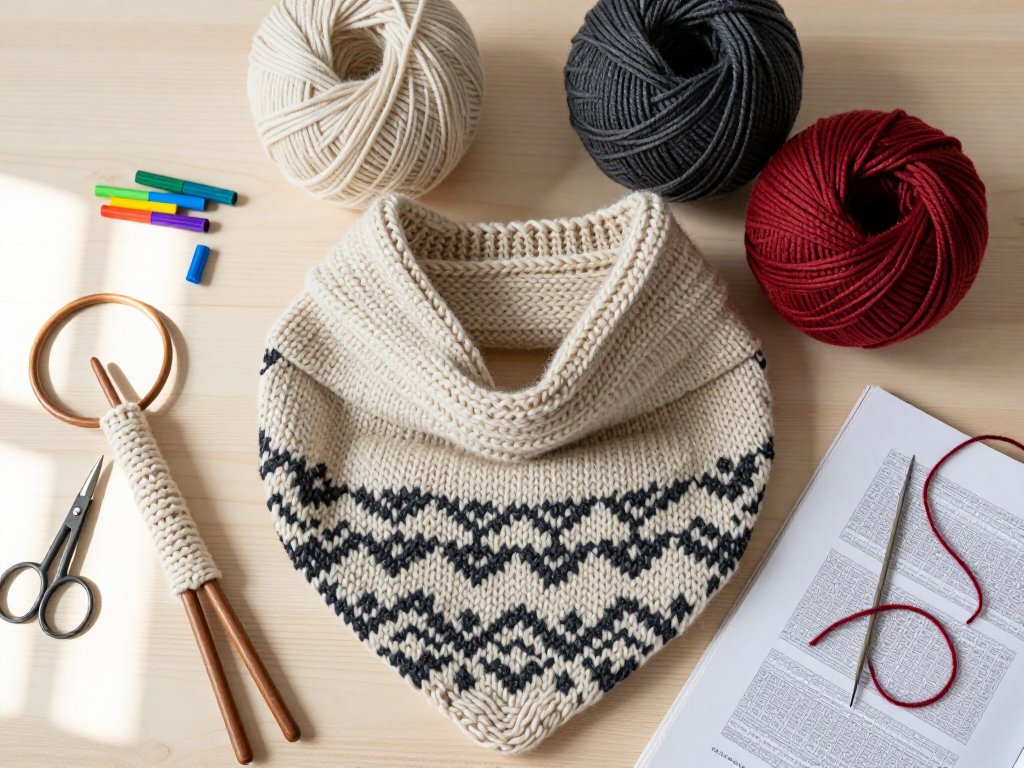
If you would rather jump straight to something more wearable while still staying simple, a beginner-friendly hooded cowl pattern is a lovely warm-up that uses the very same in-the-round skills, just on a slightly larger scale.
Start with a long-tail cast-on of about eighty-eight stitches on a 16-inch circular needle. Join carefully in the round, making sure the cast-on edge is not twisted.
Work four rounds of two-by-two ribbing — knit two, purl two — in your background color. This gives a snug, stretchy edge that will not roll.
Then begin the chart. Knit round one in your motif color, round two in the background, following your chosen repeat around the headband.
Every time a float spans more than three stitches, catch it. Every time you finish a colored stitch, stretch it slightly on the right needle tip before continuing.
Continue the colorwork until the band measures about four inches, or another length you prefer. Then work four rounds of two-by-two ribbing again in the background color.
Bind off loosely in pattern, using a needle one size larger if your cast-off tends to be tight. A strangled bind-off will ruin an otherwise perfect headband.
You now have a finished two-color piece. The first one is never perfect, and it does not need to be — it is a record of a skill you have just acquired.
Common Beginner Problems and Fixes
Puckering, as we said, comes from tight floats. Stretch each finished stitch on the needle tip, and keep the work spread across the whole circular rather than bunched near the tips.
Uneven tension is almost universal in first projects. Some stitches sit loose, others snug, and the fabric looks slightly lumpy on the needles.
Do not panic at this stage. Wool's fibers open and relax in a warm bath, and blocking evens out exactly this kind of small inconsistency.
Lost or dropped stitches look alarming in stranded work but are easy to rescue. A float holds the errant stitch in place, so it rarely runs as far as it would in plain stockinette.
Use a small crochet hook to catch the dropped stitch and ladder it back up, taking care to bring the float in behind it at the right round.
Tangled yarn is the other great beginner frustration. Two balls rolling freely across the floor will twist around each other within three rounds.
The cure is yarn management. Put each color in its own bowl, or place both balls in a large zip-top bag with a small hole cut in the corner for the strands to feed through.
Turn the work gently in the same direction each round, and untangle the strands every few rounds rather than waiting for a crisis. A stranded-knitting ring worn on your finger can hold the strands apart neatly.
Finally, if you lose your place in the chart, count the stitches in the current repeat. The pattern will almost always tell you where you are within a few seconds of counting.
Finishing: Weaving In and Blocking
Weaving in the ends of a stranded project is a genuine pleasure, because the floats give you somewhere to hide. Thread the tail on a blunt tapestry needle and work it through the wrong side.
Travel diagonally or horizontally through the backs of stitches for two to three inches, changing direction once so the tail cannot work loose. Never knot wool; knots work their way out over time.
Wet blocking is where stranded wool becomes magical. Fill a basin with cool water and a little gentle wool wash, and submerge the piece without agitation.
Let it soak for twenty minutes, then press the water out gently — never wring or twist, which would felt the wool and distort the fabric.
Roll the piece in a towel and press to remove excess moisture. Then lay it flat, pinning it gently to the measurements you want the finished fabric to hold.
As it dries, the wool fibers bloom and fill the tiny gaps between stitches. Floats relax, minor puckering softens, and the pattern sharpens into something crisp and even.
This is the transformation that convinces beginners to keep knitting colorwork. Fabric that looked slightly handmade on the needles comes off the pins looking professional.
Where to Go Next
Once your headband is finished, the world of stranded colorwork opens quickly. The same skills — holding two colors, reading a chart, catching floats — scale up to mittens, hats, and full sweaters.
Try a pair of mittens next. They are small, quick, and every round teaches you something about tension and pattern rhythm.
Then consider a hat worked in the round from the brim up, with a simple repeating band around the crown. Hats are the perfect bridge between swatch and garment.
Collect motifs as you go. A Fair Isle notebook of small patterns, drawn on graph paper, becomes a personal library you will use for decades.
Learn the Shetland names for things, too — a "peerie" is a small all-over pattern of tiny motifs, and knowing the vocabulary deepens the pleasure of the craft.
Most of all, keep your hands loose and your expectations kind. Colorwork rewards patience, and patience is the one material you cannot buy at the yarn shop.
You began with two strands and a chart. You end with a piece of cloth that carries a tradition stretching back centuries across a tiny northern island.