Introduction
I once paid eleven dollars for a tiny glass bottle of sepia ink. It was smaller than my thumb. I used half of it on a single afternoon of sketching and it was gone.
That bottle cost more than a week of my coffee. Meanwhile, the black walnut tree two streets over was dropping hulls all over the sidewalk, and every one of them was full of the exact same brown.
My first attempt at fixing that mistake went badly too. I boiled some berries, poured the purple water into a jam jar, screwed the lid on, and put it on a shelf. Three weeks later it had a fuzzy grey cap and smelled like a swamp.
Both of those failures were fixable, and neither one needed money. So here is the honest version of how to make ink from plants: what actually works, what fades, and what a batch really costs you.
So What Actually Happens in That Pot?
Plant colour lives inside the plant's cells. Those cell walls are tough little packets, and as long as they stay closed, the pigment stays locked in and your water stays clear.
Heat and water are what break them open. Simmer plant material in water and the walls soften, burst, and release their pigment into the liquid. What you strain off afterward is coloured water.
Here is the part that trips up most beginners, so I'll draw the line clearly. Dye and ink come from the same extraction. Dye is meant to soak into fibre. Ink is meant to sit on a surface and flow from a nib.
So ink is just that same coloured liquid reduced further and thickened. You simmer it down to concentrate the colour, then add a binder so it grips paper instead of bleeding through it.
Same pot, same fruit, different destination. That is the whole trick, and once it clicks, the rest is just ratios.
What You Need (And What It Really Costs)
Almost none of this has to be bought new. A thrift store run and your kitchen drawer will cover most of it.
- An old stainless steel or enamel pot and a wooden spoon. Thrift store, a couple of dollars. Never your good cookware — the tannins will stain it permanently.
- A fine mesh strainer plus paper coffee filters. The mesh gets the big bits; the filters do the real work.
- Clean glass jars with lids. Jam jars are perfect. Small ones beat one big one, for reasons I'll get to.
- Distilled or filtered water. If your tap water is hard, the minerals will dull your colours before the ink is even bottled.
- White vinegar and salt. This is the cheap colour-set pair, and it costs pennies per batch.
- Gum arabic. The thickener. Order it once and it lasts for years. One part gum arabic to about ten parts ink is the starting ratio.
- A preservative. Clove or wintergreen essential oil, or a few whole cloves dropped in the jar.
- Cheap labels and a notebook. Non-negotiable. An unlabelled jar of brown liquid tells you nothing next season.
- Alum, if you want to get serious. A bag of alum powder costs a few dollars and acts as a mordant, helping colour bind to the paper instead of sitting on top of it.
Total spend for a beginner setup, if you own nothing: under twenty dollars, and most of it is reusable for years.
One warning about the pot. Once you simmer walnut hulls or oak bark in it, that pot is no longer cookware. Keep it in the craft cupboard and leave your good pans alone.
Plant by Plant: What Actually Gives Colour
Not every pretty plant makes good ink. Some give stunning colour that vanishes. Others give a dull brown that outlives your sketchbook.
- Black walnut hulls — deep warm brown, very high tannin. Wear gloves. It stains skin, counters and clothing and does not come out.
- Oak galls and oak bark — dark brown to near-black. Strong tannin, excellent staying power.
- Buckthorn berries — green-yellow shifting to a bright, almost neon green.
- Wild grapes and blackberries — rich purple. Beautiful, and quick to fade.
- Blueberries — soft blue-purple. Fades faster than almost anything on this list.
- Marigold and cosmos petals — yellow through orange. Marigold holds better than most flower petals.
- Japanese maple and dogwood leaves — autumn reds and browns, best gathered in fall when the leaves are already turning.
- Avocado pits — a surprising soft pink. Chop them small; they are hard as rocks.
- Beet — vivid magenta that fades within weeks.
- Red cabbage — purple, and pH-sensitive enough that it will change colour on you.
Here is the honest ranking. High-tannin sources last. Walnut, oak galls and bark are your keepers. Juicy berries fade fastest, and they are the ones beginners reach for first.
Timing matters as much as the plant. Flower petals give the most colour in the first day or two after opening, and almost nothing once they wilt.
Leaves are strongest in late summer, and autumn leaves give warmer reds and browns after the chlorophyll breaks down. Bark and hulls hold their tannin year round, which is another reason they are the forgiving choice.
How to Make Your First Batch
This works for leaves, flowers, stems, berries, bark and even roots. Start with one plant, not five.
- Gather one to two cups of plant material. For a beginner batch, that is roughly a small bowlful.
- Chop it up. More cut surface means more cells open at once and stronger colour from less plant.
- Add it to water at about half a cup of plant material per cup of water.
- Stir in one teaspoon of white vinegar and a dash of salt.
- Simmer gently for twenty to forty minutes. Gentle, not rolling. Watch that the pot does not boil dry.
- Pull the plant material out when the colour has left it. If it is still bright, put it back.
- Strain twice — mesh first, then a coffee filter. Never skip the second strain or your ink will clog a pen nib.
- Reduce further if you want stronger colour. Simmer the strained liquid down and watch it darken.
- Cool, then stir in gum arabic and a drop of preservative.
- Bottle it, leaving a little air space, and label it with the plant and the date.
That is the full method. Everything after this point is refinement, and refinement is where the good ink comes from.
Test Strips and a Swatch Book
Here is where most people lose their results. They make one great batch of purple, use it up, and cannot remember what they did.
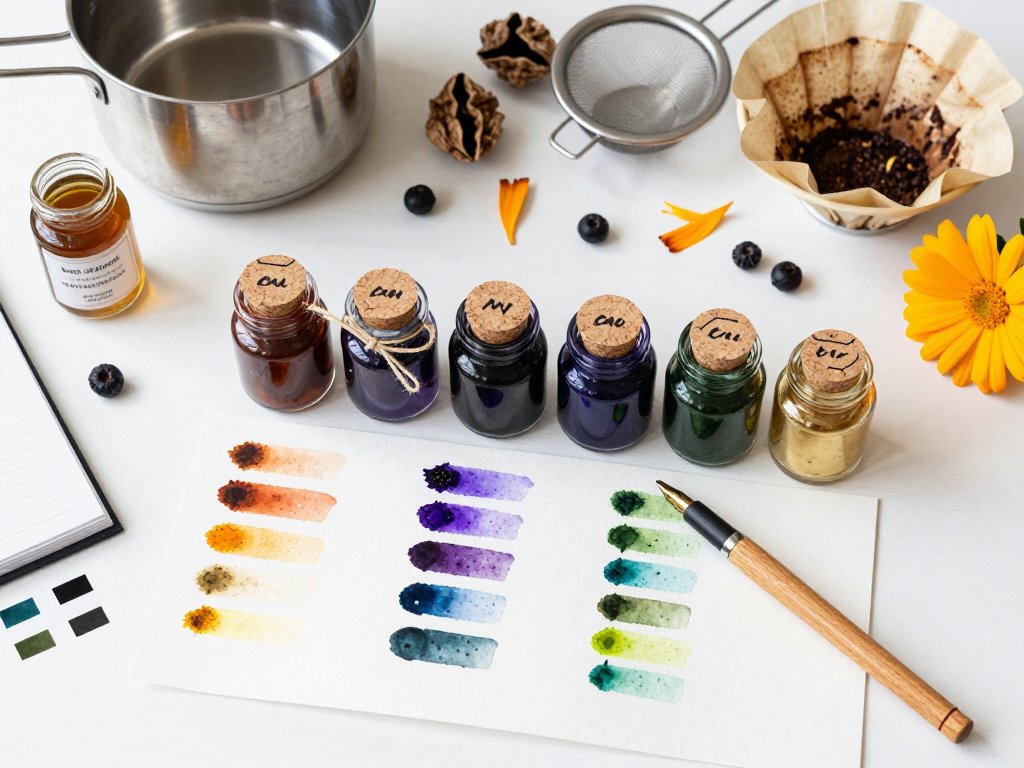
Make test strips on watercolour paper for every batch. Write the plant name, the date and any additives right on the strip while the ink is still wet.
The wet colour, the dry colour, and the colour after a week on a sunny windowsill can all be three different things. Berry inks darken as they dry and then grey out in light.
So why bother with a swatch book? Because it turns one lucky batch into a repeatable recipe. Salt the strips into a cheap sketchbook and you build a pigment library for free.
Record the ratio too, not just the plant. Half a cup per cup, one teaspoon of vinegar, twenty-five minutes simmering — that line is what lets you hit the same purple again in October.
Cheap Additives That Change the Colour
Once you have a baseline batch, small additions can shift it dramatically. Change one variable at a time so you know what did what.
- A rusty nail. Iron darkens and saddens almost everything, pushing browns toward grey-black. A rusty nail for an hour, not a week — a little goes a long way.
- Baking soda. Pushes colours toward blue-green and purple. A pinch, stirred in, watching it change.
- Cream of tartar or citric acid. Brightens colours and can rescue a muddy batch.
- Salt. Changes how pigment settles, which affects how an ink spreads once it hits wet paper.
Add, test, label the strip, repeat. That loop is exactly how a beginner turns kitchen chemistry into a personal palette.
Storage, Shelf Life and the Mould Problem
Keep ink in a cool dark place. Not on a sunny windowsill, and not next to the stove.
Use small jars instead of one big one. You open a small jar, use it up, and the rest of your stock stays sealed and clean.
Always add a preservative. Mould needs warmth, light, oxygen and no competition. The cloves take care of two of those.
Expect bright berry inks to fade or ferment within weeks. That is not a failure on your part, it is the nature of the pigment.
The honest version: high-tannin inks last for years, and berry inks are for projects you photograph, not heirloom documents. Label accordingly.
What Foraged Ink Is Actually Good For
Dip pens and brushes are the natural fit. So is wash work — thin a little ink with water and layer it on watercolour or mixed-media paper.
It is also lovely for tinting paper before you bind it into a journal. A thin brown wash over cream paper makes a sketchbook look fifty years old.
Stamping and relief printing work well too, especially if you thin it and test first. If you want to try printing with it, carve your first linocut block and pull a few test prints on scrap paper before you commit.
Be realistic about the limits. Foraged ink is thinner and far less lightfast than commercial ink. It belongs in sketchbooks and one-of-a-kind pieces, not on anything that must survive decades of sunlight.
The Arithmetic on a Bottle of Ink
Let's do the math plainly, because this is the part that made me stop buying ink.
A modest commercial artist ink runs about five to twelve dollars for a small bottle. Call it eight dollars for two fluid ounces.
Your batch: roughly two cups of finished ink, about sixteen ounces, from material you gathered for free. Vinegar and salt cost pennies. Gum arabic for that volume costs maybe twenty cents.
So call it under a dollar for eight times the volume. Even if you burned an entire afternoon gathering and simmering, the second batch takes forty minutes because you already know what you are doing.
And if you sell at craft fairs or on Etsy, this gets more interesting. A small bottle of ink paired with two of your sketches, with a handwritten label naming the plant, is a cheap add-on with a real story behind it.
Buyers pay for stories. You have one for free in your backyard.
Foraging Without Being That Person
Take small amounts from plants that are abundant. A handful from a thick patch, never a whole plant, and never strip a patch bare.
Skip roadside verges and anything near sprayed lawns or fields. You are concentrating whatever is on that plant into a liquid you will handle.
Never take protected species, and never forage on protected land or private property without permission.
Be certain of your identification before you handle anything that might get on your skin. Unsure means leave it alone.
Wear gloves for walnut hulls and anything with milky or sticky sap. Walnut stains are essentially permanent, and some saps irritate skin.
Troubleshooting: When It Goes Wrong
Almost every problem has a specific cause. Here are the ones I have hit personally, and the fix that actually worked.
My ink is thin and bleeds
Add gum arabic a drop at a time, stirring and testing between drops. You can also reduce the liquid further before bottling. Thin ink usually just needs less water.
My colour came out pale and weak
Three likely causes: too much water, plant material past its best, or too short a simmer. Reduce the batch down and it will often come back.
There is mould in the jar
Preservative missing, jar not clean, or the storage spot is too warm. Dump it, scrub the jar with hot water, and start again with cloves or a drop of oil.
My ink clogs the nib
You skipped the coffee-filter strain. Mesh alone leaves fine plant particles that settle and block a feed. Strain it again through a filter and bottle the clear liquid.
The colour changed in the bottle
Either the pH shifted or light got to it. Move it to a dark cupboard, and store it in the smallest jars you have.
It stains beyond where I wanted it
Foraged ink is meant to soak in, so masking is your friend. Tape off edges, test on scrap first, and wear an apron you do not love.
My colour went muddy and dirty
Usually too many plants in one pot, or an iron addition that went too far. Iron darkens fast, so go in small steps and stop the moment you like what you see.
The ink separated in the jar
Pigment settling is normal, especially with thick vegetable inks. Shake or stir before you dip. If it separates into two clear layers, the gum arabic did not fully dissolve.
Why Your Backyard Is the Better Art Store
You do not need a shopping cart. You need an old pot, a coffee filter, a jar and a walk.
Start with walnut hulls in fall if you have them — the tannins almost guarantee a usable result on your first try. Bottle it, label it, and make a test strip.
Then try one more plant next weekend, and one more after that. That is how to build a palette nobody else owns, for the price of vinegar and an afternoon.
The tree dropping hulls on your sidewalk is not litter. It is ink. Somebody paid eleven dollars a bottle for it, and you just walked past it.
