Introduction
There is a moment every potter remembers: the first time they held a lump of clay that they had dug out of the ground themselves.
It feels different from the tidy gray blocks from the art supply store. It is heavier, grittier, more honest.
It carries the smell of riverbank and rain, and somehow, the memory of the place it came from.
Foraging wild clay is one of the oldest human crafts. Long before pottery wheels and kilns, people dug clay from the earth, cleaned it with their hands, and shaped it into vessels for cooking, storing, and carrying water.
That tradition is still alive, and it is more accessible than you might imagine.
This guide will walk you through the whole journey: where to look for clay, how to test whether what you found is the real thing, how to clean and prepare it for working, and how to fire your finished pieces.
You do not need special equipment, and your first dig can happen on a weekend afternoon.
What Wild Clay Is
Clay is not a single substance but a family of fine-grained minerals — mostly hydrated aluminum silicates — that form when rocks weather over thousands of years.
Water, ice, and time break down feldspar and other minerals into particles so small they feel smooth between your fingers, and those particles are what make clay plastic: able to be shaped and to hold that shape.
Not all clay is alike. Primary clays sit near the rock they came from, and they tend to be pure and pale, like kaolin. Secondary clays have been carried by water — down rivers, across floodplains — picking up iron, sand, and organic matter along the way.
Most wild clay you will find is secondary clay, and that is good news for beginners, because the impurities give it color and make it more workable.
That color is one of the pleasures of foraging. A clay that fires terracotta red, a clay that fires warm buff, a gray clay that turns almost black in a wood fire — the earth has a whole palette, and each dig is a surprise.
Is It Legal and Safe to Forage Clay?
Before you start digging, take a moment to consider the practical and legal side. Foraging clay is generally safe and legal in most places, but there are three questions worth asking first.
Whose land is it? On your own property, you can dig freely. On public land, rules vary widely — some parks and forests allow small amounts of personal collection, others prohibit it entirely.
When in doubt, ask a ranger or land manager; a quick conversation can save you a fine and keeps the hobby respectful.
On private land, always get permission; many landowners are delighted to let you dig a bucket of clay from an unused corner of their field.
Is the site clean? Avoid clay near roads, industrial sites, old mines, or agricultural fields with heavy pesticide use.
The clay itself may be fine, but surface runoff can carry contaminants you do not want in your hands or your kiln.
Look for wild, natural spots: stream banks, riverbeds, eroding hillsides, and freshly dug construction cuts.
Is it really clay? Not every gray, slippery deposit is clay. The field tests in the next section will tell you, and they take about two minutes.
Where to Look for Wild Clay
Clay hides in predictable places. Once you know the pattern, you will start spotting it everywhere — on hikes, on drives, even in your own backyard.
Stream and riverbanks. Water is the great clay mover. Look where the bank has been undercut by the current, especially on the outside of bends where the water slows and drops its sediment. Exposed layers of smooth, dense earth, often gray, blue-gray, or rusty orange, are a classic find.
Road cuts and construction sites. Wherever earth has been sliced open, you can see the layers. Fresh cuts through hillsides often reveal bands of clay that have been buried for millennia. Only collect where it is safe and legal — never on active sites without permission.
Eroding hillsides and gullies. After heavy rain, look for areas where soil has washed away to expose the subsoil. Clay layers are often the slickest, most water-retentive bands.
Your own garden. Dig down a foot or two in a damp corner and you may find workable clay. Many gardeners curse the sticky subsoil that clogs their spade; that same soil is a potter's treasure.
Animal burrows and tree falls. When roots pull up or animals dig down, they bring subsoil to the surface. A fresh molehill or a toppled tree's root ball can reveal a clay layer without you digging at all.
The Field Tests: Is This Really Clay?
Before you fill a bucket, run three quick tests. They take minutes and will save you from hauling home a bag of ordinary mud.
The smell test. Wet clay has a distinctive earthy, mineral smell — not rotten, not grassy, but like damp basement crossed with fresh soil. If the sample smells like living soil or decay, it is probably topsoil, not clay.
The smear test. Rub a small piece of dampened soil between your thumb and forefinger. Clay feels smooth and slippery, almost soapy, and it smears like butter. Sandy soil feels gritty and falls apart; silty soil feels like flour but lacks the slippery stick.
The roll test. Roll a piece of damp soil between your palms into a coil about the thickness of a pencil, then gently bend it into a ring.
Real clay will hold together without cracking or crumbling. If it cracks badly, it needs more water — or it is too sandy to use alone.
The shine test (optional). Rub a dry sample with your fingernail. True clay takes on a soft, satiny shine, like polished stone. This is the test archaeologists and potters have used for centuries.
If your sample passes the smear and roll tests, congratulations — you have found clay. Now comes the fun part: getting it home.
Digging and Collecting: What to Bring
Foraging clay requires very little gear, but a few items make the trip comfortable and safe.
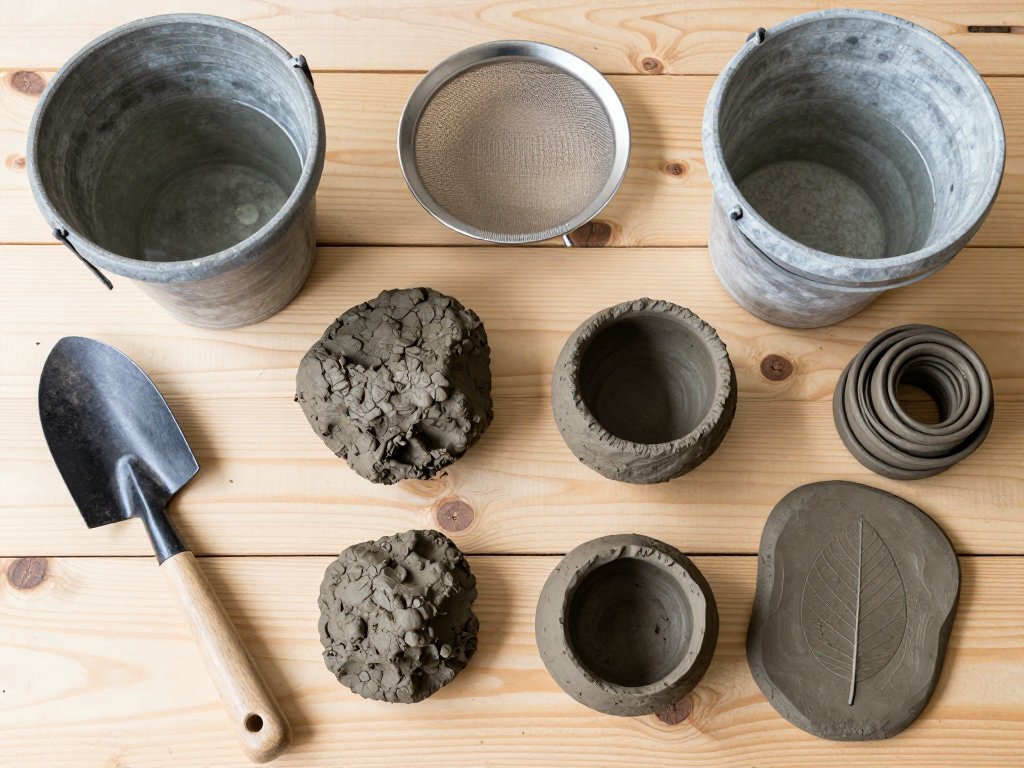
Buckets. One sturdy bucket for clay and one for water. A five-gallon bucket of wet clay is heavier than you expect, so take only what you can carry.
A trowel or small shovel. For digging. A garden trowel is perfect for most spots.
A tarp or old sheet. Spread it on the ground to keep your dig site tidy and to let clay dry partially before packing.
Gloves. Optional but pleasant; clay can be cold and gritty.
Water bottle. To rinse your hands and test samples.
Bags or containers. Ziplock bags for small samples from different spots. Label each one — you will want to know which clay came from where.
When you dig, take clay from below the dark topsoil layer. The top few inches are full of roots and organic matter; the good stuff is underneath.
Collect a few different samples if you can, from different spots, and test each one.
Variety is the spice of foraging — you may find two clays that are lovely on their own or that mix beautifully together.
Cleaning Your Clay: The Slaking Method
Raw clay is full of stones, roots, and grit. Before it becomes workable, it needs a bath. The classic method is called slaking, and it uses nothing more than water and time.
First, break your clay into small pieces — walnut-sized or smaller — and spread them on a tarp to dry completely. This step matters: bone-dry clay dissolves into water much more readily than damp clay. Depending on the weather, this takes a few days to a week.
Once the pieces are dry, place them in a bucket and cover them with water.
Let them sit. Over the next day or two, the clay will slake — it will fall apart and dissolve into a thick slurry, while stones and heavy grit sink to the bottom.
This is the first, easiest separation: nature does the heavy lifting.
Stir the slurry gently with your hands or a stick. You are looking for a smooth, creamy consistency, like thick milkshake. If it is too stiff to stir, add a little water; if it is soupy, let it settle and pour off the excess.
Sieving and Levigation
Now the slurry needs to lose its impurities. Two techniques, one rough and one fine, will get it there.
Sieving. Pour the slurry through a sieve or screen — a kitchen strainer works for a first pass, a window screen stretched over a frame is better, and a fine-mesh nylon bag is ideal.
The sieve catches roots, pebbles, and lumps, and the smooth slurry passes through. Press the solids with a spoon to squeeze out every bit of clay.
Levigation. This is the potter's refinement: pour the sieved slurry into a bucket, add plenty of water, and stir thoroughly.
Let it settle for a few minutes — just long enough for the heavy sand to sink.
Then carefully pour the cloudy water (which holds the fine clay in suspension) into a second bucket, leaving the sand behind.
Repeat this a time or two, and your clay becomes progressively finer and silkier.
You can sieve twice or three times if the clay is very dirty. Each pass removes more grit, and the difference is tangible — the clay in your hands goes from rough to buttery.
Drying, Wedging, and Storing
Your clean slurry is full of water, and working with it means getting that water out — slowly and evenly.
Drying the slurry. Pour the slurry onto a plaster bat, a thick slab of drywall, or several layers of old towel, spread over a wooden board.
The absorbent surface pulls water out from below. As the clay firms up at the edges, fold it inward — this keeps it from drying unevenly.
When it reaches the consistency of stiff dough, it is ready to wedge.
Wedging. Wedging is the potter's kneading: you cut the clay, stack it, and push it together in a rhythmic motion to remove air bubbles and distribute moisture evenly.
To wedge, press the clay against a table with the heels of your hands, fold it over, and repeat.
You will feel trapped air pop out as you work. Ten minutes of wedging turns lumpy clay into a smooth, homogenous block ready for the wheel or the hand.
Storing. Wrap wedged clay tightly in plastic bags or damp cloths inside a sealed container. Stored this way, wild clay keeps for months. If it dries out, add a little water and re-wedge.
Testing Your Clay: Shrinkage and Firing
Before you commit a precious lump to a project, get to know your clay's personality. Every wild clay is different, and a few simple tests tell you how to treat yours.
The shrinkage test. Roll a coil of clay and cut it to exactly 10 centimeters (or 4 inches).
Let it dry completely, then measure again — the difference is your drying shrinkage, usually 5 to 8 percent.
After firing, measure once more for your total shrinkage. This tells you how large to make your pots so they come out the size you want.
The firing test. Make a small test tile or pinch pot, dry it completely, and fire it in your kiln at a low temperature — around 1000°C (1832°F, cone 06 to 04) for most earthenware clays.
See how it comes out. If it is chalky and absorbs water, it is under-fired; if it warps or bloats, it is over-fired.
Wild clay is almost always earthenware, which means it matures at lower temperatures and is not suitable for oven or table use unless glazed — but it is perfect for sculpture, planters, and decorative pieces.
An important caution. Some wild clays contain iron or other minerals that can melt or blister at high temperatures, especially in a fast firing.
If you are new to this, keep your first firings low and slow, and never fire wild clay in a kiln you are not prepared to clean afterward.
Many foragers start with pit firing or bonfire firing, which suits earthy clay beautifully.
Simple First Projects with Wild Clay
Now the reward. Here are three gentle projects that show off wild clay's character without demanding precision.
Pinch pots. The classic first project. Roll a ball of clay, press your thumb into the center, and pinch the walls evenly as you rotate the pot.
Keep your fingers wet and your movements slow. A wild clay pinch pot, with its earthy color and finger ridges, looks like it was made by hands — because it was.
Coil pots. Roll long coils of clay and stack them in a spiral, blending the joins with a wet finger or a rib. Coiling is forgiving and meditative, and it lets you build larger, expressive vessels. Experiment with leaving the coils visible for a textured, rustic look.
Small sculptures and ornaments. Wild clay is wonderful for pinch animals, leaf bowls, and simple garden ornaments.
Press a real leaf into a slab of clay for an imprint, or roll tiny beads to string into a necklace.
Because these pieces do not need to hold liquid, they are the most forgiving of all.
Whichever you choose, remember that your first wild clay pieces are not about perfection. They are about connection — to the material, to the process, and to every potter who came before you.
Conclusion
Foraging wild clay is a reminder that craft does not begin at the art supply store.
It begins in the ground, with your hands, in a stream bank or a roadside cut you have walked past a hundred times.
The clay you dig, clean, and shape carries a story no store-bought block can match.
Start small: find a spot, pass the tests, bring home a bucket. Let your first pinch pot be wobbly and your first firing be a learning experience. Every wild clay potter has a shelf of experiments, and every one of those experiments taught them something the next pot used.
The earth has been making clay for millions of years. Now you know how to find it, clean it, and shape it into something of your own. That is a skill worth digging for.
