Introduction
My grandmother's hallway held one framed print, and that frame was real gold leaf. As a child I touched it whenever nobody was watching, expecting warmth, finding only cool metal that flashed in the afternoon light.
That flash stayed with me. Years later, at a flea market, I bought a cracked gilded frame for very little, mostly for the memory. Then I learned the craft behind it and began gilding my own paintings instead.
Here is the good news. Gold leaf gilding is not a mystery reserved for restorers. With imitation leaf, a small bottle of adhesive, and a patient weekend, you can add genuine shimmer to your own work.
This guide walks absolute beginners through every step. We will cover what gold leaf is, which type to buy first, how to prepare a surface, and how to apply, burnish, patch, and seal it. No specialist studio is required.
What Gold Leaf Actually Is
Gold leaf is metal beaten impossibly thin, often around a tenth of a micron, far thinner than a human hair. At that gauge it becomes translucent and weightless, drifting on the slightest breath of air.
Genuine gold leaf is sold by karat. Standard gilding leaf is 23kt or 22kt, alloyed slightly with silver and copper so it stays workable. It never tarnishes and it lasts for centuries.
Imitation leaf, also called composition leaf, is not gold at all. It is a copper-zinc alloy, essentially brass, pressed to the same fragile thinness and coloured to imitate the real thing.
Prices speak plainly. A book of genuine 23kt leaf costs many times more than an identical-looking book of imitation leaf. For learning, the cheap one is the sensible purchase, without question.
Leaf is sold in booklets of twenty-five sheets. Standard loose-leaf sheets measure roughly 80mm square, while transfer leaf is often a little larger, near 90mm, because it needs a margin for handling.
Buy one booklet of imitation leaf, gold or pale gold, and accept that your first sheets will be ruined. That is not failure. It is simply the tuition fee of learning a delicate material.
Transfer Leaf Versus Loose Leaf
Loose leaf arrives as bare, unbacked metal in a paper booklet, separated by thin tissue. Lift it carelessly and it curls, clings to your fingers, and crumbles along the edges.
To move loose leaf you need a gilder's tip, a flat brush you charge with static by passing it through your hair or against your arm. The leaf clings to the brush until you lay it down.
Transfer leaf, also called patent leaf, solves this problem for beginners. Each sheet is bonded lightly to a tissue backing. You press the backing face-down onto your surface and lift it away.
The metal stays behind on your work. The tissue goes in the bin. No static, no gilder's tip, no trembling hands chasing a fleeing fragment across the desk.
Once you are confident, loose leaf gives a softer, more handmade look, and it often costs less per sheet. But start with transfer leaf and make your life genuinely easy.
Your Beginner Toolkit
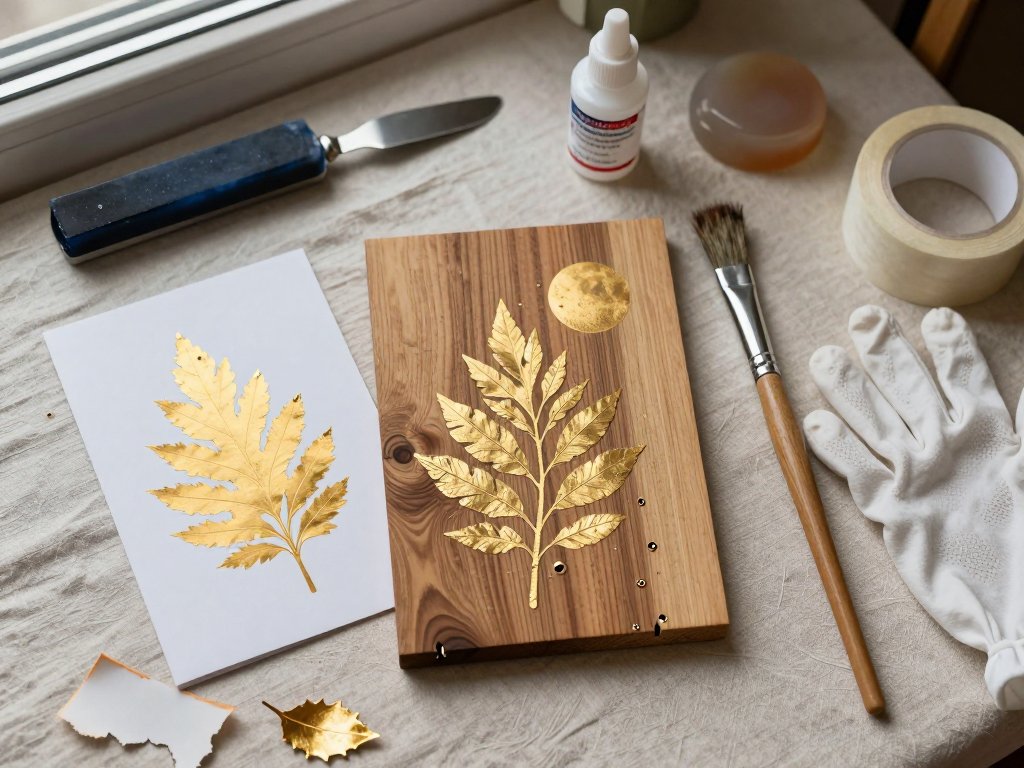
You need surprisingly little to begin. Everything below fits in a shoebox, and some of it you may already own in a drawer somewhere.
- Gilding size, the adhesive made for leaf, sold in small bottles. Water-based dries faster; oil-based gives a longer working window.
- A soft flat brush, roughly two centimetres wide, for applying size in even, single-direction strokes.
- A soft squirrel-style brush for tamping and pressing the leaf down without tearing it.
- A burnisher, or a smooth agate stone, for working leaf onto the surface through its backing.
- Cotton gloves, because natural oils from fingers dull the metal almost immediately.
- A soft, lint-free cloth for dusting surfaces and wrapping finished panels.
- Sealant or varnish, matte or gloss, to protect imitation leaf from tarnish.
- Low-tack masking tape and glassine or silicone paper for burnishing and storage.
A gilder's tip is optional. Buy one only if you plan to move to loose leaf later. Transfer work never needs it.
Preparing the Surface and Planning the Composition
Gold leaf reflects everything beneath it. Any bump, dust speck, or rough brushstroke telegraphs straight through, so surface preparation matters more than brush technique.
Canvas works well once sealed. Paint the area first, even a flat colour, then seal it so the size sits on a smooth film rather than sinking into the fabric weave.
Board, wood, watercolour paper, and gesso panels all take leaf beautifully. Gesso is the classic ground: smooth, absorbent, and ready to accept adhesive evenly.
Seal raw wood and paper with a coat of acrylic medium or shellac, then let it dry completely. A sealed surface keeps your adhesive sitting on top, where you can control it.
Mask off the areas you do not want gilded. Press low-tack tape firmly along your lines so adhesive cannot creep underneath, then burnish the tape edge with a fingernail.
Planning the composition before you gild is worth ten minutes of quiet thought. Gold is loud; it draws the eye wherever it sits, so decide deliberately where the shine belongs. This is where 7 composition techniques genuinely help, because placement changes the entire read of a painting.
Applying the Size: The Waiting Game
Shake your size, then pour a little into a jar lid. Never brush straight from the bottle, or you will pick up grit and contaminate everything that remains.
Apply one thin coat with the flat brush, working in a single direction. Resist the urge to scrub back and forth; overlapping strokes leave ridges that print straight through the leaf.
Cover the masked area evenly, right up to the tape edge. Thin is the goal here. A milky, translucent coat dries faster and holds leaf more reliably than a thick, wet one.
Now comes the waiting. Water-based size turns from milky white to clear, then stays faintly tacky. That clear-but-sticky window is when the leaf bonds best.
Test with a clean knuckle. Touch the surface lightly. If it feels wet, wait. If it feels like sticky tape, gild now. If it feels dry, you have missed the window.
Humidity changes everything. On a damp day the window can stretch to twenty minutes; on a dry, hot day it may close in three. Stay nearby and keep checking.
Laying Down Transfer Leaf
Hold the transfer sheet flat, tissue side up, and lay the metal face-down onto the tacky surface. Do not press yet. Position it first.
Once placed, press gently with your fingertips, then rub the backing with your soft brush or a clean finger in small circles. The metal releases wherever you press.
Peel the tissue back slowly, low and even, watching the gold stay behind. If a corner lifts with the tissue, lay it back down and press again.
Overlap sheets slightly so no bare adhesive shows between them. For a deliberately handmade look, leave tiny hairline gaps and let them read as gold seams.
Sheets tear, often. Set a torn piece back in place with its backing, press it flat, and burnish gently. Small tears vanish into the overall shimmer of the surface.
Burnishing, Filling Gaps, and Patching
Burnishing is what turns dull, matte leaf into bright, solid metal. It presses the gold into every tooth of the surface and polishes it in a single action.
Lay a sheet of glassine, or the leaf's own backing paper, over the gold. Then rub firmly with your burnisher or agate in straight, overlapping strokes.
Work from the centre of each sheet outward. Press hard enough to feel the gold flatten, but stop short of scrubbing straight through the metal.
Watch the colour shift. Unburnished leaf looks greenish and hazy; burnished leaf snaps into a deep, reflective shine. The change is immediate and slightly addictive.
Burnish edges a little more firmly, since they lift first. On textured surfaces, burnish lightly and let the weave show through for a weathered, antique finish.
Small bare spots always appear somewhere. Do not panic. Press a scrap of leaf onto the missed area, backing and all, then rub and peel as before.
Work scrap pieces with a soft brush to seat them into corners. A torn triangle fits a gap that a whole sheet could never reach.
For stubborn spots, dab on a little extra size, wait for the tack stage, and lay a fresh scrap. Never brush wet adhesive over laid leaf, or you will tear it.
Here is the secret nobody tells beginners: a few visible seams and overlaps look intentional. They read as handwork, which is exactly what this is.
Perfection looks machine-made. Slight irregularity is the signature of a human hand, so treat texture as a feature rather than a flaw you must hide.
Sealing Your Gilded Work
Imitation leaf is brass, and brass tarnishes. Left bare, it slowly dulls to greenish-brown as it meets air and moisture, losing the shine you worked so hard for.
Genuine 23kt gold never tarnishes, which is why restorers still treasure it. If you used imitation leaf, sealing is not optional. It is the finishing step.
Choose your finish deliberately. Matte varnish keeps a soft, antique glow and suits botanical and vintage work. Gloss varnish deepens the shine and looks almost wet.
Brush sealant on thinly with a soft brush, following the direction of the leaf. Two thin coats beat one thick one, which can pool and cloud the metal beneath.
Let each coat dry fully before the next. Rushing here traps solvent under the film and turns your bright gold into a milky, disappointing haze.
A Weekend Project: A Gilded Moon Panel
Here is a small project that practises everything at once: a gilded moon on a painted panel. It takes a weekend, most of which is waiting.
- Day one, morning: paint a 15cm board or canvas with a deep indigo night sky. Let it dry completely, about two hours.
- Midday: seal the painted area with one thin coat of acrylic medium. Leave it to dry for an hour.
- Afternoon: draw or tape a circle for the moon, then mask around it with low-tack tape.
- Late afternoon: brush one thin coat of water-based size inside the circle. Wait for it to turn clear and tacky, roughly ten to twenty minutes.
- Evening: lay transfer leaf over the tacky circle, press, and peel. Overlap two or three small sheets to fill the disc, then burnish through glassine.
- Day two, morning: fill any remaining gaps with scraps, then burnish again, firmly, for an even shine.
- Midday: peel the masking tape slowly at a low angle. A crisp gilded edge appears like magic.
- Afternoon: seal with two thin coats of matte or gloss varnish, an hour apart. Leave the panel to cure overnight.
You could gild a leaf silhouette just as easily, or run a thin gold line along a painted crack for a kintsugi-inspired repair. The method never changes.
Realistic drying times matter more than any tool. Paint needs two hours, sealant one, size ten to twenty minutes of tack, and varnish an hour between coats. Plan your weekend around patience.
Troubleshooting Common Gilding Problems
Leaf will not stick. Your size has dried past its tack stage. Recoat with fresh size, wait for the clear-and-sticky stage, and try again.
Leaf sticks everywhere, including your fingers. The size was too wet or over-brushed. Wait longer before laying, and use fewer, lighter strokes when applying it.
Cloudy, milky finish. Usually over-sealing or a dusty burnisher. Wipe your tools before use, and apply varnish in thin coats rather than one heavy one.
Torn sheets. Almost always from peeling the backing too fast or at a steep angle. Peel slowly and keep the tissue almost flat to the surface.
Tarnish on imitation leaf. Bare brass reacting with air. Seal both sides if you can, and store finished work away from damp, sunny spots.
Leaf cracks when burnished. You pressed too hard or the surface was uneven. Prepare a smoother ground next time and burnish with lighter pressure.
Where to Go Next
Once the basics feel natural, experiment freely. Try genuine 23kt leaf on a small panel and notice how differently it behaves and ages over time.
Combine gold with texture. Gild over gesso stipple, press leaf into painted impasto, or gild only thin outlines to suggest structure rather than filling whole shapes.
Learn loose leaf with a gilder's tip when you feel ready. It costs less and gives softer, more organic edges that many artists prefer for expressive work.
Keep your first gilded piece, even if it is lumpy and uneven. My flea-market frame still hangs in my hallway, and it taught me everything that followed.
Gold catches light that paint alone cannot. Your hands, a brush, and a quiet weekend are all it takes to make something that suddenly glows.