Introduction
A glowing porch is one of the kindest things you can offer on Halloween night. It tells every family that walks by that your home is ready for trick-or-treaters.
Paper lanterns make that warm welcome easy to build. You do not need special tools or a whole weekend. A few sheets of cardstock and an afternoon will do.
This guide walks you through three lantern styles, step by step. Each one uses the same basic skills, so the first lantern is the slowest and the rest go quickly.
If you have ever folded a paper fan or wrapped a gift, you already have the hands for this. Nothing here is fussy, and none of it needs to be perfect.
Start with a single lantern. Hang it, light it, and see how it looks before you commit to a whole porch. You may find one is all it takes.
There is no wrong way to begin. Even one lantern by the front door changes how the whole porch feels on a dark October evening.
What You'll Need
Everything on this list is easy to find at a craft store or online. Buy your cardstock first, then match your tools to it.
Here is the full supply list for all three lanterns:
- Medium-weight cardstock, 65 to 80 lb. Thinner paper sags; heavier board cracks when it folds.
- Cardstock in black, orange, and cream for a classic Halloween palette.
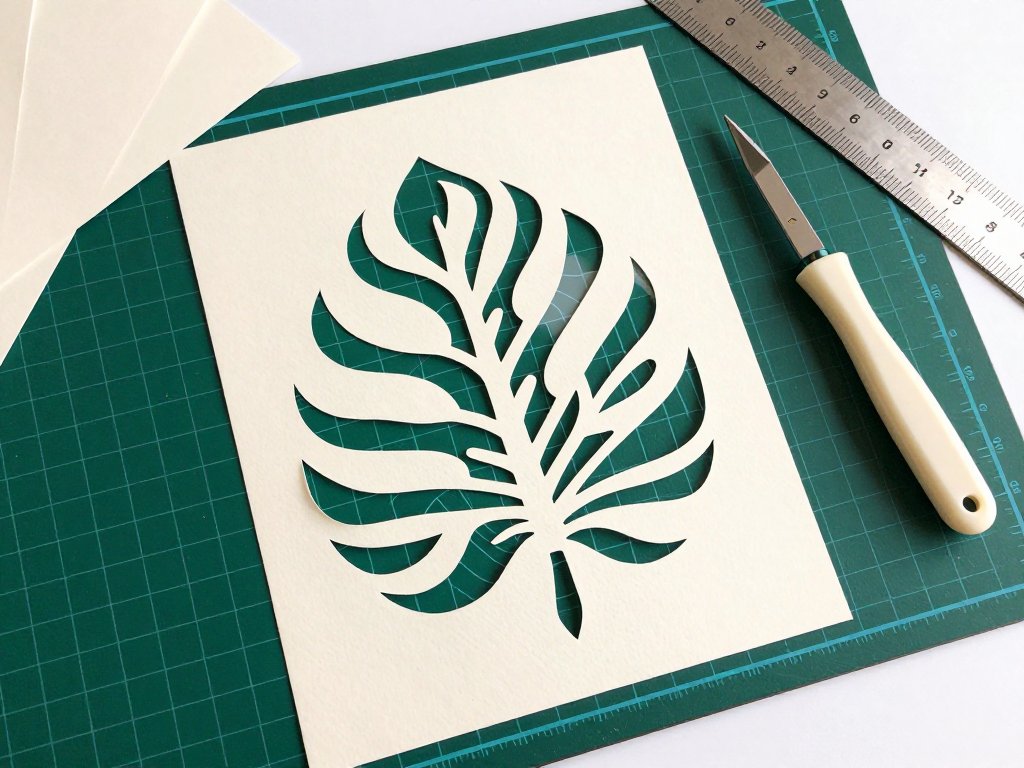
- A craft knife with a fresh blade. A dull blade tears instead of cutting.
- A self-healing cutting mat, about 12 by 18 inches.
- A metal ruler, because plastic rulers get nicked by the knife.
- A bone folder for scoring crisp fold lines.
- A glue stick or a small bottle of clear craft glue.
- Battery-operated tea lights. Never use real candles in paper.
- Thin twine or fishing line for hanging.
- A pencil, for marking lines lightly.
Nothing here needs to be expensive. A simple knife and a good mat will carry you through years of projects.
A fresh blade matters more than a fancy tool. Change it when cuts start dragging, and your lines stay clean and your hand stays steady.
If you are buying cardstock for the first time, choose a matte finish. Matte takes a score line beautifully and hides small fingerprints.
Set aside one clear afternoon and a space the size of your cutting mat. A tidy bench makes every step calmer and faster.
Cutting Safely: For Adults and for Kids
These lanterns are simple, but a craft knife still deserves respect. A few calm habits keep the whole project safe and pleasant.
Always cut on the mat, never on your lap or a bare table. Work slowly and let the blade do the cutting instead of your arm.
Keep the fingers of your other hand behind the ruler, well clear of the blade path. Hold the ruler down firmly so it cannot slip.
Cut in several light passes rather than one hard press. Light passes follow your line better and are far less likely to tear the paper.
Change the blade the moment it starts to drag. A sharp blade needs less pressure, which means more control for you.
Kids can absolutely help, just not at the knife station. Set them up with rounded-tip scissors and a paper punch instead.
Let them cut simple shapes and punch holes for the glow strips and windows. Their pieces become the extra decorations you add later.
Older children can fold and score with the bone folder, which is safe and quietly satisfying. Keep the knife work for the adults.
Three Habits to Learn Before You Cut
These three habits apply to every lantern in this guide. Learn them once and the rest of the project almost runs itself.
Score before you fold. Drag the bone folder along your marked line, pressing firmly from end to end. A scored line folds crisply, while an unscored one cracks the fibers and looks messy.
Cut before you fold. Always cut your windows and strips while the cardstock is still flat. Once the paper is folded, clean cuts become nearly impossible.
Leave a border. Keep at least a half-inch of solid paper between cuts and around every edge. This keeps the lantern strong instead of floppy.
Hide the seam. When you glue the lantern closed, plan for one folded flap to sit on top of the join. Glue under that flap so the seam disappears.
These four habits take two minutes to understand and will save you a great deal of frustration. Tape them to your work surface if that helps.
Lantern One: The Pleated Round Lantern
This is the classic lantern shape, and a good place to start. It begins as one long strip and opens into a round globe like a paper fan.
- Cut a strip of cardstock 6 inches tall and 18 inches wide. The length becomes the lantern's width around.
- On the back, mark lines every 1 inch along the long edge with your pencil.
- Score each line with the bone folder, pressing evenly from top to bottom.
- Fold along every score, alternating mountain and valley, like an accordion.
- Press the folded stack flat, then trim the top and bottom edges smooth.
- Open the strip and bring the two short ends together, overlapping by about half an inch.
- Glue the overlap, tuck it under the end flap, and hold until it sets.
- Cut a small notch at the top for your hanging loop, or punch two neat holes.
The lantern now opens and closes like a fan, which means it stores flat and springs back into shape. That is part of its charm.
If your folds look uneven, do not worry. Once the lantern is lit, small inconsistencies fade into the glow and no one notices.
For a bolder look, alternate black and orange strips and glue them into one wide band before folding. The result looks like it took far longer than it did.
Lantern Two: The Glow Strip Lantern
This lantern glows in tidy vertical lines. It looks modern and clean, and it takes the least time of the three.
- Cut a piece of cardstock 7 inches tall and 14 inches wide.
- Along the long edge, mark vertical lines every 1 inch, keeping a clear margin at each end.
- Cut each marked line with the knife, stopping about 2 inches short of the top and bottom.
- Check that no two cuts touch and that every gap is at least a half-inch wide.
- Score a fold line 1 inch in from each short end.
- Roll the cardstock into a tube and glue the overlap, hiding the seam behind the scored flap.
- Press gently to round the tube, then punch two holes at the top for your twine.
Because the cuts stop short of the edges, the lantern keeps its shape. The solid bands along the top and bottom are what hold it together.
You can vary the look by changing the spacing. Wider strips read as bold and graphic, while narrow slits feel delicate and almost like lace.
Lantern Three: The Little House Lantern
This one is the family favorite. A small house with glowing windows reads as cozy, welcoming, and unmistakably Halloween.
- Cut a rectangle of cardstock 8 inches tall and 12 inches wide for the walls.
- Score three vertical fold lines at 4-inch intervals to make four walls.
- On one or two walls, draw simple window and door shapes with your pencil.
- Cut the windows out while the paper is still flat, leaving a half-inch border on every side.
- Score a roof line 2 inches down from the top, then fold it inward.
- Fold the walls into a box shape and glue the final seam under its flap.
- Cut two triangles for the peak and glue them in place, or leave the roof open and simple.
- Punch a small hole at the back for a hanging loop, or set the house on a ledge.
You can cut dozens of tiny windows for a haunted, flickering look. Or keep it to one door and two windows for a tidy little cottage.
Try a kraft or cream house with black window frames, or a deep black house that lets the orange glow pour out. Both look wonderful on a dark porch.
Lighting Your Lanterns Safely
Lighting is what turns folded paper into something special. It is also the step that deserves the most care.
Use battery-operated tea lights only. A real candle is never a safe choice inside paper or near a porch railing.
Place the tea light on a small glass jar or a flat LED insert made for paper lanterns. This keeps the bulb clear of the paper edges.
The bulb should never touch the cardstock. If the tea light presses against a cut edge, set it on a small riser to lift it clear.
Check that the light sits level before you hang the lantern. A tilted light looks uneven and can slowly lean into the paper.
Battery tea lights last through an evening easily. Keep a spare pack on hand so you can swap one out without any fuss.
Because the light stays cool, this is a safe craft for a family. Still, do a quick check that nothing is pinched before you walk away.
If you want a warmer, softer orange glow, choose tea lights with an amber bulb instead of a bright white one.
How to Hang Your Porch Lanterns
You have several easy hanging options, and none of them require drilling into your porch.
- A twine loop threaded through the top holes and knotted, hung from an existing hook.
- A wooden dowel laid across a porch railing, with lanterns hung at even spacing.
- A shepherd's hook planted in a planter or the yard, ideal for a single lantern.
- A simple garland of three lanterns strung along one length of twine.
The garland is an easy favorite for a porch. Measure your twine first, knot the lanterns at even intervals, then hang the whole line at once.
Hang the lanterns at different heights for a layered look. A little variation keeps a straight railing from feeling too stiff.
If you are building a whole porch display, pair your lanterns with these DIY Halloween treat bags so the table matches the glow.
Weatherproofing, Storing, and Reusing
Paper and weather are not natural friends, so a little planning keeps your lanterns looking good for years.
For outdoor use, spray each lantern with a matte clear sealer. Apply light coats outside or in a well-ventilated space, and let it dry fully before hanging.
A sealer adds water resistance, not true waterproofing. If rain is in the forecast, bring the paper lanterns inside for the night.
The tea lights should come inside regardless of the weather. Moisture is hard on batteries and on the small metal contacts inside them.
To store, fold the lanterns flat, stack them between sheets of tissue, and keep them in a dry box. Stored flat, they hold their folds and their shape.
Next year, unfold, reshape, and re-crease any lines that have softened. Most lanterns look almost new again with a quick touch-up.
Reusing saves money and keeps a good thing going. Add a fresh tea light and a new ribbon, and the same lantern feels brand new.
A labeled storage box is worth the small trouble. Write "Halloween lanterns" on the lid so you find them again next October.
When Something Goes Wrong
Small problems are normal in a paper project, and most have a quick fix. Here is how to handle the common ones.
Creases that crack the cardstock. You likely folded without scoring first. For the next lantern, score every line firmly, and switch to a slightly lighter cardstock.
Torn or ragged cuts. Your blade is dull or you pressed too hard. Change the blade and cut in several light passes instead of one heavy one.
A lantern that sags or collapses. The paper is too thin or your borders are too narrow. Leave at least a half-inch edge and use 65 to 80 lb cardstock.
Glue showing through. You used too much, or you glued the wrong side. Use a light touch and tuck the seam under a folded flap.
Windows that look uneven. Mark them with a ruler before cutting, and always cut them while the paper is still flat.
A lantern that will not round out. Your folds are too shallow. Re-press each score with the bone folder and open it gently.
Final Thoughts
Halloween paper lanterns prove that a warm welcome does not need to be complicated. A sheet of cardstock, a few careful folds, and a soft battery light are enough.
Make one lantern this afternoon. If it feels good, make two more and string them together along the railing.
Your porch will glow a little softer for every neighbor who walks past, and that is the real point of the whole project.
Take your time, keep your blade fresh, and let the kids handle the punching and the folding. The imperfect lanterns are often the ones that feel most like home.