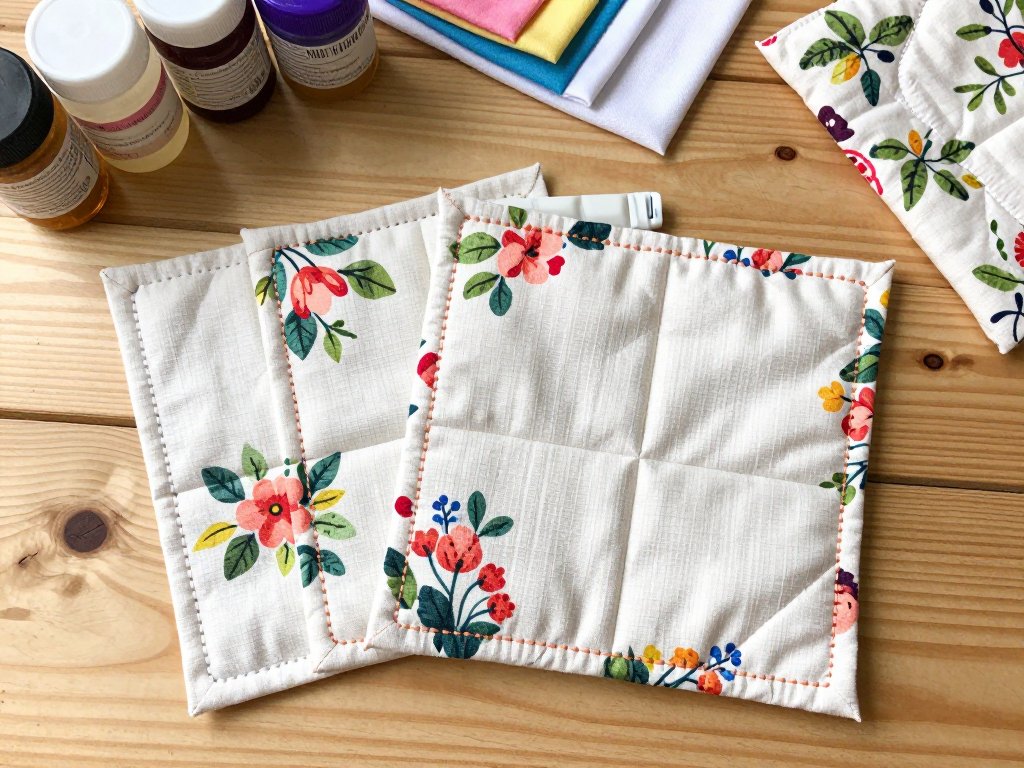
There is something deeply satisfying about creating something both beautiful and useful with your own two hands. Hand-quilted coasters are the perfect project for anyone who has ever wanted to try quilting but felt intimidated by the idea of a full-sized bed quilt. These little squares of fabric, batting, and thread come together in an afternoon, and they make the loveliest gift for a friend, a hostess, or simply yourself.
I remember the first set of coasters I ever quilted. I was a new mother, desperate for a creative outlet that I could start and finish in a single nap time. A full quilt felt impossible, but four little coasters? That I could manage. I cut my fabric on the kitchen counter, hand-stitched while the baby slept, and by dinner time I had a completed set sitting on our coffee table. They were far from perfect — my stitches were uneven, my corners were a bit wonky — but I was hooked. And that, dear reader, is the beauty of this project. You do not need to be a master quilter to make something lovely. You just need a bit of fabric, a needle and thread, and the willingness to try.
In this tutorial, I will walk you through everything you need to know to make your own set of hand-quilted coasters. We will talk about fabric selection, batting choices, thread types, and several different quilting patterns you can try. By the end, you will have a finished set of coasters and the confidence to take on your next quilting project.
Why Hand-Quilted Coasters?
Coasters are the ideal beginner quilting project for several reasons. First, they are small. A typical coaster measures about four inches square, which means you are working with manageable pieces of fabric that are easy to handle and inexpensive to replace if something goes wrong. Second, they are flat. You do not have to worry about curved seams or complex shaping. Third, they are forgiving. A slightly uneven stitch or a corner that is not perfectly square is hardly noticeable on a coaster, and it certainly does not affect its function. Fourth, they are practical. Everyone needs coasters, and a handmade set brings warmth and personality to any coffee table or desk. Finally, they are quick. You can complete a set of four coasters in a single afternoon, which gives you that wonderful sense of accomplishment that keeps you motivated to try more advanced projects.
Materials You Will Need
Before we begin stitching, let us gather our supplies. Most of these items can be found at your local fabric store or online. I recommend investing in good-quality tools where it matters — a sharp rotary blade and a comfortable needle will make your experience much more pleasant.
Fabric — Cotton Quilting Fabric
For your first set of coasters, choose 100% cotton quilting fabric. Quilting cotton is woven with a tight, even weave that holds its shape well and is easy to hand-stitch through. It comes in an endless array of colors, prints, and patterns. For a set of four coasters, you will need two fat quarters or one half-yard of fabric for the coaster tops, plus a coordinating fat quarter for the backing. Fat quarters are precut pieces of fabric measuring roughly eighteen by twenty-two inches — they are the quilter's best friend and give you plenty of material for small projects. If you prefer, you can also use precut charm packs, which are five-inch squares of coordinating fabrics sold in bundles. These are wonderfully convenient because the cutting is already done for you. Just make sure you choose a weave that feels crisp and substantial rather than flimsy or loosely woven. Avoid cotton blends with polyester, as they do not press as crisply and can be more difficult to hand-quilt through.
For your first project, I recommend choosing a print that you love on the front and a solid or tone-on-tone fabric for the back. This makes it easy to see your quilting stitches on the back while keeping the front visually interesting.
Batting
Batting is the soft, fluffy layer that goes between your top fabric and backing fabric. It is what gives quilted items their warmth and dimension. For coasters, you have several excellent options:
- Cotton batting — This is the most popular choice for quilting. It is breathable, natural, and gives a lovely traditional look. Cotton batting shrinks slightly when washed, which creates that beautiful crinkly texture that quilters call "old-fashioned charm." For coasters, look for a low-loft (thin) cotton batting so your coasters are not too bulky.
- Cotton-poly blend batting — This combines the natural feel of cotton with the durability and quick-drying properties of polyester. It is a good choice if you plan to wash your coasters frequently, and it tends to have less shrinkage than all-cotton batting.
- Wool batting — Wool batting is wonderfully warm and has a beautiful drape. It is more expensive than cotton but can be a lovely choice if you want a slightly puffier, more luxurious coaster. Just be aware that wool batting requires more careful washing.
- Felted wool or craft felt — For an ultra-simple version, you can use a layer of wool-blend craft felt in place of batting. This gives you a stable, no-fray interior layer that requires less quilting to hold together. It is a great shortcut for beginners who want to focus on the stitching rather than the construction.
For your first coaster set, I suggest starting with a low-loft cotton batting. It is affordable, easy to work with, and gives beautiful results. You only need a piece about twelve inches square to make four coasters, so a small package will last you through many projects.
Thread
The thread you choose matters more than you might think. For hand quilting, you want a thread that is strong enough to hold your layers together but smooth enough to glide easily through the fabric without tangling. Here are your options:
- 100% cotton quilting thread — This is my top recommendation for beginners. Cotton thread is slightly grippy, which helps your stitches stay in place, and it blends beautifully with cotton fabric. Look for threads specifically labeled "quilting thread" or "hand quilting thread" — these are usually slightly heavier and stronger than all-purpose thread. Brands like Aurifil, Gütermann, and Coats & Clark all make excellent cotton quilting threads.
- Cotton-covered polyester thread — This is a good all-purpose option that combines the look of cotton with the strength of polyester. It is less likely to break under tension and works well for beginners who may pull their stitches a bit unevenly.
- Perle cotton thread (size 8 or 12) — Perle cotton is a thick, lustrous thread that is not meant to be used in a sewing machine. It is beautiful for hand quilting because it creates visible, decorative stitches. Size 8 is thicker and more prominent; size 12 is slightly finer. If you want your quilting stitches to be a design feature rather than something hidden, perle cotton is a wonderful choice. It comes in gorgeous colors and gives a slightly rustic, heirloom feel to your work.
For your first project, I recommend a neutral-colored 100% cotton quilting thread in a shade that coordinates with your fabric. A medium gray, ecru, or soft white will blend well with most fabrics while still being visible enough to show off your stitching.
Needles
Hand quilting needles, sometimes called "betweens," are shorter and finer than regular sewing needles. The short length allows you to make small, even stitches. Needle sizes range from 1 (thickest) to 12 (finest). For beginners working with quilting cotton and low-loft batting, I recommend a size 8 or 9 between needle. It is fine enough to glide through the fabric easily but thick enough that it will not bend or break as you are learning your rhythm. You will know you have the right needle when you can take three or four small stitches onto the needle before pulling it through — that is the hallmark of comfortable hand quilting.
Rotary Cutter, Cutting Mat, and Quilting Ruler
These three tools work together to give you clean, straight cuts — and accurate cutting is the foundation of successful quilting.
- Rotary cutter — This is essentially a very sharp circular blade on a handle. It rolls across the fabric, cutting cleanly and precisely. For small projects like coasters, a 45mm or 28mm rotary cutter works beautifully. The smaller 28mm size is especially nice for cutting around curves or smaller pieces. Always retract or cap the blade when not in use, and keep a spare pack of blades on hand — a dull rotary cutter is more dangerous than a sharp one because you have to press harder, increasing the risk of slipping.
- Cutting mat — A self-healing cutting mat protects your work surface and keeps your blades sharp. For coasters, a small 12-by-18-inch mat is plenty large enough. Look for one with a grid printed on it — the grid lines help you line up your fabric for square cuts.
- Quilting ruler — A quilting ruler is a thick, transparent ruler marked with a grid of lines. It allows you to measure and cut with precision. A 6-by-24-inch ruler is the standard size that most quilters use, but even a 6-by-12-inch ruler will work for coaster-sized pieces. The key feature is the 45-degree and 60-degree angle lines printed on the ruler, which make it easy to cut fabric on the bias if you ever want to try that technique.
Additional Supplies
- Fabric scissors — A good pair of sharp fabric scissors is essential for trimming threads and cutting small pieces. Reserve them exclusively for fabric — using them on paper will dull them quickly.
- Straight pins or safety pins — You will need these to hold your fabric layers together while you quilt. Quilting safety pins (curved safety pins) are especially helpful because they are easier to close through multiple layers.
- Seam ripper — Every quilter needs a seam ripper. Do not be afraid to use it. Removing stitches is part of the learning process, and a seam ripper makes it quick and painless.
- Iron and ironing board — Pressing your fabric at each step makes a tremendous difference in the final result. A hot iron and a sturdy ironing board are non-negotiable for good quilting.
- Thimble — Many hand quilters find a thimble essential for pushing the needle through multiple layers. Leather or silicone thimbles are comfortable for beginners. Alternatively, you can use a small piece of moleskin or a rubber fingertip grip if a traditional thimble feels awkward.
- Fabric marking pen or chalk — You will need this to draw your quilting lines on the fabric. Look for a water-soluble or air-erasable pen so the marks disappear after you finish stitching.
Step-by-Step Instructions
Now that we have all our supplies assembled, let us begin making our coasters. Take a deep breath, make yourself a cup of tea, and settle in. This is meant to be a peaceful, meditative process.
Step 1: Preparing Your Fabric
Begin by washing, drying, and pressing your fabric. Pre-washing removes any sizing (a starch-like coating applied during manufacturing) and pre-shrinks the fabric so your finished coasters will not warp or pucker when you wash them later. Press your fabric with a hot iron until it is completely smooth and wrinkle-free. Place your fabric on the cutting mat, aligning the selvage edge with a horizontal grid line. Use your quilting ruler to trim off the selvage edge — this is the tightly woven edge of the fabric that does not behave like the rest of the fabric. Now measure and cut your fabric into the following pieces:
- Coaster tops (front fabric): Cut four squares measuring 5 inches by 5 inches each.
- Coaster backs (backing fabric): Cut four squares measuring 5 inches by 5 inches each.
- Batting: Cut four squares measuring 5 inches by 5 inches each.
Why 5 inches when the finished coaster will be 4 inches? The extra half-inch on each side is our seam allowance. Once we sew the layers together and turn them, the coaster will finish at about 4 inches square. If you are using a charm pack (precut 5-inch squares), you can skip this cutting step entirely — just press the squares and move on.
Step 2: Assembling the Layers
For each coaster, you will create a "quilt sandwich" — three layers stacked together. Place your backing fabric right-side down (the pretty side facing the table). Place your batting square on top of the backing, centered. Finally, place your coaster top fabric right-side up (pretty side facing you) on top of the batting. You should now have: backing (wrong side up), batting in the middle, top (right side up). Smooth out any wrinkles with your hands, then pin the layers together. Place one pin in the center and one near each corner, about half an inch from the edge. If you are using quilting safety pins, close them through all three layers. If you are using straight pins, place them perpendicular to the edge so you can easily remove them as you sew.
Step 3: Choosing Your Quilting Pattern
Now comes the fun part — deciding how to quilt your coasters. Quilting is the stitching that holds the three layers together, and the pattern you choose creates the texture and visual interest of your finished piece. Here are three beginner-friendly patterns to try:
Straight Line Quilting: This is the simplest and most classic approach. Using your fabric marking pen and ruler, draw parallel lines across your coaster top. The lines can be spaced half an inch apart, three-quarters of an inch apart, or a full inch apart — experiment to see what you like. For a 5-inch square, lines spaced every half inch will give you about 9 lines, which creates a lovely, dense texture. Start by drawing a line through the center of your coaster, then draw additional lines out to each side, keeping them evenly spaced. You can run the lines vertically, horizontally, or even diagonally. Diagonal straight lines are especially forgiving because they make the eye move across the coaster and distract from any uneven stitches.
Crosshatch Quilting: This is essentially straight line quilting in two directions — first one set of diagonal lines, then another set crossing the first at a 45-degree or 90-degree angle. The result is a diamond or square grid pattern that looks intricate but is surprisingly easy to achieve. Starting from one corner, draw a diagonal line across the coaster at a 45-degree angle. Then draw additional lines parallel to this line, spaced every half inch or three-quarters of an inch. Once all the lines in one direction are drawn, repeat the process in the opposite direction. Crosshatch quilting gives your coasters a lovely, professional-looking texture and is one of my personal favorites for small projects.
Echo Quilting: Echo quilting follows the shape of your fabric design or a motif you draw on the fabric. If your fabric has a large-scale print — like a flower, a leaf, or a geometric shape — you can stitch around that shape, then stitch again farther out, "echoing" the original line. Start by stitching directly along the edge of your chosen motif. Then stitch a second line a quarter inch or half inch outside the first line. Continue echoing outward until you reach the edge of the coaster. Echo quilting is beautiful for showcasing a favorite fabric print and gives the coaster an organic, flowing feel. If your fabric does not have an obvious motif to follow, you can draw a simple shape — a heart, a star, or a circle — in the center of the coaster and echo around it.
For your first set of coasters, I recommend trying straight line quilting on two coasters and crosshatch on the other two. This gives you practice with two different techniques and lets you see which style you prefer.
Step 4: Threading Your Needle and Making a Knot
Cut a length of thread about 18 inches long — any longer and it will tangle; any shorter and you will be constantly re-threading. Thread your needle and pull the thread through until you have about a 4-inch tail. To make a quilter's knot, hold the tail end of the thread against the needle, wrap the thread around the needle three or four times, then slide the wraps down the needle and off the end. This creates a small, tidy knot that will not pull through the fabric. Practice this knot a few times — it becomes second nature very quickly.
Step 5: Beginning to Stitch
Insert your needle into the top fabric about half an inch from where you want your first stitch to start, between the layers of the quilt sandwich. Bring the needle back up at your starting point. Gently tug the thread until the knot pops through the fabric and lodges inside the batting layer. This hides the knot between the layers — a classic quilter's trick.
Now you are ready to stitch. Hold the needle between your thumb and forefinger, with your other hand underneath the coaster to guide the needle back up. Rock the needle up and down through the layers, taking small, even stitches. The goal is to make each stitch about an eighth of an inch long. Try to take three or four stitches onto the needle before pulling it through — this rocking motion is the hallmark of hand quilting and becomes very rhythmic once you get the hang of it. Do not worry if your first few stitches are uneven. Speed and consistency come with practice. Focus on the feel of the needle moving through the fabric and the satisfaction of seeing your quilting lines emerge.
Sew along your drawn lines until you reach the edge of the coaster. To end a line of stitching, make a small backstitch (just one or two stitches going backward), then run your needle into the batting layer and bring it out about half an inch away. Snip the thread close to the fabric surface — the tail will disappear into the batting. Knot the thread end with another quilter's knot or simply leave it to be trimmed later.
Step 6: Trimming and Squaring Up
Once all your quilting lines are stitched, it is time to trim the coaster to its final size. Use your ruler and rotary cutter to trim all four edges so the coaster is exactly 4 inches square. Make sure your cuts are straight and your corners are square. If your quilting has pulled the fabric slightly out of shape, give the coaster a good press with your iron to relax the fabric before trimming. This squaring-up step is what gives your coasters a professional, finished look.
Step 7: Binding the Edges
Binding is the fabric strip that covers the raw edges of your coaster and gives it a clean, finished border. For small coasters, you have two excellent options:
Method 1 — Standard Binding: Cut strips of fabric 2 inches wide from your backing fabric or a coordinating fabric. You will need enough length to go around all four sides of the coaster, plus a little extra — about 18 inches per coaster. Fold the binding strip in half lengthwise and press with an iron. Starting in the middle of one side, open the folded binding and place it along the edge of the coaster, aligning the raw edges of the binding with the raw edges of the coaster. Sew through all layers using a quarter-inch seam allowance. When you reach a corner, stop a quarter inch from the edge, lift your presser foot, and fold the binding up (away from the coaster) to create a 45-degree miter, then fold it back down along the next side. This creates a neat, angled corner. Continue around all four sides. When you return to the starting point, overlap the binding tails and trim them. Fold the binding over to the back of the coaster and hand-stitch it in place using a blind stitch or a simple whip stitch.
Method 2 — Self-Binding (Turn-and-Stitch): This is my preferred method for coasters because it is simpler and creates a lovely, clean edge. Before quilting, sew the front and back fabric pieces together with batting inside, leaving a 2-inch opening on one side for turning. Use a quarter-inch seam allowance. Clip the corners diagonally (being careful not to cut through the stitches), then turn the coaster right-side out through the opening. Use a chopstick or a knitting needle to gently push out the corners so they are sharp and square. Press the coaster flat, then hand-stitch the opening closed or topstitch close to the edge all the way around. Now quilt through all layers as described above. With this method, the edge is already finished and no separate binding strip is needed. The topstitching around the perimeter gives a crisp, modern look.
For your first set of coasters, I recommend the self-binding method. It is easier for beginners and gives beautiful results with less handling.
Step 8: Final Pressing
Give your finished coasters a thorough press with a hot iron. If you used cotton batting, the heat will help set your stitches and give the fabric a lovely, smooth finish. Stack your coasters, admire your work, and place them on your favorite table. You made these!
Tips for Success
Creative Variations
Once you have mastered the basic hand-quilted coaster, the possibilities are endless. Here are some ideas to inspire your next set:
Seasonal Coasters
Create a set for each season. Use autumn-themed fabrics with warm oranges, browns, and golds for fall, or fresh florals and pastels for spring. Quilt a jack-o'-lantern or a snowflake motif into the center of each coaster using echo quilting. Seasonal coasters make wonderful hostess gifts and are a lovely way to refresh your home decor throughout the year.
Scrappy Coasters
Instead of using a single piece of fabric for the top, piece together small fabric scraps to create a patchwork top. Cut your scraps into 1-inch or 1.5-inch squares, arrange them in a pleasing layout, and sew them together before layering with batting and backing. Scrappy coasters are a wonderful way to use up fabric leftovers from other projects, and the patchwork design adds visual interest that is uniquely yours.
Appliqued Coasters
Add a fabric applique to the center of each coaster before quilting. Cut a simple shape — a heart, a leaf, a circle — from a contrasting fabric, and hand-stitch it onto the coaster top using a small blanket stitch or a running stitch. Then quilt around the applique to incorporate it into the design. Applique adds a personal, handmade touch that makes each coaster feel like a tiny work of art.
Personalized Monogram Coasters
Embroider an initial or a monogram onto each coaster top before assembling the quilt sandwich. Use a simple backstitch or a stem stitch to trace a letter in the center of the fabric. Monogrammed coasters make elegant wedding gifts, housewarming presents, or a set for your own dining table. They also make it easy to tell whose coaster is whose at a gathering.
Oversized Drink Coasters
Scale the project up to make trivets for hot dishes. Cut your fabric squares to 8 inches by 8 inches (or larger) and use a thicker batting, such as wool or high-loft cotton. Quilt more densely to ensure the layers stay securely together. Oversized trivets are perfect for protecting your table from casserole dishes and soup pots, and they look beautiful hanging on a hook in the kitchen when not in use.
Round Coasters
If you are feeling adventurous, try making round coasters. Use a compass or a round template to draw a 4-inch circle on your fabric, then cut out the circle with a generous 5-inch circle to allow for seam allowance. Round coasters are quilted the same way as square ones, just with curved quilting lines or concentric circles. They add a lovely softness to a table setting and are surprisingly easy to bind — you simply cut bias binding strips and curve them around the edge, easing in the fabric as you sew.
Gift Sets
A set of four or six hand-quilted coasters tied with a ribbon and accompanied by a handwritten care card makes a thoughtful, personal gift that anyone would treasure. Bundle them with a small mug or a bag of specialty coffee for a complete hostess gift. You can even make a matching coaster for a teapot or a coffee carafe using a larger square of fabric.
Caring for Your Hand-Quilted Coasters
Your handmade coasters will last for years with proper care. For everyday cleaning, simply wipe them with a damp cloth. When they need a deeper clean, hand-wash them in cool water with a mild detergent. Gently squeeze out excess water — do not wring or twist, as this can distort the quilting — and lay them flat to dry. If you used cotton batting, expect a slight shrinkage after the first wash. This is normal and desirable; it creates the soft, crinkly texture that gives hand-quilted items their character. If you must machine-wash, place the coasters in a mesh lingerie bag and use the gentle cycle with cold water. Air-dry them flat, away from direct sunlight to prevent fading. With gentle care, your hand-quilted coasters will remain beautiful and functional for many years.
Conclusion
Hand-quilted coasters may be small, but they carry an outsized amount of satisfaction. In a single afternoon, you can take a few pieces of fabric, some batting, and a simple needle and thread, and transform them into something that will protect your furniture and bring beauty to your everyday life. Each stitch is a small act of creation, and each finished coaster is a reminder of what your hands can do.
I hope this tutorial has given you the confidence to pick up a needle and give hand quilting a try. Start with one coaster, then make another, and another. Before you know it, you will have a stack of coasters, a new skill, and the quiet pride that comes from making something with your own hands. That is what this craft is all about.
Happy stitching, dear friend. Your hands are more capable than you know.
