Introduction
There is something about a weathered terracotta pot that instantly transports you to a sun-drenched Italian courtyard or a centuries-old English garden.
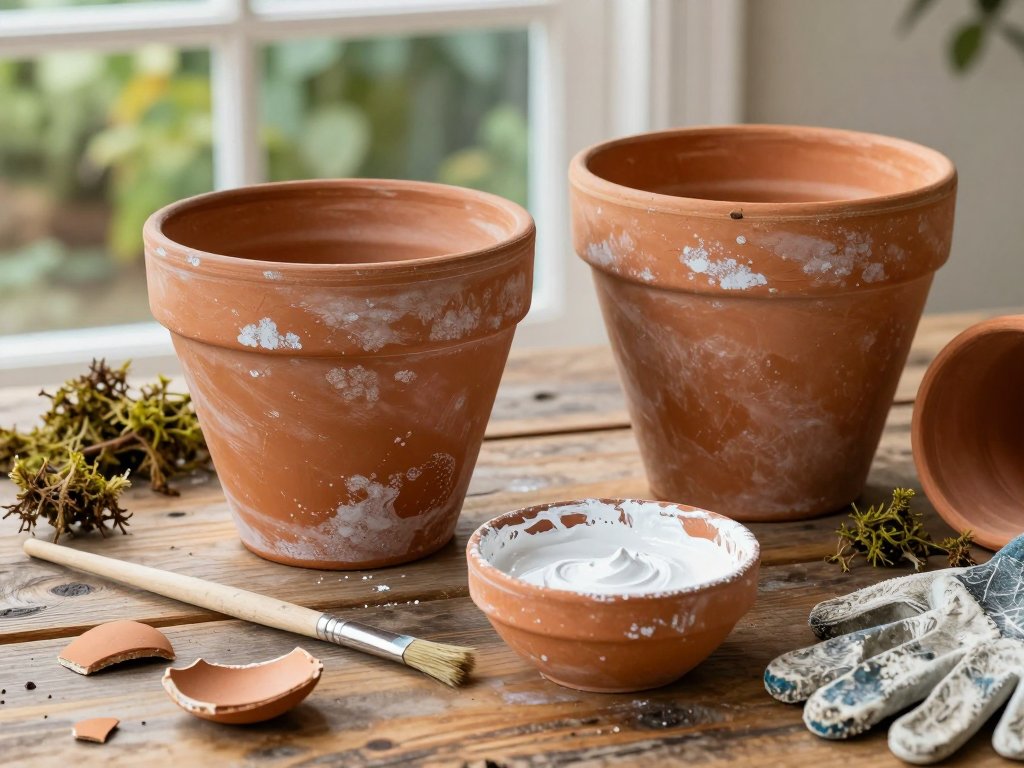
The mossy patina, the chalky white bloom, the subtle cracks that speak of seasons past — these are the marks of time that no mass-produced pot can replicate.
But what if you could capture that look in an afternoon, without waiting years for nature to work its magic?
Aging terracotta pots is one of the most satisfying DIY projects you can undertake for your garden.
It is inexpensive, requires materials you probably already have at home, and the results are genuinely beautiful.
Whether you are styling a patio for summer gatherings, creating a rustic herb garden on your kitchen windowsill, or preparing containers for a special gift, aged terracotta adds warmth and character that no shiny new pot can match.
In this guide, we will explore several methods for aging terracotta, from the gentlest patina-building techniques to more dramatic weathered effects.
Each method is beginner-friendly and can be completed in a single afternoon, though some require a day or two for the materials to fully set.
By the time you finish reading, you will know exactly which approach suits your style and how to execute it with confidence.
Understanding Your Terracotta Canvas
Before we dive into techniques, it helps to understand what we are working with. Terracotta is unglazed, fired clay — porous, absorbent, and naturally warm in tone.
These qualities are precisely what make it so lovely to age. The porosity means that paints, stains, and natural treatments penetrate the surface rather than sitting on top, creating a finish that looks genuine rather than applied.
New terracotta pots range in color from pale salmon to deep brick red, depending on the clay source and firing temperature.
As they age naturally, several things happen: the surface develops a chalky white bloom called efflorescence (caused by minerals migrating to the surface), moss and algae colonize the damp areas near the rim and base, and the color shifts to a softer, more muted terracotta.
Our DIY methods aim to mimic these natural processes.
Start with clean, dry pots. If your pots have been used before, scrub them with a stiff brush and warm water to remove any loose dirt or old plant matter.
Let them dry completely — at least a few hours in the sun or overnight indoors.
A dry surface accepts treatments much more evenly than a damp one.
Method One: The Yogurt and Moss Technique
This is my personal favorite and the method that produces the most natural-looking results. It encourages actual moss and algae growth on the pot surface, creating a living patina that continues to develop over time.
What You Will Need
- Clean, dry terracotta pots
- Plain yogurt (full-fat works best)
- A handful of moss from your garden or a neighbor's (ask first!)
- A small paintbrush or sponge
- A spray bottle filled with water
- A plastic bag or wrap large enough to cover each pot
The Process
Step 1: Prepare the moss mixture. Place your moss in a bowl and crumble it into small pieces.
Add about half a cup of yogurt and mix until you have a thick, spreadable paste.
The yogurt provides nutrients that help the moss spores establish themselves on the clay surface, while the lactic acid gently etches the terracotta to create a receptive surface.
Step 2: Apply the mixture. Using your brush or sponge, apply the yogurt-moss paste to the outside of the pot.
Focus on the areas that would naturally accumulate moisture and organic matter — the rim, the base, and any textured bands or ridges.
Do not apply it too thickly; a thin, even coat will produce a more natural-looking result than a gloopy layer.
Step 3: Create a humid environment. Mist the pot lightly with your spray bottle, then place it inside a plastic bag. Seal the bag loosely — you want humidity, not an airtight seal. The moisture trapped inside will encourage the moss to colonize the surface.
Step 4: Wait and monitor. Place the bagged pot in a shaded spot outdoors or on a cool windowsill.
Check it every few days. After about a week, you should see patches of green beginning to appear on the surface.
The longer you leave it, the more established the moss will become. Two to three weeks yields a lovely aged look, while a month or more produces a pot that looks genuinely decades old.
Step 5: Set it free. Once you are happy with the moss coverage, remove the pot from the bag and let it acclimate to normal conditions.
The moss will continue to grow, especially in damp weather, but it will not overrun your pot as long as you allow it to dry out between waterings.
The beauty of this method is that the moss is alive. Your pots will continue to change with the seasons, growing more lush in spring rains and taking on a drier, silvery cast in summer heat. It is aging as a living process, not a static finish.
Method Two: The Whitewash Patina
If you prefer the look of aged Mediterranean pots — the soft, chalky white bloom that develops on sun-baked terracotta — this method delivers it in a single afternoon. The technique uses diluted acrylic paint or lime wash to create that coveted weathered patina.
What You Will Need
- Clean, dry terracotta pots
- White or off-white acrylic paint (matte finish) OR hydrated lime powder
- Water
- A wide paintbrush or sponge
- A soft cloth for buffing
The Process
Step 1: Mix your whitewash. If using acrylic paint, dilute it with water at a ratio of one part paint to three parts water.
The mixture should be thin and milky, not opaque. If using lime, mix one part hydrated lime with two parts water until you have a smooth, creamy consistency.
Lime produces a more authentic mineral bloom, but acrylic is easier to find and works beautifully.
Step 2: Apply unevenly. This is the key to a natural-looking patina. Do not paint the entire pot uniformly.
Instead, apply the whitewash in random strokes, concentrating on the raised areas and letting the brush marks show.
The deeper crevices and corners should receive less paint, allowing the terracotta color to show through.
Think of it as suggesting age rather than applying a solid color.
Step 3: Wipe back. While the whitewash is still damp, take your soft cloth and wipe some of it away.
Focus on the areas that would naturally be rubbed by handling — the rim, the middle of the pot, the base.
This creates highlights where the terracotta shows through, mimicking the wear of years of use.
Step 4: Build layers. Once the first application is dry (about an hour), assess the effect. If it looks too uniform, apply a second, even thinner layer and wipe back again. The goal is subtle variation — patches of white, areas of bare terracotta, and everything in between.
For an even more convincing aged look, try mixing a tiny amount of raw umber or burnt sienna paint into your whitewash for the second layer. This produces a warmer, dirtier white that looks like it has been exposed to soil and weather.
Method Three: The Accelerated Weathering Technique
For those who want a more dramatic aged look — cracked surfaces, darkened crevices, and the appearance of extreme weather exposure — this method combines staining with physical distressing. It is more involved than the previous methods but produces truly striking results.
What You Will Need
- Clean, dry terracotta pots
- Black or dark brown acrylic paint
- Water
- Sandpaper (medium and fine grit)
- A hammer and a thick towel (for cracking)
- A paintbrush
- A soft cloth
The Process
Step 1: Create cracks (optional). If you want the pot to look genuinely weather-cracked, wrap it in a thick towel and give it a few gentle taps with a hammer.
Start lightly — you can always add more cracks, but you cannot undo a crack that goes all the way through.
The goal is surface crazing and small hairline cracks, not structural damage. Unwrap the towel and brush away any loose clay dust.
Step 2: Apply a dark wash. Mix a very thin wash of black or dark brown paint with water — about one part paint to six parts water.
Brush this over the entire pot, working it into the cracks and crevices. Let it sit for a minute, then wipe it off with a soft cloth.
The dark pigment will remain in the recessed areas, mimicking the accumulation of dirt and organic matter that occurs naturally over time.
Step 3: Sand the highlights. Once the wash is dry, use medium-grit sandpaper to lightly abrade the raised areas — the rim, any decorative ridges, and the edges of cracks.
This removes a thin layer of terracotta, revealing the fresh, lighter clay beneath. The contrast between the dark crevices and the sanded highlights creates the illusion of years of wear and weather exposure.
Step 4: Repeat and refine. Apply a second, lighter wash and sand again with fine-grit paper. Each cycle adds depth and complexity to the aged surface. Finish by wiping the pot with a barely damp cloth to remove sanding dust and soften the overall effect.
Choosing the Right Method for Your Project
Each of these methods produces a distinctly different aged look, and the best choice depends on the effect you want to achieve and the environment where the pots will live.
The yogurt and moss technique is ideal for pots that will live outdoors in a shaded or damp location.
The moss will thrive in these conditions and continue to develop, creating a pot that looks like it was pulled from an ancient garden wall.
It is less suitable for indoor pots or covered patios, where the moss may struggle to survive without regular moisture.
The whitewash patina works beautifully for indoor and outdoor pots alike. It is the most controlled method, giving you precise influence over the final appearance.
Whitewashed pots pair wonderfully with succulents, herbs, and Mediterranean-style plantings. They also make excellent gifts — you can create a set of matching aged pots for a fraction of the cost of antique originals.
The accelerated weathering technique is perfect for statement pieces — a large urn for the front porch, a set of pots for a modern farmhouse display, or a gift for someone who loves the rustic, timeworn aesthetic.
The cracks and darkened crevices give these pots a sense of history that feels genuine, even though you created it in an afternoon.
Sealing and Protecting Your Aged Pots
Once you have achieved the aged look you want, you may wonder whether to seal the pot. The answer depends on where the pot will live and what you planted in it.
For pots that will hold plants, particularly edible plants like herbs and vegetables, it is best to leave them unsealed.
Terracotta's porosity is one of its greatest assets — it allows air and moisture to move through the pot walls, creating a healthy root environment.
A sealant would block this exchange and potentially harm your plants. The aging treatments themselves are safe for plants, especially the yogurt and moss method, which uses only natural materials.
For decorative pots that will not hold soil, you may choose to apply a matte acrylic sealer to protect the finish from rain and handling.
If you do, test the sealer on a small, inconspicuous area first to make sure it does not alter the color or sheen of your aged finish.
A matte sealer is essential — gloss or satin will undo the weathered look you worked so hard to create.
Displaying Your Aged Terracotta Pots
Aged terracotta pots have a wonderful ability to elevate any planting arrangement. Their muted, timeworn tones provide a perfect backdrop for vibrant green foliage, delicate flowers, and trailing vines. Here are a few ideas to inspire your display.
Group in odd numbers. Three pots of varying sizes, clustered together, creates a natural focal point. Place the largest slightly off-center and arrange the smaller pots around it. The aged finishes will complement each other even if they are not identical.
Mix with natural materials. Aged terracotta looks stunning alongside stone, wood, and weathered metal. Place your pots on a wooden bench, arrange them on a bed of pebbles, or pair them with a rusted garden ornament. The common thread of natural aging ties the whole scene together.
Use as gift containers. An aged terracotta pot planted with a small herb or succulent makes a memorable gift. The pot itself becomes part of the present — a handmade, one-of-a-kind container that the recipient will treasure long after the plant has been repotted.
Create a seasonal display. Because aged terracotta has a timeless quality, it works beautifully with seasonal plantings. Fill your pots with spring bulbs, summer annuals, autumn ornamental cabbages, or winter evergreens. The pots provide continuity as the plantings change throughout the year.
Troubleshooting Common Issues
Like any DIY project, aging terracotta pots comes with a few potential pitfalls. Here is how to handle them.
The whitewash looks streaky and artificial. This usually happens when the paint mixture is too thick or was applied too evenly.
Dilute your paint further and apply it with a drier brush, using random, overlapping strokes.
The streaky look you are trying to avoid is often caused by overworking the paint — less is more.
The moss won't grow. Moss needs moisture, shade, and time. If your pot is in a sunny, dry location, the moss will struggle.
Move it to a shaded spot and mist it daily. If you are using a yogurt-based mixture, make sure your yogurt is fresh — the live cultures are what feed the moss spores.
You can also try collecting moss from a damp, shaded area rather than a sunny spot.
The dark wash wiped off completely. Thin the paint further and let it sit on the surface for several minutes before wiping.
The pigment needs time to penetrate the porous terracotta. If the pot was still damp from cleaning, the wash will not absorb properly — always start with bone-dry pots.
The aged finish rubs off on my hands. This is normal for unsealed pots, especially in the first few weeks.
The excess pigment will gradually wear away with handling and exposure. If you cannot tolerate any transfer, apply a matte acrylic sealer, but be aware that it will change the surface feel and appearance slightly.
Conclusion
Aging terracotta pots is one of those rare DIY projects where the results genuinely exceed expectations.
With a few simple materials and a single afternoon, you can create pots that look like they have been weathered by decades of sun, rain, and seasons.
The process is forgiving, the materials are inexpensive, and the finished pots add a warmth and authenticity to your garden that no store-bought container can match.
I encourage you to try more than one method. Age a few pots with the moss technique, a few with whitewash, and one or two with the accelerated weathering approach.
Place them together and observe how the different finishes interact. You may find that a mix of aging styles creates the most natural and beautiful display of all — just as it does in a real garden, where every pot tells its own story of time and weather.
So gather your supplies, pick a method that speaks to you, and spend an afternoon transforming ordinary terracotta into something extraordinary. Your garden — and your plants — will thank you.