Introduction
Have you ever looked at a hand-crocheted hat and thought, "I wish I could make that"? You can. A crochet beanie is one of the most forgiving first projects in the craft world, and it works up fast enough that you will see real progress in one sitting.
Maybe you have a ball of yarn in a drawer that has been waiting for a purpose. Or maybe the cold weather has reminded you that hats make wonderful gifts. Whatever brought you here, you are in the right place.
This guide will walk you through everything from choosing yarn to weaving in your last ends. By the end, you will have a warm, handmade beanie and the confidence to try your next project.
Grab your hook, put on something cozy, and let us begin.
Why a Beanie Is the Perfect First Project
Beginners often ask me which project to start with. My answer is almost always a beanie, and here is why.
First, it is small. You are not committing to a blanket that takes months. A beanie uses about one ball of yarn and a single evening of stitching.
Second, the shape is forgiving. Hats stretch, and small mistakes hide beautifully in the fabric. If your tension wobbles or a stitch goes missing, nobody will ever know.
Third, it is genuinely useful. Scarves sit in drawers, but hats get worn. Every time someone compliments your beanie, you will remember that you made it yourself.
Finally, it teaches the skills you will need for bigger projects. Chain stitches, single crochet, half double crochet, and seaming are the building blocks of sweaters, cardigans, and blankets.
What You Will Need
The beauty of this project is a short supply list. Most of it you may already own.
- Yarn. One ball of worsted weight yarn, about 150 to 200 yards. Acrylic yarns like Red Heart Super Saver or Lion Brand Vanna's Choice are soft, affordable, and easy to wash.
- Crochet hook. A 5.5mm (US I-9) hook works beautifully with worsted weight yarn. If your yarn label suggests a different size, follow it.
- Scissors. Any sharp pair will do.
- A yarn needle. This blunt-tipped needle is used for seaming and weaving in ends.
- A tape measure or ruler. You will use it to check your size as you go.
That is genuinely it. No special gadgets, no expensive kits. A beginner beanie is a budget-friendly project from start to finish.
One tip before you shop: if you are choosing yarn in person, pick something soft. Scratchy yarn makes an itchy hat, and an itchy hat never gets worn.
Choosing the Right Yarn and Hook
Yarn weight matters more than brand. For this pattern, look for the number 4 on the yarn band, which means worsted weight. This is the most common yarn weight, so it is easy to find in any craft store.
Your hook size should match your yarn. A 5.5mm hook is the sweet spot for worsted weight. If you crochet very tightly, try a 6mm hook. If your stitches are loose and airy, a 5mm hook will firm things up.
Color is a personal choice, and there are no wrong answers. Light colors make stitch definition easy to see, which helps while you learn. Dark colors hide dirt better, which matters if the hat is for a busy kid.
If you want to make a matching set, buy two balls of the same dye lot. Dye lots can vary slightly between batches, and nobody wants a hat with two different shades of blue.
The Three Stitches You Will Use
Do not let crochet jargon scare you. This pattern uses only three stitches, and each one is simple to learn.
Chain stitch (ch). This is the foundation. You wrap the yarn over the hook and pull it through the loop. Repeat until your chain reaches the length you need.
Half double crochet (hdc). This stitch is the workhorse of this pattern. It is taller than a single crochet but shorter than a double crochet, which makes a warm, squishy fabric that works up quickly.
Yarn over, insert the hook, yarn over and pull through, then yarn over and pull through all three loops on the hook.
Slip stitch (sl st). This tiny stitch joins pieces together. Yarn over and pull through both loops on the hook in one motion. It does not add height; it simply connects.
That is the whole skill set. If you can chain and half double crochet, you can make this beanie.
If you need a refresher on any stitch, there are excellent video tutorials online. Pause, practice a few stitches, and come back when you feel ready.
How to Crochet a Beanie: Step-by-Step
This beanie uses the rectangle method, which is the simplest way to shape a hat. You crochet a rectangle, fold it, seam the side, and gather the top. No increasing, no decreasing, no math anxiety.
Step 1: Make a Foundation Chain
Chain until your foundation measures the head circumference you need, minus about two inches. Hats need negative ease so they hug the head instead of slipping off.
Here are starting chain lengths for common sizes. Remember, everyone's tension is different, so measure rather than counting stitches alone.
- Baby (14-16 inches): chain about 44 stitches.
- Toddler (16-18 inches): chain about 48 stitches.
- Child (18-20 inches): chain about 52 stitches.
- Teen or small adult (20-22 inches): chain about 56 stitches.
- Adult (22-24 inches): chain about 60 stitches.
Keep your foundation chain loose. A tight chain is the number one reason beginners struggle with the first row.
Step 2: Work the First Row
Skip the first two chains from your hook. These two chains count as your first half double crochet.
Work one half double crochet into each chain across the row. When you reach the end, you should have the same number of stitches as your foundation chain.
Count your stitches. Counting feels tedious, but it takes twenty seconds and saves you from discovering a mistake ten rows later.
Step 3: Build the Rectangle
Chain two, turn your work, and half double crochet into every stitch across.
Repeat this row until your rectangle is tall enough to cover the ears and reach just past the top of the head. For an adult beanie, that is usually about 8 to 9 inches of fabric.
To test the height, wrap the rectangle around your head. The two short edges should meet comfortably, and the rectangle should cover the crown of your head.
Remember to keep your tension steady. If your rows start to pinch at the edges, you may be skipping the first or last stitch. Adding a stitch marker to the first stitch of each row can help.
Step 4: Fold and Seam
When your rectangle is tall enough, fasten off and weave in the starting tail. Do not weave in the final tail yet; you will use it for seaming.
Fold the rectangle in half so the two short ends meet. The folded edge will become the bottom of your hat, and the open edges will become the top.
Thread your yarn needle with the tail. Whip stitch the side seam from the folded edge up to the top opening.
Whip stitching is simple: bring the needle through both layers, over the edge, and through again. Keep your stitches close together for a secure seam.
Step 5: Gather the Top
Now for the magical part. Thread your needle with a long piece of yarn, about 18 inches, and weave it in and out around the top opening, like a drawstring.
Pull the yarn tight, and the opening will gather closed like a little pouch. Stitch through the gathered center a few times to secure it.
Turn the hat right side out, and the gathered top becomes the crown of your beanie.
This gather method creates a slightly gathered crown, which many people love. It gives the hat a soft, rounded look rather than a flat top.
Step 6: Weave in the Ends
Thread your needle and weave the remaining tails through the wrong side of the fabric, back and forth a few times. Snip the excess close to the fabric.
Give your hat a gentle stretch and a pat. You just finished your first crochet beanie. How does it feel?
How to Make Your Beanie Fit Perfectly
Fit is the difference between a hat that sits in the drawer and a hat that gets worn every day. Here is how to get it right.
Measure the head. Wrap a tape measure around the head, just above the eyebrows and ears. That is your head circumference.
Subtract two inches. Hats need negative ease, meaning the finished hat should be slightly smaller than the head. Two inches of ease keeps the hat snug without being tight.
Check your gauge. If you want precision, crochet a small swatch, about four by four inches, in half double crochet. Count the stitches per inch and multiply by your target circumference.
Adjust as you go. The beauty of the rectangle method is that you can hold the work against your head at any point and see if the width is right.
If the hat comes out too big, unravel and restart with a shorter foundation chain. Crochet is wonderfully forgiving that way. Unraveling is not failure; it is part of the process.
Finishing Touches: Brims and Pompoms
Your plain beanie is already wonderful. These finishing touches simply make it extra special.
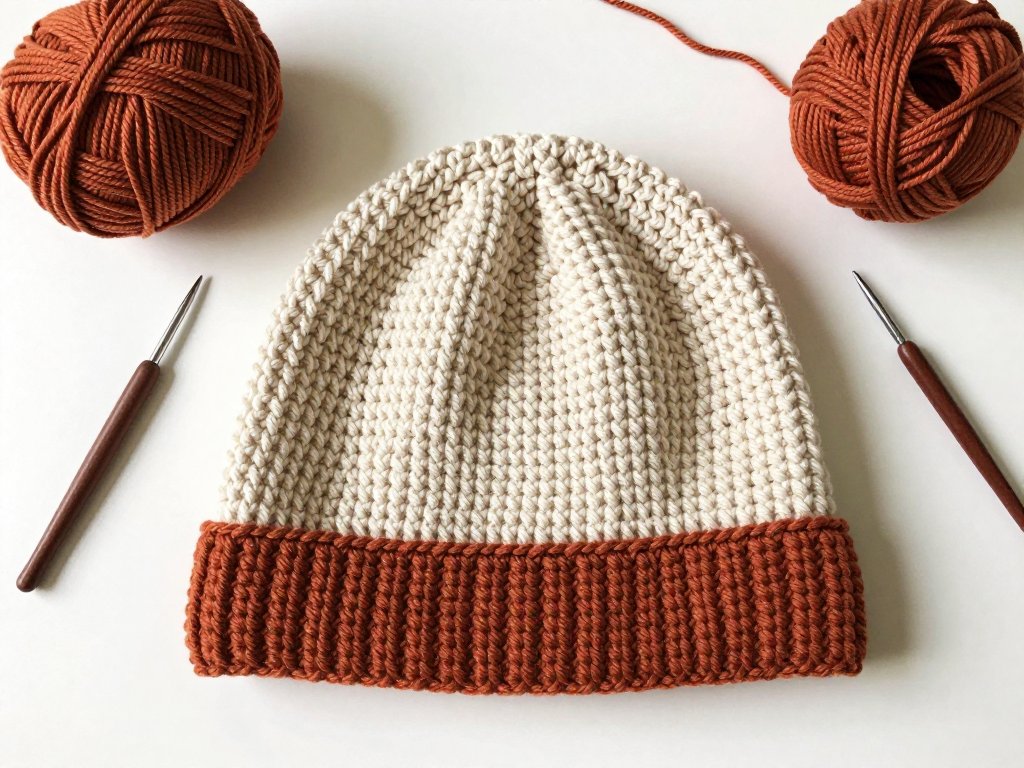
A folded brim. Crochet your rectangle two inches taller than needed, then fold the bottom edge up. This creates a cozy double-layer brim that keeps ears warm.
A ribbed look. Work the first two inches of the rectangle in the back loop only. This creates a stretchy ribbed texture that looks like store-bought knit hats.
A pompom. Wrap yarn around a small piece of cardboard about fifty times. Slide it off, tie it tightly in the middle, and snip the loops open. Fluff, trim, and attach it to the crown with a needle.
A simple flower. Chain five, join with a slip stitch to form a ring, and work clusters of double crochet around it. Sew the flower to the side of the hat for a sweet, feminine touch.
Even a single row of a contrasting color at the bottom edge gives the hat a polished, designer feel.
Common Beginner Mistakes and How to Fix Them
Every crocheter makes mistakes, especially at the beginning. Here are the most common ones and the quick fixes that work.
My foundation chain is too tight. This is the most common issue by far. The fix is to use a hook one size larger for the foundation chain only, then switch back to your regular hook for the body.
My edges are wavy or uneven. You are probably adding or skipping stitches at the ends of rows. Count your stitches after every row until you find the rhythm.
My hat has holes. Loose tension creates gaps in the fabric. Try a smaller hook, or consciously pull each stitch a little snugger as you work.
My rows are getting wider. This happens when you accidentally crochet into the turning chain as if it were a stitch. Learn to recognize the last stitch of the row; it likes to hide.
I made a mistake three rows down. Do not panic. If the mistake is small, leave it. If it is large, carefully pull out the stitches until you reach the error and redo them. The yarn will not mind.
The best advice I can give is this: crochet forward, not backward. Unless a mistake will ruin the fit or the look, let it be. Handmade things are supposed to show a little character.
What to Make Next
Now that you have conquered the beanie, a whole world of crochet is open to you. Here are a few natural next steps.
A matching scarf. Use the same yarn and half double crochet to make a simple scarf. It will take longer than the beanie, but the rhythm is the same.
A crochet pumpkin. Fall is the perfect time to make these adorable decorations, and they use the same basic stitches you just learned.
An ear warmer headband. This is basically a mini beanie rectangle, worked flat and seamed. It takes an evening and makes a wonderful gift.
Baby hats for charity. Hospitals and shelters welcome handmade baby hats. Your new skill can genuinely help others.
Every project you finish builds your confidence a little more. The beanie was your first step, not your last.
Final Thoughts
You have done something meaningful today. You took a ball of yarn and a hook and turned them into something warm, useful, and entirely yours.
Crochet is a skill that rewards patience. Your first beanie might not be perfect, and that is completely okay. My first hat had a lopsided seam and a crown that looked like a cinnamon roll. I wore it anyway, and I was proud of it.
Every expert crocheter you admire started exactly where you are right now, with one chain and a little bit of hope.
So wear your beanie with pride, gift it with joy, and when you are ready, pick up your hook and make another. The more you crochet, the more you will love it.
Happy crocheting, friend. You have got this.