Introduction
Triangle scarves are everywhere this season, and the reason is simple: the shape works. It drapes like a shawl without the bulk of one.
It tucks neatly under a coat, lies flat on a hanger, and never demands the endless wrapping and re-wrapping of a long rectangle.
It flatters nearly everyone, too. The wide top edge settles across the shoulders, and the deep point falls wherever it looks best on you.
For a busy knitter, this is the rare project that actually fits a life in motion. One shape, one stitch, two increases per row, nothing else.
You can cast on a Tuesday evening and wear the finished scarf by the weekend. That is the kind of quick win a tired yarn bag deserves.
And if your last few projects stalled halfway, this one is different. It grows visibly, row by row, which is its own quiet encouragement.
Why the Triangle Shape Works
Think about why a shawl stays put. Its top edge is wide, so it rests on the shoulders instead of sliding off.
Wear the point in front and the wide edge rides behind your neck like a soft collar. The ends cross at your chest or hang loose, and nothing slips.
Wear the point in back and the wide edge frames your shoulders while the point falls into a gentle cape line between your shoulder blades.
Both arrangements take about three seconds to achieve, which matters when you are already running late.
Garter stitch adds its own quiet magic. The fabric is dense and slightly springy, so it grips your shoulders instead of slithering off the way silky knits do.
Because the shape narrows to a point, there is no wad of fabric to wrestle with under a coat. It lies flat where it must and drapes where it can.
Choosing Your Yarn and Needles
For a first triangle scarf, reach for worsted or aran weight yarn. It is thick enough to grow quickly and soft enough to live against your neck.
Plan on roughly 300 to 500 yards. The lower end makes a neat neck scarf, while the higher end gives a generous wrap you can pull up over your chin.
Chunky yarn is a wonderful shortcut. You will use fewer yards, finish sooner, and end up with a cozy scarf with a cowl-like drape.
Let the yarn label choose your needles. Most worsted yarns are happy on US 7 to 9 needles, and chunky yarns on US 10 to 11.
Straight needles work perfectly well here. Circular needles are lovely too: the growing stitch count rests on the cable, and the weight settles in your lap.
Now for the stitch. Garter stitch is the no-curl hero of the knitting world. Knit every row and the fabric lies flat all by itself.
Stockinette curls at the edges no matter how neatly you knit it. Garter does not, which makes it the obvious choice for a scarf you will actually wear.
Gauge is forgiving here, and that suits a busy life. A scarf does not have to fit a body the way a sweater does.
Even so, a quick four-inch swatch is worth the twenty minutes. It tells you how wide your scarf will grow and how the fabric will drape.
For fiber, wool and wool blends offer the nicest drape and bounce, while cotton blends knit lighter for warm days. Acrylics are easy-care and have improved enormously, a sensible choice for busy households.
Before you cast on, gather a few small tools:
- Yarn: worsted, aran, or chunky, about 300 to 500 yards.
- Needles in the size your yarn label recommends.
- A tapestry needle for weaving in ends.
- Small, sharp scissors.
- A tape measure for checking your swatch and your growing top edge.
The Pattern: A Simple Garter Stitch Triangle
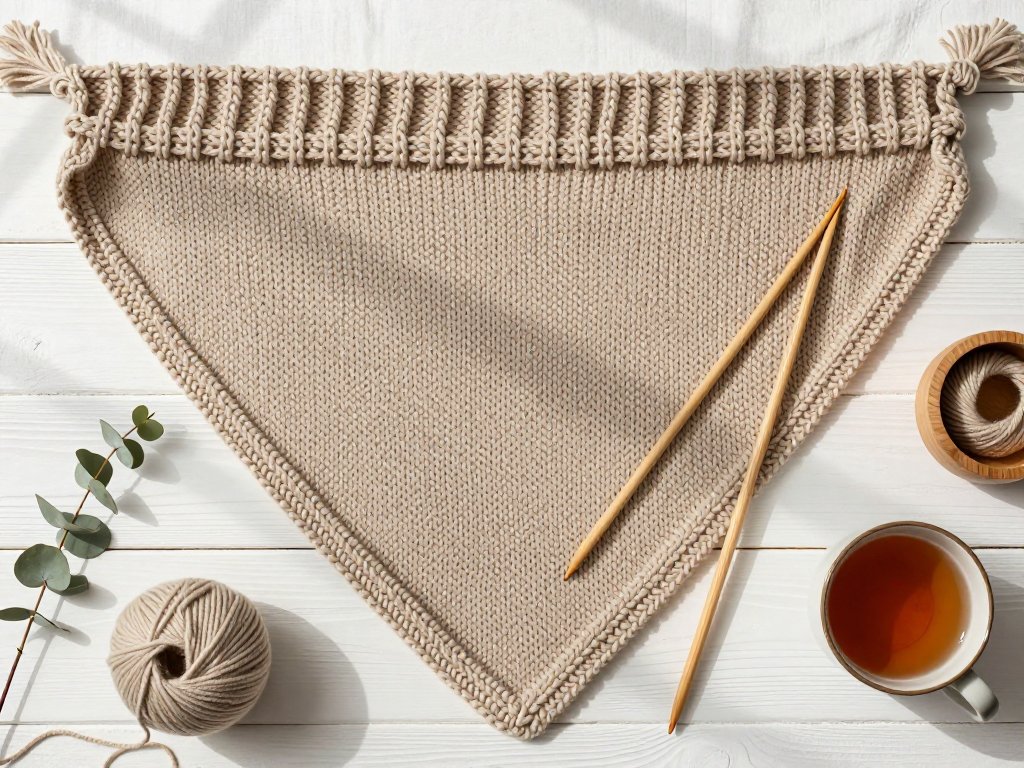
Here is the whole pattern in one breath: cast on three stitches, increase at both ends of every row, and knit until the top edge is as wide as you want.
That is genuinely all of it.
The only move you need: kfb
The increase used here is called kfb, which stands for knit front and back. It turns one stitch into two, and it is easier than it sounds.
Knit into the front loop of the next stitch exactly as you normally would, but do not slide the old stitch off the left needle yet.
Now swing the right needle around and knit into the back loop of that same stitch. Only then slide the stitch off the needle.
You have just made two stitches out of one, and the whole maneuver takes about two seconds once you have done it twice.
Kfb leaves a small, tidy bump rather than a hole, which is exactly what you want at the edge of a scarf.
Now put kfb to work. The entire pattern, step by step:
- Cast on 3 stitches, leaving a 6-inch tail. Those three little stitches are the point of your triangle.
- Increase row: kfb into the first stitch, knit across to the last stitch, and kfb into the last stitch.
- Repeat that row, over and over. Because you knit every row, you are knitting garter stitch without a second thought.
- Keep going until the top edge is the width you want, or until you are nearly out of yarn. Wrap it around your shoulders now and then to test it.
- Bind off loosely. If your bind-off tends to pull tight, switch to a needle one size larger just for this final row.
- Weave in the two loose ends with your tapestry needle. In garter stitch, ends hide easily along the edge.
The math you can trust
Every row adds exactly two stitches, one at each edge, so the triangle grows symmetrically outward from the point.
Start with 3 stitches and you will hold 23 after ten rows, and 103 after fifty. The count is always three plus twice the rows completed.
That even growth is why the shape comes out balanced. You cannot accidentally knit one side longer than the other.
Depending on your yarn and chosen width, most triangle scarves take somewhere between eighty and a hundred and fifty of these rows.
Styling and Wearing Ideas
The best thing about this scarf is that it looks intentional no matter how quickly you throw it on.
Point forward is the classic look. Let the point hang down your chest, with the wide edge snug behind your neck and the ends crossed or loose.
Over a plain tee, it instantly makes an outfit feel finished.
Point back is the undercoat secret. Turn the triangle so the point falls between your shoulder blades and the wide edge frames your collarbones like a soft cowl.
This is the easiest way to wear it with a jacket, because nothing bunches at the throat.
Under a coat, the flat triangle is a quiet blessing. When you step indoors and shed the coat, your scarf is still arranged, not knotted and lumpy.
On a cool summer evening, knit the same pattern in a lighter cotton or linen yarn. It becomes an airy layer that takes the chill off without overheating.
Add fringe or tassels for a dressier feel, or leave the edges clean for a minimalist line.
Easy Variations to Make It Yours
Stripes
Knit two to four rows in one color, then switch to the next. Two-row stripes are especially satisfying, because two rows make one complete ridge in garter stitch.
To avoid a tangle of loose ends, carry the color you are not using loosely up the side edge, and pick it up again when its turn comes around.
Change color at the same edge every time, and the carried strand hides neatly in the selvedge.
A seed-stitch border
For a nubby, textured frame along the slanted edges, work the first three and the last three stitches of every row in seed stitch.
Seed stitch is simply knit one, purl one, repeated. On the next row you reverse it, purl one, knit one, so the little bumps alternate like cobblestones.
Knit the scarf plain until the row holds about twelve stitches, then start the border, placing your kfb increases just inside it so the pattern stays undisturbed.
The middle of the scarf stays garter, and the edges gain a tactile frame that also helps the scarf lie flat.
Simple tassels and fringe
Fringe is the fastest dress-up trick in knitting.
- Cut a bundle of strands to length. Two or three strands per fringe is plenty for worsted yarn.
- Fold the bundle in half. Insert a crochet hook through an edge stitch, from front to back.
- Catch the folded loop with the hook and pull it partway through the stitch.
- Pull the loose ends through the loop and tug gently until the knot sits snug against the edge.
- Repeat along the top edge, then trim all the ends even with sharp scissors.
For a proper tassel, wrap yarn around a piece of cardboard the length you want, about twenty times.
Slide the loops off carefully, tie them tightly at the top, and snip the bottom loops open. Wrap a shorter strand around the tassel near the top, knot it, and trim the bottom square.
Attach tassels at the two lower corners of the triangle, or space a few along the top edge for a shawl-like finish.
Sizing up with chunky yarn
Every stitch is bigger in chunky yarn, so you need far fewer rows, and the thicker fabric drapes in deep, squishy folds.
The result feels like a cowl and a shawl had a very comfortable baby. It is the version to knit when you need a hug in yarn form.
Troubleshooting for Beginners
Four small problems account for almost every worried message new knitters send. Here is each one, and the fix.
Curling edges
If your triangle curls like a burrito, you have almost certainly drifted into stockinette stitch without meaning to.
Stockinette is knit one row, purl the next, and it curls at the edges no matter what. Garter stitch lies flat on its own.
This pattern has no purl rows at all: every row is a knit row. If you have been purling some rows, rip back and knit them instead.
Holes at the increases
If neat little eyelets appear where your increases should be, you are probably making a yarn over instead of a kfb.
The two are easy to confuse. A yarn over wraps the yarn over the needle and leaves a deliberate loop, which reads as a hole.
A kfb knits twice into the same stitch and leaves a small bump. If you see holes, check your hands: no wrapping over the needle, just two knits into one stitch.
A bind-off that is too tight
A tight bind-off makes the long top edge pucker, and the scarf refuses to drape across your shoulders.
The fix is painless: bind off loosely, or switch to a needle one size larger just for the bind-off row.
A stretchy top edge is what lets the triangle sit comfortably, so err on the side of too loose rather than too snug.
Uneven or messy edges
If your slanted edges look ragged, try slipping the first stitch of every row instead of knitting it.
Slip the first stitch as if to purl, with the yarn held behind the work, then kfb into the second stitch and knit to the last stitch, ending with a kfb.
That slipped stitch forms a neat, chain-like edge that makes the whole triangle look finished, even on the wrong side.
One more habit helps: every few rows, count your stitches. The number should always be three plus twice the rows you have finished.
A Realistic Time Frame
Let me be honest about time, because I know your evenings are short and your to-do list is long.
This is a weekend project in the truest sense. A few evenings of knitting, or a lazy Saturday with a movie, and it is done.
The middle rows are the long stretch, the knitting equivalent of a book's second act, but the rhythm carries you.
Once the increase pattern clicks, this becomes perfect TV knitting. No chart to follow, no complicated counting, just kfb, knit, kfb, knit.
Keep the project in a small bag by your sofa. Ten minutes here and there genuinely add up when the project is this portable.
Most knitters finish in somewhere between six and ten hours of actual knitting, spread however the week allows.
And because the finished scarf is a single piece with no seaming, the last hour is pure pleasure rather than a wrestling match.
A Handmade Gift Idea
A hand-knit triangle scarf is one of the most personal gifts you can give.
It suits almost anyone: a teacher, a neighbor, a sister, a friend walking through a hard season, a new mother who deserves something that is only for her.
Choose a yarn in their favorite color, and the gift could never be mistaken for something store-bought.
Because the pattern is quick, you can knit two at once: one for them and one for you.
If the gift is for someone with small children, pick a machine-washable yarn and say so with a clear conscience. Practical love is still love.
Fold the scarf around a handwritten note that says it was made slowly, on purpose, for them. That note will be kept long after the scarf is worn soft.
A Last Encouraging Word
If you have been waiting for a sign to pick up your needles again, consider this it. The triangle scarf asks little and gives back a great deal.
You do not need perfect tension or flawless edges. Garter stitch forgives uneven knitting, and you should forgive yourself too.
If your first scarf is a little wonky, wear it anyway, with the wonky side as your secret. No one will count your stitches; they will only feel the warmth.
Remember that every knitter's first triangle had a crooked moment in it. The finished scarf does not care, and neither will you.
When you bind off and wrap it around your neck, pause to notice what you did: you made something warm and beautiful in the middle of a busy life.
That is not a small thing. That is knitting doing what knitting does best.
Happy casting on. Your yarn is waiting, and so is the quiet hour you have earned.