There is something undeniably special about watching a movie under the open sky. The glow of the projector against a white sheet, the crickets chirping in the background, the cool night air settling in as the credits roll — it is a summer ritual that never gets old. But let me be honest: what really makes or breaks a backyard movie night is the snacks. You can have the best sound system and the crispest 4K projector money can buy, but if your family and friends are trudging back and forth to the kitchen every fifteen minutes, the magic evaporates. What you need is a dedicated concession stand, purpose-built for outdoor cinema, stocked and ready right there in your own yard. And the best part? You can build one yourself over a single weekend for a fraction of what a prefabricated cart would cost.
I have built three concession stands over the past five years. The first was a wobbly plywood box held together with hope and too few screws. The second was a proper rolling cart with a fold-down counter and painted lettering that made my neighbors ask if I was starting a food truck business on the side. The third, which I am going to walk you through in this guide, is the result of everything I learned from the first two. It is sturdy, weather-resistant, portable, and customizable to whatever look you want — retro diner, rustic barnwood, sleek modern, or full-on carnival kitsch. Whether you are a seasoned woodworker or someone who has never touched a circular saw, I have designed this build to be approachable. You will need some basic tools and a willingness to make a few mistakes, but by the time this article is finished, you will have a clear roadmap to a concession stand that will be the star of your backyard for years to come.
Why Build a Concession Stand Instead of Using a Table?
Before we get into the nuts and bolts, let me address the obvious question: why go through the effort of building a dedicated stand when you could just drag a folding table out of the garage and call it a day? I have done that too, and I can tell you the difference is night and day. A folding table is flat, flimsy, and offers no organization. Your popcorn bags slide off one end while someone else is trying to balance a soda on the other. There is no shade for your ice tub, no hooks for string lights, no shelves for backup supplies, and no signage to create that carnival atmosphere that makes kids (and adults) light up. A proper concession stand transforms the experience. It creates a focal point, a destination. It tells everyone that this is not just a movie; this is an event. Plus, when you build it yourself, you can tailor every inch to exactly what you need — cup holders at precisely the right height, a counter that folds down for easy transport, storage compartments for your projector and extension cords, and wheels that roll smoothly across grass or gravel. A folding table can never do that.
Materials: What You Will Need
This build is designed around materials you can find at any home improvement store. I have priced it out using mid-range lumber and hardware, and the total cost hovers between $80 and $150 depending on your choices. If you want to save money, use plywood instead of MDF and skip the decorative trim. If you want to splurge, upgrade to cedar or pressure-treated lumber for maximum weather resistance. Here is the full list.
Wood and Sheet Goods
- One 4x8 sheet of 3/4-inch plywood (BC grade or better) — this will be the main body. MDF is a cheaper alternative, but it soaks up moisture and swells, so seal it thoroughly if you go that route.
- One 4x8 sheet of 1/4-inch plywood or hardboard for the back panel and shelf dividers.
- Two 8-foot lengths of 2x4 lumber for the base frame and leg supports.
- One 8-foot length of 1x4 pine for decorative trim and the countertop lip.
- One 8-foot length of 1x2 pine for shelf cleats and small braces.
Hardware and Fasteners
- 1-1/4-inch wood screws (about 100 count) — these are your primary fasteners for assembling the plywood panels.
- 2-1/2-inch wood screws (about 20 count) — for joining the 2x4 base frame pieces.
- 1-inch brad nails or finishing nails — for attaching trim and small details.
- Two heavy-duty gate hinges or piano hinges — for the fold-down countertop.
- Two locking casters (for the front) and two non-locking casters (for the back) — 3-inch casters handle grass and gravel much better than smaller ones.
- A barrel bolt or hasp latch — to keep the countertop secured during transport.
- A sturdy handle — a flush-mount cabinet handle or a drawer pull that you can grip comfortably.
Finishing Supplies
- Wood primer (one quart) — use a stain-blocking primer, especially if you are using MDF or plywood with visible grain.
- Exterior-grade latex paint (one quart in your main color, plus smaller amounts for accent colors) — semi-gloss or gloss holds up better to wiping and weather.
- Outdoor sealant or polyurethane (one quart, matte or satin finish) — this is your weatherproofing topcoat. Do not skip it.
- Paintbrushes and foam rollers — a 2-inch angled brush for corners and a 4-inch foam roller for flat panels.
- Painter's tape — for crisp lines on accent stripes and lettering.
- Stencils or vinyl lettering — for your concession stand signage. You can buy pre-made stencils at a craft store or cut your own with a Cricut or Silhouette machine.
- Sandpaper in 80, 120, and 220 grits — start coarse, finish fine.
Tools
- Circular saw or table saw — either works. A circular saw with a straight-edge guide is perfectly adequate.
- Drill/driver with a screwdriver bit and a drill bit set.
- Measuring tape, square, and pencil.
- Clamps — at least two bar clamps or pipe clamps for holding panels together while you screw.
- Jigsaw — optional but helpful for cutting curved decorative elements or handle cutouts.
- Sander or sanding block — an orbital sander saves a lot of elbow grease.
- Level — a 2-foot level is ideal.
Design Options: Permanent Stand vs. Pop-Up Cart
The most important decision you will make before cutting a single piece of wood is what kind of stand you want to build. There are two main approaches, and each has its own strengths. I have built both, and my recommendation depends entirely on how you plan to use it.
The Permanent Stand
A permanent concession stand is built to stay in one place. You might anchor it to a patio, mount it against a fence, or build it into a dedicated corner of your yard. The advantages are significant: you can make it larger, more elaborate, and more stable than any portable version. You can add a roof, permanent lighting, built-in cabinets, a mini-fridge cutout, and electrical outlets. A permanent stand becomes a backyard fixture, usable not just for movies but for barbecues, birthday parties, and holiday gatherings. The downside, obviously, is that you cannot move it. If you ever rearrange your yard, move to a new house, or just decide the stand would look better on the other side of the patio, you are looking at demolition and rebuilding. Permanent stands also require more planning — you need to think about drainage, sun exposure, and whether your homeowners association has any rules about permanent structures. If you own your home and have a spot you are committed to, the permanent stand is the superior long-term choice.
The Pop-Up Cart
The pop-up cart, which is what I am going to focus on in this guide, is the more versatile option. It is built on a wheeled base with a fold-down countertop that allows it to roll through a standard doorway and store in a garage or shed when not in use. You can wheel it out for movie night, roll it under a canopy for shade, reposition it as the sun moves, and tuck it away when the season ends. The trade-off is size — a pop-up cart needs to be compact enough to be portable, so you have to be thoughtful about how you use the available space. But with clever design, you can fit a surprising amount of storage and counter area into a package that rolls easily. My current pop-up cart measures approximately 48 inches wide, 24 inches deep, and 36 inches tall (before the countertop is folded down). It holds two large storage bins, a beverage tub, a popcorn machine, a candy display, and all the cups, napkins, and utensils I need for a crowd of twenty. It takes me about ten minutes to roll it out of the garage, unfold the counter, and set up the decorations. That is hard to beat.
Step-by-Step: Building the Pop-Up Concession Cart
Now we get to the building. I am going to walk you through this as if we are standing in my garage together. Take your time, measure twice, and do not be afraid to adjust the dimensions to fit your own space and needs. The dimensions I give below are what worked for me, but they are guidelines, not commandments.
Step 1: Cut the Panels
Start by cutting your 3/4-inch plywood sheet into the following pieces. I recommend cutting the sheet with a circular saw and a straight-edge guide, making sure your blade is sharp so you get clean edges without tear-out. Mark every measurement in pencil before you cut, and label each piece on the back so you do not confuse them later.
- Two side panels: 48 inches tall x 24 inches deep. These will be the left and right walls of the cart.
- Bottom panel: 48 inches wide x 24 inches deep. This forms the floor of the cart.
- Upper shelf: 48 inches wide x 24 inches deep. This sits about 18 inches above the bottom panel and provides a mid-level surface for organizing snacks.
- Countertop panel: 48 inches wide x 24 inches deep. This one attaches with hinges and folds down — it will be your serving surface.
- Face frame: two pieces of 1x4, each 48 inches long, for the front top and bottom edges.
- Back panel: 48 inches wide x 36 inches tall, cut from your 1/4-inch plywood or hardboard. This closes off the back of the cart.
Cut your 2x4 lumber into four pieces, each 22 inches long, for the leg supports, and two pieces, each 48 inches long, for the front and back base rails. These will form the frame that the plywood sits on.
Step 2: Build the Base Frame
Lay your two 48-inch 2x4 rails parallel to each other on your work surface, 24 inches apart. Place the four 22-inch leg pieces between them at the corners, forming a rectangle. Use your 2-1/2-inch wood screws to join the legs to the rails — two screws per joint, pre-drilled to prevent splitting. Make sure the frame is square by measuring diagonally from corner to corner; if the two diagonal measurements match, you are square. Clamp the frame together and let it sit while you move on to the main body.
Step 3: Assemble the Body
Stand your two side panels on edge, parallel to each other, 48 inches apart. Place the bottom panel between them, flush with the bottom edges. Drive 1-1/4-inch screws through the side panels into the edges of the bottom panel, spacing them every 6 inches. This creates a U-shaped structure. Now attach the base frame to the bottom of the assembly — the frame should sit flush against the underside of the bottom panel. Screw through the 2x4 rails into the bottom panel, using 1-1/4-inch screws every 8 inches.
Next, install the upper shelf. Measure 18 inches up from the bottom panel on both side panels and draw a level line. Cut four 2-inch-long blocks from your scrap 1x2 lumber as shelf cleats. Screw two cleats to each side panel, with their top edges aligned with your line. Set the upper shelf panel on top of the cleats and screw through the side panels into the shelf edges, using the same 6-inch spacing pattern.
Finally, attach the back panel. Lay the cart on its face (front side down) so the back is facing up. Apply a bead of wood glue along the back edges of the side panels, bottom panel, and upper shelf, then position the 1/4-inch back panel and nail it in place with 1-inch brad nails every 4 inches. The back panel adds tremendous rigidity — the cart will feel much sturdier once this is on.
Step 4: Install the Face Frame and Trim
Stand the cart upright. Take your two 1x4 face frame pieces and attach them to the front edges: one flush with the top of the cart, and one flush with the bottom of the cart (just above the base frame). Use 1-1/4-inch screws driven through the face frame into the side panels. This gives the cart a clean, finished look and hides the raw plywood edges. If you want a more polished appearance, add 1x2 trim strips along the front vertical edges as well, covering the exposed corners.
Step 5: Attach the Countertop
Your countertop panel is a separate piece that will fold down when the cart is in use and fold up against the front of the cart for storage and transport. To attach it, position the countertop so its top edge aligns with the top edge of the cart. Screw your two heavy-duty hinges to the underside of the countertop and the front face of the upper shelf, making sure the hinge pins are aligned and the countertop swings freely. When folded down, the countertop should rest horizontally, flush with the bottom edge of the face frame. Test the swing — if it binds, adjust the hinge position slightly. Once the countertop folds smoothly, install a barrel bolt or hasp latch on the underside of the countertop near the bottom edge, so you can lock it in the upright position when the cart is not in use.
Step 6: Add Wheels
Flip the cart onto its side. Attach locking casters to the two front corners of the base frame (the side that will face the audience) and non-locking casters to the two back corners. Use the screws that came with the casters, making sure they go through the 2x4 frame and not just into the plywood bottom. Three-inch casters are the sweet spot — they roll over grass and small rocks without catching, and they are large enough that the cart sits high enough to clear most thresholds. Locking casters on the front are important because they prevent the cart from rolling away when someone leans on the countertop.
Step 7: Attach the Handle
On the back of the cart (the side opposite the fold-down counter), install your handle. I recommend placing it at about waist height — 30 inches from the bottom. A flush-mount cabinet handle works well, or you can cut a hand-hold opening with a jigsaw if you prefer a recessed grip. If you plan to roll the cart across grass, consider attaching a longer handle (like a garden tool handle) that you can tilt and pull like a wagon. This makes a huge difference on uneven terrain.
Step 8: Sand Everything
Before you paint, sand every surface that will be visible. Start with 80-grit sandpaper on any rough edges, glue drips, or splintery areas. Move to 120-grit for general smoothing, and finish with 220-grit for a surface that will take paint beautifully. Pay special attention to the edges and corners, where plywood tends to splinter. Wipe all dust off with a tack cloth or a damp rag and let the cart dry completely before painting.
Step 9: Prime and Paint
Apply a coat of stain-blocking primer to every surface of the cart, including the underside of the shelves and the inside of the compartments. Primer is not optional — it seals the wood, prevents tannins from bleeding through (especially if you are using plywood), and gives the paint something to grip. Let the primer dry according to the manufacturer's instructions, then sand lightly with 220-grit paper and wipe clean.
Now the fun part: color. I painted my cart in two tones — a deep red for the main body (like a classic movie theater concession color) and white for the face frame and countertop. You can choose any combination that fits your backyard aesthetic. For a retro look, go with red and white or yellow and black. For a modern look, matte black with copper accents. For a rustic look, stain the wood instead of painting it and use barnwood-style trim. Apply two coats of exterior-grade latex paint with a foam roller for a smooth finish, allowing each coat to dry fully before sanding lightly between coats. Use a 2-inch brush for corners and crevices.
Once the paint is dry, apply a coat of outdoor sealant or polyurethane. This is your weatherproofing layer. Two thin coats are better than one thick coat — thin coats cure more evenly and are less likely to show brush marks. Let the sealant cure for at least 24 hours before you do anything else with the cart.
Step 10: Add Lettering and Signage
This is where your concession stand starts to look like the real deal. I used adhesive vinyl lettering cut with a Cricut machine to spell out "CONCESSION" across the front panel above the countertop. You can buy pre-made stencils from a craft store and paint the letters by hand, or order custom vinyl decals from an online print shop. If you go the stencil route, use painter's tape to hold the stencil flat and dab paint with a stencil brush rather than brushing — brushing pushes paint under the edges and ruins the crisp lines. For a more rustic look, you can screw in retro metal letters or mount a chalkboard panel for a menu that you can update each movie night.
Snack Organization Ideas
Once the cart is built, the real magic happens when you organize it for movie night. How you arrange your snacks is almost as important as the cart itself. Here is how I set mine up, and it has been refined through trial and error over many screenings.
The interior of the cart has two compartments — a lower compartment (the space between the bottom panel and the upper shelf) and an upper compartment (the space between the upper shelf and the fold-down countertop). The lower compartment is deeper and more enclosed, which makes it ideal for heavy or less frequently accessed items. I keep two plastic storage bins here: one holds bags of popcorn kernels, napkins, paper towels, disposable gloves, and trash bags; the other holds backup supplies like extra cups, lids, straws, and candy refills. Between the bins, I store a small camping cooler for ice that can be accessed quickly when the beverage tub on the counter needs refreshing.
The upper compartment is shallower — about 18 inches tall — and I use it for daily-access items. On the left side, I have a popcorn machine (a small countertop model fits perfectly). On the right side, I stack plastic serving bowls and baskets. In the center, I keep a tiered candy display — you can buy these at any craft store or build a simple one from scrap wood and dowels. I fill the tiers with classic movie candy in a rainbow of wrappers: red boxes of Milk Duds, yellow boxes of Sour Patch Kids, blue boxes of Junior Mints, and brown-and-white boxes of Whoppers. The visual effect is genuinely appealing, and it makes kids' eyes go wide when they see it.
The fold-down countertop is my serving surface. I set up a beverage station on the left side: a galvanized steel tub filled with ice and an assortment of sodas, sparkling water, and juice boxes. Next to it, a stack of cups and a Sharpie for name-writing. In the center, I place the popcorn machine (if it fits; otherwise, I transfer popcorn to a large bowl). On the right side, I set out the candy display and a small card reader or a cash box if we are doing a fundraiser screening. The countertop also has room for napkins, a bottle opener, and a small vase of fresh flowers or a string of battery-operated fairy lights for ambiance.
I also recommend adding hooks to the sides of the cart. Cup hooks along the side panels can hold string lights, and larger hooks can hold a trash bag or a roll of paper towels. A small magnetic strip mounted to the inside of the face frame is perfect for holding a bottle opener, a pair of scissors, and a utility knife.
Decorating Your Concession Stand
A concession stand is functional, but it is also a piece of theater. The way you decorate it sets the mood for the entire movie night. Here are three distinct styles I have tried, each with its own personality and level of effort.
Retro Diner / Carnival Style
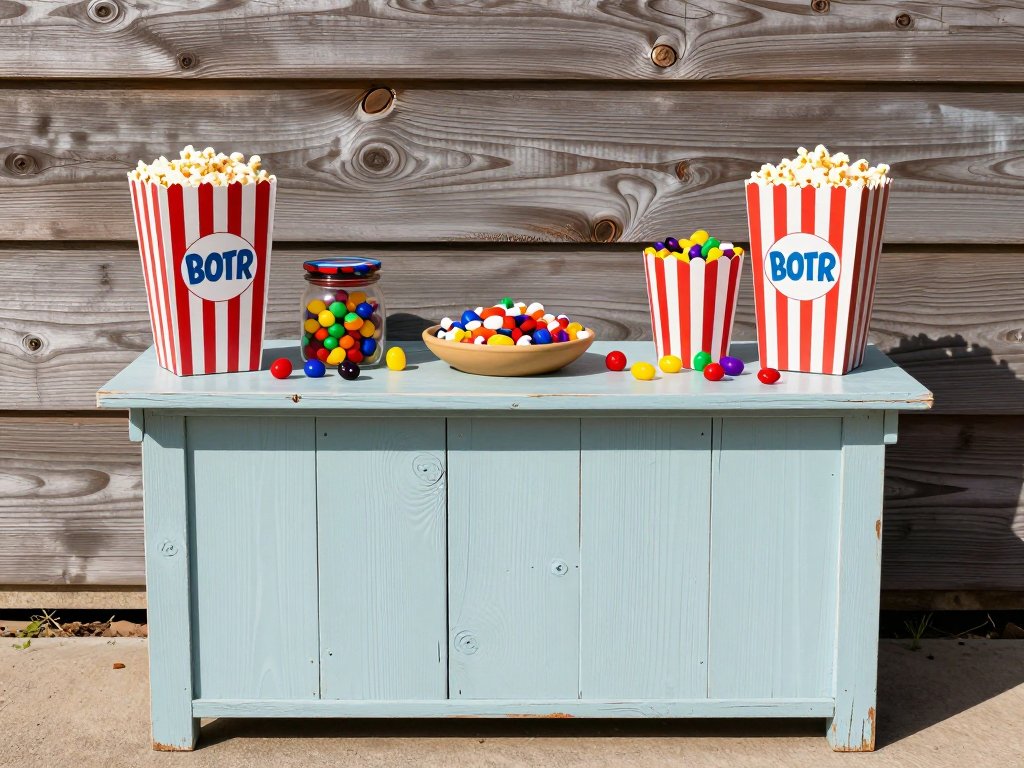
This is the classic look, and it is the one I gravitate toward most often. Paint the cart in bright red with white trim, or yellow with black trim. Add a checkerboard pattern — you can achieve this with painter's tape and careful measuring, or use adhesive vinyl checkerboard sheets. Hang a vintage-style "Popcorn" or "Concession" sign above the cart. String red-and-white bunting along the front edge of the countertop. Set out red-and-white striped paper cones for popcorn instead of plain bowls. Add a small string of globe lights overhead. This style is joyful, nostalgic, and immediately communicates that something fun is happening.
Rustic Barnwood Style
If your backyard has a more natural or farmhouse aesthetic, skip the paint and go for stain and reclaimed wood. Use cedar or pine boards for the face frame and trim instead of painted plywood. Stain the entire cart in a warm walnut or weathered gray color. Replace the standard plywood panels with rough-sawn lumber or faux barnwood panels (available at home improvement stores as tongue-and-groove wall planks). Use black metal hardware — hinges, handles, latches — with visible screws for an industrial touch. For signage, use a chalkboard panel with a wooden frame, and write the menu in chalk each week. Add a galvanized steel beverage tub and mason jars for drinks. This style blends beautifully with a natural setting and feels more permanent.
Modern Minimalist
For a clean, contemporary look, keep the cart's lines simple and the color palette restrained. Paint the entire cart in matte black, charcoal gray, or navy blue. Skip the decorative trim entirely — let the clean geometry of the plywood panels speak for itself. Use minimalist hardware: small black or brushed-nickel hinges, a recessed handle, and caster wheels that match the body color. For signage, use clean white vinyl lettering in a sans-serif font. Light the cart with a single strip of warm-white LED lights mounted under the countertop. This style looks especially striking in a modern backyard with a sleek patio and contemporary furniture. It also has the advantage of being the easiest to build, since you skip the trim and decorative details.
Weatherproofing Tips
Your concession stand will live outdoors, at least for the duration of movie season, and it will face heat, humidity, the occasional rain shower, and maybe even a surprise thunderstorm. Weatherproofing is not optional — it is the difference between a cart that lasts for years and one that starts peeling, warping, and rotting after a single season. Here is what I have learned about keeping your stand in top shape.
First, seal every edge. Plywood edges are thirsty — they absorb moisture much faster than the flat faces. Before you assemble the cart, run a bead of wood glue along every exposed edge and let it dry. Then seal the edges with primer and paint. For extra insurance, I apply a thin layer of exterior-grade wood filler to the edges and sand it smooth before painting. This creates a moisture barrier that prevents the layers of the plywood from delaminating.
Second, elevate the cart when it is in storage. If you are storing the cart in a garage or shed, place it on a couple of 2x4 scraps or a pallet to keep it off the concrete floor. Concrete sweats, and that moisture will wick up into the wood over time, causing rot and mold. The same applies if you leave the cart outside — put it on pavers or blocks so air can circulate underneath.
Third, invest in a cover. A simple canvas tarp or a custom-fitted grill cover will protect the cart from rain, dust, and UV rays when it is not in use. If you are using a tarp, make sure it is breathable — plastic tarps trap moisture underneath and can cause more damage than they prevent. Canvas or polyester with a waterproof coating is ideal. Secure the cover with bungee cords so it does not blow off in a windstorm.
Fourth, refresh the sealant annually. At the start of each summer, inspect the cart for any areas where the paint or sealant has chipped, peeled, or worn thin. Sand those areas lightly, wipe clean, and apply a fresh coat of sealant. This maintenance takes about an hour and will double the lifespan of your cart.
Fifth, consider using pressure-treated lumber for the base frame and any parts that will sit closest to the ground. Pressure-treated wood is infused with preservatives that resist rot and insect damage. It is more expensive than standard pine, but it is worth the investment for the components that take the most moisture exposure. I use pressure-treated 2x4s for the base frame of all my outdoor builds, and they have held up beautifully even after being left out in the rain.
Finally, store your removable items separately. Do not leave popcorn kernels, candy, napkins, or paper products in the cart between movie nights. They attract pests — mice, ants, raccoons, and the neighborhood possum who seems to know exactly when I have stocked up on Sour Patch Kids. I learned this the hard way. Take everything out after each use and store it in sealed plastic bins in the house or garage. Your cart will stay cleaner, and your snacks will stay uneaten by wildlife.
Budget Breakdown
I believe in being transparent about costs, so here is a detailed breakdown of what I spent on my most recent pop-up concession cart build. Prices are based on my local home improvement store in 2026; your costs will vary depending on region and material choices.
- 3/4-inch BC plywood, 4x8 sheet: $55
- 1/4-inch hardboard, 4x8 sheet: $15
- 2x4 lumber, three 8-foot lengths: $18
- 1x4 pine, one 8-foot length: $8
- 1x2 pine, one 8-foot length: $5
- 1-1/4-inch wood screws, 1-pound box: $8
- 2-1/2-inch wood screws, 1-pound box: $8
- Brad nails, 1-inch, 2-pack: $5
- Two heavy-duty gate hinges: $10
- Four 3-inch casters (2 locking, 2 non-locking): $25
- Barrel bolt latch: $4
- Flush-mount cabinet handle: $6
- Stain-blocking primer, 1 quart: $12
- Exterior latex paint, 1 quart (main color): $15
- Exterior latex paint, sample size (accent color): $6
- Outdoor polyurethane sealant, 1 quart: $14
- Sandpaper assortment: $8
- Paintbrushes and foam rollers: $10
- Painter's tape: $5
- Vinyl lettering or stencils: $10
- Wood glue: $6
Total: approximately $253. That is more than I initially estimated, but it includes everything down to the sandpaper and paintbrushes. If you already own most of the tools and consumables (screws, glue, sandpaper, brushes), you can subtract about $40. If you use MDF instead of plywood, you save about $20. If you skip the vinyl lettering and paint your signage by hand with stencils you already have, you save another $10. The core structural cost — the wood and hardware — comes to about $170, and that is the part you cannot really compromise on. The rest is finishing and decoration, where you can economize as much as you like.
Compare that to a pre-built concession cart, which typically runs $400 to $1,200 for something with similar features and dimensions. A basic hot dog cart from a restaurant supply store starts at $600, and those are not designed for backyard movie use — they are built for asphalt and sidewalks, not grass and gravel. Building your own saves you somewhere between $150 and $800, and you end up with something that is custom-fitted to your exact needs and painted in your exact colors. Plus, you get the satisfaction of saying, "I built that," every time someone asks where you bought it.
Final Thoughts
Building a DIY concession stand is one of those projects that pays dividends far beyond the wood and paint you put into it. It becomes a fixture of your summer, a gathering point for your family and friends, and a catalyst for memories that you will look back on for years. I have lost count of the number of movie nights my cart has hosted — the time we watched Jaws and served shark-shaped gummies, the double feature of The Sandlot and Field of Dreams where we ran out of popcorn before the third inning of the second movie, the rainy-night screening of The Princess Bride that we moved into the garage because nobody wanted to miss it. Every one of those nights was better because the snacks were right there, organized and ready, on a cart that I built with my own hands.
So pick up that sheet of plywood, clear a weekend, and build something that will make your backyard the place everyone wants to be. The movies will take care of the rest.