The $300 Mistake That Taught Me How to Use a Cricut
I bought my first Cricut on a Black Friday sale and immediately did the dumbest thing possible: I also bought the big accessory bundle.
Extra mats, a weeding kit, three kinds of vinyl, a starter pack of blades — the whole thing.
By the time I got home, I'd spent nearly $300 before cutting a single shape.
Then I opened Design Space, picked a design I liked, and pressed Cut. The machine hummed along like it knew exactly what it was doing. I did not.
I peeled the mat off and discovered my masterpiece was a wobbly sticker stuck to the cutting mat, sliced halfway through its liner, with half the design still weeded into the vinyl.
I salvaged maybe ten cents' worth of material out of that first sheet. My wife still brings it up.
Here's the thing I learned after a lot of trial, error, and wasted adhesive vinyl: a Cricut is not hard to use.
It just rewards a little patience and the right first projects. If you've got a machine gathering dust in a closet, or you're about to unbox one, these ten projects are exactly where you should start.
Every single one uses cheap materials, teaches you a core skill, and ends with something you'd actually pay money for.
What You Actually Need Before You Start
Before we get to the projects, let me save you the money I wasted on that bundle. Here's the honest starter list:
- The machine. Any model works for these projects. The Cricut Joy is great for small vinyl and paper work. The Explore series handles 12 by 12 inch mats and 300-plus materials. The Maker adds a rotary blade for fabric and heavier stuff like balsa wood and leather.
- One StandardGrip mat. That's the green one. It's the workhorse for most projects. A LightGrip (blue) is nice for delicate paper later, but you can start with just the green.
- Basic tools. A weeder, a scraper, and a pair of tweezers. The weeding tool looks like a dentist's pick and it's your best friend. A basic tool set costs about $10 to $15, and you don't need the fancy $40 version.
- Design Space. The software is free, and it works on desktop and your phone. You don't need a subscription for the projects here — the free library has plenty of basic shapes, and you can upload your own images.
- Materials. Start with a few sheets of permanent adhesive vinyl, some cardstock, and one roll of transfer tape. That's maybe $20 and it covers the first five projects on this list.
Notice what's missing? The $200 bundle. You can add specialty mats and blades when a project actually calls for them. Buy for the project, not for the shelf.
1. Vinyl Decals for Mugs and Tumblers
This is the project everyone starts with, and for good reason. It's cheap, it's forgiving, and it teaches you the three skills you'll use in almost everything else: cutting, weeding, and transferring.
Grab a plain mug or tumbler from the dollar store, or better yet, one of the blank mugs you've been gifted over the years. Open Design Space, type your name or a short phrase, and pick a simple font. Set the material to "vinyl" and let it cut.
Here's where beginners panic: weeding. After the cut, you peel away everything that isn't your design. Take your time. This is not a race, and honestly, it's kind of meditative once you get the hang of it.
Then comes the transfer tape — a clear sheet that lifts your design off the backing paper and carries it to the mug.
Stick it down, burnish it with the scraper, and pull the backing off slowly. Center it on the mug, press from the middle outward, and peel the tape away at a sharp angle.
Done.
Why I love this as a first project: if you mess up, you're out maybe fifty cents of vinyl. And you'll instantly understand why the Cricut is worth the counter space.
2. Personalized Gift Tags
Gift tags are the ultimate scrap-buster project. Those little leftover pieces of vinyl from your mug decals? Perfect for this.
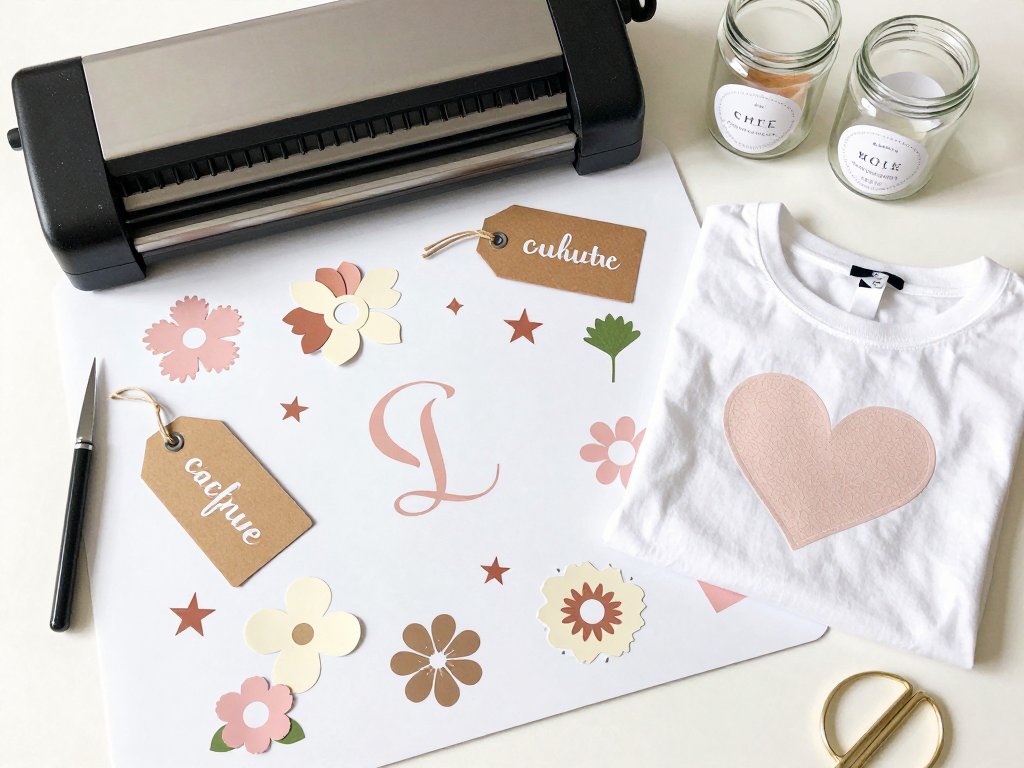
Cut simple tag shapes out of cardstock, then cut names, monograms, or little icons out of vinyl scraps. "To" and "From" lines, a snowflake for the winter gift pile, a heart for a birthday — you can make a whole set in about fifteen minutes.
The best part is the math. Store-bought tags run a dollar or two a pack and look exactly like everyone else's. Your cut vinyl tags look custom, because they are. A sheet of cardstock costs about a dollar and makes dozens of tags.
This is also the project that teaches you how to align small pieces on the mat, which sounds boring until you realize it's the difference between a clean cut and a design that walks off the edge mid-cut.
3. Iron-On Shirts for the Whole Family
Iron-on vinyl, also called heat transfer vinyl or HTV, is where the Cricut stops feeling like a toy and starts feeling like a money printer. A plain tee is three or four dollars. Add an iron-on design, and it looks like a boutique shirt you'd pay twenty for.
Here's the golden rule that trips up almost every beginner: mirror your design before cutting. Iron-on has a shiny carrier side and a matte vinyl side.
You cut on the matte side, which means the design comes out backward unless you flip it in Design Space.
I learned this the hard way with a shirt that read perfectly from the inside out.
Cut with the material set to "iron-on," weed out the excess, and position the design on the shirt with the carrier sheet facing up.
Press with a home iron or a heat press, following the time and temperature for your vinyl brand.
Peel the carrier while it's still warm, and you're done.
Start with one-color designs and simple shapes. Once you get comfortable, you can layer colors — but that's a skill for your second week, not your first night.
4. Cardstock Paper Flowers
If you've ever paid twenty dollars for a bouquet of paper flowers, this project will make you feel a little cheated. A pack of cardstock is a few dollars, and one sheet makes several flowers.
In Design Space, search for a simple paper flower — layered petals work best. Cut each petal layer out of cardstock, then curl the edges with a stylus or the handle of a paintbrush.
Stack the layers with a dab of hot glue, and you've got a flower that looks like it came from a boutique.
This project teaches you the LightGrip mat (or the "cardstock" pressure setting) because paper is delicate. Cut too hard and you'll score through to the mat; too light and the petals won't separate cleanly.
Paper flowers are also a gateway to bigger things. Cluster them on a wreath, glue them to gift toppers, or make a centerpiece for a party. Same technique, endlessly reusable.
5. Custom Stickers with Printable Vinyl
Printable vinyl is the cheat code of the sticker world. You print your design on a regular inkjet printer, let the Cricut cut around it, and suddenly you're a sticker manufacturer.
This is the project that unlocks the "Print Then Cut" feature in Design Space. It's a little intimidating the first time — the machine reads black registration marks around your printout to know exactly where to cut.
The key is to let the ink dry fully and keep the sheet flat on the mat, or the machine will misread the marks.
Why bother making your own stickers? Because a sheet of printable vinyl runs a few dollars and yields a full page of stickers, while a single die-cut sticker at a shop costs two or three bucks.
If you have kids, you already know where this is going: sticker books for school, laptop stickers for yourself, labels for everything in the kitchen.
For extra durability, add a clear laminate sheet over the top before cutting. It makes the stickers waterproof and gives them that slightly glossy finish you'd expect from a store.
6. Pantry and Spice Jar Labels
Here's the project that finally got my wife on board with the Cricut. We had a cabinet full of identical glass jars and no idea which one held the flour and which held the powdered sugar.
Cut simple rounded rectangles out of vinyl, then cut the label text in a clean sans-serif font. Apply each label to a jar with the transfer tape method from project one. That's it. The whole cabinet took an afternoon, and it looks like a kitchen from a magazine.
This is really a practice session for adhesive vinyl, disguised as home organization. You'll get comfortable with centering text, spacing letters, and fixing the inevitable slightly-crooked label (peel it off and try again — permanent vinyl is surprisingly forgiving while it's fresh).
Bonus: removable vinyl works even better here if you refill jars, because you can swap labels when the contents change.
7. Paint Stencils for Fabric and Walls
Stencil vinyl is the unsung hero of the Cricut world. It's a low-tack vinyl designed to be cut, weeded, and then used as a reusable paint mask.
Cut a design — a monogram, a polka dot pattern, a geometric shape — out of stencil vinyl, weed out the openings, and stick it to a tote bag, a wall, or a wooden sign.
Paint over it, let the paint dry, and peel the stencil off. The crisp edges look professionally painted.
What this project teaches you is blade depth and the value of a weeded design. Stencil lettering is the ultimate weeding workout: every little island inside an "a" or an "e" has to come out cleanly, or the paint fills it in.
Start with a tote bag or a canvas shoe. Walls are less forgiving, but the technique is identical. I'd still recommend practicing on fabric first, because a mistake on a tote bag is a happy accident, and a mistake on your hallway is not.
8. Greeting Cards That Look Store-Bought
Cardstock, a few vinyl details, and a blank card base are all you need to make greeting cards that embarrass the drugstore rack.
Cut a card-front design out of cardstock — a balloon cluster, a birthday cake, a simple floral arrangement — then layer it on a blank card base with a glue pen. Add a vinyl sentiment like "Happy Birthday" or "Congrats" for that extra pop.
This is a natural pairing with the vinyl gift tags from project two, by the way. A custom card plus a matching custom tag turns a twenty-dollar gift into a forty-dollar experience, and it costs you about a buck in materials.
If you want to go deeper with card-making, this is also the project where a bone folder and a scoring tool become worth the money. But for your first cards, a glue pen and a steady hand are plenty.
9. Locker and Wall Decals
Removable vinyl turns the Cricut into a room decoration machine. Cut a name, a favorite quote, or a simple shape, and apply it to a bedroom wall, a dorm room door, or a kid's locker.
The key word here is removable. Permanent vinyl is for mugs and jars; for walls and lockers you want the low-tack stuff that peels off cleanly months later.
Ask me how I know — my first attempt used permanent vinyl, and removing it took a heat gun, a scraper, and a surprising amount of swearing.
Wall decals also teach you the hinge method for big transfers: tape the top of the design to the wall, lift the bottom, peel the backing, and smooth it down from the top. It keeps a large design from folding onto itself and turning into a vinyl origami disaster.
Back-to-school season is the perfect time for this one. If you're making locker decorations for the kids, you'll also want to check out our guide to DIY pencil cases and locker decor for ideas that don't need a machine at all.
10. Vinyl-Wrapped Water Bottles
Round surfaces are the final boss of beginner Cricut projects, but they're not as scary as they look. A water bottle is the perfect training ground because it's cheap to replace and the curve is gentle.
Cut a design out of permanent vinyl, apply it with transfer tape, and then work from the center of the design outward with a squeegee or your thumbs.
The trick is to let the vinyl stretch slightly as you push it around the curve.
Slow and steady beats fast and bubbly every time.
For more complex shapes — tumblers with ridges, bottles with taper — the technique gets more advanced. My own deep dive on vinyl wraps on curved objects covers the hinge method, heat stretching, and relief cuts for when you're ready to level up.
For now, a straight-sided bottle with a simple design is a win. It's the project where everything finally clicks: cut, weed, transfer, apply, admire.
Mistakes I Made So You Don't Have To
Every one of these projects has a trap I fell into on my first try. Here's the short version of my tuition:
- Cutting through the liner. If your blade pressure is too high, you'll slice through the vinyl AND the backing paper, and your design becomes confetti. Lower the pressure for thin materials. It's better to under-cut and re-run than to over-cut and start over.
- Forgetting to mirror iron-on. Iron-on designs cut backward. Flip them in Design Space before cutting, or you'll make a shirt that reads correctly only in the mirror. (Yes, I've done this. Twice.)
- Skipping transfer tape. Some beginners try to peel vinyl off the backing and stick it on by hand. It wrinkles, it stretches, and it picks up every piece of lint in the room. Transfer tape is not optional — it's the tool that makes vinyl behave.
- Weeding in a hurry. Rushing the weeding step is how you snap tiny letters and then spend twenty minutes hunting for the pieces. Put on a podcast and take your time.
- Overloading the mat. The mat loses stickiness over time. When pieces start lifting mid-cut, wash the mat gently with warm water and dish soap, let it dry, and it's sticky again. A lint roller also works for quick touch-ups.
None of these mistakes wasted more than a few dollars of material. That's the beauty of starting with cheap projects — your failures are affordable.
Final Thoughts
If you just got a Cricut, or you're finally unboxing the one that's been in the closet for a year, start with project one tonight. One mug, one sheet of vinyl, one hour. That's the whole assignment.
These ten projects aren't a to-do list; they're a skill ladder. Each one teaches you something the next one builds on, and by the time you've worked through them, you'll look at a blank wall, a plain tee, or a boring jar and see a project instead.
And once you're comfortable with the machine, the craft world opens up fast. The same cardstock skills translate to junk journaling and paper mache sculpture, and vinyl techniques feed into everything from this year's biggest craft trends.
The machine cuts the shapes. But the projects — and the confidence — are yours.