Introduction
I was eight years old the first time I truly looked at a cloudy sky.
It was a summer afternoon in my grandmother's garden, and I was lying flat on my back in the clover, complaining that there was nothing to do.
She came out with two jam jars of water, a battered tin of her old watercolor pans, and a scrap of paper torn from a sketchbook.
"Paint what you see up there," she said, pointing. And I tried. The result was a muddy, overworked mess — but something clicked that day. I understood that clouds weren't just white blobs. They had depth, movement, edges that blurred and sharpened. They were alive.
That was thirty years ago, and I have been chasing that same sky ever since.
Watercolor is the perfect medium for clouds. Its transparency, its willingness to bleed and bloom, its refusal to be fully controlled — these qualities mirror the sky itself.
You do not fight watercolor into submission. You learn to work with it, to anticipate where the water will go, and to trust the paper to do some of the work for you.
In this tutorial, I will walk you through everything you need to paint a convincing cloudy sky.
Whether you are picking up a brush for the first time or returning to watercolor after a long pause, these techniques will give you a solid foundation.
And if your first attempt looks nothing like a cloud — well, that is how it should be.
My grandmother would say you are simply painting the sky you have not learned to see yet.
What You Will Need
Let us start with supplies. You do not need a lot, but what you do need matters. I have painted cloudy skies with student-grade materials and with professional ones, and while the expensive stuff is lovely, it is technique that makes the difference.
Watercolor Paper. Use 100% cotton, cold-pressed paper of at least 140 lb (300 gsm). Cotton paper holds water differently than wood-pulp paper.
It gives you more time to work wet-into-wet, and it lifts more cleanly when you need to pull out cloud shapes.
A full sheet is nice, but a quarter-sheet (roughly 11 x 15 inches) is perfect for practicing.
Arches, Fabriano Artistico, and Stonehenge are reliable brands.
Brushes. You need three brushes to start: a large flat or mop brush (size 12 or bigger) for the initial wash, a medium round (size 8 or 10) for shaping clouds, and a small rigger or liner brush (size 2) for fine edges and cirrus wisps.
Natural-hair brushes hold more water than synthetics, which is helpful for wet-on-wet work, but a good synthetic blend works perfectly well.
My most-used brush is a well-worn size 12 synthetic mop that cost me twelve dollars ten years ago.
It has painted hundreds of skies.
Paint Colors. You only need four tubes or pans to paint any cloudy sky. Ultramarine gives you that warm, deep blue found higher in the sky. Cerulean is cooler and paler, perfect for the lower sky and for mixing soft grays. Burnt sienna is your secret weapon — a tiny amount mixed with ultramarine creates the most beautiful neutral gray for cloud shadows.
And Payne's gray is useful for stormy skies and the darkest accents. That is it.
Four colors. Everything else is optional.
Additional Supplies. You will want a mixing palette with wells, two jars of clean water (one for rinsing, one for clean mixing), a soft paper towel or cotton cloth, a pencil for light sketching, and a spray bottle for keeping your paper damp.
A hairdryer can speed things up between layers, but it is not essential. I often work without one, letting the sky take its time.
Understanding the Wet-on-Wet Technique
Wet-on-wet is the foundation of almost every watercolor sky. The name describes exactly what it sounds like: you apply wet paint onto a wet surface. The pigment spreads, bleeds, and softens naturally, creating the diffused edges that make clouds look real rather than cut out.
There is a moment in every wet-on-wet painting when the water and pigment begin to move on their own.
It feels almost magical. You lay down a wash of blue, and before it dries, you touch in a stroke of gray, and the two colors bloom into each other like memory and imagination meeting halfway.
That moment is what I love most about watercolor.
The key variable is the wetness of your paper. If the paper is soaking wet — gleaming with a visible film of water — your pigment will spread far and create very soft, dreamy edges.
If the paper is merely damp — not shiny, but cool to the touch — your pigment will spread less and hold a slightly firmer shape.
Learning to read the moisture level of your paper is the single most important skill in sky painting.
I test the moisture by tilting the paper slightly. If water runs in rivulets, it is too wet.
If the surface looks matte but feels cool when I rest the back of my hand an inch above it, it is just right.
This is not something you can learn from a book. You have to touch the paper, feel it, make mistakes, and try again.
I have ruined hundreds of skies this way, and I am grateful for every one.
Painting Different Cloud Types
Not all clouds are the same, and they should not be painted the same way. Each type has its own character, its own rhythm, and its own technical approach.
Cumulus Clouds
Cumulus clouds are the ones you drew as a child — big, fluffy, cotton-ball shapes with flat bottoms and rounded tops. They are the most recognizable cloud and the most satisfying to paint when you get them right.
To paint a cumulus cloud, start with a wet-on-wet wash of cerulean blue across your sky area.
While the paper is still damp, load a clean brush with clear water and paint the shape of your cloud — the water will push the pigment aside, creating a light area.
This is called a wet lift. Then, while the paper is still damp, touch in a shadow mixture of ultramarine with a tiny speck of burnt sienna along the bottom edge of the cloud.
The pigment will bleed softly upward, giving the cloud volume.
The trick is not to overwork it. Cumulus clouds have hard edges at the top where they catch the sun and soft, dissolving edges at the bottom.
If you keep fussing, you will lose that contrast. Paint the shadow, step back, and let the water do the blending.
I ruined countless clouds by trying to fix them. Most of the time, the first pass is the best one.
Cirrus Clouds
Cirrus clouds are high, thin, wispy streaks that look like brushstrokes across the sky. They are delicate and require a lighter touch.
For cirrus clouds, work on paper that is barely damp — almost dry to the touch but still cool.
Load a rigger brush with a very dilute mixture of cerulean and a touch of Payne's gray.
Using the side of the brush, pull long, sweeping strokes across the paper in the direction of the wind.
The pigment should feather out naturally at the edges. If the strokes are too sharp, go over them immediately with a clean, damp brush to soften.
Cirrus clouds are forgiving because they are supposed to look uneven and irregular. I think of them as the handwriting of the sky — each stroke records the movement of air at a particular moment. No two are alike, and that is exactly right.
Stratus Clouds
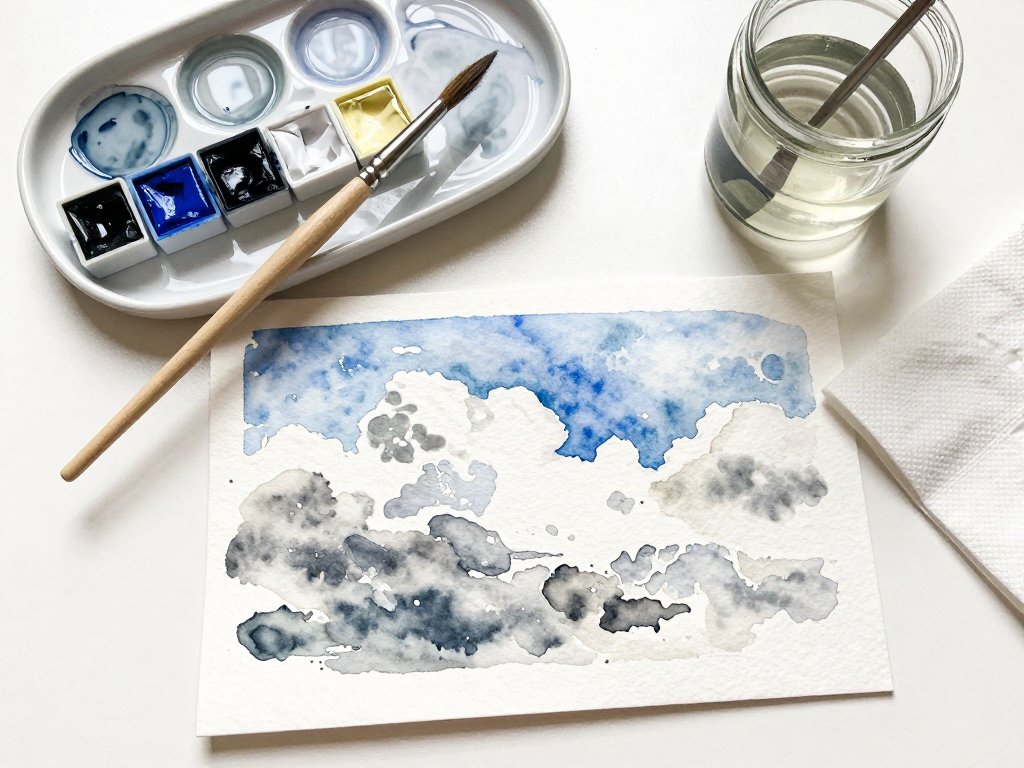
Stratus clouds are the ones that cover the whole sky in a flat, gray blanket. They are the most difficult to paint well because they have so little obvious structure. The beauty is in the subtle variations of tone.
To paint a stratus sky, wet your entire paper evenly with a large brush, then apply a graded wash of Payne's gray mixed with a touch of ultramarine.
While the wash is still wet, tilt the board slightly to let the pigment settle into gentle horizontal bands.
Blot the paper in places with a crumpled tissue to create lighter patches where the sun tries to break through.
Stratus skies remind me of November afternoons in my hometown, when the light was flat and soft and everything felt muffled and still. There is a melancholy beauty to them that is hard to capture. Do not try to make a stratus sky dramatic. Let it be quiet.
Controlling the Water-to-Paint Ratio
Every watercolorist I know has a story about the time they used too much water. Or too little. The ratio of water to pigment determines everything: the value, the softness, the behavior of the paint on the paper.
For sky backgrounds, you want a very watery mixture — what painters call a "juicy wash." The pigment-to-water ratio should be roughly one part pigment to five or six parts water.
The mixture should look pale on your palette. It will dry lighter, so do not be afraid if it looks too faint when wet.
For cloud shadows and darker accents, use a thicker mixture — about one part pigment to two parts water. This heavier mixture will hold its shape better on damp paper, creating the harder edges that define cloud forms.
Here is the test I use: load your brush, then touch it to a paper towel.
If the mark spreads into a diffuse bloom with a dark center, the ratio is right for wet-on-wet work.
If the mark holds a sharp, solid line, the mixture is too thick for a wash but may be perfect for shadow details.
If the mark is barely visible, add more pigment.
Every time I start a new sky, I remind myself of something a teacher told me years ago: "You are painting with water. The pigment is just along for the ride."
Lifting Techniques for Cloud Shapes
One of the great advantages of watercolor is that you can remove pigment as well as apply it.
Lifting is the technique of pulling wet or damp pigment off the paper to reveal the white surface beneath.
For cloudy skies, lifting is how you create the bright, sunlit tops of clouds.
Wet lifting. While your sky wash is still wet, rinse your brush thoroughly, squeeze out most of the water, and gently touch the brush tip to the area where you want a cloud to appear.
The dryish brush will absorb pigment from the paper, leaving a lighter shape. Blot the brush on a towel and repeat to make the cloud lighter.
This technique works best on cotton paper, which releases pigment more readily than cellulose paper.
Damp lifting. If your wash has dried but is not fully set (within a few minutes of drying), you can still lift pigment by rewetting the area with clean water, waiting a few seconds, then blotting with a tissue or a clean, dry brush.
This gives you more control over the final shape than wet lifting, but the edges will be slightly harder.
Dry lifting. For fully dry paper, use a stiff, damp brush to scrub the surface gently, then blot immediately. This technique is useful for correcting mistakes or adding small highlights after the sky has finished drying. Be gentle — aggressive scrubbing can damage the paper surface and create unwanted texture.
I learned lifting techniques by painting the same cloud over and over again on scrap paper, trying to lift pigment at different stages of dryness.
It took me weeks to develop a feel for when the paper was ready. The time investment was worth it.
Lifting is the difference between a cloud that looks painted on and a cloud that looks like it belongs in the sky.
Common Beginner Mistakes and How to Fix Them
I have made every mistake in the book, and probably a few that are not in any book. Here are the ones I see most often in student work, along with the fixes that helped me.
Muddy colors. This happens when you mix too many colors together or when you overwork the paper while it is still wet.
The fix is to limit your palette to two or three colors per cloud and to stop painting before you think you are done.
If the colors on your paper look clean and bright, put the brush down.
Hard edges where you want soft ones. Hard edges appear when you apply paint to paper that has already dried.
The solution is to work faster or to keep the paper damp with a spray bottle.
If a hard edge appears where you do not want it, you can soften it immediately with a clean, damp brush.
Once the edge is fully dry, you cannot fix it without scrubbing.
Clouds that look like disconnected blobs. This is usually caused by painting each cloud in isolation rather than seeing the sky as a continuous whole.
The fix is to wet the entire sky area before you begin and to work across the whole painting rather than finishing one cloud at a time.
Clouds in nature flow into one another. Your painting should do the same.
Overworking. This is the hardest mistake to stop making because it comes from a good place — you care about the painting and want it to be right.
But watercolor is not a medium that rewards perfectionism. Every time you touch a drying wash, you risk disturbing the delicate balance of pigment and water.
The fix is simple: learn to stop. Paint your sky in two or three passes at most, then walk away.
Let the painting be what it wants to be.
Using too much paint. Beginners often use paint straight from the tube or pan without diluting it enough.
The result is a sky that looks heavy and opaque rather than light and airy.
The fix is to mix your wash on the palette and test it on scrap paper before applying it to your painting.
A sky wash should look like tinted water, not like paint.
Step-by-Step: Painting Your First Cloudy Sky
Let us put everything together in a single exercise. Set aside an hour, make a cup of tea, and give yourself permission to create something imperfect.
Step 1: Prepare your paper. Stretch your paper if you are using a lightweight sheet, or tape a heavy sheet to a board with artist's tape.
Lightly sketch the horizon line about one-third of the way up from the bottom. Do not sketch the clouds — let them emerge from the water.
Step 2: Wet the sky area. Using your large mop brush, wet the entire area above the horizon with clean water.
Work in even strokes, left to right or top to bottom. The surface should glisten but not pool.
If puddles form, tilt the board to drain them or blot with a tissue.
Step 3: Apply the sky wash. Mix a generous wash of cerulean blue with a touch of ultramarine.
Starting at the top of the paper, paint horizontal strokes across the sky, working downward.
The wash should be lighter near the horizon. If the bottom is too dark, blot it gently with a tissue to lift excess pigment.
Step 4: Create your first clouds. While the wash is still wet, rinse your brush and squeeze out most of the water.
Touch the tip to the paper where you want your main cumulus cloud. The brush will absorb pigment, leaving a light shape.
Work quickly, creating two or three cloud shapes across the sky. Vary their size and placement.
Nature does not repeat itself.
Step 5: Add cloud shadows. Mix a small amount of ultramarine with a tiny speck of burnt sienna.
Using your medium round brush, touch this gray mixture along the bottom edge of each cloud.
The pigment will bloom upward into the damp paper, creating soft shadows. Do not paint the entire bottom edge — let some areas remain white.
Clouds are not solid objects.
Step 6: Introduce cirrus wisps. While the paper is still damp, load your rigger brush with a very dilute mixture of cerulean and Payne's gray.
Pull thin, horizontal strokes through the upper part of the sky. These wisps give the sky depth and movement.
Keep them light — they should whisper, not shout.
Step 7: Let it dry completely. This is the hardest step. Place your board flat and walk away for at least twenty minutes. Do not touch the paper. Do not check on it. Let the water and pigment settle into their final shapes.
Step 8: Evaluate and adjust. Once the sky is bone dry, look at what you have.
If the clouds are too faint, you can deepen the shadows with a second wash.
Rewet the cloud areas with clean water, let them become damp, then touch in a stronger gray mixture.
If the clouds are too dark, you can lift pigment with a damp brush and blotting.
But remember: less is more. If the sky looks good, call it finished.
Step 9: Paint the foreground. Wet the area below the horizon and paint a simple landscape element — a field, a hill, a stretch of water. Keep it simple. The sky is the subject of this painting. The foreground is just there to give the clouds something to sit above.
Step 10: Sign your work. Even if it is not perfect. Especially if it is not perfect. Every painting is a record of a moment in your learning, and that is worth signing.
Finding Your Own Sky
A few weeks after that afternoon in my grandmother's garden, I painted another sky. It was not good.
The clouds looked like bruises, the blue was muddy, and the paper was so waterlogged that it buckled.
But my grandmother framed it anyway. It hung in her kitchen for fifteen years, until she passed away.
That painting taught me something important. A cloudy sky in watercolor does not need to be technically perfect to be meaningful. It needs to have feeling. It needs to capture the way the light changed, the way the clouds moved, the way you felt standing under them.
The techniques in this tutorial will give you the tools to paint any sky you can see.
But the real work — the work of looking, of feeling, of translating what you see onto paper — that is yours alone.
Start with a wet wash and a clean brush. Paint what you see, not what you think a cloud should look like.
And if your first attempt fails, try again. The sky will still be there tomorrow, full of new clouds, waiting for you to try once more.
For more watercolor tutorials and inspiration, visit Painting at arttools.com or explore our collection of beginner-friendly guides.