Introduction
There is a particular kind of magic in a bowl of fall leaves. You bring them home, still warm from the sun, and for a day or two they look like treasure. Then they curl, brown, and crumble into dust on the kitchen counter.
I have watched that little heartbreak happen more times than I can count. So this guide is my attempt to help you keep the color a while longer — pressed flat in a book, softened with glycerin, or dipped in wax.
None of these methods require special talent. They need a dry afternoon, a few pantry items, and the patience to let time do most of the work. You already have everything else.
Let's start with why leaves change at all, because knowing the science actually helps you pick the right ones at the right moment.
Why Leaves Change Color in Fall
Through summer, a leaf is a little solar factory. It is full of chlorophyll, the green pigment that captures sunlight and turns it into food for the tree.
As days shorten and temperatures drop, the tree stops producing chlorophyll and begins to pull nutrients back into its trunk and roots. The green fades from the leaf, and whatever colors were hidden underneath finally get their turn.
Carotenoids are the yellows and oranges — the same pigments that make carrots orange. They were in the leaf all along, just masked by green. That is why maples and birches turn such reliable gold and amber.
Anthocyanins are different. These are the reds and purples, and the tree actually manufactures them fresh in autumn, especially on bright, cool days. A warm sunny afternoon followed by a chilly night is the recipe for the deepest crimson.
This matters for your craft basket. A leaf at peak color still has moisture and structure left in it. It preserves beautifully. A leaf that has already gone brown and brittle is mostly dead tissue, and no method will bring the color back.
So pick your moment. The best leaves are the ones that turned fully but haven't dried out yet. If it crunches underfoot, leave it there.
Which Leaves Preserve Best
Not every leaf behaves the same way in a press. Thin, low-moisture leaves dry flat and hold their shape well. Thick, waxy, high-moisture leaves fight you every step of the way.
My reliable favorites are maple, oak, birch, ginkgo, and elm. Maples press into crisp stars. Oak leaves are sturdy and leathery, with lovely lobed edges. Birch brings tiny yellow hearts. Ginkgo gives you perfect golden fans that look almost painted.
Leaves to be cautious with include magnolia, holly, and anything else that feels thick and slick like a rubber plant. Their waxy coatings trap moisture, so they mold easily and press unevenly. Holly also has spines that puncture newspaper.
Here is a quick rule: if you can fold the leaf gently and it whispers rather than snaps, it will press well. If it feels like a thick wet dishrag, plan on glycerin or wax instead.
How to Gather Leaves
When you gather makes a surprising difference. Head out on a dry day, never right after rain. Wet leaves carry mold spores straight into your project.
Mid-morning is ideal. The overnight dew has dried, the sun is gentle, and the leaves are still pliable. Avoid late afternoon, when dampness starts creeping back in.
Always leave the stem on. The stem gives you something to hold while dipping or pressing, and it looks natural in a finished craft. Snip it later if you need to.
Pick from the branch when you can, choosing leaves that have turned color but still feel firm. If you must take from the ground, take only freshly fallen ones that lie flat and smooth.
Skip anything already curling at the edges, spotted with black, or damp to the touch. A curled leaf will never flatten cleanly. Bring a flat-bottomed basket or a shoebox so your harvest doesn't crush itself on the walk home.
Method 1: Pressing Leaves
Pressing is the classic method, and it rewards patience. It gives you the flattest, most paper-like result — perfect for anything that will be glued or framed.
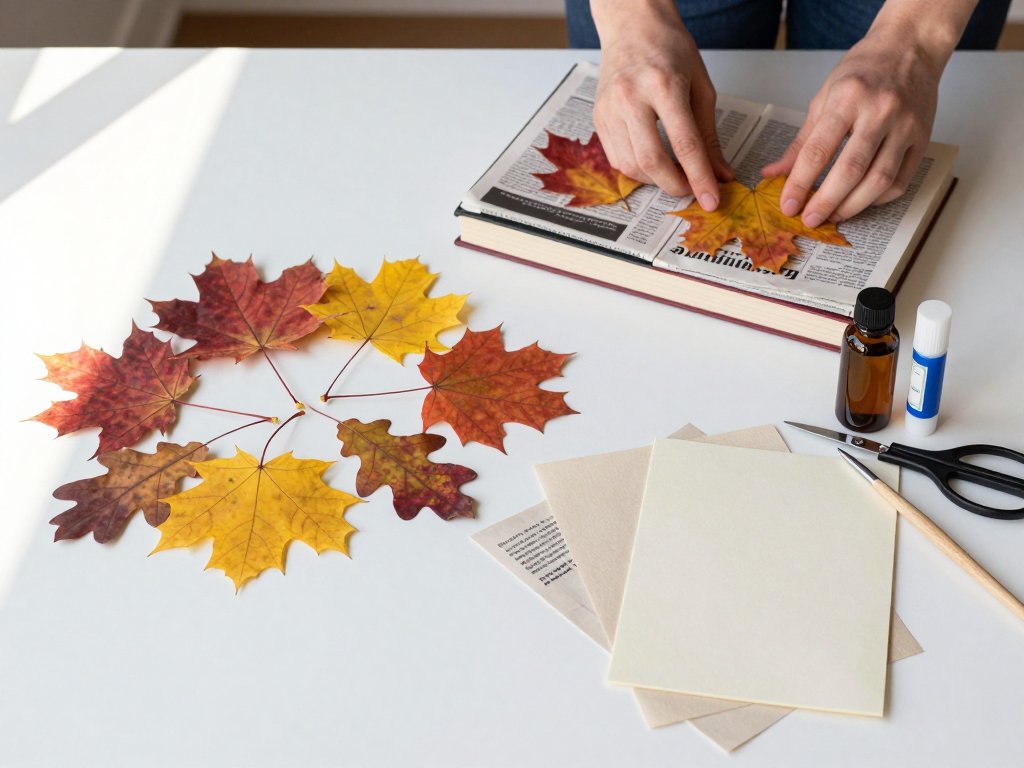
Pressing Between Newspaper and Books
- Lay a sheet of newspaper on a flat surface.
- Place your leaves face down, leaving space between each one so air can move.
- Cover with a second sheet of newspaper.
- Stack heavy books on top — a dictionary plus a couple of cookbooks works well.
- Wait one to three weeks, depending on thickness.
The trick most people miss is changing the paper. After two days, swap in fresh, dry newspaper. That removes the moisture the leaves have released and prevents mold.
Check the paper every few days. If it feels damp, change it again. A pressed leaf that molds is a lost leaf.
Pressing With Wax Paper and an Iron
When you need results by this weekend, the iron shortcut is your friend. Lay a leaf between two sheets of wax paper, then sandwich that between two towels or sheets of plain paper.
Set your iron to low or medium, with no steam. Press gently for a few seconds, lift, and check. Repeat in short passes until the leaf is flat and the wax has sealed around it.
The wax paper clings to the leaf and gives it a soft sheen, which looks lovely on cards. It also makes the leaf slightly stiff, so reserve this method for flat projects.
The Microwave-Press Shortcut
You can also use a microwave flower press, or two ceramic tiles held with rubber bands, with the leaf layered in paper between them. Microwave in short bursts of 20 to 30 seconds.
Crucially, let the press cool completely between bursts. Rushing this is how leaves scorch, and scorched leaves turn an unappealing brown. Three or four cycles is usually enough for thin leaves.
Microwave pressing is fast but less predictable, so test with one leaf before committing your whole basket.
Method 2: Glycerin Soak
Pressing flattens leaves, but glycerin keeps them flexible. If you want bendable, leathery leaves for wreaths or garlands, this is the method for you.
Glycerin replaces the water inside the leaf with a syrupy liquid that never fully dries out. The leaf stays supple for months instead of turning brittle. The color shifts a little — usually toward a muted olive or bronze — but it holds.
Mix one part glycerin to two parts water in a shallow pan. Glycerin is available at drugstores and craft shops, and a small bottle goes a long way. Inexpensive and worth keeping on hand.
Submerge your leaves and weigh them down with a plate so they stay under the surface. Soak for two to six days, depending on thickness. Thin maples may be done in two; thicker oak can take nearly a week.
You will know they are ready when the leaves feel soft and slightly heavier, and the color has taken on that dull, rich tone. Remove them and blot gently with paper towels.
Then lay them flat to dry, still with stems intact, on a rack or a sheet of parchment. They will not need pressing, but they will stay flexible. Flexible leaves are perfect for wrapping around candle holders or weaving into wreaths.
Method 3: Wax Dip or Wax Coating
Waxing gives leaves a glossy, preserved look that feels almost like porcelain. It also makes them a little more durable to handling — a good choice for a garland the kids will touch.
Paraffin wax is the traditional choice and the cheapest. Beeswax gives a warmer, slightly golden finish and smells lovely. Either works; a blend is wonderful if you have both.
Safety first: always melt wax in a double boiler or a heatproof bowl set over simmering water. Never melt wax directly over a flame, and never leave it unattended. Wax can flash if it overheats.
Once the wax is fully liquid and clear, hold a leaf by the stem and dip it in, then lift it out. Let the excess drip back into the pot for a second.
Then blot the leaf between sheets of paper towel to remove any thick pools, and lay it flat to harden. It sets within a minute or two.
One caution: waxed leaves resist glue. Mod Podge and white glue will not stick to a wax coating, so think twice before waxing leaves that you plan to glue onto cards. Use waxed leaves for loose decoration instead.
Method 4: Silica Gel and Desiccant
If you want leaves that keep their three-dimensional shape — gently cupped, not flattened — silica gel is the answer. It dries leaves in place in two to four days.
Look for the sandy, flower-drying type of silica gel crystals, not the little bead packets that come in shoeboxes. Craft stores sell it by the bag as "flower drying crystals."
Pour an inch of crystals into an airtight container, nestle your leaf on top, then gently sift more crystals over and around it until fully buried. Seal the lid and wait.
Thin leaves are ready in about two days; thicker ones in four. Lift them out gently with a soft brush, because they are delicate once dry.
The tradeoff is cost. A bag of silica gel is more expensive than newspaper, and it needs to be dried out in the oven between uses to stay effective. But for a special display piece, it is worth it.
Storing Preserved Leaves
Once your leaves are dry, how you store them decides whether they survive the season. Tossed in a drawer, they will crumble. Stored well, they will wait patiently for your next project.
Layer them between sheets of tissue paper in a rigid box — a photo box or a shallow storage bin works perfectly. Add a sheet of card between layers for extra support.
Keep the box somewhere cool and dry, away from the basement damp and the bathroom steam. Humidity is the enemy of every preserved leaf.
And keep it out of direct sunlight. Despite all your work, sunlight will fade the pigments over time, and a sunny windowsill will undo a season's worth of color in a few weeks.
Crafts That Show Preserved Leaves Off
This is the fun part. Once you have a box of preserved leaves, the projects practically suggest themselves. Here are the ones that use each method best.
Leaf-and-Mod-Podge Coasters or Trivets
Press flat leaves, arrange them on plain ceramic tiles, and seal with several coats of Mod Podge. Use the matte or dishwasher-safe formula for trivets, and the glossy formula for a shiny coaster set.
Pressed leaves work best here because they lie perfectly flat. Brush a thin layer under each leaf, then two or three coats over the top, letting each dry fully.
Framed Leaf Collage With Mats
Arrange pressed leaves in a grid or a spray on a sheet of cream card, then frame with a generous mat. The mat gives the composition breathing room and looks gallery-worthy.
Ginkgo fans and maple stars are especially striking in a symmetrical layout. Use acid-free card so the leaves don't discolor over the years.
Greeting Cards
Pressed leaves turn a blank card into something handmade and personal. Glue with a glue stick or clear craft glue, then add a handwritten note. These are lovely for thank-you notes in November.
Thin pressed leaves are best, since bulky ones make the card hard to close. A single perfect leaf centered on cream paper is often enough.
Bookmarks Laminated With Clear Contact Paper
Sandwich pressed leaves between two pieces of clear contact paper, trim with a border, and punch a hole for a ribbon. You have a bookmark that will last for years.
This is the one project where lamination is a true win, because it protects delicate leaves from handling. Pressed leaves only — anything thicker will bubble.
Autumn Table Decor and Place Cards
Scatter waxed or glycerin leaves down a runner, or tuck one into each folded napkin. Small pressed leaves make elegant place cards when glued to a tent of card stock.
For a full tablescape — runner, candles, and layered centerpieces — our guide to Fall Tablescape Ideas: Easy Autumn Centerpieces walks through a whole autumn table from scratch.
Candle Holders
Wrap clean glass votive holders with glycerin leaves, overlapping them like scales, and secure with a thin ribbon or twine. The flexible leaves hug the curve beautifully.
Never let the leaves touch the flame or sit near a lit candle's heat. Keep decorations at the base, and never leave a burning candle unattended.
Pressed-Leaf Garland
To make a garland, lay glycerin leaves face down in a row, overlapping, and run a line of craft glue or double-sided tape down their centers. Fold each leaf gently over the line.
Glycerin leaves are ideal because they stay supple and bend with the string. Hang the finished garland across a mantel or a doorway for an instant autumn feel.
Working With Kids
Crafting with little ones is a joy, but it also means dividing the work into safe and unsafe steps. Being clear about that keeps everyone happy and safe.
A four-year-old can absolutely help gather leaves on a walk, sort them by color and shape, and brush glue onto paper with a fat glue stick. Sorting is wonderfully absorbing for small hands.
What needs an adult: the hot iron, the wax pot, the microwave, and lamination with contact paper or a machine. Those are grown-up tools, full stop.
A good rhythm is to let your child gather and sort while you handle the heat. Then invite them back to decorate the cards and coasters, where their small, sticky fingers shine.
Troubleshooting
Even with care, things go sideways. Here are the problems I hear about most, and what to do.
- Leaves curl as they dry. They were pressed unevenly or dried too fast. Weight them more evenly next time, and change the paper more often.
- Mold spots appear. Moisture got trapped. Change the newspaper after two days, use dry leaves, and never gather when it's wet outside.
- Results turn brown and brittle. The leaves were past peak when gathered, or the iron and microwave were too hot. Go cooler and shorter.
- Leaves fall apart when glued. The glue is too wet. Use a glue stick, or seal with Mod Podge in thin layers instead of a heavy liquid glue.
- Colors fade after a season. Sunlight did it. Store and display your work away from direct sun, and expect some softening no matter what.
One Evening Is Enough
Here is the heart of it: you do not need a whole weekend, or a craft room, or any special skill. One dry morning walk is enough to fill a basket for the entire season.
Gather more than you think you need. Press some, glycerin others, and tuck the extras away in tissue. Then the projects can happen whenever you find a quiet half hour.
Some of your leaves will curl and some will fade. That is completely normal, and it is not a measure of how well you did. The point was never perfection.
The point was a pocket full of October, brought home and pinned down, so you can look at it in January and remember the walk. That is worth every crumbly leaf.