Introduction
Junk journaling is the craft trend that has taken over 2026, and for good reason. It is affordable, sustainable, endlessly creative, and requires almost zero skill to begin. If you have ever saved a pretty receipt, a vintage postcard, or an old book you could not bear to throw away, you already have everything you need to start.
This guide will walk you through exactly what junk journaling is, why it is exploding right now, what supplies you actually need (spoiler: very few), and the core techniques that will have you creating beautiful pages in your first session. No fluff, no gatekeeping, just a clear path from zero to your first completed journal spread.
What Is Junk Journaling?
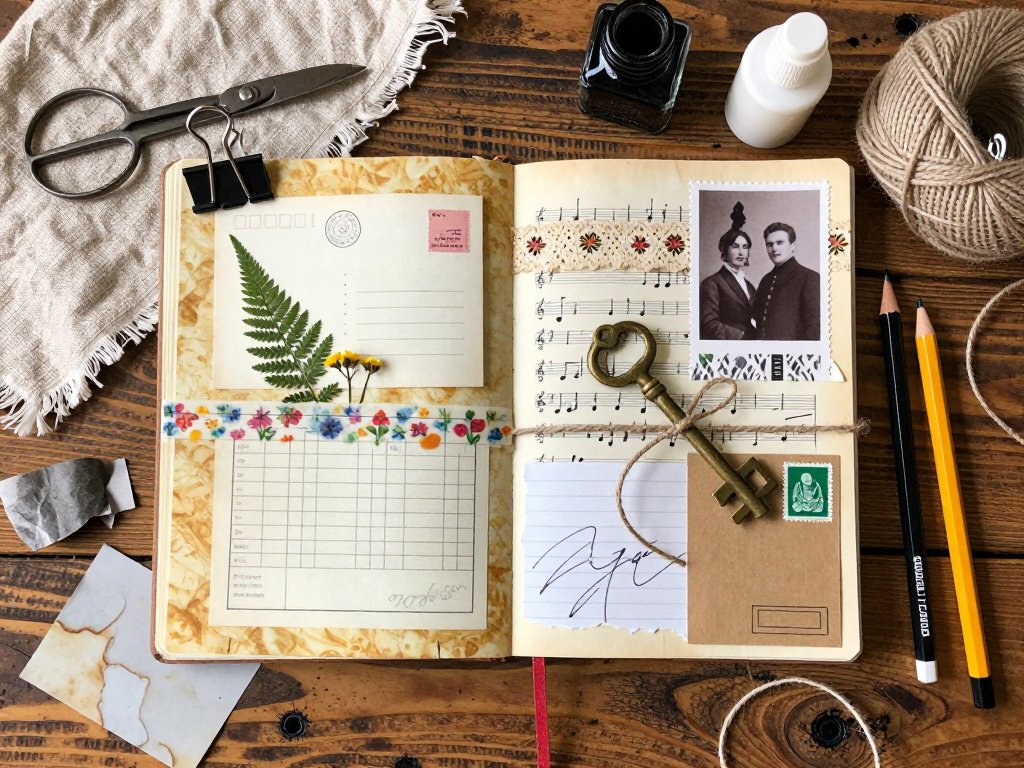
Junk journaling is the practice of using found papers, recycled materials, and everyday ephemera to create unique art journals. Instead of buying expensive crafting supplies, you repurpose things that would otherwise be trash or sit unused. Old book pages, sheet music, envelopes, receipts, maps, greeting cards, ticket stubs, packaging, and handwritten notes all become raw material for your pages.
The defining characteristic of a junk journal is that no two pages look alike. Every spread is a one-of-a-kind composition built from whatever catches your eye. Some pages hold writing and reflection. Others are purely visual collages. Many include hidden pockets, tuck spots, and interactive elements that make flipping through the journal an experience in itself.
This is not about perfection. It is about creative reuse, personal expression, and the joy of making something beautiful from things that others overlooked. If you can cut, glue, and arrange paper, you can junk journal.
Why Junk Journaling Is Trending in 2026
The rise of junk journaling is not a coincidence. Several cultural shifts have converged to make this the moment for the craft.
The sustainability movement. More people are looking for creative outlets that do not generate waste or require disposable consumer goods. Junk journaling is the ultimate upcycling craft. Your main supply is literally trash and thrift store castoffs. It aligns perfectly with the growing desire to make, mend, and reuse rather than buy new.
The hunger for analog creativity. We live in a screen-saturated world. Junk journaling offers a tactile, offline escape. There is something deeply satisfying about working with physical paper, feeling textures, and creating something you can hold in your hands. It is a deliberate counterbalance to digital life.
Low barrier to entry. You can start junk journaling with items you already have in your home. A discarded notebook, a glue stick from the back of a drawer, and a stack of old mail are enough to complete your first spread. There is no expensive starter kit to buy, no steep learning curve to climb.
The therapeutic aspect. The repetitive motions of cutting, arranging, and gluing are meditative. Many practitioners describe it as a form of active mindfulness. The process quiets the mind, reduces anxiety, and provides a sense of accomplishment that scrolling on a phone cannot replicate.
Strong community on TikTok and Instagram. The hashtag #junkjournaling has billions of views across platforms. Thousands of creators share technique tutorials, page tours, and supply hauls daily. The community is exceptionally welcoming and beginner-friendly. You will find inspiration and encouragement immediately.
Basic Supplies: What You Actually Need
Let us be direct about what you need versus what is nice to have. If you are starting today, these are the essentials.
Essential Supplies
- A blank journal or notebook. A composition notebook from the dollar store works perfectly. So does an old hardcover book whose pages you can repurpose. You can also buy a pre-made junk journal base from craft stores or arttools.com. Look for something with sturdy pages that can handle glue and layered paper.
- A glue stick. Elmer's purple glue stick is the gold standard for beginners. It goes on purple so you can see where you have applied it, dries clear, and does not warp thin paper. Avoid liquid glue for now it wrinkles pages too easily.
- Scissors. A sharp pair of detail scissors will serve you better than large shears. Fiskars craft scissors are reliable and affordable.
- Washi tape. This decorative paper tape is a junk journalist's best friend. It adheres well, is repositionable, comes in endless patterns, and adds instant visual interest. Buy a multipack of assorted colors from any craft store or arttools.com to start.
- Found papers. This is your main material. Start collecting: junk mail with interesting typography, greeting cards, sheet music from thrift stores, old maps, vintage postcards, book pages from discarded library books, paper bags, receipts, ticket stubs, and handwritten letters from flea markets.
- A pen. A fine-tip black pen for writing in your journal. Micron pens in size 01 or 05 are excellent. A white gel pen for writing on dark papers is also handy.
Nice-to-Have Supplies
- Rubber stamps and ink pads. A few alphabet stamps and a small set of date stamps add texture and customization. Black archival ink is the most versatile.
- Stencils. Circle and geometric stencils help create consistent shapes for backgrounds and borders.
- Ribbon and lace. Used for bookmarks, page ties, and decorative edges. Thrift store sewing baskets are an excellent source.
- Buttons and charms. Sew or glue these onto covers and pages for three-dimensional interest.
- Bone folder. A simple tool for creasing paper and smoothing glued layers. A plastic one costs under five dollars and lasts forever.
- Paper trimmer. If you find yourself cutting a lot of straight edges, a guillotine-style paper trimmer saves time and gives cleaner results than scissors.
Sourcing Materials on a Budget
Junk journaling should cost almost nothing. Here is where to find materials without spending much money at all.
Thrift stores are your primary hunting ground. Old books cost fifty cents to two dollars. Look for ones with yellowed pages, interesting covers, and unusual topics. Vintage sheet music, maps, and postcards are often found in the same section. Grab anything that appeals to your eye the price is low enough that you can experiment freely.
Friends and family are excellent sources. Ask them to save their junk mail, old greeting cards, used envelopes, and discarded magazines. Most people are happy to pass these along to someone who will use them creatively.
Your own mailbox is a steady supply. Before you recycle any catalog, letter, or promotional postcard, flip through it and see if any of the paper stock or imagery appeals to you. You will be surprised how often the answer is yes.
Library sales and book swaps offer damaged or withdrawn books for pennies. These are ideal because the damaged condition that led to their removal does not matter for your purposes in fact, it often adds character.
Freecycle groups and Buy Nothing communities on Facebook frequently have craft supplies listed. Set a search alert for paper, books, and craft supplies and you will build a solid stash within a month.
Core Techniques for Beginners
These five techniques form the foundation of junk journaling. Master these and you can create any page you imagine.
1. Collage Layering
Collage layering is the most fundamental technique. You build visual depth by stacking multiple pieces of paper on top of each other, creating a composition that draws the eye across the page.
How to do it:
- Start with a base page. This can be a plain journal page, a piece of scrapbook paper, or a page torn from an old book.
- Choose a focal point. This is the main image or piece of text that anchors the spread. A vintage postcard, a photograph, or a large decorative cutout works well.
- Add background layers behind the focal point. Tear or cut papers that complement the colors and theme of your focal piece. Overlap them slightly so no single piece sits alone.
- Add foreground elements on top of the focal point. Small items like a ticket stub, a stamped image, or a snippet of handwriting sit at the top layer of the composition.
- Use washi tape along the edges of your layers to blend them into the page and add decorative borders.
The key to successful collage layering is contrast. Pair light papers with dark, smooth textures with rough, large images with small text snippets. The variety of materials is what gives junk journal pages their signature look.
2. Pocket Pages
Pocket pages are pages with hidden or visible compartments that hold loose items postcards, tags, photographs, notes. They add an interactive element to your journal and give you places to store things you want to keep but not permanently glue down.
How to make a basic pocket page:
- Cut a piece of decorative paper to the same height as your journal page but about two-thirds the width.
- Apply glue along the left edge, the bottom edge, and the right edge of the paper piece, leaving the top edge unglued.
- Press the paper onto your journal page. You now have an open pocket at the top.
- Let the glue dry completely before inserting anything into the pocket.
- Decorate the front of the pocket with washi tape, a label, or a small image so it looks intentional and integrated into the page design.
Variations include double pockets (two compartments side by side), angled pockets (trim the top edge at a slant for a more dynamic look), and layered pockets (a smaller pocket on top of a larger one).
3. Tuck Spots
Tuck spots are small paper strips glued at their edges to create miniature sleeves that hold individual items. They are simpler than full pockets and perfect for holding tickets, photos, or tags.
How to make a tuck spot:
- Cut a strip of paper about two inches wide and two inches tall, or sized to match the item you want to hold.
- Apply glue to the left edge, the right edge, and the bottom edge of the strip. Leave the top edge open.
- Press the strip onto your journal page where you want the item to sit.
- Slide your photo, ticket, or tag into the opening. It should fit snugly but slide out easily.
Tuck spots work beautifully in rows or grids. Try creating three small tuck spots in a row across the bottom of a page to hold a series of polaroid-style photos or a set of botanical prints.
4. Tea and Coffee Staining
Tea and coffee staining ages new paper in minutes, giving it the warm, vintage patina that characterizes classic junk journals. This technique is simple, satisfying, and transforms even plain printer paper into something that looks a hundred years old.
How to stain paper with tea:
- Brew a strong cup of black tea. Let it cool to room temperature. Two tea bags in one cup of boiling water steeped for ten minutes produces a deep stain.
- Lay your paper flat on a protected surface. A baking sheet lined with parchment paper works perfectly.
- Dip a clean paintbrush or sponge into the tea and brush it across the paper in even strokes. You can also crumple the paper first and then brush tea into the creases for a more textured result.
- Let the paper dry completely. This takes one to two hours at room temperature. You can speed it up with a hairdryer on low heat.
- For darker edges, dip just the corners of the paper into leftover tea and let them sit for a minute before drying.
How to stain paper with coffee: Follow the same process using cooled brewed coffee instead of tea. Coffee produces a slightly warmer, browner tone than tea and tends to have a more speckled result, especially if you use instant coffee granules sprinkled onto wet paper.
Aim to stain a batch of ten to twenty pages at once so you always have vintage paper on hand for future spreads.
5. Thread Binding
While you can absolutely junk journal in a pre-bound notebook, making your own signature bindings unlocks more possibilities. The simplest beginner-friendly binding is the saddle stitch, which works perfectly for small journals made from folded paper signatures.
How to saddle stitch a mini journal:
- Fold several sheets of paper in half to create a signature. Four to six folded sheets is a manageable thickness for a beginner.
- Open the signature and lay it flat. Using a needle or awl, poke three holes along the fold line one in the center, one about an inch from the top, and one about an inch from the bottom.
- Thread a needle with waxed thread or embroidery floss. Push the needle through the center hole from the outside of the fold to the inside.
- Push the needle through the top hole from the inside to the outside.
- Push the needle through the bottom hole from the outside to the inside.
- Return the needle through the center hole from the inside to the outside. You should now have a thread forming a vertical line along the fold with both ends exiting the center hole.
- Tie the two thread ends together in a firm knot. Trim the excess thread to about a quarter inch.
This technique requires a bit of practice to get the tension right, but it is extremely forgiving. Even a slightly uneven stitch will hold your pages together securely and add a handmade charm that pre-bound journals cannot match. For detailed tutorials on more advanced binding methods like Coptic stitch, visit arttools.com.
Your First Junk Journal Spread: A Step-by-Step Walkthrough
Let us put these techniques together into a complete spread. Find a clear workspace, gather your materials, and follow along.
Step 1: Choose your theme and color palette. Pick a simple theme for your first spread. Nature, travel, and everyday gratitude are good starting points. Select two or three colors that will anchor your palette. If you are using a vintage botanical postcard as your focal point, pull brown, cream, and sage green from it.
Step 2: Prepare your base. Open your journal to a clean two-page spread. If the pages are stark white, consider giving them a light wash of tea stain or a thin layer of scrapbook paper as a background. You want the base to have some visual warmth.
Step 3: Arrange your main elements. Without gluing anything yet, place your focal image, larger background papers, and significant text pieces on the pages. Move them around until the composition feels balanced. Step back and look at it from a distance. Adjust until you are satisfied.
Step 4: Add pockets or tuck spots. Decide if you want any hidden compartments on these pages. If you have a small photograph or a handwritten note you want to include without gluing permanently, make a pocket or tuck spot now and position it in your layout.
Step 5: Glue everything in place. Start with the bottommost layers and work up. Apply glue stick evenly to the back of each piece, press it down firmly, and smooth it with your hand or a bone folder. Wipe away any excess glue immediately.
Step 6: Add decorative finishing touches. Use washi tape along the edges of your collage pieces to hide any glue marks or uneven cuts. Stamp a date or a small image in an empty corner. Write a short caption or thought next to your focal image.
Step 7: Let it dry and then enjoy. Close your journal gently and place a weight on top such as another book. Let it sit for thirty minutes. Then open it and flip through your first completed spread. Congratulations you are now a junk journalist.
Common Beginner Mistakes and How to Avoid Them
Every new junk journalist makes these mistakes. Here is how to recognize and avoid them.
Using too much glue. Less is more. A thin, even layer of glue stick is all you need. Excess glue will wrinkle your paper and create stiff, uneven pages. If you see glue oozing out from the edges of your paper, you used too much.
Overloading a single page. It is tempting to include every beautiful piece of paper you have collected, but crowded pages lose their impact. Leave some empty space. Let your eye rest. A page with three well-chosen elements is more striking than a page with thirty.
Comparing your work to established creators. The junk journals you see on TikTok and Instagram are often made by people with years of experience and extensive material collections. Your first pages will not look like theirs, and that is completely fine. Your journal is yours. It does not need to impress anyone.
Skipping the drying step. Wet glue and layered paper need time to set. If you close your journal too soon, pages will stick together and your carefully arranged elements will shift. Always let your spread dry fully before moving on.
Being afraid to alter books. Many beginners hesitate to cut or glue in old books because it feels destructive. Remember that these books were destined for the landfill or recycling bin. You are giving them a second life as art. That is a beautiful thing, not a destructive one.
Taking It Further: Next Steps After Your First Journal
Once you have completed your first journal of ten to twenty spreads, you will likely be hooked. Here is what to explore next.
Try different journal formats. Switch from a composition notebook to a handmade signature bound with Coptic stitch. Experiment with a tiny journal made from a repurposed matchbox or a large-format journal built inside an old hardcover book cover. Each format changes how you compose your spreads.
Build themed journals. Dedicate an entire journal to a single theme. A travel journal using maps and ticket stubs. A nature journal using pressed leaves and botanical prints. A gratitude journal using warm colors and handwritten affirmations. Themed journals are deeply satisfying to complete and make meaningful gifts.
Learn new binding techniques. Coptic stitch binding lies flat when open, making it ideal for thick journals. Japanese stab binding creates beautiful exposed spines with decorative thread patterns. Both are accessible to intermediate crafters and transform the structure of your journals.
Explore mixed media. Add acrylic paint, watercolor washes, gel medium transfers, and fabric elements to your pages. These techniques expand your creative range and produce textures that paper alone cannot achieve.
Join the community. Post your pages on Instagram or TikTok with the #junkjournaling tag. Participate in online swaps where you trade handmade ephemera with other journalists. Join a local craft group or start one at your library. The community is one of the greatest strengths of this craft, and sharing your work will inspire you to keep creating.
Final Thoughts
Junk journaling is the most accessible, affordable, and forgiving creative practice you can start today. You do not need talent. You do not need expensive supplies. You do not need a plan. You just need a stack of paper, a glue stick, and the willingness to make something imperfect.
The beauty of this craft is that the limitations are what set you free. You work with what you have. Every scrap of paper carries its own history, and when you combine them, you create something that has never existed before. That is a powerful thing.
Start today. Open a notebook. Spread out some papers. Begin. Your first page will not be your best, but it will be yours, and that is the whole point.
For a curated selection of beginner-friendly junk journaling supplies, visit arttools.com. For technique video tutorials, check out the arttools.com blog for step-by-step guides.