Introduction
There is a particular ache in holding a broken bowl.
You remember the day you bought it, the soup you served in it, the small chip your toddler gave it two winters ago. Now the pieces sit in a box, too precious to throw away and too broken to use.
What if the break were not the end of the story?
Kintsugi, the Japanese art of mending pottery with gold, offers a different answer. Instead of hiding the crack, you illuminate it. The bowl comes back stronger, more beautiful, and more honest than before.
You do not need a kiln, a studio, or years of training. You need one broken object, a few simple supplies, and a quiet afternoon.
The best part? The mended bowl will never be ordinary again. Every time you see the gold seam, you will remember the afternoon you fixed it.
In this guide, we will trace the history of kintsugi, explore the philosophy behind it, and walk through a gentle modern method you can finish in a weekend. No lacquer expertise required.
The Story Behind Kintsugi
Every craft has a creation story. Kintsugi's begins in the late fifteenth century, with a shogun and a broken tea bowl.
Ashikaga Yoshimasa, the eighth Ashikaga shogun, owned a treasured Chinese tea bowl. When it cracked, he sent it back to China for repair. It returned held together with ugly metal staples — functional, but frankly, a disappointment.
So Yoshimasa asked Japanese craftsmen to find a more beautiful way. They answered with lacquer dusted with gold, and a new art form was born.
Historians may debate the details, but the legend carries its own truth. Notice what happened in the story. The shogun did not ask for an invisible repair. He asked for a beautiful one.
That small shift in intention is the entire philosophy of kintsugi.
The philosophy has a name: wabi-sabi, the appreciation of imperfection, impermanence, and the honest marks of time. A repaired crack becomes part of the object's story, not a flaw to hide.
This is the quiet magic of wabi-sabi. It asks us to slow down and look again at the things we would normally discard, and to find the beauty that age and accident have left behind.
What Kintsugi Really Means
The word kintsugi (金継ぎ) translates to "gold joinery." Kin means gold; tsugi means joining or repair.
Traditionally, craftsmen mix urushi lacquer with powdered gold, silver, or platinum, then use that glowing paste to join the broken edges.
It is a small word for such a large idea.
In kintsugi, the mended seam is the most important part of the object. It records the moment of breakage and the care of the repair. The bowl's history becomes visible, worn proudly like a scar that tells a story.
Some artists choose silver or platinum powder instead of gold, which changes the mood of the piece entirely. Gold feels warm and celebratory; silver feels quiet and moonlit.
The choice of metal is a creative decision, not a rule. Beginners usually start with gold because it photographs beautifully and feels celebratory.
For beginners, the philosophy is liberating news. You are not trying to make the crack disappear. You are trying to make it meaningful.
Traditional Urushi vs. The Modern Beginner Method
Before we gather materials, let us be honest about the traditional way.
Classic kintsugi uses urushi, a natural lacquer tapped from the lacquer tree, Toxicodendron vernicifluum. It is a magnificent material — waterproof, durable, almost indestructible once cured.
It is also demanding. Raw urushi contains urushiol, the same compound that gives poison ivy its bite, and it can irritate skin badly. The lacquer cures slowly in a humid environment, so a single traditional repair can take weeks of patient waiting.
Urushi rewards those who master it. A cured finish can outlive the pot itself. But it asks for gloves, a curing box with controlled humidity, and a timeline measured in weeks rather than days.
If you fall in love with kintsugi, learning urushi later is a worthy adventure. Many artists spend years with it. For now, let the modern method carry you.
That is why this guide teaches a modern beginner method instead.
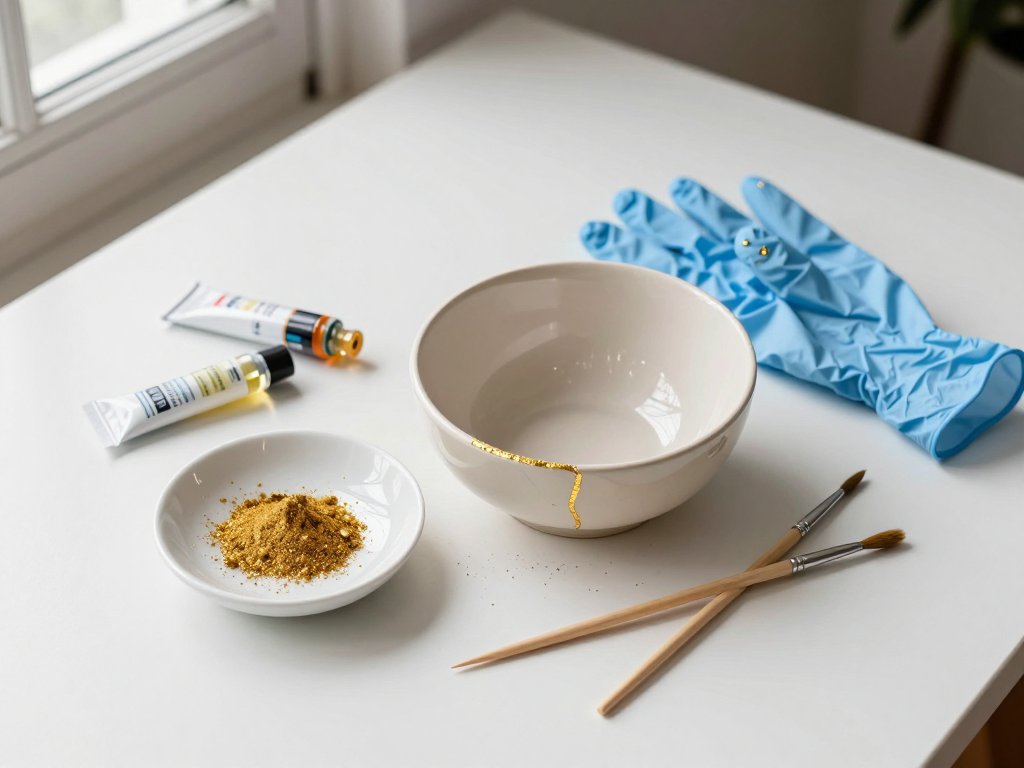
You will use a two-part epoxy resin or ceramic-safe adhesive, mixed with gold mica powder. It dries in hours, needs no special equipment, and produces a beautiful, luminous gold line.
One honest note: pieces repaired this way are for display, not for food service. Unless every material is certified food-safe, keep your mended bowl on the shelf, not in the dishwasher.
What You'll Need
Kintsugi's material list is short, and most of it is easy to find online or at a craft store.
- Two-part epoxy resin or ceramic-safe adhesive. A clear-drying formula lets the gold powder shine.
- Gold mica powder. A little goes a long way; one small jar will last through many repairs.
- Nitrile or latex gloves, because epoxy is sticky and stubborn on skin.
- Wooden toothpicks for applying and shaping the gold paste.
- Masking tape or painter's tape to hold pieces together while the epoxy sets.
- A covered work surface — a silicone craft mat or wax paper works beautifully.
- Rubbing alcohol and a soft cloth for cleaning the break edges.
- A small dish for mixing, plus patience. Patience is the most important supply.
Why epoxy and not super glue? Epoxy gives you working time. You can position the pieces, adjust the seam, and wipe away the excess before it locks. Super glue sets in seconds and leaves you no room for a gentle hand.
If you cannot find gold mica powder locally, look for it online; craft suppliers carry it in many shades, from pale champagne to deep antique gold.
Choosing Your First Piece
Not every broken object is a good first project. Choose wisely, and your first kintsugi will feel like a triumph rather than a struggle.
Look for a simple two-piece break. A bowl cracked cleanly in half, a mug that lost its handle, a plate snapped into two large shards.
Multiple fragments multiply the difficulty. Every new piece is another seam to align, another angle to hold steady while the epoxy sets. Save the twelve-piece puzzle for your third or fourth repair.
Choose a decorative object first — a vase, a trinket dish, a keepsake bowl. That way, you skip the food-safety question entirely and simply enjoy the process.
Avoid porous, crumbly earthenware for your debut; it drinks up glue and leaves a messy seam. Smooth, well-fired ceramics behave far better.
Thrift stores are wonderful hunting grounds. A chipped vase from the secondhand shelf costs little, and a gold repair turns it into a one-of-a-kind treasure.
Above all, choose something you love. The whole point of kintsugi is that the object matters enough to repair.
Step-by-Step: Your First Kintsugi Repair
Find a quiet afternoon. Clear the kitchen table, put on some music, and lay out your supplies.
- Clean and dry every shard. Wash gently with mild soap, rinse well, and let the pieces dry completely. Any grease or dust on the break edges weakens the bond.
- Test-fit the pieces. Hold them together dry and study the seam. Notice how the edges meet and where the finished crack will sit.
- Use masking tape to hold the bowl together from the outside. This is your rehearsal. If the pieces fit neatly here, the real repair will go smoothly.
- If the pieces wobble during the test fit, look closely at the break edges. A small fragment may be hiding in the box, and finding it now saves you trouble later.
- Mix the epoxy according to the package directions, then stir in a pinch of gold mica powder until the paste turns a rich, even gold.
- Apply a thin line of the gold mixture to one edge of the break. A toothpick gives you the control a brush cannot.
- Press the pieces together gently, aligning the seam as you go. The gold paste will squeeze out — that is expected, not a mistake.
- Wipe away the excess with a damp cloth or your fingertip, smoothing the line as you wipe.
- Hold the pieces for a few minutes, then secure them with tape and leave them completely alone.
- Let the repair cure fully — 24 to 48 hours. Resist the urge to peek. Epoxy needs uninterrupted time to reach full strength.
Why thin lines? Because the gold should trace the crack, not bury it. A fine seam catches the light like a hairline of sunlight; a thick one looks like buttercream icing.
Work at a table, not on your lap. A steady surface keeps the pieces from sliding while the epoxy is still wet.
Filling Chips and Missing Pieces
Not every break is a clean line. Sometimes a corner of the rim is gone entirely, or a shard shattered into dust.
Do not despair. Small missing areas are some of the easiest places to work gold.
Mix a slightly thicker batch of epoxy and gold powder — think honey, not water. Use a toothpick to fill the gap, building the paste up until it sits level with the surrounding surface.
Work in a well-lit spot. Gold paste is easier to shape when you can see exactly where the edge of the gap is.
You can also add a tiny amount of clay or ceramic dust to the mix to give the filler body, then dust the top with gold mica powder while it is still wet.
For a deeper chip, fill it in two layers, letting the first cure before adding the second. Thick epoxy in one pour can sag or trap bubbles.
Once cured, the filled chip becomes a small gold island. It reads as decoration, as if the bowl always intended to wear gold there.
Finishing Touches
The epoxy has cured. The seam is solid. Now the repair becomes yours.
If the surface feels rough, sand it gently with fine-grit sandpaper — around 400 grit — working in small circles. Go slowly; you can always remove more, but you cannot put material back.
Wipe away the dust, then re-touch the line with a little more gold powder or a thin coat of gold paint to refresh the color.
For a truly traditional look, try gold leaf. Brush a thin layer of fresh epoxy over the cured seam, let it turn tacky, and press a sheet of gold leaf onto it. Brush away the excess with a soft brush. The result is a metallic seam with real depth.
Practice gold leaf on a scrap piece first if you can. It is forgiving, but a dry run builds confidence.
Finally, consider a sealant. A spray-on acrylic sealer protects the gold from tarnish and dust, keeping your seam bright for years.
Know when to stop, too. Kintsugi is not about perfection; a slightly uneven line is part of the charm, proof that a human hand did the mending.
Troubleshooting
Every repairer meets trouble. Here is how to meet it back.
Sticky epoxy that never seems to set usually means you mixed the two parts in the wrong ratio. Measure carefully, and give the mix a full minute of stirring.
Misaligned seams happen when the tape does its job too late. Tape the pieces together before you apply the glue, then work the glue into the seam from the outside.
Air bubbles trapped in the gold line look like tiny craters. Press the pieces together slowly, and use your toothpick to coax bubbles out before the epoxy thickens.
Too-thick lines are the beginner's most common regret. Use less mixture than you think you need. You can always add more gold, but removing a bulging seam means sanding and starting over.
If the piece wobbles, you may have missed a tiny fragment or the surfaces are not perfectly flush. Check the fit before the glue sets, and shim the seam with a thin extra layer of paste.
And if a repair goes wrong anyway? Let it cure, sand it back, and try again. Kintsugi teaches patience even in its practice.
Safety Notes
Kintsugi is gentle in spirit, but the materials deserve respect.
Always wear gloves when handling epoxy. It is a strong adhesive, and it is stubborn on skin. Keep your work area ventilated, and work away from children and pets.
Do not inhale the gold mica powder; it is fine and easily airborne. A mask is a reasonable precaution if you mix large batches.
And repeat the important disclaimer: epoxy repairs are not food-safe unless every product you used is certified for food contact. Use your mended pieces for display, dried flowers, jewelry, or keys — and keep them out of the dishwasher and microwave.
If you want a piece that can hold soup again, seek out food-safe ceramic repair kits and follow their instructions to the letter. They exist, and they are worth the extra cost.
Repairing as a Gift Idea
Some of the most moving gifts are the ones with a past.
Think of your grandmother's serving bowl, the one that broke during a move. Repair it in gold, wrap it carefully, and give it back to her. The crack tells the family story — every dinner, every holiday, every hand that carried it.
A kintsugi repair says: this object mattered enough to save, and so do you.
For children, repairing a favorite mug or a beloved ceramic animal together can be a quiet lesson in resilience. The thing that broke did not become trash; it became art.
A mended piece also makes a thoughtful housewarming gift. The new owner receives something with a visible history, and a story to tell their guests.
When you give a mended piece, include a short note explaining the gold lines. The receiver will understand that the repair is not a cover-up. It is a celebration of everything the object has survived.
Conclusion
There is a reason kintsugi has traveled so far from its fifteenth-century origins.
We all carry cracks. We all have places where life broke us and we were mended. Kintsugi whispers that those places can be the most beautiful parts of us — if we are willing to fill them with gold.
Your first repair does not need to be perfect. It needs to be done with care.
Take your time. Let the epoxy cure completely. Admire the seam before you judge it.
So find the broken bowl in your cupboard. Gather your epoxy, your gold powder, and your patience. And when the seam shines, set the bowl where you will see it every day.
That is the whole art: not hiding the break, but honoring the story it tells.