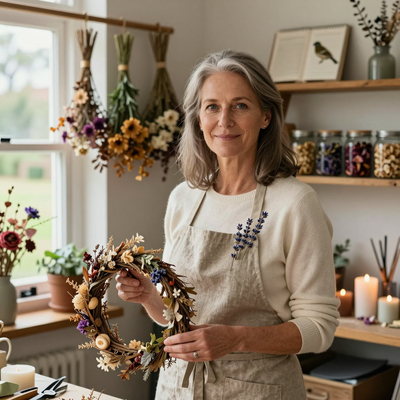
Introduction
Knitting has been warming human shoulders since at least the thirteenth century. The earliest known knitted artifacts — intricate cotton socks discovered in the tombs of medieval Egypt — reveal a craft already refined, already elegant, already capable of producing fabric as durable as it was beautiful.
Those first knitters worked with four or five needles in the round, creating socks with complex colorwork and shaped heels that would impress a modern designer.
They did not learn from YouTube tutorials or craft store pamphlets. They learned by sitting beside a grandmother, an aunt, or a village elder, watching hands move in rhythms older than memory, until the motion became their own.
Seven centuries later, the scarf remains the single most popular first project for beginner knitters — and for good reason.
Unlike a sweater, which requires shaping, sizing, and seaming, a scarf is a rectangle. It asks nothing of you but patience and repetition.
It does not care if your tension wavers or your edges wander. It will keep you warm regardless.
There is a directness to knitting a scarf that connects you to the very origins of the craft: two needles, a length of yarn, and the simple, meditative act of making loops out of thread.
What follows is a guide for the absolute beginner — someone who has never held knitting needles, who does not know a cast-on from a bind-off, who may be looking at a ball of yarn and wondering how on earth it becomes a garment.
By the time you finish reading, you will know exactly how to choose your first yarn, what tools you need (fewer than you think), and the two essential techniques that form the foundation of virtually every knitted object ever made.
And if you follow the steps, you will end up with a scarf — your first scarf — that you made with your own hands.
Welcome to a tradition six hundred years in the making. Let us begin.
Why Knit Your Own Scarf?
In an age of fast fashion and $12 machine-knit scarves available at any department store, why would anyone choose to spend hours making one by hand? The answer is layered, much like the fabric itself.
There is, first, the question of warmth. A hand-knit scarf, worked in a dense garter stitch with quality yarn, is substantially warmer than most commercially produced scarves.
Machine knitting produces a looser, more uniform fabric optimized for speed rather than insulation. A hand-knit scarf traps air between its stitches in a way that machine knitting rarely replicates, creating a natural thermal barrier that holds body heat against the skin.
On a bitter January morning, when the wind cuts through everything else you are wearing, a hand-knit scarf makes itself known.
Then there is the dimension of personal expression. A hand-knit scarf carries the imprint of its maker in every stitch — the slight variations in tension that give handmade fabric its particular texture, the color you chose because it reminded you of autumn leaves or ocean water, the length you decided on because you wanted it to wrap twice around your neck.
No one else on earth will have a scarf exactly like yours. That is a small but genuine form of freedom in a world of mass production.
There is also something to be said for the process itself. Knitting is, at its core, a repetitive physical activity — and repetitive physical activities have a curious effect on the human mind.
The rhythmic clicking of needles, the steady growth of fabric beneath your fingers, the small but measurable progress of each completed row: these create a state of focused calm that researchers have compared to meditation.
The scarf you make is not just a garment. It is a record of the time you spent making it — the podcasts you listened to, the conversations you had, the quiet evenings on the couch with a cup of tea and the yarn warm in your lap.
Finally, there is the matter of slow fashion. The garment industry is one of the largest polluters on the planet.
A hand-knit scarf represents the opposite philosophy: one garment, made with care, from materials chosen deliberately, meant to last for years.
Knitting a scarf is an act of gentle resistance against disposability. A well-made garter-stitch scarf, knit in decent yarn and cared for properly, can last a decade or more.
That $12 machine-knit scarf will likely pill, stretch, and unravel within a season or two.
Your handmade scarf will still be in your closet ten winters from now, soft from washing, familiar as an old friend.
Choosing Your First Yarn: A Practical Guide
Walking into a yarn shop can be overwhelming for a beginner. There are shelves of yarn in every color imaginable, labeled with terms like "worsted," "aran," "DK," "fingering," and "super-bulky." Let us simplify.
For your first scarf, you need exactly three things in a yarn: medium weight, light color, and affordable material.
Medium weight. Yarn thickness is measured in categories from 0 (lace, very thin) to 7 (jumbo).
For a beginner, the sweet spot is Category 4 — known as "worsted weight" or "aran weight." This is a medium-thickness yarn that works up quickly enough to feel rewarding, but not so quickly that you cannot see what you are doing.
It is also the most widely available weight, sold in every craft store and supermarket.
Light color. This may sound like an aesthetic recommendation, but it is a practical one.
Dark yarns — navy, black, deep burgundy — make it genuinely difficult to see your stitches, especially under artificial light.
Choose a light color: cream, soft gray, pale blue, mint, butter yellow. You will thank yourself the first time you drop a stitch and need to find it against the background of the fabric.
Affordable material. There is a temptation to buy the cheapest possible acrylic yarn on the theory that you are just learning and do not want to waste money.
I understand the logic, but cheap acrylic yarn is slippery, splits easily, and produces fabric that feels plasticky against the skin.
At the same time, you do not need to spend $30 on a skein of hand-dyed merino.
What I recommend is a good-quality acrylic-wool blend from a reputable brand — Lion Brand's Heartland or Wool-Ease lines, or Cascade Yarns.
Expect to spend $6 to $10 per skein. For a standard 6-inch-wide, 60-inch-long scarf, you will need approximately two skeins (about 300 to 400 yards total).
That is $12 to $20 — less than a single dinner out, and far more enduring.
Essential Tools: Simpler Than You Think
One of the beautiful things about knitting is how few tools it requires. For a scarf, you need exactly four things.
Knitting needles, size 8 (5 mm). This is the needle size most commonly paired with worsted-weight yarn, producing a fabric that is dense enough to be warm but loose enough to be comfortable to knit.
You can use straight needles (the classic kind with a stopper on one end) or circular needles (two needle tips connected by a cable).
Many beginners find circular needles more comfortable because the weight of the fabric rests in your lap rather than hanging off the end of a long needle.
Either is fine. For material, I recommend bamboo or wooden needles. They have a slight grip that prevents stitches from sliding off too easily — a common frustration with slick aluminum needles — and they are warm in the hand.
A pair costs about $5 to $8.
Scissors. Any small pair of scissors will do. Embroidery scissors are charming; kitchen shears are equally functional. Do not overthink this.
A tapestry needle. This is a large, blunt-tipped needle with an eye big enough to thread yarn through. You will use it at the very end to weave in the loose ends so they do not unravel. Tapestry needles cost about a dollar.
(Optional but recommended) A row counter. For a 60-inch scarf at approximately five rows per inch, you will knit roughly 300 rows. A simple plastic cylinder counter, a free smartphone app, or even tally marks on paper will save you from losing your place.
That is the complete tool list. You do not need a knitting bag, a stitch gauge, a cable needle, or any of the dozens of specialty items that populate knitting catalogs. You are ready to begin with almost nothing.
The Two Stitches You Need
Virtually every knitted garment in existence — sweaters, socks, hats, blankets, shawls, mittens, cardigans, baby booties — is built from exactly two stitches: the knit stitch and the purl stitch.
Everything else is a variation or a combination of these two fundamental movements. For your first scarf, you need only one of them: the knit stitch.
You will also need two supporting techniques — the cast-on (which puts loops onto the needle to begin) and the bind-off (which secures those loops when you finish).
But the body of your entire scarf will be worked in nothing but the knit stitch, every row, from beginning to end.
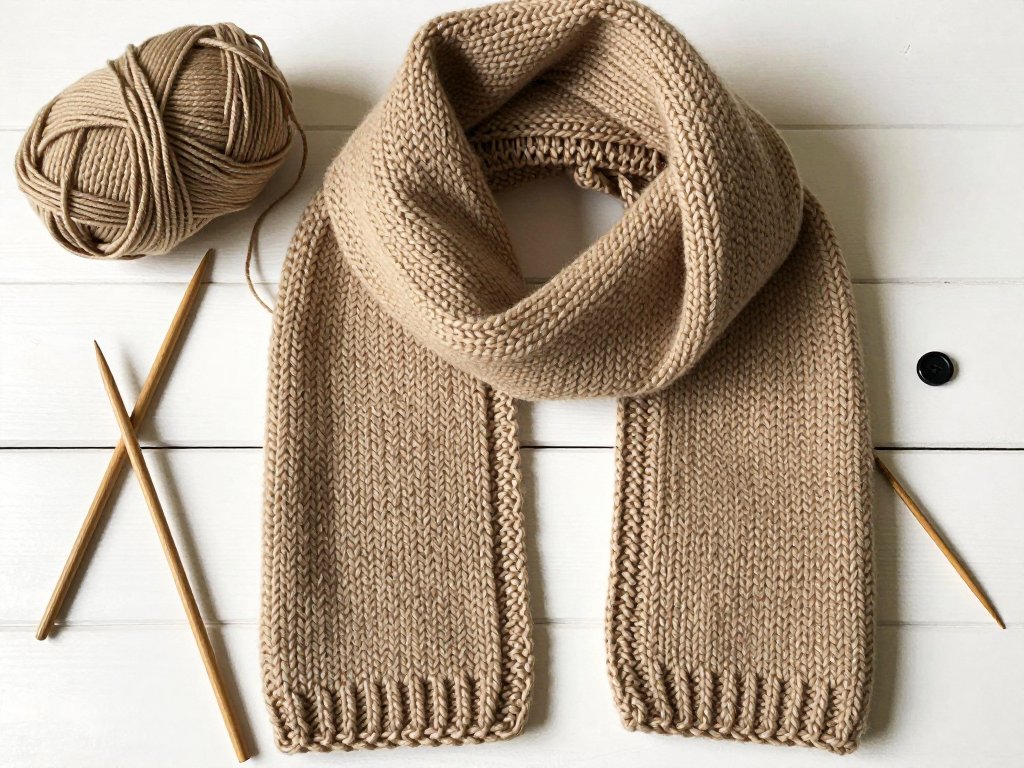
This fabric is called garter stitch, and it is the first thing every knitter learns.
The Cast-On (Long-Tail Method). Measure out a tail of yarn about three times the width of your intended scarf — roughly 18 inches.
Make a slip knot near the end and place it on your needle. Hold the needle in your right hand.
With your left hand, drape the yarn between your thumb and forefinger: the tail end over your thumb, the working yarn over your forefinger.
Insert the needle tip upward through the loop on your thumb, then bring it over and down through the loop on your forefinger.
Pull the needle back through the thumb loop, letting the thumb loop slip off. Tighten gently.
Repeat until you have 30 stitches on your needle. Count them carefully.
The Knit Stitch. With your 30 cast-on stitches on the left needle and the working yarn behind your work, hold the needle with the stitches in your left hand.
Insert the right needle into the front of the first stitch, from left to right, so that the right needle crosses behind the left needle.
Wrap the working yarn counterclockwise around the tip of the right needle. Pull the right needle back through the stitch, catching the wrapped yarn and bringing a new loop to the front.
Slide the old stitch off the left needle. You have just knit one stitch. Repeat across all 30 stitches.
When you reach the end, swap the needles and knit another row. That is garter stitch: every row, knit stitch.
It produces a fabric that looks the same on both sides, with gentle horizontal ridges.
It is reversible, squishy, and forgiving.
The Bind-Off. When your scarf reaches the desired length, knit the first two stitches normally.
You now have two stitches on the right needle. Insert the left needle tip into the first stitch on the right needle, lift it over the second stitch, and drop it off the needle.
Knit one more stitch, lift the lower stitch over it, and drop it off. Repeat until one stitch remains.
Cut the yarn, leaving a 6-inch tail, and pull it through the last loop. You have bound off.
Step-by-Step: Knitting a 6-Inch-Wide Scarf
Step 1: Gather your materials. Two skeins of worsted-weight yarn in a light color, a pair of size 8 (5 mm) knitting needles, scissors, a tapestry needle, and a row counter.
Step 2: Cast on 30 stitches. Using the long-tail method, cast on exactly 30 stitches.
Count three times. An extra stitch added now will only grow more confusing as you knit.
Thirty stitches will produce a scarf approximately 6 inches wide — narrow enough to be elegant, wide enough to be warm.
Step 3: Knit every row. Knit all 30 stitches across the first row. When you reach the end, swap the needle with the stitches to your left hand and knit another row.
Every row is exactly the same: insert the needle, wrap the yarn, pull through, slide off.
Continue until your scarf reaches 60 inches in length, or until you run out of yarn.
Let the repetition become meditative. Let your hands learn the rhythm.
Step 4: Bind off. When your scarf is long enough, bind off all 30 stitches. Cut the yarn, leaving a 6-inch tail, and pull it through the final loop.
Step 5: Weave in the ends. Thread the yarn tails onto your tapestry needle. Weave each tail back and forth through the edge stitches of your scarf for about 2 inches, then trim the excess.
Step 6: Block your scarf. Fill a basin with cool water and a drop of gentle soap.
Submerge your scarf completely and let it soak for 15 to 20 minutes. Do not wring or twist.
Drain the water, press the scarf gently against the side of the basin, and roll it in a clean towel to absorb excess moisture.
Lay it flat on a drying rack, gently stretching it to its intended dimensions. Let it dry completely, which may take 24 to 48 hours.
When it is dry, it is ready to wear. Wrap it around your neck. You made this.
No machine, no factory — just your hands, two sticks, and a length of thread.
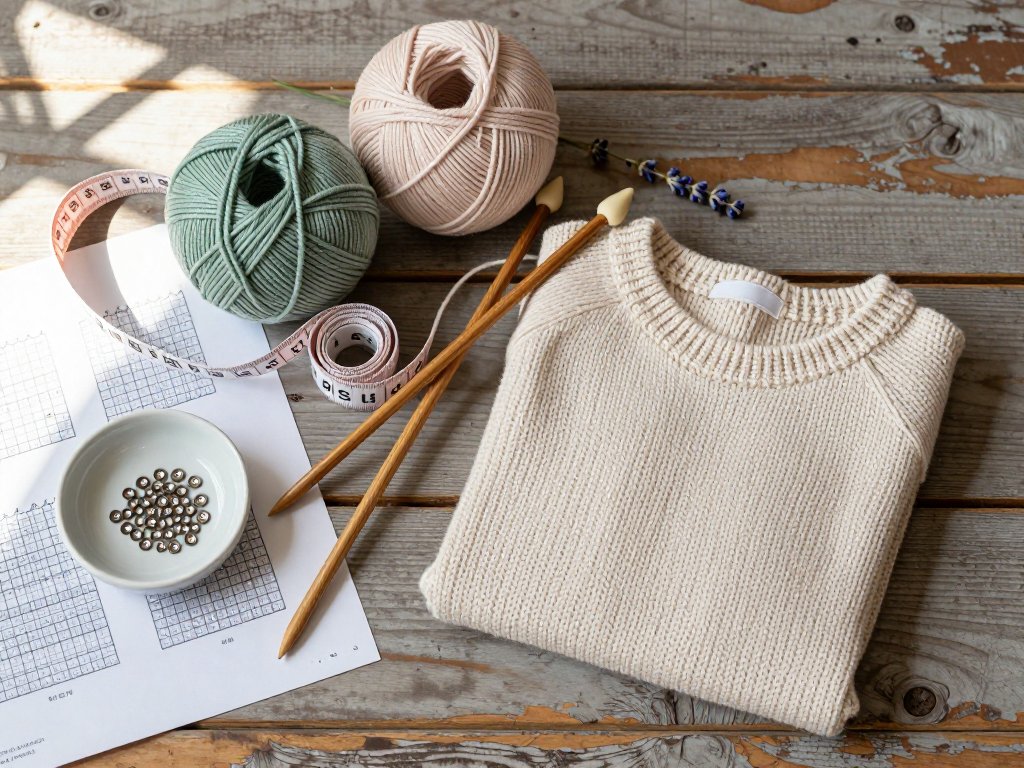
Image: Craft Blog Flat Lay for AI Image Generation
For the accompanying photograph, commission an image with the following specifications. A warm, inviting flat lay photograph shot from directly overhead on a rustic wooden table bathed in bright, natural daylight streaming from a window on the left side.
The central subject is a partially knitted scarf in soft cream and heather-gray worsted-weight yarn, currently resting on size 8 bamboo knitting needles; approximately four inches of garter stitch fabric hang from the needles, showing clear, even V-shaped knit stitches and the characteristic ridges of garter texture.
Beside the work-in-progress lies a full ball of matching cream yarn with its label still attached, a second ball in pale gray, a small pair of silver embroidery scissors, and a wooden tapestry needle resting on a linen cloth.
A steaming ceramic mug of tea sits in the upper-right corner, adding warmth. The composition feels calm, achievable, and handmade — the kind of photo that makes a beginner think, "I can do that." Soft shadows fall to the right, and the wooden grain of the table is visible beneath the arrangement.
Common Beginner Mistakes (And How to Fix Them)
Dropped stitches. A dropped stitch occurs when a loop slips off the needle and begins to unravel downward.
If you catch it quickly, you can lift the loop back onto the needle using a crochet hook or the tip of your knitting needle.
The best prevention is to count your stitches at the end of every row. If you started with 30 and now have 29, look carefully for the loose loop and rescue it.
If the run is long, use a crochet hook to work the ladder back up one rung at a time.
Uneven tension. Beginners often knit loosely at the beginning of a row and tightly at the end, producing fabric that is wider in some places and narrower in others.
Tension improves with practice — your hands learn consistent muscle memory over time. Try to be conscious of pulling the yarn to roughly the same tightness on every stitch.
Not too tight (which makes the fabric stiff) and not too loose (which makes it floppy).
Blocking will even out many tension irregularities, and your second scarf will be noticeably more even than your first.
Adding stitches by accident. You start with 30 stitches, and somehow, twenty rows later, you have 38.
This usually happens because you accidentally knit into the space between stitches rather than through the stitch itself, or because you created an accidental yarn-over — wrapping the yarn over the needle between stitches.
The solution is to count your stitches at the end of every row. If you have more than 30, look for an extra loop or a small hole.
If you spot it within a row or two, you can slip it off the needle and let it unravel back.
If it has been many rows, you may need to unravel back to where the count was correct.
Holes in the fabric. Small holes usually mean you accidentally created a yarn-over or dropped a stitch that ran down several rows.
The fix depends on the cause. For a yarn-over hole, treat the extra loop as a stitch on the next row.
For a dropped-stitch hole, use the crochet-hook rescue method. For tension holes, blocking will help.
The golden rule of beginner knitting: count your stitches at the end of every single row. It takes five seconds and saves you hours of frustration.
Caring for Your Handmade Scarf
Proper care will keep your scarf looking beautiful for years. Washing: Hand washing is always safest.
Fill a basin with cool water and a small amount of gentle detergent. Submerge your scarf and let it soak for 15 to 30 minutes.
Swish gently — do not scrub, wring, or twist. Drain, press against the basin, and roll in a towel to absorb excess moisture.
Lay flat to dry, reshaping to original dimensions. Never hang a wet knit garment; the weight of the water will stretch it out of shape.
Storage: Fold your scarf and store it in a drawer or on a shelf. Do not hang it, which will stretch it over time.
If storing for the summer, make sure it is clean and completely dry before putting it away.
Add cedar blocks or lavender sachets as natural moth deterrents.
Pilling: Small balls of fiber can form on the surface with wear. A fabric shaver or a sweater stone will remove them gently. Do not pull at pills with your fingers — that can pull up the yarn itself.
Repair: Knitted fabric is remarkably repairable. A small hole can be darned with matching yarn and a tapestry needle. If damage is extensive, you can unravel back, re-knit, and graft the ends together. Your scarf can genuinely last a lifetime.
Conclusion: You Are Now Part of the Tradition
If you have followed these instructions — if you have cast on, knitted hundreds of rows, bound off, woven in ends, and blocked your first scarf — then you have joined a lineage of makers that stretches back to the thirteenth century, to Egyptian tombs and medieval churches, to grandmothers in cold cottages and shepherds on windswept hills.
The basic motion of your hands — inserting the needle, wrapping the yarn, pulling through, sliding off — is the same motion those first knitters used, six hundred years ago, to create the earliest knitted objects we know.
You are doing the same thing they did.
Your first scarf will not be perfect. It will have uneven edges. There will be a place where you accidentally added a stitch and made the fabric bulge.
There will be a row where your tension went tight and the fabric puckers. That is not a flaw.
That is the signature of a handmade object. Machines produce perfect uniformity; human hands produce character.
The little irregularities in your scarf are evidence that a real person made it — someone who was learning, who was present, who pulled the yarn a little too tight while watching something dramatic on television, who relaxed into the rhythm during a peaceful Sunday afternoon.
Those imperfections are you, recorded in thread.
Keep your first scarf. Wear it. When someone compliments it, tell them you made it yourself.
Watch their face change — a flicker of surprise, of respect, of a question they may or may not voice: could I do that?
And the answer is yes. Of course yes. You just did.
What will you knit next? A hat in the round? A pair of fingerless mitts?
A blanket, worked in strips and seamed together? The second project is always easier than the first, and the third easier still.
Before long, you will find yourself in a yarn shop, touching skeins without even thinking about it, imagining what they might become.
You will find yourself noticing other people's hand knits in coffee shops, recognizing the familiar architecture of stitches.
You will find yourself talking to strangers about yarn, because that is what knitters do.
The tradition pulls us together.
Welcome to the tradition. Your hands know what to do now. Keep knitting.