Introduction
Every kitchen has a drawer, a shelf, or a whole cabinet devoted to mason jars.
They arrive in our lives carrying pasta sauce and pickles, and then they stay, too useful to throw away and too plain to display.
If you have a collection like mine — a little dusty, a little mismatched — summer is the perfect season to put them to work.
Mason jars are the most forgiving craft supply you will ever own. They cost nothing, they are endlessly reusable, and they look charming no matter what you do to them.
Paint them, wrap them in twine, fill them with flowers or herbs or bath salts — they always come out looking like they were meant for exactly that.
Today I am sharing six easy mason jar projects for summer decor and gifts. Some take ten minutes, some take an afternoon, and all of them are beginner-friendly.
Whether you want to dress up your porch, teach the kids a new skill, or put together a heartfelt gift without spending much, there is a jar project here for you.
Why the Mason Jar Belongs in Summer
There is something about a glass jar that captures summer light perfectly. Set a jar on a sunny windowsill and the light gathers inside it, glowing like it has been saved up for you.
Add a tea light at dusk and the same jar becomes a little lantern. It is hard to think of another object that does so much with so little.
Mason jars are also wonderfully practical for hot weather. They are the natural home for lemonade, iced tea, and cut flowers from the garden.
They keep herbs alive on a sunny counter. They survive being carried to the beach, the porch, and the picnic table without complaint.
Everything you make with them gets used, not just admired.
And for gift-giving, jars are a dream. They are already containers, so half the wrapping is done.
Fill one with something homemade — cookies, bath salts, a tiny herb garden — tie a ribbon around the rim, and you have a gift that feels personal and expensive, even when it cost you almost nothing to make.
Gathering Your Supplies
The great news is that you probably already own most of what you need. Here is the basic list:
- Clean mason jars in assorted sizes — pint and quart jars work best for most projects
- Acrylic craft paint in summer colors — soft white, sage, sky blue, lemon
- Twine, jute, or ribbon
- A hot glue gun or strong craft glue
- Tea lights, preferably LED for safety
- Chalkboard paint and a chalk marker, if you want label jars
For the gift projects you will also want whatever filling you choose: cookie mix ingredients, bath salts, sugar scrub, or a small herb plant. Everything else is optional decoration — lace, buttons, washi tape, whatever your craft bin offers.
Before you start, wash your jars well and remove the labels. Soaking them in warm soapy water usually loosens the paper, and a little rubbing alcohol takes care of stubborn glue residue. Dry them completely, and they are ready for anything.
Project One: Painted Lantern Jars
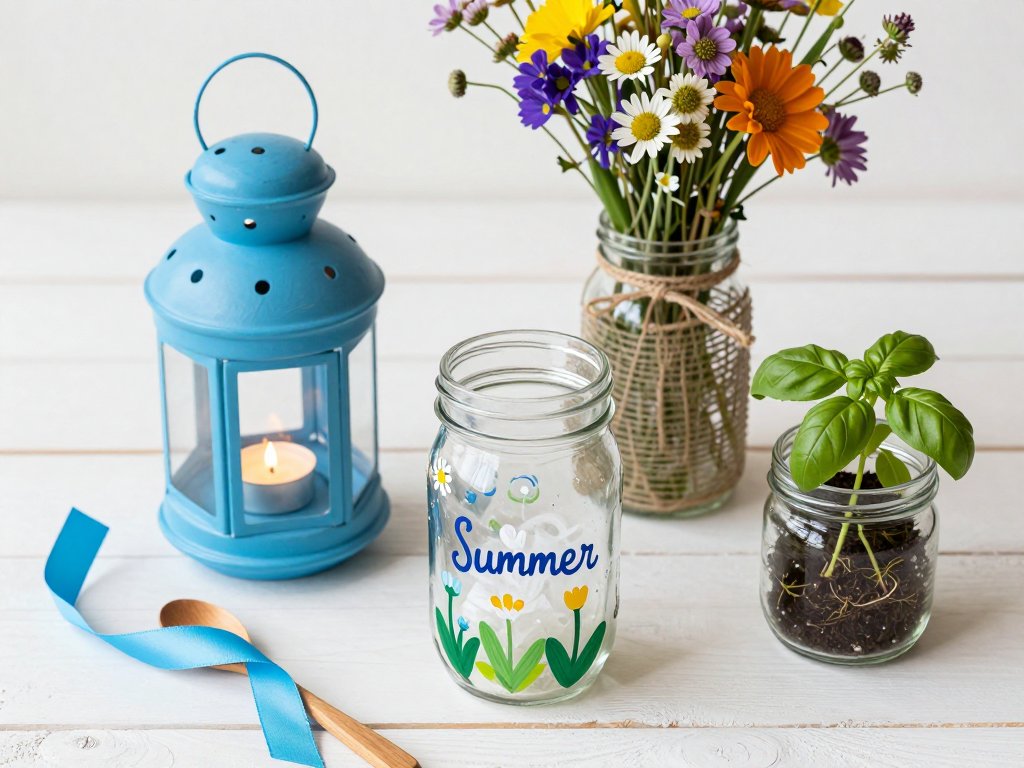
This is the project that turns a plain jar into pure summer magic. You will need a clean jar, a sponge brush, and acrylic paint in the color of your choice.
Paint the outside of the jar with two thin coats, letting each coat dry completely.
Thin coats are important — they dry faster and are less likely to peel later.
Once the paint is dry, add a pattern if you like. Little white dots, a stripe of contrasting color, or a hand-painted sun all look adorable. You can also use a stencil for a cleaner look; even the simple stencils from a craft store make a jar look professional.
For a starry night effect, try this trick: paint the jar a deep blue, let it dry, then dip a toothbrush in white paint and flick the bristles with your thumb.
The fine white specks scatter across the blue like stars. Kids adore this step, and it is nearly impossible to do wrong.
Drop an LED tea light inside your finished jar and set it on the porch railing or along a garden path as dusk falls.
The painted glass glows softly, and the light dances through the pattern. If you make a whole row of them — blue, sage, lemon, cream — your evening porch becomes a little festival.
Please use LED candles rather than real flames, especially around children, dry grass, or wooden surfaces.
Project Two: Wildflower Vase Jars
Some of the prettiest summer tables are the simplest, and nothing is simpler than a jar of wildflowers. But you can make the jar itself part of the arrangement with a little twine and ribbon.
Start with a clean jar and wrap jute twine around it, starting at the base and working upward.
Apply a dab of hot glue every couple of inches to hold the twine in place, and tuck the end underneath the last wrap to hide it.
Leave the top third of the jar bare so you can see the flower stems and water inside.
For a softer look, use a strip of lace or fabric instead of twine, tied in a small bow.
For a farmhouse feel, glue a short length of ribbon vertically from rim to base and knot a little wooden bead or button where it meets the rim.
Each jar takes about five minutes and looks like it came from a boutique.
Then fill your jars with whatever the garden offers — daisies, zinnias, coneflowers, or even herbs like mint and rosemary, which smell wonderful on a summer table.
Line a group of wrapped jars down the center of a picnic table and you have centerpieces for a party you did not have to spend a dime on.
Project Three: Herb Garden in a Jar
If you have a sunny windowsill, this project gives you fresh herbs all summer long, and it makes a spectacular gift. You will need a wide-mouth quart jar, some potting soil, and a small herb seedling — basil, parsley, chives, and thyme all do beautifully in jars.
Add an inch of small pebbles to the bottom of the jar for drainage. Fill the jar most of the way with potting soil, make a small well in the center, and settle your seedling in.
Firm the soil gently around it and water lightly — the soil should be damp, not soggy.
Place the jar where it gets at least six hours of sunlight a day.
For a finishing touch, tie a piece of twine around the rim and attach a small wooden spoon or a folded recipe card.
If you are giving the jar as a gift, tuck a note inside with simple care instructions: water when the top inch of soil feels dry, and snip leaves from the outside of the plant first.
There is something deeply satisfying about snipping basil from a jar on your own counter. It makes even a simple pasta night feel a little more like a garden dinner. And because herbs grow quickly, the jar stays productive all summer — a gift that keeps on giving, literally.
Project Four: Layered Cookie Mix Jars
This is the classic gift jar, and it earns its popularity. A quart jar filled with colorful layers of dry cookie ingredients looks gorgeous on the shelf, and the recipient gets a full batch of cookies with almost no effort.
Choose a cookie recipe with clearly layered dry ingredients — chocolate chip, oatmeal, and sugar cookies all work well.
Measure the flour, sugar, oats, and chips according to the recipe and pack them into the jar in layers, pressing each layer gently flat before adding the next.
Alternate colors for the most striking effect: white flour, brown sugar, golden oats, dark chocolate chips.
Attach a tag with the complete instructions: the wet ingredients to add (usually eggs, butter, and vanilla), the baking temperature, and the baking time. Without those instructions the jar is just pretty flour, so do not skip them. Tie the tag to the rim with twine or ribbon.
These jars are perfect for teacher gifts, hostess thank-yous, or a summer visit to a friend who just had a baby.
You can make six in an hour once you have the ingredients, and each one looks like a professional product.
If you want to be extra thoughtful, use a recipe that is a family favorite and write "from our kitchen to yours" on the tag.
Project Five: Bath Salts and Sugar Scrub Jars
For a spa-at-home gift that feels truly luxurious, fill jars with homemade bath salts or sugar scrub. These take about fifteen minutes, cost a few dollars, and look absolutely beautiful in glass.
For simple bath salts, combine two cups of Epsom salt with a quarter cup of sea salt and a teaspoon of your favorite essential oil — lavender and eucalyptus are summer classics.
Stir well, then spoon the mixture into jars. For color, add a drop or two of natural food coloring and mix until it spreads evenly.
For sugar scrub, mix one cup of white sugar with half a cup of coconut oil and a teaspoon of vanilla extract or a few drops of essential oil.
The result is a creamy, gently scented scrub that leaves skin soft. Pack it into a wide-mouth jar and press a circle of pretty fabric over the rim before screwing on the lid band — instant vintage charm.
Attach a small wooden scoop or a folded note explaining how to use the gift: "Sprinkle a handful in warm bathwater and breathe deep." These jars make wonderful bridal shower favors, thank-you gifts, or a little summer treat for yourself.
Make a double batch and keep one — you have earned it.
Project Six: Chalkboard Label Jars
This project is less about decoration and more about bringing order to a busy house — which, let us be honest, is its own kind of beauty. Paint the center section of each jar with chalkboard paint, let it dry, and you have endlessly relabelable storage.
Use these jars for pantry staples, craft supplies, or the odds and ends that clutter every kitchen counter. Write the contents on the chalkboard with a chalk marker, and when the contents change, wipe and rewrite. No more peeling paper labels, no more guessing which bin holds the buttons.
In summer, these jars shine at the lemonade stand. Fill a few with straws, napkins, and change, label each one clearly, and let the kids run their little business with everything in its place.
They will feel very professional, and you will appreciate not finding straws in the garden for weeks afterward.
For a prettier version, paint the entire jar in a soft color first, then add the chalkboard panel. Displayed on open shelves, a row of these jars looks intentional and calm — the kind of kitchen you see in magazines, except it is yours, and it actually works.
Gift-Wrapping Your Jar Creations
Half the delight of a jar gift is the unwrapping, so do not skimp on the presentation.
A simple length of twine or ribbon around the rim instantly elevates any jar. Tuck a sprig of fresh herbs or a dried flower under the knot for a personal touch that costs nothing.
For a larger gift, nestle the jar in a small basket with a linen napkin and a handwritten card.
For sets, arrange several jars in a simple wooden crate or a shoebox lined with tissue paper.
Brown kraft paper, twine, and a sprig of lavender make everything look artisanal — you do not need fancy supplies, just a little care.
Remember the golden rule of handmade gifts: the thought is the gift. A jar of cookie mix tied with kitchen twine carries more love than anything from a store.
When someone opens a gift you made with your own hands, they are not just receiving cookies or bath salts — they are receiving your time, which is the rarest thing any of us have to give.
Making It a Family Project
Mason jar crafts are wonderfully child-friendly. Little ones can paint jars with complete confidence, wrap twine with enthusiastic wobbly loops, and spoon bath salts into jars with only minor spillage.
Give each child their own jar and let them own the result — the lopsided bow and the extra-thick paint are exactly what make it theirs.
Set up a jar craft afternoon on a day when the heat keeps everyone indoors.
Lay down newspaper, pour the paint, and let the afternoon unfold at its own pace.
When the jars are dry, hold a little ceremony of placing them around the house or wrapping them for gifts.
Children remember these afternoons far longer than they remember the jars.
And if a jar breaks or a project goes wrong, do not fret. The joy of mason jars is that there are always more. Rinse another one, try again, and laugh about the first attempt. In crafting, as in summer, the trying is the point.
Conclusion
The humble mason jar may be the most versatile craft supply you will ever own.
In one afternoon you can transform a shelf of dusty jars into lanterns for the porch, vases for the picnic table, herb gardens for the windowsill, and gifts that will be genuinely loved.
The materials are inexpensive, the techniques are beginner-friendly, and the results are always charming.
So open that cabinet, pull out your jars, and give them a summer job. Paint one, wrap one, fill one — start with whichever project speaks to you.
By the time the sun goes down, your house will look a little more like summer, and it will have cost you almost nothing but a pleasant hour.
And when you have made your first jar, you will start seeing the next one everywhere.
Jars for the beach trip, jars for the lemonade stand, jars for the teacher in the fall.
The mason jar is patient. It will wait for you in the cabinet, ready for whatever season brings next.