Introduction
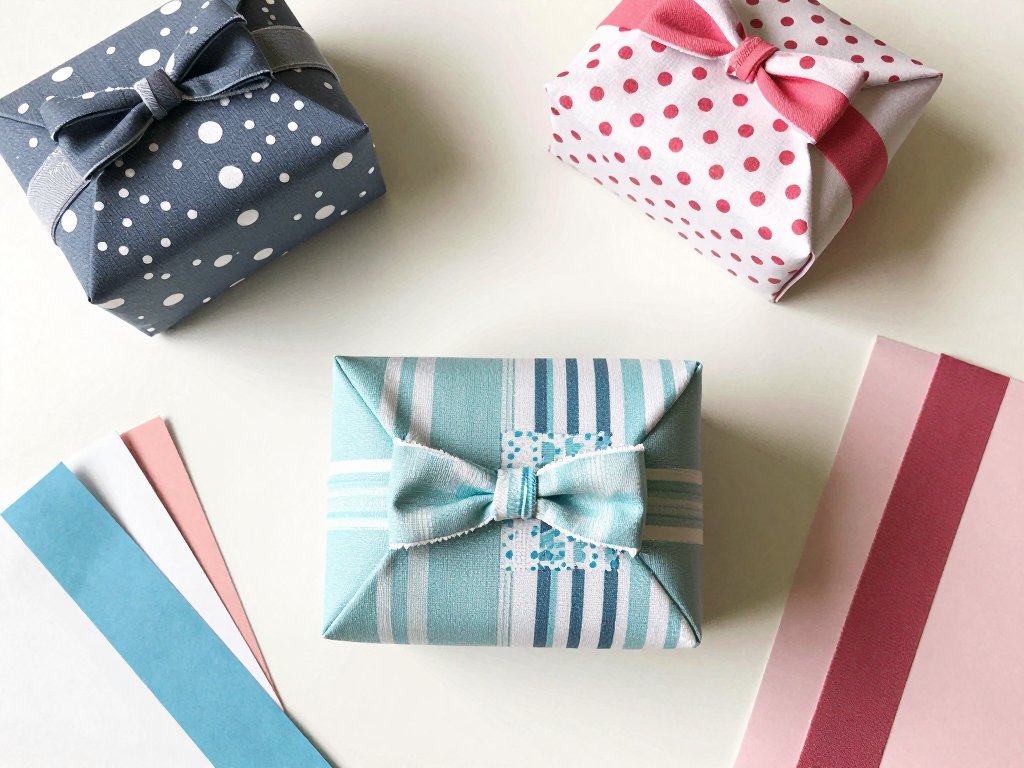
There is something undeniably charming about a gift wrapped in fabric. The texture, the pattern, the way the light catches a carefully chosen textile — it elevates a simple present into something truly personal. Now imagine taking that same fabric-forward approach and applying it to a favor box with a quilted appearance, all without threading a single needle. That is exactly what no-sew modern quilt favor boxes deliver, and they have become one of the most sought-after paper-craft-adjacent projects in the party planning and gift-giving world.
These boxes look like they took hours of meticulous hand-stitching. They appear heirloom-quality, something your grandmother might have whipped up on a sewing machine. But here is the secret: there is no sewing involved whatsoever. By combining stiff cardboard base boxes with carefully cut fabric squares and a reliable adhesive like Mod Podge or fabric glue, you can create a quilted effect that is structurally sound, visually stunning, and completely machine-wash-and-dry free. It is fabric crafting for people who love the look of quilting but do not own a sewing machine or simply do not have the time for a full-scale quilting project.
Whether you are planning a wedding and want fifty coordinating favor boxes that match your color palette, hosting a birthday party and need custom containers for sweets, or preparing holiday gifts that feel extra special, no-sew quilt favor boxes are the answer. They are budget-friendly, beginner-accessible, and endlessly customizable. In this guide, I will walk you through everything you need to know — from materials selection to advanced mitered-corner techniques — so you can produce boxes that look professionally crafted but were made in your kitchen in an afternoon.
Why No-Sew Quilt Favor Boxes?
Before we dive into the how, let us talk about the why. Traditional quilting is a beautiful art form, but it is also time-intensive. Cutting precise fabric pieces, pinning them in place, running them through a sewing machine, pressing seams, and finishing edges — a single quilted potholder can take an experienced crafter a couple of hours. A full quilt? Weeks or months. For party favors, you do not need that kind of time commitment. You need something reproducible, scalable, and forgiving of minor imperfections.
No-sew quilt favor boxes solve all of those problems. They use adhesive instead of stitching to bond fabric to a rigid form. The "quilted" look comes from the way fabric squares are arranged and overlapped on the surface of the box, creating a patchwork pattern that mimics traditional quilt blocks. The result is a sturdy container that can hold candies, small gifts, jewelry, bath salts, or any other party favor you can dream up.
Another major advantage is that no-sew boxes are genuinely beginner-friendly. You do not need to know how to thread a needle, tie a knot, or sew a straight line. If you can cut fabric and spread glue, you can make these boxes. That makes them an ideal project for craft parties, bridal shower activities, classroom projects, or even as a fun weekend activity with kids (with appropriate supervision for the cutting and gluing steps).
Finally, there is the cost factor. Fabric scraps are inexpensive and can often be sourced from remnants bins at fabric stores, old clothing, or thrift-store finds. Cardboard boxes can be purchased in bulk from craft supply stores, or you can upcycle plain gift boxes from around your house. Adhesive and a few basic tools complete the supply list. Compared to buying pre-made quilted favor boxes from specialty retailers — which can cost $5 to $15 each — making your own brings the per-box cost down to under a dollar.
Materials: What You Will Need
To get started, you will need a handful of supplies. Most of these are available at any craft supply store, and some you may already have at home.
Cardboard Boxes. The foundation of your project. You can use plain kraft-colored gift boxes, jewelry boxes from the craft store, or even small shipping boxes. The key requirements are that the box has a separate lid (not a hinged lid) and that the cardboard is sturdy enough to hold its shape when covered with fabric. Thin, flimsy boxes will warp when adhesive is applied. Look for boxes with at least a 1.5 mm board thickness. Popular sizes for favor boxes range from 2 x 2 x 2 inches (for a single truffle or small trinket) to 4 x 4 x 4 inches (for larger assortments). You can also use pillow boxes, heart-shaped boxes, or any novelty shape — just keep in mind that curved surfaces are more challenging to wrap smoothly.
Fabric Squares. This is where your creativity comes in. The fabric you choose dramatically affects the final look of your quilted boxes. For the true "quilt" aesthetic, you will want to use multiple coordinating fabrics. Fat quarters from a quilting cotton collection are perfect — they are pre-cut to roughly 18 x 22 inches, giving you plenty of material to cut multiple squares. Quilting cotton is ideal because it is lightweight, presses well, and absorbs adhesive evenly. It does not fray excessively and is easy to cut cleanly. Cotton canvas is a step up in weight and durability. It gives boxes a more substantial, structured feel and is less likely to wrinkle during application. However, canvas is thicker, so mitered corners and overlapping edges require a bit more care. Avoid heavy upholstery fabrics, stretchy knits, or slippery silks for your first few projects — save those for after you have mastered the technique. For each standard 3-inch box, you will need approximately four to six 2-inch fabric squares per face (top, bottom, and four sides), totaling around 24 to 36 squares. Cut them slightly larger than the space they need to cover to allow for overlap and wrapping.
Adhesive. Choosing the right adhesive is critical. The two most popular options are Mod Podge and spray adhesive, and each has its own strengths. Mod Podge (the matte or fabric version) is a water-based sealer, glue, and finish all in one. It dries clear, holds fabric firmly, and gives a slightly stiff, sealed finish that protects the fabric from dust and light wear. It is brushed on with a foam brush, which gives you precise control. The downside is that it takes time to dry — usually 15 to 20 minutes per coat — and it can cause thin fabric to wrinkle if applied too heavily. Spray adhesive, on the other hand, is fast and produces a smooth, even bond with no brushstrokes. It is ideal for covering large flat surfaces quickly. However, spray adhesive requires good ventilation and careful masking to avoid overspray. It also does not seal the fabric the way Mod Podge does, so you may want to apply a clear acrylic sealer over the top if the boxes will be handled frequently. For most makers, I recommend using spray adhesive for the initial fabric-to-box bond and then brushing a thin layer of Mod Podge over the top as a sealer. This hybrid approach gives you the best of both worlds: speed and protection.
Scissors or Rotary Cutter. A sharp pair of fabric scissors is essential. Dull scissors will chew the edges of your fabric squares and make precise cutting nearly impossible. A rotary cutter paired with a self-healing cutting mat and a quilting ruler takes your precision to the next level, especially when you are cutting dozens of identical squares for a batch of boxes.
Ruler and Bone Folder. A metal ruler with a non-slip backing is invaluable for measuring and for making crisp creases. A bone folder — a simple hand tool used in bookbinding and paper crafts — helps you burnish fabric edges into corners and create sharp, professional-looking folds. If you do not have a bone folder, the back of a butter knife or a plastic credit card can work in a pinch.
Ribbon, Trim, and Embellishments. Ribbon handles are a popular addition to favor boxes, making them easy to carry and adding a polished touch. Grosgrain ribbon, satin ribbon, or even twine can be attached to the lid or wrapped around the base of the box as a decorative band. You might also consider adding small tags, labels, buttons, beads, lace trim, or pressed flowers. These finishing touches elevate your boxes from "homemade" to "handcrafted with intention."
Optional But Recommended
- Clothespins or binder clips — to hold fabric in place while adhesive dries
- Wax paper — to place inside the box while gluing the exterior, preventing the lid from sticking to the base
- Acrylic sealer spray — for a final protective coat on high-contact boxes
- Heat tool or hairdryer — to speed up drying time between Mod Podge coats
Step-by-Step Instructions
Step 1: Prepare Your Fabric Squares
Begin by choosing your fabric palette. For a cohesive quilt look, select three to five fabrics that share a common color story. For example, a dusty blue, a soft cream, a sage green, and a pale lavender create a vintage garden vibe. A combination of mustard yellow, charcoal gray, burnt orange, and white feels modern and moody. Lay your fabrics out together and make sure they look harmonious before you start cutting.
Wash, dry, and press all fabrics before cutting. This pre-shrinks the fabric and removes any sizing or finishes that could interfere with adhesive bonding. Press with a hot iron to remove all wrinkles — once fabric is glued down, wrinkles are permanent.
Cut your fabric into squares. For a 3-inch box face, cut squares that are approximately 1.5 inches on each side. You will arrange these in a grid pattern on each face of the box. For a more traditional quilt-block look, cut squares that are exactly the same size and align them edge to edge with a tiny gap (simulating seam allowance). For a scrappier, more organic look, cut squares of slightly varying sizes and overlap them randomly. Aim for consistent square sizes when starting out — it makes alignment much easier. Stack your squares by fabric type for easy access during assembly.
Step 2: Prep the Box
Separate the lid from the base of the box. Lightly sand any glossy surfaces on the cardboard with fine-grit sandpaper to give the adhesive something to grip. Wipe away dust with a tack cloth or a slightly damp paper towel. Let the box dry completely. If you are using a kraft box with printing or labels, cover the printing with a coat of white acrylic paint or gesso to prevent it from showing through light-colored fabrics.
Step 3: Plan Your Layout
Before applying any glue, lay your fabric squares out on each face of the box to plan the arrangement. You want to avoid having the same fabric appear in the same position on adjacent faces unless you are going for a uniform look. Distribute the fabrics so the overall pattern feels balanced. Take a photo of your layout so you can reference it during gluing. For the lid top, which is the most visible face, consider creating a more deliberate pattern — a nine-patch block (three by three squares) is classic and satisfyingly symmetrical.
Step 4: Apply Fabric to the Box Exterior
Work on one face at a time. If using spray adhesive, follow the manufacturer's instructions for distance and coverage. Hold the can 6 to 8 inches from the surface and apply a light, even coat to the box face. If using Mod Podge, apply a thin, even layer to the box face using a foam brush. Work quickly but carefully — Mod Podge begins to set in about a minute.
Place your first fabric square onto the adhesive. Press it firmly from the center outward, smoothing any air bubbles. Continue adding squares, working in your planned grid pattern. Leave a very small gap — about the width of a toothpick — between adjacent squares to simulate the look of stitched seams. If you prefer a more fused look, you can overlap the edges of adjacent squares by 1/8 inch.
Once all squares for that face are in place, seal them with a thin top coat of Mod Podge. Brush from the center of each square outward, using light, even strokes. Do not overbrush, or you may dislodge the squares. Let this coat dry completely before moving to the next face. Repeat for all six faces (four sides, top of lid, bottom of base).
Step 5: Mitered Corners — The Professional Touch
This is the technique that separates good-looking boxes from truly polished ones. Mitered corners are the way fabric wraps around the edges of the box, creating a clean, tailored finish instead of a bulky, lumpy one.
To execute a mitered corner on a lid, start with the fabric overhanging the edge by about 3/4 of an inch on each side. After the top face of the lid is covered, the fabric will be hanging loose over all four edges. Here is how to handle each corner:
Fold one edge of the fabric over the side of the lid and press it down with adhesive. Do the same for the adjacent edge. You now have a triangular flap of fabric sticking out from the corner. Take that triangle and fold it neatly over the corner so the raw edge is tucked underneath. The fold line should run diagonally from the outer corner of the box to the inner corner of the seam. Use your bone folder to crease this fold sharply. Apply a dab of adhesive to hold it in place. Repeat for all four corners. The result is a clean diagonal seam at each corner that looks like it was expertly tailored.
For the base of the box, the technique is the same, but you will be mitering the bottom corners after wrapping the sides. Take your time with miters — they are the single most impactful detail for achieving a professional finish.
Step 6: Line the Interior
While the exterior of the box is what everyone sees, the interior matters too, especially if the lid comes off and the inside of the base is visible. Line the inside with a coordinating fabric or paper. Cut a piece of fabric slightly smaller than the interior floor of the lid and the interior floor of the base. Glue these in place with Mod Podge. For the interior walls of the base, cut a strip of fabric long enough to wrap around the perimeter and tall enough to cover the side walls. Apply adhesive to the walls and press the fabric strip in place, smoothing as you go. Miter the corners inside the same way you did on the exterior. A lined interior makes the box feel complete and luxurious.
Step 7: Add Ribbon Handles and Embellishments
Ribbon handles are both functional and decorative. For a classic look, cut two 8-inch lengths of ribbon and attach them to the top of the lid, crossing in an X shape, or attach them as two parallel loops on either side. Use a strong adhesive like E6000 or hot glue to secure the ribbon ends on the inside of the lid. If you want the ribbon to wrap around the base of the box as a decorative band, measure the circumference of the box, cut the ribbon to length, and attach it with fabric glue. You can also tie a bow at the front or thread a small gift tag onto the ribbon.
Other embellishments to consider: a single vintage button sewn (or glued) to the center of the lid top, a sprig of dried lavender tucked under the ribbon, a small wax seal stamped with the recipient's initial, or a hand-lettered tag tied with twine. Less is often more — let the quilted fabric pattern be the star, and use embellishments as accents.
Sizes and Uses
Wedding Favors
No-sew quilt favor boxes are a dream for weddings. Choose fabrics that match your wedding colors — blush and gold, navy and ivory, sage and terracotta. Fill them with personalized M&Ms, Jordan almonds, mini jars of honey, or seed packets. For a rustic barn wedding, use linen or burlap fabric with lace trim. For a modern city wedding, go with geometric prints in black and white with a single velvet ribbon. Make one for each guest and place them at the table settings — they double as decor and a take-home gift.
Birthday Parties
For kids' birthdays, use bright, playful fabrics — polka dots, stripes, cartoon characters, or rainbow patterns. Fill the boxes with candies, small toys, stickers, or temporary tattoos. For adult birthdays, go with elegant metallics or monochromatic palettes. A box filled with artisan chocolates or a mini bottle of champagne makes a memorable party favor.
Holiday Gift Boxes
Christmas favor boxes can use classic red and green plaid, snowflake prints, or modern Scandinavian-style patterns. For Hanukkah, blue and silver or white fabric with Star of David motifs. For Easter, pastel florals or gingham. For Valentine's Day, hearts and cherries on a cream background. These boxes make great gift toppers — attach a small one to the top of a larger wrapped present for a layered look.
Everyday Gift Giving
These boxes are not just for parties. Use them for teacher appreciation gifts, hostess gifts, bridal shower favors, baby shower treats, corporate gifts, or simply as reusable gift boxes for friends and family. Because the fabric covering is durable, the boxes can be reused by the recipient for storing jewelry, sewing supplies, keepsakes, or desk accessories.
Tips for Success
- Press everything. Before cutting and before gluing, press your fabric with a hot iron. Wrinkles become permanent once adhesive is applied. Press your cardboard boxes flat too — any bends or warps will show through the fabric.
- Work in batches. If you are making a large number of boxes (say, 50 for a wedding), set up an assembly line. Cut all your fabric squares first. Then prep all the boxes. Then glue all the squares on the top faces. Then all the sides. Batch processing saves time and builds momentum.
- Seal the edges. Fabric edges that are not sealed will fray over time, especially on corners and the rim of the lid. A thin line of clear-drying fabric glue or Mod Podge along the cut edges prevents fraying and extends the life of your boxes.
- Use wax paper between lid and base. When you are working on the exterior of the box, place a sheet of wax paper between the lid and the base. This prevents them from accidentally gluing together if adhesive seeps over the edge.
- Let each coat dry fully. Rushing the drying process leads to wrinkled fabric, cloudy glue spots, and squares that shift out of alignment. Mod Podge dries clear but needs patience. A hairdryer on the low heat setting can speed things up, but keep it moving to avoid overheating any one spot.
- Practice on a scrap box first. If you have never done fabric wrapping before, practice on a plain cardboard box you do not care about. You will learn how the fabric behaves, how much adhesive to use, and how to handle corners without the pressure of a perfect first attempt.
- Think about the closure. If your favor box does not have a snug-fitting lid, consider adding a ribbon tie closure. Punch two small holes in the lid and two corresponding holes in the base, then thread ribbon through and tie a bow. This also adds a charming finishing touch.
Creative Variations
Once you have mastered the basic technique, the possibilities are endless. Here are some variations to explore:
Ombre Quilt Boxes. Instead of random fabric placement, arrange your squares in a gradient from light to dark across the face of the box. This creates a modern, painterly effect that is especially beautiful with a single color family like blues or pinks.
Hexagon Quilt Boxes. Step beyond squares and use fabric hexagons instead. You can purchase hexagon templates or use a die-cutting machine to cut your shapes. Hexagons need to be overlapped more carefully, but the resulting honeycomb pattern is stunning and feels even more quilt-like.
Embroidered Accents. Even though this is a no-sew project, you can add a few hand-embroidered stitches to the fabric squares before gluing them down. A simple cross-stitch or French knot in the center of each square adds incredible texture and a nod to traditional quilting.
Stenciled Fabric. If you cannot find fabric with the pattern you want, use fabric paint and stencils to create your own custom-printed squares. This is ideal for thematic parties where you want specific motifs — stars for a celestial theme, leaves for a garden party, or monograms for a personal touch.
Mixed Media Boxes. Combine fabric squares with other materials like scrapbook paper, lace, felt, or even thin cork sheets. This creates a tactile, layered look that is richly textured and highly original.
Miniature Boxes. For ring boxes or tiny favor containers, use matchbox-sized boxes and 1/2-inch fabric squares. These make adorable wedding favor boxes for a single chocolate truffle or a set of earrings. The miniature scale requires tweezers and a steady hand, but the results are absolutely delightful.
Fabric-Covered Lid Only. If you are short on time or fabric, cover only the lid of the box with the quilted pattern and leave the base plain. Wrap the base in a single piece of coordinating fabric or leave it in its natural kraft finish. This is a great shortcut that still looks intentional and polished.
Troubleshooting Common Issues
Wrinkles in the fabric. This usually happens when the adhesive is applied too thickly or the fabric is stretched during application. Use a thin, even coat of adhesive and smooth the fabric from the center outward. If wrinkles appear after the glue has dried, you may need to peel back the fabric and start that section over.
Air bubbles. These form when air gets trapped between the fabric and the cardboard. Pop them with a pin and smooth the area flat. If the bubble is large, lift the fabric gently, reapply a small amount of adhesive, and press down again.
Fabric fraying at edges. Seal raw fabric edges with a thin line of clear fabric glue or Fray Check before wrapping. On corners, fold the fabric over itself to hide the raw edge, as described in the mitered corner section.
Box warping. If the cardboard becomes wet from too much Mod Podge, it can warp. To prevent this, use thin coats and allow each coat to dry fully before applying the next. If warping occurs, place the box under a stack of heavy books while the final coat dries to flatten it.
Adhesive showing through light fabric. White or very light fabrics can become translucent when wet adhesive is applied underneath. To avoid this, use a white spray adhesive instead of clear Mod Podge, or apply a layer of white acrylic paint to the box before attaching the fabric.
Conclusion
No-sew modern quilt favor boxes are one of those rare craft projects that look far more complicated than they actually are. The combination of structured cardboard, carefully chosen fabrics, and a few basic adhesives yields a finished product that feels both handmade and high-end. Whether you are making a single gift box for a dear friend or fifty matching favor boxes for a wedding reception, the process is satisfying, the results are beautiful, and the cost is remarkably low.
The best part? Every box you make is completely unique. No two will ever be identical because no two fabric arrangements are exactly the same. That individuality is the heart of handcrafted gift-giving — your recipients will know that you made something with your own hands, just for them. And when they see the quilted pattern, the mitered corners, and the ribbon finishing, they will never guess that not a single stitch was sewn.
So gather your fabric scraps, grab a box, and start creating. Whether you are quilting for a wedding, a birthday, a holiday, or just because, no-sew quilt favor boxes bring warmth, texture, and personality to every occasion. Happy crafting, and do not forget to share your creations with the community!
Share your no-sew quilt favor boxes with us on social media using #ArtToolsCrafts, and tag @ArtTools for a chance to be featured. We love seeing how you make these projects your own!