Introduction
I remember the first time I tried oil painting. I was twenty-three, sitting in a dusty community center, surrounded by retirees who seemed to know exactly what they were doing. The instructor handed me a palette with five blobs of color and said, "Paint what you see." The canvas was terrifyingly white.
That first painting was terrible. The sunflower looked like a fried egg. I left feeling discouraged and did not touch oils again for five years.
I tell you this because if you have ever wanted to try oil painting but felt intimidated, I understand completely. My second attempt was much better. My third was better still. And now, more than a decade later, oil painting is the thing I turn to when I need to slow down.
This guide is for the person who has never held an oil brush. Or who tried once, got frustrated, and put the paints away in a box under the bed. I am going to walk you through painting one simple summer landscape — a field with a tree, a sky, and a distant hill — using a handful of colors and techniques that are nearly impossible to mess up. By the end of this article, you will have a painting you are proud to hang on your wall. And more importantly, you will have discovered why oil painting has been soothing human hearts for five hundred years.
The Summer That Taught Me to See
The summer I finally learned to paint, I was housesitting for my aunt in a small town in Vermont. She had a garden that ran wild — cosmos and zinnias and sunflowers that had escaped their beds and were doing whatever they pleased. Every afternoon, I would sit on the back porch with a cheap set of oil paints I had bought at an art supply store, and I would try to capture the light falling on the garden.
I failed, repeatedly, beautifully. But somewhere in those failures, I stopped trying to make the painting look like the garden and started trying to make it feel like the garden. That shift is everything in oil painting. You are not a photocopier. You are a translator. You are taking the feeling of a warm July afternoon and turning it into pigment and linseed oil.
That is what I want you to experience with this project. Not the pressure of creating a photorealistic landscape. Just the quiet joy of mixing a blue that looks like the sky above your own backyard and putting it on a canvas.
What You Will Need: The Honest Starter List
Oil painting has a reputation for being expensive and complicated. It does not have to be. Here is the minimum you need to complete this project, along with what you can skip.
Paint
Do not buy a giant set of forty colors. You only need five to paint a landscape: titanium white, cadmium yellow, ultramarine blue, alizarin crimson, and yellow ochre. With these five colors, you can mix every green, blue, gray, and brown you will need for a summer landscape. A set of five student-grade tubes from brands like Winsor & Newton Winton or Gamblin 1980 will cost about $25 and last you through many paintings. Professional-grade paints are lovely but not necessary for learning.
Brushes
You need three brushes to start: one flat brush (about half an inch wide) for broad areas like sky and grass, one round brush (size 6 or 8) for details and branches, and one small filbert brush (size 4) for blending and soft edges. Synthetic bristle brushes are perfectly fine for beginners and cost a fraction of natural hair. A set of three good synthetic brushes runs about $15. Clean them with mild soap and water after each session, and they will last through many paintings.
Canvas
A pre-stretched canvas is the easiest way to start. Buy an 8-by-10-inch or 9-by-12-inch canvas — small enough to finish in one sitting, large enough to practice brushwork. A three-pack of small canvases costs about $10 at any craft store. If you want to save money, canvas panels (canvas glued to cardboard) are even cheaper and work just as well for practice.
Palette and Medium
A disposable paper palette pad costs about $6 and saves you the hassle of cleaning a wooden palette. For medium, you need linseed oil or a solvent-free gel medium. Avoid turpentine or mineral spirits if you are painting in a shared space — the fumes are strong and not pleasant to breathe. Water-mixable oil paints are also an option, but traditional oils with a solvent-free medium are actually very manageable for beginners and smell much milder.
Other Essentials
- Two small jars: one for medium (linseed oil), one for cleaning brushes between colors (I use safflower oil, which is odorless and brush-friendly)
- Rags or paper towels — you will use more than you think
- A palette knife for mixing colors (a cheap plastic one works fine)
- An apron or old shirt you do not mind getting stained
Total cost for everything on this list: about $50 to $60. That is less than a dinner out, and the supplies will last through a dozen paintings. If you already have some supplies, even better. The canvas, the five paints, and one brush are all you truly need.
Setting Up: Before You Make a Single Mark
Oil painting is a process, not a race. The setup matters as much as the painting itself.
Find good light. North-facing windows give the most consistent, even light. Bright indirect light from any window works well. Avoid direct sun streaming onto your canvas — it creates glare and makes it hard to judge colors.
Protect your surface. Cover your table with newspaper or a vinyl cloth. Oil paint does not wash out of fabric easily, so keep it away from curtains, carpets, and your favorite jeans.
Squeeze small amounts. Squeeze a pea-sized amount of each color onto your palette. You can always add more. Wiping a puddle of unused paint into the trash is wasteful and discouraging.
Mix your medium. Fill one small jar halfway with linseed oil. Dip your brush in the oil, then wipe it on a rag before picking up paint. This conditions the brush and helps the paint flow smoothly. Too much oil makes the paint runny. Too little makes it stiff. You will find the balance after a few strokes.
Take a deep breath. Before you pick up your brush, look at your blank canvas and remind yourself: nothing you do today cannot be painted over. Oil paint is forgiving. You can scrape it off. You can paint over it. You can leave it to dry and come back tomorrow. There is no such thing as a mistake that cannot be fixed.
The Landscape: Step by Step
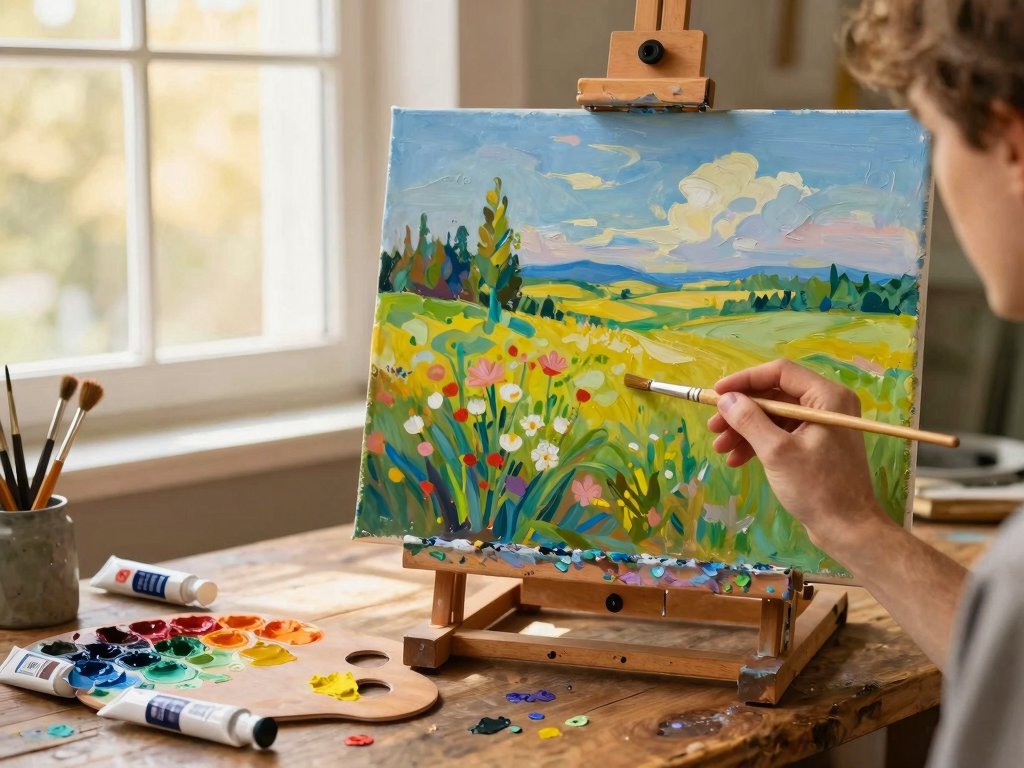
The painting we are making together is simple: a summer sky, a distant hill, a field with a single tree. It is the kind of scene you might see driving through the countryside on a July afternoon. It uses three layers — sky, land, and tree — each building on the one before.
Step 1: Sketch the Composition
Using a small brush and a tiny amount of ultramarine blue thinned with linseed oil, sketch the basic shapes on your canvas. Draw a horizontal line about one-third of the way down from the top — this is the horizon line. Below it, sketch a gentle curve for the distant hill and a few vertical lines where the tree trunk will go. The sketch should be loose and light. You are just creating a road map. If it looks like a child's drawing, you are doing it right.
The classic landscape composition places the horizon at the lower third of the canvas, leaving two-thirds for the sky. This gives the painting a sense of openness and air. For a more intimate scene, you can reverse it — two-thirds land, one-third sky — but for your first painting, the open sky is more forgiving because it lets you practice broad, sweeping brushwork.
Step 2: Paint the Sky
Mix a sky blue from ultramarine blue and titanium white. Start with a generous amount of white and add blue a tiny dab at a time until you reach a color that reminds you of a clear summer sky. It should be lighter than you think — oil paint darkens slightly as it dries.
Using your flat brush, apply the sky color in broad, horizontal strokes across the top two-thirds of the canvas. Do not try to make it even. Variations in pressure and paint thickness create the natural cloud-like texture that makes a sky look real. Leave a few patches of white canvas showing through where clouds might be. You can blend those patches into soft cloud shapes by dragging your brush through them gently.
If you want clouds, mix a tiny amount of alizarin crimson into your sky blue to create a warm gray, then add more white for a soft cloud color. Dab the cloud color onto the canvas in loose, rounded shapes, then blend the edges with a clean, dry brush. The key to believable clouds is soft edges — clouds do not have hard outlines. If your clouds look too sharp, go over the edges with a clean, dry brush to soften them.
Let the sky dry while you mix the next colors. Oil paint stays workable for hours, so you do not need to rush. This is a good moment to step back, look at your painting from across the room, and notice how the sky already changes the energy of the canvas.
Step 3: Paint the Distant Hill and Field
For the distant hill, mix ultramarine blue with a touch of alizarin crimson and a generous amount of white. The result should be a soft, hazy purple-blue — the color of a hill that is far away. Distant objects in a landscape always appear cooler and lighter than objects in the foreground because the atmosphere between you and them scatters warm light. Adding a touch of crimson to your blue-and-white mixture creates this atmospheric effect naturally.
Using your flat brush, paint the hill shape below the horizon line. Keep the brushstrokes following the contour of the hill — horizontal for the flat top, following the curve down the sides. Soften the top edge where the hill meets the sky by dragging a clean, dry brush across the boundary. This blurring is what creates the illusion of distance.
For the foreground field, mix yellow ochre with a small amount of ultramarine blue to create a warm, muted green. Add more yellow ochre than blue — you want a green that leans toward golden, not toward blue. If it looks too green, add a tiny dab of alizarin crimson to warm it up. If it looks too brown, add more yellow ochre and white.
Paint the lower section of the canvas with this green, using horizontal and slightly angled brushstrokes. Vary the pressure and direction to suggest grass and earth. Add small dabs of pure yellow ochre and pure white into the wet green paint — do not blend them fully. These small variations in color will read as wildflowers, patches of sunlight, and texture when viewed from a distance.
Step 4: Paint the Tree Trunk and Branches
Mix a dark brown from ultramarine blue and alizarin crimson. Start with more blue than crimson — about two-thirds blue to one-third crimson — and add a tiny touch of yellow ochre to warm it. The result should be a rich, neutral dark that is nearly black but has more life than pure black ever does.
Using your round brush, paint the tree trunk. Start at the bottom, where the trunk meets the ground, and pull upward with a steady hand. The trunk should be wider at the base and taper as it rises. Do not paint a straight line — trees grow with slight curves and irregular thickness. A trunk that wobbles slightly looks more natural than one that is ruler-straight.
From the trunk, paint the main branches branching outward. Branches grow upward and outward, not downward. Keep the branches thinner than the trunk and let them fork naturally. Use the tip of your round brush for fine branches, pressing lightly and lifting as you reach the tip of each branch. If a branch looks too thick, scrape it off with your palette knife and try again. Oil paint is forgiving.
Step 5: Add the Foliage
For the leaves, mix a fresh green from cadmium yellow and ultramarine blue. Start with more yellow than blue — about two-thirds yellow to one-third blue — to create a bright, sunlit green. Mix a second, darker green with more blue and a touch of crimson for the shadow side of the tree.
Using your filbert brush, dab the lighter green onto the top and outer edges of the branch structure in loose, rounded clusters. Do not try to paint individual leaves — you are painting the shape of the leaf mass, the way a cloud shapes the sky. The dabs of paint will naturally suggest individual leaves when viewed from a normal distance.
Add the darker green to the underside and interior of the tree shape. This creates depth and volume. The tree should look round, not flat. Step back and look. Where does the tree need more light? Add more light green. Where does it need more shadow? Add dark green or a touch of the dark brown mixture.
Do not overwork the foliage. The most common beginner mistake is to keep adding and blending until the tree turns into a green mush. Stop while it still looks fresh. A tree with distinct patches of light and shadow reads as dimensional and alive.
Step 6: Add Foreground Details
Using your round brush and the dark brown mixture, add a few vertical lines in the foreground field to suggest grass stems or wildflower stalks. Do not paint a full field of grass — a few well-placed lines in the lower corners are enough. The suggestion of detail is more powerful than a fully rendered foreground.
Add small dots of pure cadmium yellow and titanium white to suggest wildflowers. Three or four dots of yellow in the lower left, a couple of white dots scattered in the grass. That is all it takes. Your eye will fill in the rest. This is the principle of economy in painting: the viewer's brain completes what the brush only suggests.
If your painting has an area that feels empty, resist the urge to fill it. Empty space is what gives a landscape room to breathe. A summer field with a single tree does not need a barn, a fence, and a flock of birds. It needs sky, earth, and the quiet stillness of a hot afternoon.
A Note About Letting Go
Somewhere around the middle of this process, your painting will go through an awkward phase. The sky might look too blue. The tree might look like a broccoli. This is normal. Every painting goes through an ugly stage. The difference between a finished painting and an abandoned one is the willingness to push through.
When I was painting in my aunt's garden that summer, I nearly threw away at least three paintings during the ugly stage. But I kept going. I added one more layer. I softened one more edge. I scraped a branch off and repainted it. And every time, the painting came together in the last ten percent — that magical moment when the colors click, the composition settles, and you realize you have made something that did not exist before.
If you reach the ugly stage and feel stuck, here is what to do: set the painting aside, make a cup of tea, and come back to it in an hour. Sometimes all a painting needs is fresh eyes. If it still looks wrong, try adding more white to your sky mixture and painting a thin, translucent layer over the existing sky. More white to your foliage green. More yellow ochre to your field. Lightness and warmth are almost always the answer when a landscape feels off.
Cleaning Up and Caring for Your Painting
Oil paint takes days to dry, sometimes weeks depending on thickness and climate. Your painting will be touch-dry in three to seven days and fully cured in two to four weeks.
While it dries: Place the canvas flat on a shelf or table in a dust-free area. If you need to store it vertically, make sure nothing touches the painted surface. A simple cardboard box cut to size makes an excellent drying rack.
Cleaning your brushes: This is the most important habit to develop. Rinse each brush in your oil jar (safflower or linseed oil), wipe on a rag, then wash with mild soap and warm water. Shape the bristles with your fingers and let them dry flat or hanging bristle-down. A brush left with paint in the ferrule (the metal part) will be ruined within days. I lost my favorite brush to carelessness and still mourn it.
Storing leftover paint: If you mixed more paint than you used, scrape it onto a piece of wax paper, fold it over, and store it in the refrigerator. It will stay workable for several days. This is a great habit for weekend painters who want to continue a painting in a second session.
Varnishing (optional): After your painting is fully dry (at least four weeks), you can apply a thin coat of gloss or matte varnish. Varnish evens out the surface sheen, protects the paint, and makes the colors look their best. It is not required for a first painting, but it gives a professional finish. Use a soft, wide brush and apply the varnish in long, even strokes. Let it dry in a dust-free space for 24 hours.
What to Paint Next
Once you have finished your first summer landscape, you will have learned skills that apply to almost any subject: mixing colors from a limited palette, creating depth with atmospheric perspective (cooler, lighter colors for distant objects), painting with broad shapes before details, and knowing when to stop.
Your next painting could be:
- A sunset version of the same scene, using more alizarin crimson and cadmium yellow in the sky and longer, darker shadows on the field. This teaches you how dramatically light changes the same composition.
- A seascape — a beach with waves, sand, and a distant horizon. The same sky-and-land approach, but with water introducing horizontal reflection lines and a lighter overall palette.
- A still life — a bowl of fruit on a table. Still lifes are excellent for learning how light falls on objects because the subjects do not move. Apples are the traditional beginner subject for good reason: they are basically spheres with color variation, challenging but achievable.
- A portrait of a tree — not a landscape with a tree, just the tree itself, filling the canvas. This teaches you to see bark texture, branch structure, and leaf mass with focused attention. A single tree study is one of the best exercises for building observational skills.
Each painting you finish teaches you something the last one did not. And each one will be easier than the last. The barrier to entry in oil painting is not talent. It is simply the willingness to make a first mark on a blank canvas and see where it leads.
Conclusion
That first terrible painting I made of the chipped pitcher and the sunflower-fried-egg is still somewhere in my parents' attic. I keep meaning to throw it away, but I never do. Because it reminds me that every painter starts somewhere. Every master was once a beginner staring at a white canvas, feeling completely lost. The only thing that separates the painter from the non-painter is the decision to pick up the brush and make a mark.
Your first landscape will not be perfect. Your tree might look like a lollipop. Your sky might be streaky. Your distant hill might sit at the wrong height. None of that matters. What matters is that you mixed a color that felt like the sky you remember from a summer afternoon. What matters is that you created something with your own hands that did not exist an hour before.
Oil painting is not about talent. It is about showing up, mixing colors, and letting the brush teach your hand what it knows. Your hands already know more than you think. They just need permission to try.
The summer landscape is waiting for you. Pick up your brush. Mix a sky blue. And see what happens.


