Introduction
The first portrait I ever drew was of my daughter, asleep in the crook of my arm. She was three weeks old, and I was running on two hours of sleep.
I remember thinking the drawing should be easy. Her face was right there, peaceful and perfect. But the pencil marks refused to cooperate. Her eyes floated too high. Her nose looked like a small potato. I laughed, tore the page out, and tucked it into her baby book anyway.
Years later, I understand what was missing. It was never talent. It was a map.
That is what this article gives you: a simple map of the face. You will learn the classic proportions artists have used for generations. You will learn where the eyes truly sit, how wide the face really is, and how to draw each feature one gentle step at a time.
By the end of the weekend, you will have drawn a real portrait. Not a perfect one. A real one. And that is the whole point.
Why Proportions Matter More Than Talent
Here is a secret the art world does not advertise: drawing a recognizable face has very little to do with talent.
It has everything to do with where things go.
If the eyes sit in the right place, the nose lands where it should, and the mouth follows the rules of the face, the portrait will look like a person. Even if every line is a little wobbly.
Get the placement wrong, and no amount of fancy shading can save it. The face will look off, and you will not quite know why.
Andrew Loomis, the beloved mid-century illustrator, understood this better than anyone. His book "Drawing the Head and Hands" popularized a construction method that changed how beginners learn. He showed you start with a simple oval, add two cross lines, and build the face from there, step by step.
That book is still treasured today, and for good reason. It turned portrait drawing from a mystery into a method.
So if you have ever told yourself, "I just do not have the talent for faces," please hear me: you have been carrying a mistake. You have a method now, and a method beats talent every single time.
The Simple Materials You Need
Before we draw, let us gather supplies. The good news is that you probably own most of these already.
- Three graphite pencils: a 2H, an HB, and a 2B. The 2H is hard and light, perfect for construction lines you will erase later. The HB is your everyday workhorse. The 2B is softer and darker, lovely for gentle shading.
- Smooth sketch paper. Nothing fancy. A sketchbook with medium-weight pages works beautifully.
- A kneaded eraser. Unlike a pink eraser, it lifts graphite like soft dough. You can shape it into a point to lift tiny highlights.
- A mirror for self-portrait practice, and a few family photos for reference. Photos are wonderful because faces hold still.
That is the whole list. One trip to the craft store, or one quick online order, and you are ready.
The Head Map: Finding the Eye Line and Center Line
Every good portrait begins with a map, and the Loomis method gives us the best one.
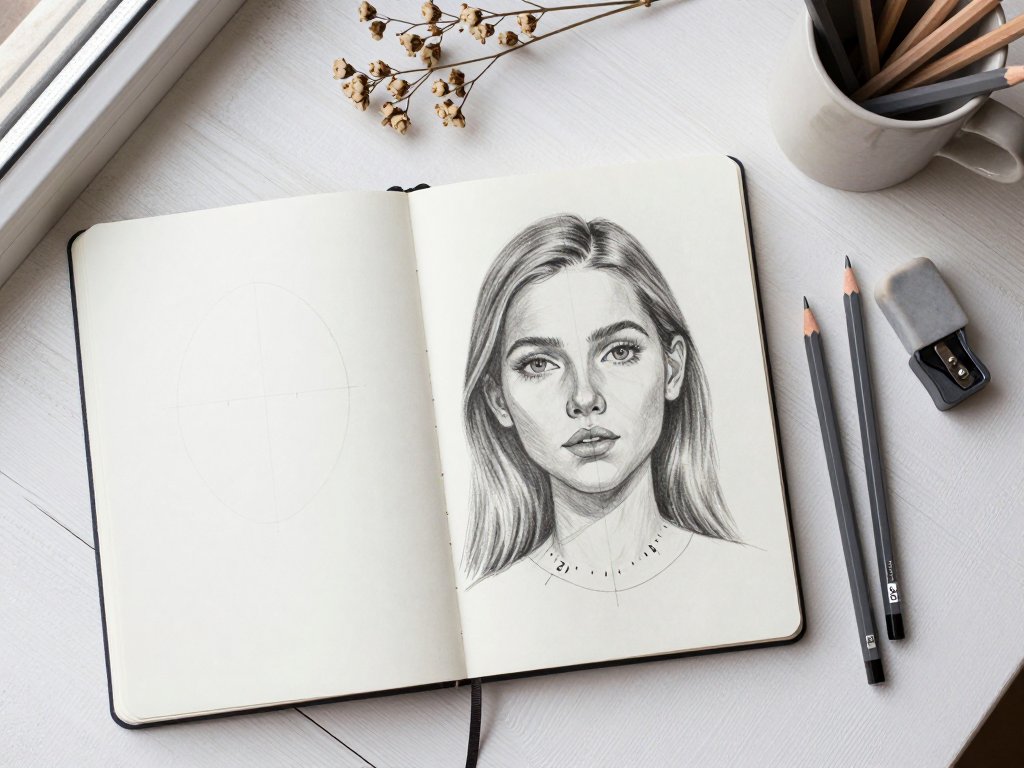
- Draw a light oval with your 2H pencil. Press softly. This is a guideline, not the finished head, and it should feel free.
- Draw a vertical line down the center of the oval. This is the center line. It divides the face into two equal halves and shows which way the head is turning.
- Draw the eye line. Here is the classic rule: the eyes sit roughly halfway between the top of the head and the chin. Not up near the forehead, where beginners always put them. Halfway down.
Where the center line and the eye line cross is the middle of the face. Every feature will anchor itself to this spot.
It feels strange at first. The eye line seems far too low. Trust it. This single rule fixes more portraits than any other trick I know.
Five Eye-Widths Wide: Placing the Features
With the map in place, we can start placing features. And the unit of measurement for the whole face is the eye.
Here is the classic proportion: the face is about five eye-widths wide. One eye on the left edge, one eye-width gap, one eye in the center, another gap, and one eye on the right edge.
The space between the eyes is about one eye-width. Not a tiny sliver, not a wide canyon. One comfortable eye.
Now for the nose. The bottom of the nose sits about halfway between the eyes and the chin. Draw a small tick mark there.
The mouth sits about a third of the way between the bottom of the nose and the chin. Not halfway. A third.
Here is a delightful detail: the corners of the mouth roughly line up with the centers of the pupils. When you draw the eyes, you can drop two invisible lines down to find where the mouth should end.
And the ears? The tops line up with the eyebrows, and the bottoms line up with the nose. In a simple front view, they tuck along the sides of the head between those two lines.
One more lovely fact before we move on. Babies have larger foreheads, with features placed low on the face. Adult features sit closer to the vertical center. So if your toddler portrait looks like a tiny adult, that is why.
Drawing the Eyes
The eyes are the part everyone worries about, so let us take them slowly.
Think of the eye as a simple almond shape, not a football. The outer corner sits slightly higher than the inner corner, and the top lid curves more than the bottom.
Start with a light almond outline. Inside it, draw the iris, the colored circle, and the dark pupil at its center.
Here is the trick that makes eyes look alive: leave a tiny highlight white. Do not shade over it. That small bright spot catches the light, and it turns a flat shape into a real eye.
Shade the iris gently with your HB pencil, going darker at the top where the eyelid casts a shadow. Then add a soft line for the upper lid. Eyelashes should be drawn lightly, in small feathery strokes, not heavy spikes.
When you draw the second eye, resist the urge to make it identical. Human faces are not symmetrical, and a hint of difference makes a portrait look like a person instead of a mask.
If the eyes still feel clumsy, that is fine. You are training your hand. Each attempt teaches it something.
Drawing the Nose
The nose scares more beginners than any other feature. Let me show you why it should not.
The nose is not a line drawing. It is a small sculpture of light and shadow.
Beginners outline the whole nose, and it ends up looking like a cartoon. Instead, think of three simple planes: a front plane, and two sides that slope away.
Start by marking the bottom of the nose with your light tick from earlier. Then suggest the shape with a few soft strokes for the sides and a gentle curve for the underside.
The nostrils are soft marks, not dark holes. Draw them lightly and let shading do the work.
Add a little shadow beneath the nose and along one side, and suddenly the nose lifts off the page.
Here is a comforting thought: in a three-quarter view, the far side of the nose is often just a whisper of line, or nothing at all. Less really is more.
The pencil-at-arm's-length trick helps here. Hold your pencil upright at arm's length, close one eye, and measure how many pencil lengths the nose takes up. Compare it to the eyes. This ancient trick trains your eye to see proportions instead of guessing them.
Drawing the Mouth and Lips
Lips are soft, and your pencil should be softer for them.
Remember the placement: the mouth sits about a third of the way between the bottom of the nose and the chin. And the corners line up with the centers of the pupils.
Start with a very light horizontal line for the opening between the lips. Do not press hard. This line is the mouth's anchor.
Then draw the upper lip with two gentle curves, like a soft letter M. The lower lip is a fuller curve beneath it.
Here is the rule that saves every mouth: never outline the lips heavily. A dark outline makes lips look like a sticker. Instead, suggest the shape with light strokes and let shading define the fullness.
The upper lip is usually a little darker than the lower lip, because it tilts away from the light. A touch of shadow under the lower lip gives it that lovely lifted look.
If the mouth seems too small, resist the urge to widen it. Beginners tend to draw features too big, and mouths are frequent victims. Trust your measurements, not your instincts.
Drawing the Ears
Ears are the feature everyone forgets, and they repay attention.
Remember the guide: the top of the ear lines up with the eyebrow, and the bottom lines up with the nose. In a front view, the ears sit along the sides of the head, often tilted slightly back.
Think of the ear as a simple cup shape with a curve inside it. That inner curve is the bowl of the ear, and it is often the only detail you truly need.
Draw the outer rim lightly, add the inner curve, and leave the rest to suggestion.
When hair covers the ears, you barely need to draw them at all. A hint of the inner curve peeking through is enough.
And if you are drawing a baby, notice how small and delicate their ears are. Soft, light strokes suit them best.
Putting It All Together: Your First Full Portrait
Now for the moment you have been building toward: a whole face.
Choose a photo of someone you love, or sit in front of the mirror. A photo is calmer for a first attempt.
Begin with the head map. Draw the light oval, the center line, and the eye line with your 2H pencil. Press gently. These lines are scaffolding, not permanence.
Add the feature guides: the five eye-widths, the nose tick, the mouth tick. Then place the features one by one, exactly as we practiced.
Use the pencil-at-arm's-length method to measure. Hold the pencil upright, close one eye, and compare the width of the face to the height of the eyes. Sighting angles helps too: hold your pencil along the angle of a jawline or an eyebrow, then copy that tilt onto your paper.
Once the drawing is placed, switch to your HB pencil and begin shading. Build tone slowly, in layers, and blend with a tissue or your fingertip. Keep the highlights white by lifting graphite with your kneaded eraser.
Then stop. This is the hardest instruction in this whole article.
Set the drawing down and look at it from across the room. I promise you, it looks more like a person than you think it does. You have drawn a face. Celebrate that.
A Weekend Practice Plan
Let me give you a plan that fits into real life, with naps and snack times and everything else.
On Saturday morning, draw features on their own. Fill a page with eyes. Just eyes, ten of them, loose and playful. Then a row of noses, then mouths. Keep each one small and quick. This is not about perfection; it is about loosening up.
In the afternoon, do a second page with the head map. Draw ovals, center lines, and eye lines until the placement feels natural. This is where the proportions truly sink in.
On Sunday, draw your first full portrait. Use the photo you chose, and give yourself a whole hour. Put on music or a podcast, make tea, and enjoy the quiet.
If confidence is shaky, trace the photo's outline onto your paper first, or use a grid. These are not cheating; they are training wheels, and they come off when you are ready.
Here is the most important part of the plan: draw from life, not imagination. Sleeping kids make wonderful models. Family photos work beautifully. Life gives you real proportions to copy, and that is where learning happens.
When the weekend ends, tuck the drawings into a folder. In six months, you will pull them out and see how far you have come.
Troubleshooting Common Mistakes
Every beginner makes the same four mistakes. Here they are, and here is how to fix them.
- Eyes placed too high. This is the most common error in portrait drawing. The fix is simple: trust the halfway rule. Measure from the top of the head to the chin, and place the eye line exactly in the middle.
- Features drawn too big. Beginners draw features larger than life because they are focusing on them. The fix is to measure. Check the five-eye-width rule and the nose and mouth guides against your drawing.
- Lips outlined too heavily. Dark outlines flatten the face and make mouths look stuck on. The fix is to draw the lip line lightly and build the lips with shading instead of outlines.
- Stiff symmetry. A face that is too perfectly mirrored looks like a mask. The fix is to embrace asymmetry. Slightly different eyes, a small quirk in the mouth, a wandering eyebrow: these make a portrait feel human.
If you spot any of these in your drawing, do not start over. Erase the offending line and try again on the same page. Every correction teaches your hand something new.
Conclusion
That first portrait of my sleeping daughter still lives in her baby book. The eyes were too high. The nose was, objectively, a potato.
But I kept it, because it was the beginning. It was the first time I understood that faces follow rules, and that I could learn the rules.
Since then, I have drawn her hundreds of times. Her first birthday, her missing tooth, the afternoon she fell asleep on the couch with a book on her chest. None of them are perfect. Some of them are wonderful.
That is the gift of this craft. You are not chasing perfection; you are collecting small moments, one pencil stroke at a time.
So this weekend, gather your pencils and pick a face you love. Draw the oval, the center line, the eye line. Trust the halfway rule. Let the portrait be imperfect.
And when you are done, sign it, date it, and keep it. Your children will grow up knowing their faces were worth drawing slowly. That is a legacy no photograph can match.
Now, go find your pencil. Your first portrait is waiting.