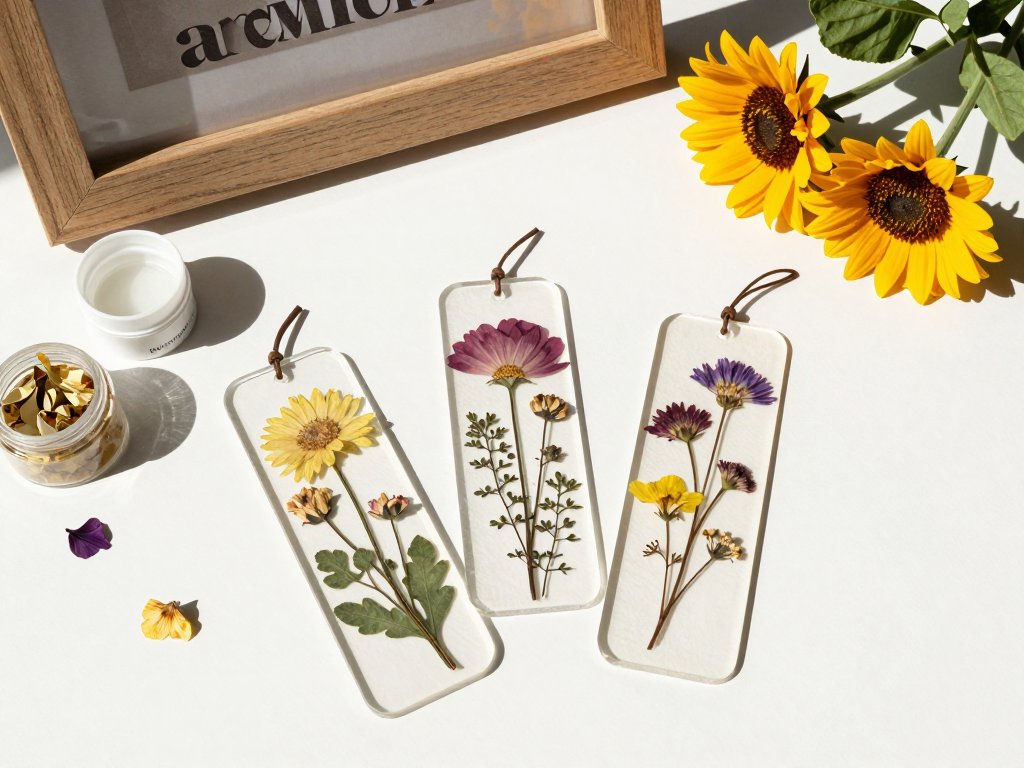
Why Pressed Flower Resin Bookmarks Are Having a Moment
There is something quietly magical about pressing a flower. You take something alive and fleeting — a perfect spring bloom, a gift from a garden or a walk through the park — and you flatten time itself. When you suspend that flower in clear, glossy resin and turn it into a bookmark, you create an object that feels almost talismanic. Every time you open your book and slide that marker between the pages, you are reminded of that day, that season, that tiny piece of nature you saved.
Pressed flower resin bookmarks have exploded in popularity across crafting communities, and for good reason. They are beginner-friendly enough for someone who has never touched epoxy resin, yet endlessly customizable for seasoned makers. They make thoughtful handmade gifts — think Mother's Day, teacher appreciation, wedding favors, or just a mood-boosting present for your book-club bestie. Plus, they combine two of the most satisfying craft worlds: botanical preservation and resin artistry. Let me walk you through everything you need to know to make your own, from picking and pressing flowers to pouring that perfect crystal-clear finish.
Gathering Your Materials
Before we get our hands messy, let's talk supplies. The beauty of this project is that you do not need a ton of expensive equipment to get started, but there are a few non-negotiable items — especially when it comes to safety. Here is your complete shopping list.
Epoxy Resin and Hardener
For bookmarks, you want a clear, high-gloss epoxy resin that cures hard and does not yellow over time. Look for a brand specifically labeled "UV-resistant" or "crystal clear" — ArtResin is a popular choice among crafters, but there are plenty of excellent options on the market. Epoxy resin comes in two parts: the resin itself and a hardener. You must mix them in the exact ratio specified by the manufacturer, usually 1:1 by volume. Do not eyeball it. Use graduated mixing cups and measure carefully — getting the ratio wrong means your bookmark stays tacky forever, and nobody wants a sticky bookmark.
UV Resin (Alternative Option)
If you are impatient or just want to make a single bookmark without committing to a full batch of epoxy, UV resin is a fantastic alternative. It cures in minutes under a UV or LED lamp instead of the 12 to 24 hours epoxy needs. The trade-off is that UV resin works best for thinner layers — great for bookmarks since they are naturally slim — and it can be more expensive per ounce. Many makers use UV resin for the final top coat because it self-levels beautifully and cures glass-hard. I will note which steps work with either option as we go along.
Silicone Mold
You need a bookmark-shaped silicone mold. These are widely available on Etsy, Amazon, and at craft stores. Look for one with smooth walls and a glossy finish — the mold determines the final surface texture of your bookmark, so a high-quality silicone mold with a mirror-like interior will give you a glass-smooth result with minimal sanding. Rectangle molds in standard bookmark dimensions (roughly 2 × 6 inches) work perfectly, but you can also find shaped molds with rounded tops, tassel holes, or decorative borders built right in.
Pressed Flowers
The stars of the show. More on pressing them in the next section, but for now, know that you want thin, flat flowers that have been fully dried. Pansies, violas, daisies, baby's breath, ferns, and individual rose petals are all excellent choices. Avoid thick, fleshy flowers like succulents or large roses — they trap moisture and will eventually rot inside your resin.
Mixing Cups and Stir Sticks
Graduated plastic or silicone mixing cups are essential for getting your resin ratios right. Buy a pack of 100 — you will go through them faster than you think. Stir sticks can be wooden popsicle sticks, silicone spatulas, or even reusable silicone stirrers. Wooden sticks are cheap and disposable, which is nice because cured resin is basically impossible to wash off.
Gloves and Safety Gear
Uncured epoxy resin is a sensitizer — repeated skin contact can cause allergic reactions that get worse over time. Always wear nitrile gloves (not latex, resin can penetrate latex). Work in a well-ventilated area, and consider a respirator with organic vapor cartridges if you are resin-ing in a small space. Safety glasses are also a good idea when sanding. This is not the part of crafting anyone likes to talk about, but trust me — your future self will thank you for being careful.
Sandpaper and Wet/Dry Sanding Supplies
Even with the best silicone mold, you will almost certainly need to do some sanding. Grab an assortment pack of wet/dry sandpaper from 400-grit up to 3000-grit or higher. You will also want a bowl of water for wet sanding, which prevents dust and gives a smoother finish. A microfiber cloth for drying and polishing is nice to have too.
Drill or Hole Punch
To add a tassel or ribbon to your bookmark, you need a hole at the top. A small handheld rotary tool (like a Dremel) with a fine drill bit works beautifully on cured resin. Alternatively, you can buy a mold that already has a hole built in, or use a hole punch designed for resin — just make sure it is sharp enough to cut through cured epoxy, which is surprisingly tough.
Optional but Nice Extras
A heat gun or kitchen torch for popping bubbles, tweezers for placing tiny flowers, gold leaf or dried herbs for accents, a UV lamp if you are using UV resin, and isopropyl alcohol for cleaning your workspace. A dust cover or a cardboard box to place over curing bookmarks will keep dust and pet hair from settling into your pristine resin.
How to Press Flowers for Resin
You cannot just grab a fresh flower and drop it into resin. Fresh flowers contain moisture, which will cloud your resin, create bubbles, and eventually cause the flower to decay inside your beautiful bookmark. Pressing flowers properly is the single most important step for professional-looking results.
The Classic Book Press Method
The old-school way works beautifully and costs nothing. Pick your flowers on a dry day — morning after the dew has evaporated is ideal. Place them between the pages of a thick book, arranging them so petals are flat and not overlapping. Close the book and stack more books on top. Leave them for one to three weeks depending on the thickness of the flower. Delicate blooms like violas may be ready in seven to ten days; thicker flowers like rosebuds need a full three weeks. Check them after the first week and rotate the pages they are in to prevent moisture from wicking through the paper. Pro tip: line the book pages with parchment paper or unprinted coffee filters to protect your book and absorb moisture.
Using a Flower Press
A dedicated flower press gives you more control. These are basically two wooden boards with bolts and wing nuts that sandwich layers of cardboard and blotting paper. The advantage is even, adjustable pressure and better airflow. You can buy one for around fifteen to twenty dollars or build your own from scrap plywood in about twenty minutes. The drying time is roughly the same — one to three weeks — but the results are more consistent because you can tighten the press as the flowers dry and shrink.
Microwave Pressing (Fast Track)
If you are short on time, you can press flowers in the microwave using a specialized microwave flower press or even just two ceramic tiles with rubber bands. Place the flower between layers of parchment paper and microwave in short fifteen-second bursts, letting the press cool completely between rounds. This can dry thin flowers in as little as two to three minutes. The downside is that colors can sometimes shift more dramatically than with traditional pressing, and there is a learning curve — you will probably accidentally scorch a few blooms before you get the timing right. Still, when you are on a craft deadline, this method is a lifesaver.
Preserving Flower Color in Resin
Here is the hard truth: almost all pressed flowers change color when encapsulated in resin. The heat generated during the exothermic curing reaction can dull bright colors. Reds and pinks are notorious for turning brownish. Blues and purples hold up reasonably well. Yellows and whites tend to go translucent or slightly amber-toned. Ferns and green leaves almost always darken — sometimes beautifully, like preserved botanicals in a vintage science display, but darker nonetheless. You can slow this down by using UV-resistant resin and curing in a cool environment (below 75°F / 24°C) to reduce heat buildup. Some crafters also seal their flowers with a thin layer of clear-drying PVA glue or Mod Podge before embedding them, which creates a barrier between the flower and the resin. Results are mixed — test on a sacrificial flower first.
Understanding Resin Mixing
Mixing resin correctly is 90 percent of the battle. Get this wrong, and nothing else matters.
The Golden Ratio
Read your resin's instructions and follow them to the letter. Most epoxy resins use a 1:1 ratio of resin to hardener by volume. Some use 2:1. Some measure by weight. Write it on your wall if you have to. Use separate graduated cups for each part — do not pour hardener directly into the resin cup because you might misjudge the volume. Pour Part A (resin) into one cup to your desired level. Pour an equal amount of Part B (hardener) into a separate cup. Then combine them in a third cup and stir.
Stirring Without Introducing Bubbles
Stir slowly and deliberately. Scrape the sides and bottom of your cup continuously as you stir. You are mixing for two to three minutes — set a timer. Stirring too fast whips air into the mixture and creates bubbles that will be a nightmare to remove. Stirring too slowly or incompletely leaves streaks of unmixed resin that will never cure. Aim for a slow, steady, figure-eight motion, scraping as you go. The mixture should go from syrupy and cloudy to thin and crystal-clear as it becomes fully blended. If you see streaks or swirls, keep stirring.
Pouring in Layers
Bookmarks are thin, but you still want to pour in at least two layers. A thin first layer — maybe one-third of your total depth — seals the bottom of the mold and provides a bed for your flowers. You let this layer partially cure until it reaches a gel-like consistency (usually one to three hours depending on the resin), then arrange your flowers on top. The second layer covers the flowers completely and forms the top surface of the bookmark. Pouring in layers prevents flowers from floating, shifting, or poking through the surface. It also reduces the risk of bubbles getting trapped under petals.
Step-by-Step: Making Your Pressed Flower Resin Bookmark
Alright, enough theory. Let's make something.
Step 1: Press and Prepare Your Flowers
Refer to the pressing methods above. By the time you start working with resin, your flowers should be bone-dry — they should feel like paper, not fabric. If they are still pliable or feel cool to the touch, they are not ready. Arrange your pressed flowers on a piece of white paper and play with the composition before committing. Try a single statement flower off-center for a minimalist look, a cluster of small blooms for a wildflower meadow vibe, or a row of tiny violets marching down the bookmark for something whimsical. Fern fronds make elegant borders. Baby's breath adds delicate texture. Take a photo of your favorite arrangement so you can reference it later.
Step 2: Prepare Your Workspace and Mold
Set up in a room that is at least 70°F (21°C) — resin cures poorly in cold temperatures, leading to cloudiness and curing failures. Cover your work surface with a silicone mat or wax paper. Wipe out your silicone mold with a lint-free cloth and a tiny bit of isopropyl alcohol to remove any dust or debris. Place the mold on a perfectly level surface — use a spirit level if you are unsure. An uneven pour will give you a bookmark that is thicker at one end and thin at the other.
Step 3: Mix and Pour the First Layer
Mix your resin according to the instructions above. Pour a thin layer into the mold — just enough to cover the bottom completely, about one to two millimeters deep. Use a stir stick to spread it into the corners and edges if the mold is not self-leveling. Let this layer sit for about ten minutes to allow any surface bubbles to rise and pop. Gently exhale over the surface (your breath contains carbon dioxide, which helps burst bubbles) or use a heat gun briefly — wave it over the surface, do not hold it in one place or you will scorch the resin. Now wait. Depending on your resin, you need the first layer to reach a gel stage where it is tacky but not liquid. This usually takes one to three hours. Check it by touching the corner with a gloved finger — it should feel like very thick syrup.
Step 4: Arrange Your Flowers
Using tweezers, gently place your pressed flowers onto the tacky first layer. Press them down lightly so they adhere. If your resin has gelled enough, the flowers will stay exactly where you put them. If they shift around, the resin is still too liquid — wait another thirty minutes and try again. This is the artistic moment: trust your instincts. Imperfection is beautiful. A slightly crooked composition often looks more natural than something rigidly symmetrical. Layer flowers on top of each other for depth if you want — just keep the total thickness smaller than your mold depth, or flowers will poke through the top surface.
Step 5: Mix and Pour the Second Layer
Mix a fresh batch of resin. Some makers reuse resin that has been sitting in the cup for the past few hours, but I recommend a new mix — the resin in your cup has already started curing and will be thicker, which means more bubbles and less even flow. Pour the second layer over your arranged flowers, starting at one corner and letting the resin flow naturally over the design. Use a stir stick if you need to guide it, especially around edges and corners. The second layer should be thick enough to completely submerge the tallest flower petal by at least one to two millimeters. If a petal breaks the surface, you will have to sand it down later and risk damaging the flower.
Step 6: Pop Bubbles
Bubbles are the enemy. After pouring the second layer, you will almost certainly see bubbles rising to the surface. Wave your heat gun or torch over the surface — not too close, not too long, just passing back and forth. Bubbles will expand and pop. Work quickly because the heat also thins the resin, helping it self-level. If you are using UV resin, a UV lamp will cure it in minutes, so pop bubbles with a toothpick or by breathing on it before you cure. With epoxy, you have a working window of about twenty to thirty minutes before the resin gets too thick for bubbles to escape easily.
Step 7: Cure
Cover your mold with a dust cover or an inverted cardboard box. Leave it completely undisturbed for the manufacturer's recommended cure time — usually 12 to 24 hours for full cure, though it will be touch-dry in about six to eight hours. Do not move the mold. Do not peek by lifting it up. Do not poke it. Resin is unforgiving about disturbance during the cure. Keep the room temperature stable throughout. After the full cure time, your bookmark should pop out of the silicone mold with a gentle flex of the mold. If it sticks or feels bendy, give it more time.
Step 8: Sand and Finish
Examine your bookmark. The bottom surface (the one that was against the mold) should be glossy and perfect. The top surface and edges may have some roughness or sharp spots where resin pooled. Start wet sanding with 400-grit sandpaper to knock down any major bumps. Dip the sandpaper in water and sand in circular motions with light pressure. Wipe the bookmark clean and check your progress. Move to 600-grit, then 800, then 1000, then 1500, then 2000, and finally 3000-grit if you have it. Each grit removes the scratches from the previous one. Between grits, rinse the bookmark and your sandpaper thoroughly. After 3000-grit, your bookmark should have a satin, almost-glossy finish. For full glass clarity, apply a thin top coat of UV resin or a resin-specific polish. Some makers buff with a microfiber cloth and a tiny drop of mineral oil for that final gleam.
Step 9: Drill a Hole and Add a Tassel
If your mold did not include a hole, now is the time to make one. Mark a spot at the top center of the bookmark. Use a rotary tool with a small drill bit (about 1/8 inch or 3 millimeters) at low speed. Go slowly and let the bit do the work — pressing hard can crack the resin. A drop of water as lubricant helps prevent heat buildup and cracking. Smooth the edges of the hole with fine-grit sandpaper. Thread a silk tassel, ribbon, or a piece of waxed cotton cord through the hole and tie it off. A simple knot looks clean; a small charm or bead above the knot adds a little extra personality.
Tips for Professional-Looking Results
Avoiding Yellowing
Yellowing is the number one complaint about resin crafts. The culprit is UV exposure and the quality of your resin. Always buy UV-stabilized, non-yellowing epoxy from a reputable brand. Cheap resin from discount stores will yellow within months. Store finished bookmarks away from direct sunlight when not in use — inside a book is actually the perfect place. If you are making bookmarks as gifts, tell the recipient not to leave them on a windowsill. A thin UV-protective spray or varnish over the cured surface can add another layer of protection.
Bubble Removal Mastery
Bubbles come from three sources: mixing, pouring, and trapped air under flowers. Mix slowly. Pour in a thin stream from height — this stretches the resin and helps bubbles escape. Let your first layer gel before adding flowers to prevent trapped air. Use a heat gun or torch on every layer, not just the final pour. If you see a bubble after the resin has started thickening, you can pop it with a toothpick and the resin will self-level. For UV resin, work in thin layers and cure each one; thick layers trap heat and create bubbles as the resin expands.
Managing Flower Color Changes
As I mentioned earlier, flower colors shift in resin. You can lean into this rather than fighting it. Red roses turn a vintage rust-brown — pair them with gold leaf for an antique aesthetic. Blue cornflowers stay blue and look stunning with silver accents. Yellow pansies go translucent and look like tiny stained-glass windows. White baby's breath turns slightly amber and takes on a preserved-in-amber look that is genuinely beautiful. Test a few flowers in a practice pour before committing to your final design. And remember: the flower you pressed two weeks ago may look different from the same flower pressed six months ago. Fresher pressed flowers generally retain more color than very old ones.
Working with Thick or Bulky Flowers
Some flowers are just too thick to press flat. For these, you can use a technique called "drying in silica gel" instead of pressing. Bury the flower in silica gel crystals for three to five days — it dries the flower while preserving its three-dimensional shape. Then you can embed it in a deeper mold (look for a chunky bookmark mold or even a small paperweight mold). This works beautifully for small roses, lavender sprigs, and daisies. Just note that the resin needed is deeper, so your bookmark will be thicker and heavier. These make lovely statement bookmarks for coffee-table books.
Creative Variations to Try
Once you have the basic technique down, the possibilities are endless. Here are a few ideas to spark your imagination.
Gold Leaf Accents: Add tiny flakes of genuine or imitation gold leaf to your first resin layer before the flowers go in. The gold catches the light behind the petals and gives the whole piece a luxe, illuminated-manuscript energy.
Dried Herbs and Spices: Lavender buds, small rosemary sprigs, whole star anise, cinnamon bark shards — these add fragrance (yes, the scent comes through the resin) and a warm, earthy color palette. Perfect for a cozy autumn craft session.
Layered Landscape Bookmark: Create a miniature scene by layering different elements. A base layer of blue-tinted resin for "water," a fern frond for "trees," tiny yellow flowers for "wildflowers," and a white flower silhouette for "clouds." Pour each layer separately, letting each one cure before the next.
Confetti Bookmarks: Mix in small dried flower petals, bits of gold leaf, and even tiny pressed letters cut from book pages. This is a wonderful way to use up leftover flower scraps and creates a celebratory, party-in-a-bookmark effect.
Watercolor Resin: Add a drop of alcohol ink or resin dye to your first layer before it cures. Swirl it gently to create a watercolor wash effect, then arrange your flowers on top. The translucent color behind the flowers adds depth without overpowering the botanical elements.
Caring for Your Finished Bookmark
Resin is durable, but it is not indestructible. Store your bookmarks flat if possible — storing them curled in a book over time can create a permanent bend. Clean them with a soft, damp cloth; avoid harsh chemicals and alcohol-based cleaners that can cloud the surface. Keep them away from extreme heat (car dashboards in summer are a death sentence for resin) and prolonged direct sunlight. With reasonable care, a well-made resin bookmark will last for decades. I have bookmarks I made five years ago that still look as clear and vibrant as the day I unmolded them.
Final Thoughts
Making pressed flower resin bookmarks is one of those rare crafts that feels both deeply satisfying and genuinely accessible. You do not need a studio full of equipment. You do not need years of experience. You just need patience, a willingness to embrace imperfection, and an appreciation for the quiet beauty of flowers that would otherwise have faded and been forgotten.
Every bookmark you make captures a moment. That pansy from your grandmother's garden. The daisy your toddler picked for you. The fern frond from a hiking trail that changed something in you. They become tiny time capsules, pressed between pages of books that hold other worlds. And that, I think, is the real magic of this craft — not just the glossy finish or the perfectly cured surface, but the story each flower carries with it into the resin.
So go for a walk. Pick a few blooms (responsibly — take only what is abundant). Press them, pour them, and preserve them. Your books are waiting for their new favorite bookmark.