Introduction
The first jack-o'-lantern I ever carved ended up in the trash before the sun came up. Not because the design was bad. Because I used the wrong tool.
I was young, broke, and sure of myself. I bought a big pumpkin and reached for the biggest kitchen knife we owned.
The knife stuck, then slipped, then stuck again. By the time I wrestled the top off, a crack ran down the pumpkin's face like a lightning bolt.
The eyes were supposed to be triangles. They came out as jagged diamonds, and the mouth looked like a zigzag drawn by a toddler with the hiccups.
Somewhere in that fight, the blade came way too close to my hand. That is the moment I still think about, years later.
I set what was left on the porch anyway. A raccoon knocked it over before midnight. Honestly, the raccoon did us both a favor.
Here is what I know now. The pumpkin wasn't the problem, and I wasn't the problem. The tool was.
I was cutting a thick-skinned vegetable with a straight blade and a pushing motion. Wrong shape, wrong motion, wrong everything.
This guide is the one I wished I had that night: carving tools that work, techniques that keep fingers safe, designs ranked by difficulty, and pumpkins that glow for days.
What's Actually in a Pumpkin Carving Kit
The secret that cost me one ruined pumpkin to learn: a small carving kit beats a drawer of kitchen knives for this job. Every time.
Kits are inexpensive, about five to fifteen dollars, and they show up everywhere in October. Grocery stores, craft stores, big-box stores, and online all carry them.
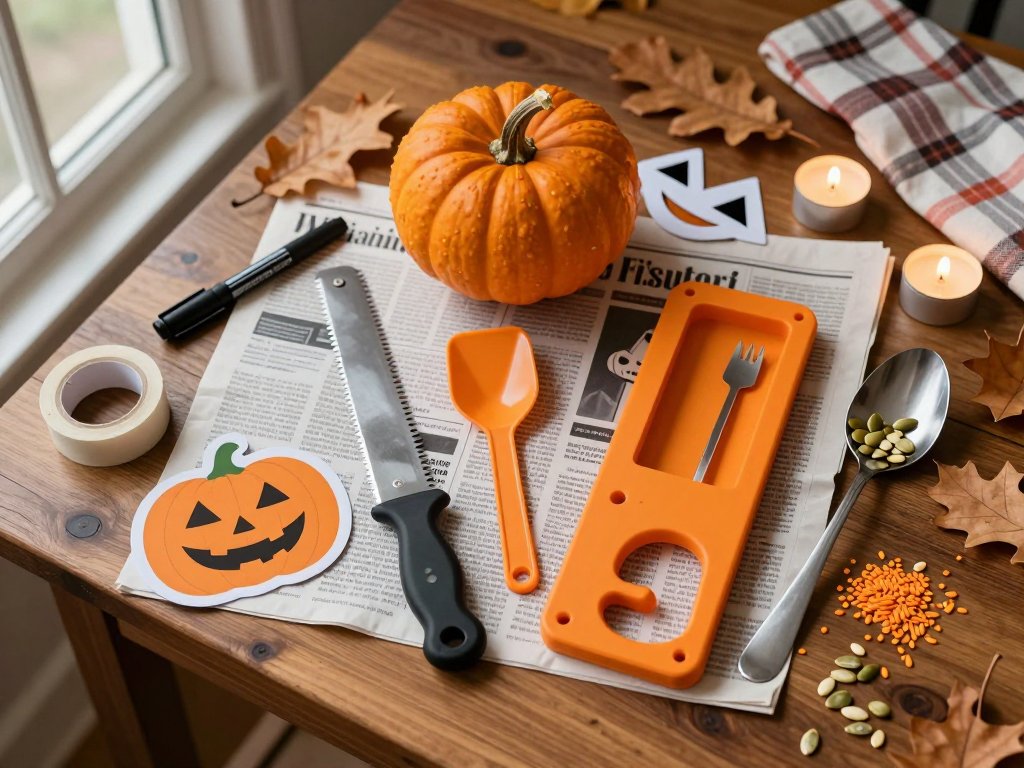
Here is what a typical kit includes:
- A small serrated saw with a short blade and a comfortable handle. This is your workhorse.
- A larger serrated saw for long, straight cuts like the main opening.
- A scooper, usually a plastic tool with serrated edges shaped like a shallow bowl.
- A poker tool that looks like a thick needle or tiny drill, for poking holes and detail work.
- Sometimes a few paper patterns and a small instruction booklet.
Nothing fancy. Nothing expensive. Just the right shapes for the job.
Why the Little Saw Beats the Big Knife
The star of the kit is the small serrated saw. Understanding why it works explains the whole hobby.
A kitchen knife cuts by pushing down through the pumpkin. That downward force is what makes it stick, slip, and stab.
The saw cuts with a sawing motion instead. A gentle back-and-forth lets the teeth nibble through the rind a few at a time.
Less force means more control. More control means safer hands and straighter lines.
The short blade also follows curves a long knife never can. You steer the saw. You don't wrestle it.
The Budget Math Nobody Mentions
Pay about five to fifteen dollars once, then pull the kit out every October. Spread across years of carving nights, the cost per pumpkin drops to pocket change.
Meanwhile, that ruined pumpkin cost me an evening and a close call with a knife. The cheapest tool is the one that stops you wasting the expensive ingredient.
Five dollars now, years of Octobers later. That is a deal I can't pass up.
Helpful Extras You Already Own
Round up a few things that are probably already in your house:
- A washable marker for drawing your design on the skin.
- Plain tape, if you use a printed pattern.
- A big kitchen spoon, for reaching the corners.
- Newspaper or an old drop cloth. Carving is glorious and messy.
- LED tea lights for later. More on those in the lighting section.
Total extra cost: basically nothing. That is the whole shopping list.
Pick a Good Pumpkin and Start Right
Everything gets easier when you start with a healthy pumpkin. No carving tool can fix one that is already rotting inside.
The Freshness Checklist
Here is how to pick a winner at the patch or the store:
- Firm all over, with no soft spots. A soft patch means rot has already started.
- Heavy for its size. Weight means moisture, and moisture means crisp, clean-cutting flesh.
- An intact, dry stem. A mushy or missing stem means an aging pumpkin.
- Skip deep bruises and scratches. They invite mold.
Carve as close to the big night as your schedule allows, one to three days ahead if you can. An uncarved pumpkin lasts weeks. A carved one lasts days.
Wash the pumpkin in plain water and dry it well when you bring it home. Dirt carries mold spores and bacteria. Clean skin is fresh skin.
Top Lid or Bottom Cut?
The classic move is a hole in the top, stem attached, lifted off like a hat. For a first carve, that is completely fine.
Many experienced carvers prefer a smarter option: cut the opening in the bottom instead.
The bottom cut quietly fixes three problems:
- The lid stays on, and the seam hides, so the pumpkin looks whole in daylight.
- No heat or smoke under the lid, even with a real candle.
- The cut edge sits at the bottom, out of sight.
The trade-off is scooping through the bottom hole, which takes some getting used to.
Beginners, don't stress the choice. A top lid is easier to scoop, while a bottom cut hides its seams. Both work, and you can switch next year.
If you cut a top lid, make the hole big enough for your hand. You will want the room while scooping.
The Scoop: Cleaning Out the Inside
Time for the messy, satisfying part. Cutting a top lid? Hold the saw at an angle, pointing toward the center of the pumpkin.
That angle makes a cone-shaped lid, wider at the top than the bottom. It rests on the rim like a cork instead of falling into the bowl.
For a bottom opening, cut a circle about five or six inches across, big enough for your hand. Set the plug aside to replace later.
Now scoop. Pull out the seeds and stringy guts with your hands and the scooper.
Then scrape the walls down to roughly one inch, about two and a half centimeters, especially on the face you will carve.
Thin walls matter twice. The saw glides through them, and light passes through them beautifully. Less pumpkin in the way means a better glow.
Don't obsess over the measurement. Scrape until the front wall feels noticeably thinner, then do a couple of extra passes there.
Keep the inside floor flat and clean. That is where the light will sit.
Save Those Seeds
Don't throw away the seeds. Rinse them, dry them, toss them with oil and salt, and roast at around 300 degrees until golden and crisp.
The messiest part of pumpkin carving becomes a free family snack. Two projects for the price of one.
Getting Your Design Onto the Pumpkin
Clean and scooped, your pumpkin is a blank canvas. Three ways to put a design on it:
Option One: Freehand With a Washable Marker
Draw straight onto the skin with a washable marker. Mess up? Wipe it off with a damp paper towel and start over.
Freehand suits simple faces and organic shapes. Pumpkins are forgiving, and a wobbly line just looks folksy.
Option Two: The Poke Method With a Printed Pattern
Print a pattern at the size you want and tape it flat against the pumpkin.
Trace every line with the poker tool, poking small holes through the paper into the skin.
Peel the paper away and you will find a dotted outline. Connect the dots with your saw.
This is the method I recommend for a first carved face. It removes the guesswork completely.
Option Three: Stencil and Trace
Some kits include paper patterns to tape on and trace with your marker. Plastic stencils also work well for the etching technique later.
Whichever route you choose, keep the first design simple. A clean, classic face will make you feel like a pro.
A complicated masterpiece will just make you feel behind schedule. Start simple, get fancy next year.
Carving: The Actual Cutting
Cut along the inside of your marker line, not on it. The finished shape matches what you drew, and small wobbles hide inside the removed piece.
Use a gentle sawing motion, like slicing bread with a serrated knife. Let the teeth work. No stabbing, no forcing, no leaning in.
Short, easy strokes beat long, aggressive ones. If the saw stops gliding, wiggle it gently through the last bit of rind.
Biggest tip in this article: turn the pumpkin, not the blade. When a curve needs a new direction, rotate the pumpkin toward you and keep the saw moving comfortably.
Twisting the blade to force a curve is how lines crack and cuts wander. The pumpkin spins, not your wrist.
When a shape is fully cut, push the piece out gently, from the front with a fingertip or from the back if it is stubborn. Never yank.
If a piece resists, run the saw around the outline once more. Patience beats force in every cut.
Staying Safe: The Non-Negotiable Part
Now the part that outranks everything: those little saws are sharp. Small, yes. Sharp, absolutely. Treat them with respect.
- Cut away from your hands and body, always.
- Keep your free hand on top or on the side, never in the blade's path.
- Cut slowly. There is no trophy for finishing first.
- Kids scoop, sort seeds, and tape patterns. An adult does the sharp work.
- Put the saws away the moment you finish. Curiosity plus a blade is a bad mix.
Family carving night works when everyone has a job that fits their hands. Little ones get the glorious mess, and grown-ups get the blades.
Everyone gets to point at the glowing result and say, we made that.
Four Designs, Ranked From Easy to Show-Off
Four jack-o'-lantern ideas, ranked from easiest to most impressive. All use only what is in your kit.
Design 1: The Classic Face
Two triangle eyes, a triangle nose, and a jagged smile with a few teeth. The classic everyone pictures.
Draw it freehand or poke a pattern, cut the shapes, pop them out, and add light. Twenty minutes, start to finish, and it reads perfectly from the street.
Design 2: The Silhouette Scene
A round moon, a bare tree, and a cat. One scene that tells a story.
The trick is connection. Draw the cat sitting on a branch so it touches the tree. Touching shapes cut as one outline and come out as one piece.
Cut the moon as its own circle, then follow the tree-and-cat outline in one long, patient pass.
Push the scene out, drop in a light, and suddenly your porch has a mood.
Design 3: Polka Dots and Starry Skies
This one leans on the poker tool, the piece that works like a tiny drill.
Mark a scatter of dots across the face, then press and twist the poker through the skin at each mark.
Round holes catch light from every angle. Cluster a few tightly, let the rest drift, and you have a starry sky.
Fastest design here. An adult starts each hole, and kids pop the little plugs out from the front.
Design 4: Etching and Shaving
The show-off move: instead of cutting through, scrape away only the outer skin where you want the glow.
Trace your design, then shave the orange skin in thin layers with the edge of a saw or the poker tool until you reach the pale flesh underneath.
Carved areas turn soft gold when lit, while the rest of the pumpkin stays solid orange. Stunning for lettering like BOO or a family name, and for leaves and vines curling around a carved face.
Because the pumpkin stays whole, etched pumpkins last longer and shrug off weather better.
Patience is the trick. Shave thin layers and stop at the pale flesh. Too shallow, nothing shows. Too deep, you punch through.
Not a first project. Try it after one good carve, and it feels like a magic trick you repeat every October.
Lighting Your Jack-o'-Lantern
A carved pumpkin is half the show. Light is the other half, the part that stops people on the sidewalk.
LED Tea Lights Win
My vote is LED tea lights, and it is not close. Here is the case:
- They run for many evenings on one tiny battery.
- No open flame near kids, pets, or dry decorations.
- No smoke, no wax, and no fire if the pumpkin tips over.
- They stay cool, so they don't bake the pumpkin from the inside.
- Packs cost pocket change, and the lights are reusable every year.
Real candles flicker beautifully, I will grant you that. But they burn fast, smoke, and turn a tipped pumpkin into an emergency.
Where the Light Goes
The best glow comes from a light sitting low and centered in the bottom. Light spreads up and hits every carved line evenly.
Wedge a light up near the face instead, and you get one bright patch with murky corners.
With a bottom cut, the pumpkin simply sits over the light like a lampshade. No lid to lift.
Using a Real Candle? Make a Chimney
Using a real candle? Give it a chimney: a small star or triangle cut in the lid.
Without a vent, the flame starves for air, flickers out, and smokes up the inside. With one, it burns steady and the lid stays drier.
Set the candle on a flat, stable spot, and never leave a burning pumpkin unattended.
Keeping Your Pumpkin Fresh Longer
Nothing deflates a carving night like a collapsing, fuzzy pumpkin on October 29. A few habits buy you real days.
Rot starts at the cut edges. Moisture escapes there and mold moves in, so your job is sealing those edges and keeping things cool.
Petroleum jelly is the classic trick. Rub a thin coat over every cut edge, eyes, mouth, lid. It locks moisture in and keeps mold out.
The spritz method: mist the cut edges and the inside with plain water every day or two, then reapply the jelly.
For a tired pumpkin, try the soak: cool water with a splash of bleach, about a tablespoon per gallon, for twenty minutes. Dry it completely before lighting.
Keep it cool and shaded. Sun and warm porches age a carved pumpkin fast.
Honest expectation: even with perfect care, a carved pumpkin lasts about three to seven days, depending on your climate. Cool and dry stretches it.
Go Make a Mess
Here is where we land. You need no talent and no expensive gear, just a fresh pumpkin, a kit for about five to fifteen dollars, and one patient hour on a cool evening.
Your first one may be lopsided. Fine. The second will be better, and by the third, you will be the house everyone walks past twice.
My first pumpkin was cracked, crooked, raccoon bait. It was never because pumpkin carving was hard. I just lacked the right carving tools and techniques. Now you have them.
So here is my question: what will your jack-o'-lantern say this year? A goofy grin, a spooky stare, or a whole sky of stars?
Grab a pumpkin and the kit. Make a glorious mess. Light it up. And when someone asks how you got so good, tell them you finally used the right tools for the job.

