Introduction
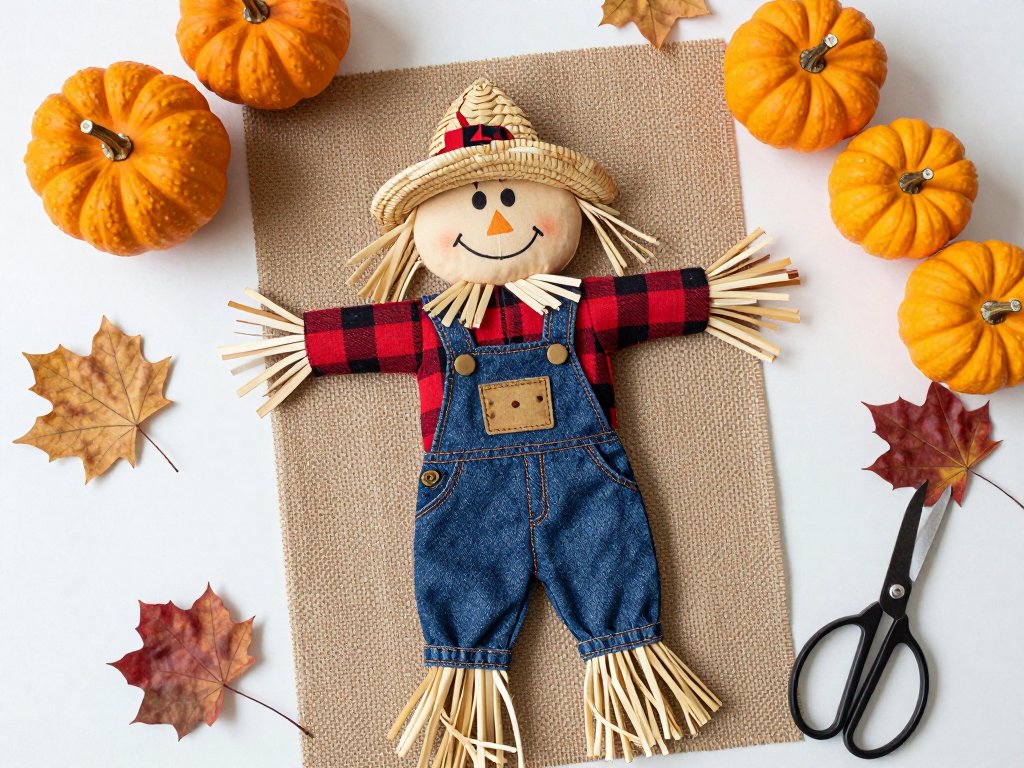
There is something about a scarecrow that makes a house feel ready for fall. Maybe it is the memory of one standing guard in a cornfield, or the cheerful way it leans against a porch railing with its patchwork arms outstretched.
Whatever it is, scarecrow crafts are one of the most beloved traditions of the season — and they are wonderfully easy to make at home.
If you are picturing a complicated project that takes over your whole weekend, let me reassure you: scarecrow crafts are some of the most forgiving projects you will ever make.
They are meant to look rustic and slightly imperfect. A crooked smile, a lopsided hat, a shirt that is a little too big — that is exactly what gives a scarecrow its personality.
In this guide, you will find five scarecrow projects for your garden and porch, from the classic burlap scarecrow to sweet mini versions you can make with your children.
Most use supplies you already have around the house, and every single one can be finished in an afternoon.
Let us make something charming together.
Why Scarecrow Crafts Are Perfect for Fall
Before we get to the projects, let us talk about why scarecrows deserve a spot in your fall decorating plans. There are more reasons than you might think:
- They are budget-friendly. Old shirts, worn jeans, straw, and burlap — most scarecrow supplies come from the back of your closet or the recycling bin. This is decorating that costs almost nothing.
- They are family-friendly. Children love helping choose the clothes, draw the face, and stuff the arms. Scarecrow making is a memory-making activity disguised as a craft.
- They work anywhere. A full-size scarecrow anchors a garden bed, while a mini version brightens a windowsill. There is a size for every space.
- They welcome the season. Scarecrows belong to autumn the way pumpkins and hay bales do. They make your home feel ready for cooler days and cozy evenings.
- Imperfection is the point. A scarecrow that looks handmade is a successful scarecrow. That takes all the pressure off — a gift for busy moms who do not need one more thing to be perfect.
Keep those reasons in mind as you craft. This is supposed to feel like play, not like a chore.
What You Need: The Scarecrow Supply Kit
Here is the good news: you probably own most of these supplies already. Gather what you can, and buy only what you truly need.
- Clothing. A flannel shirt, denim overalls or jeans, and a pair of work gloves. Thrift stores are goldmines for scarecrow clothes — look for sizes that are too big and colors that say "harvest."
- Filling. Straw is the traditional choice, but you can also use crumpled newspaper, plastic grocery bags, or an old pillowcase stuffed with fabric scraps. Anything soft and light works.
- Burlap. A yard or two for the head and face. If you do not have burlap, a plain muslin pillowcase or a scrap of linen works beautifully.
- Twine or jute rope. For tying the neck, wrists, and ankles, and for hanging mini scarecrows.
- A hat. A straw hat, a floppy sun hat, or even an old baseball cap — whatever says "scarecrow" to you.
- Scissors, a needle, and strong thread. For simple sewing. If you prefer no-sew, a hot glue gun and safety pins do the job.
- Markers or fabric paint. For drawing the face. Fabric markers stay put through weather better than regular markers.
That is the whole kit. Notice what is not on the list: no expensive specialty tools, no hard-to-find materials. Just cozy, everyday things.
The Classic Burlap Scarecrow
Let us start with the project most people picture when they hear the word scarecrow: the full-size garden guardian. Plan for about two hours, plus drying time for the face.
Step 1: Build the frame. Cross two wooden stakes or broom handles in a T shape — one long one for the body, one shorter one for the arms. Lash them together with twine at the intersection, then push the body stake firmly into the ground.
Step 2: Dress the body. Slip the shirt over the crossbar and button it up.
Stuff the sleeves with straw or crumpled newspaper to give the arms shape, then tie the cuffs closed with twine.
Slide the jeans over the body stake, stuff them lightly, and tuck the shirt into the waistband.
Tie the legs off at the ankles.
Step 3: Make the head. Cut a large square of burlap, pile filling into the center, and gather the edges into a bundle. Tie tightly with twine to form a round head, leaving a little burlap tail that will tuck into the shirt collar.
Step 4: Draw the face. Use fabric markers to add two friendly eyes, a triangle nose, and a stitched-looking smile. Let it dry completely before handling. If you want a stitched effect, embroider simple lines with yarn and a big needle instead.
Step 5: Add the hat and finishing touches. Set the hat at a jaunty angle and secure it with a few stitches or a dab of hot glue. Tuck stray straw around the collar and cuffs, and step back to admire your work.
One tip from my own kitchen table: give your scarecrow a name. Ours is named Barnaby, and he has watched over three autumns of pumpkins with the same crooked grin.
No-Sew Scarecrow from Old Clothes
Not a fan of needle and thread? This version uses no sewing at all — just stuffing, tying, and gluing. It is the perfect weekend project for busy moms.
What makes it no-sew: instead of stitching, you tie everything. Gather the shirt cuffs with rubber bands or twine. Tie the shirt hem around the jeans waist. Bundle the head fabric and tie it off. A hot glue gun handles the rest — the face, the hat, the patches.
Patch it up. Cut a few small squares from contrasting fabric, fray the edges with your fingers, and glue them onto the shirt like little repairs. This instantly gives your scarecrow that beloved, well-worn look.
Add character details. Glue on a few buttons down the front, tuck a bandana around the neck, and pin a small burlap flower to the hat. These tiny touches are what make a homemade scarecrow feel special.
The no-sew method is also the one to choose if you are crafting with children. Everything is safe, fast, and easy for small hands to help with.
Mini Scarecrow Planters and Pots
If a full-size scarecrow feels like too much, start small. Mini scarecrow planters are darling on a porch step, a windowsill, or a garden table — and they take about thirty minutes each.
You will need: a terracotta pot (any size), burlap or muslin, a small wooden dowel, twine, a hot glue gun, and markers.
Step 1: Turn the pot upside down. Glue a strip of burlap around the rim for a "shirt collar" effect, letting it drape a little.
Step 2: Make a small head from a fabric square stuffed with filling, and glue it to the top of the inverted pot. The pot becomes the scarecrow's body.
Step 3: Draw a cheerful face on the head with markers. Add a tiny straw hat or a scrap of fabric tied like a kerchief.
Step 4: Plant something inside. Yes, you read that right — the pot is upside down, so turn it right side up, fill it with soil, and plant a small mum or a sprig of ornamental kale right on top of the "hat." The scarecrow appears to be wearing a living hat of flowers.
These little fellows make wonderful hostess gifts, too. Make a few and you will have your whole gift list for October covered.
Scarecrow Wreath for the Front Door
A scarecrow wreath is the front-door greeting that tells every visitor fall has arrived. It looks complicated, but it is genuinely simple — mostly a matter of arranging and gluing.
Start with a base. A grapevine wreath is ideal. If you do not have one, a foam wreath form wrapped in burlap ribbon works just as well.
Build the face. Cut a circle of burlap for the face and glue it near the top of the wreath. Add button eyes, a fabric triangle nose, and a stitched smile drawn with a marker or embroidered with yarn.
Add the hat. Glue a small straw hat or a triangle of dark fabric (for a top hat silhouette) to the top of the face. A sunflower or a few silk leaves tuck beautifully into the hatband.
Fill in the rest. Tuck stems of silk sunflowers, dried corn husks, mini pumpkins, and sprigs of bittersweet around the wreath to fill it out. Hot glue holds everything in place.
Finish with a bow. Tie a generous burlap or plaid bow at the bottom or side. Hang the wreath with a sturdy ribbon loop and let it welcome everyone to your porch.
This project takes about an hour, and the result looks like it came from a boutique. Your neighbors will ask where you bought it — my favorite moment is telling them it came from my own craft table.
Scarecrow Crafts for Little Hands
Scarecrow projects are wonderful for children, and a few versions are especially kid-friendly. Here are three that have worked well with my own little helpers:
Paper plate scarecrow faces. Paint a paper plate tan, glue on a straw hat made from a paper triangle, and let children draw the face with crayons. Add torn construction paper "straw" around the edges. Ten minutes, zero mess, pure pride.
Sock scarecrows. Fill a sock with rice or poly-fill, tie off the top for a head, and decorate with googly eyes and a drawn smile. Glue on yarn hair and a tiny fabric hat. These sweet little guys make great table decor.
Scarecrow stick puppets. Glue a small burlap face to a craft stick, add a fabric scrap shirt, and let your child draw the face. Perfect for a little autumn puppet show after dinner.
A gentle reminder: with kids, the process matters more than the result. If the eyes end up on the forehead and the smile is upside down, that is a good scarecrow. Those are the ones you will remember.
Making Your Scarecrow Last All Season
You have put love into your scarecrow, so let us help it stay beautiful through October and beyond.
- Choose weather-friendly materials. If your scarecrow will live outside, use acrylic paint or fabric markers instead of regular markers, and consider treating burlap with a fabric protector.
- Keep the face dry. A hat with a brim helps shield the face from rain. For extra protection, cover the head with a clear plastic bag before stuffing — the face stays dry even in a downpour.
- Re-stuff as needed. Newspaper and plastic bags settle over time. Give your scarecrow a quick top-up every few weeks, especially after heavy wind.
- Bring small items inside. Mini scarecrows, wreaths, and anything with glue are happiest on a covered porch or indoors. They will look fresh for years instead of one season.
- Store carefully. When the season ends, remove the hat, fold the clothes, and store everything in a labeled bin. Next fall, you will be ready in minutes.
With a little care, your scarecrow becomes a tradition — the same friendly face welcoming family home each autumn, year after year.
Conclusion
Scarecrow crafts are everything fall decorating should be: simple, joyful, and full of heart. Whether you build a full-size garden guardian, sew-free porch friend, or a tiny pot planter with a flower hat, you are creating the kind of handmade warmth that makes a house feel like home.
Start with whichever project made you smile — that is always the right one. Gather your supplies, put on your favorite music, and let the afternoon unfold.
And when a neighbor asks where your scarecrow came from, tell them the truth: you made it yourself, and it was easier than you ever imagined.
Happy fall crafting, friends. May your porch be charming and your scarecrows be wonderfully imperfect.

