Introduction
Soft pastels may be the friendliest art medium you have never tried. If you have been curious, this is your gentle invitation.
A soft pastel is pure pigment held together with just a little binder. The moment it touches paper, it feels like drawing with powdered color.
There are no brushes to clean, no paints to mix, and no waiting for anything to dry. You open a box, choose a color, and begin.
Pastels are wonderfully forgiving, too. You can blend, layer, and even wipe a mistake away with a cloth and start that spot over.
That freedom matters when your time is precious and your energy runs low. Art should feel like a rest, not another chore.
In the pages ahead, we will explore blending and layering in small, friendly steps. By the end, you will know exactly how to begin.
Why Soft Pastels Are a Wonderful First Medium
Soft pastels are often called the closest thing to painting with pure color. Many artists find them even more direct than paint.
Because the pigment is so concentrated, one stick delivers intense, glowing color the instant it meets the paper.
There is no color mixing to master before your first mark. The color in the box is the color you draw with.
Pastels rest lightly on the surface of the paper, so nothing is permanent until you choose to protect it.
Pressed too hard, or chose the wrong spot? A soft cloth lifts the pigment away and leaves the paper ready for a second try.
That built-in eraser makes pastels uniquely forgiving while you are still finding your confidence.
They also teach a light, relaxed touch. Heavy pressure is rarely needed, so your hand stays soft and your shoulders can drop.
Opening a fresh box feels like unwrapping a treasure. The colors are so pure and rich they almost look good enough to eat.
For anyone who has set art aside because it felt complicated, pastels whisper a simpler story: color first, worry later.
Choosing Your First Pastel Set
One of the loveliest things about pastels is that you need very little to begin. A basic set of twelve to twenty-four sticks is plenty.
Look for sets that lean toward landscape and portrait ranges: warm browns, soft blues, gentle greens, creams, and dusty roses.
These are the tones you will reach for again and again, whether you dream of skies, fruit, flowers, or faces.
A smaller set of richly pigmented sticks will teach you far more than a huge box of pale, dusty ones.
Quality shows in how smoothly color goes down and how brightly it glows, so choose the best your budget allows.
Prices vary widely between brands and set sizes. You can begin affordably and add favorite colors over time.
Soft pastels are fragile by nature, and that is perfectly fine. A broken stick is not ruined; it simply gives you smaller edges for details.
Soft Pastels, Oil Pastels, and Chalk: Know the Difference
Beginners often wonder how soft pastels compare with oil pastels, and the confusion is understandable. The names are nearly twins.
Soft pastels are dry and chalky. They release a fine dust of pigment and blend, layer, and erase beautifully.
Oil pastels, by contrast, stay wet and waxy. Their creamy binder never fully dries, and they behave very differently on the page.
The techniques in this guide are made for soft pastels, so check the label before you buy.
Artist pastels are also not the same as classroom chalk. True pastels are far more pigmented, with a richness chalk cannot touch.
Hold a soft pastel once and you will feel the difference. It is dense, silky, and absolutely full of color.
A Few Well-Loved Brands to Know
Certain names surface again and again in pastel conversations, and they are helpful to know as you shop.
Rembrandt and Sennelier are cherished by experienced artists for their softness, luminous color, and beautiful handling.
Faber-Castell makes dependable, easy-to-find sets that are lovely for learning the medium.
Mungyo and Reeves offer approachable ranges that are perfect for practicing without worry.
None of these is the only good choice. The best first set is the one you will actually use without fear of wasting it.
Let your budget guide you. Your skills grow through practice, not through the price of the box.
Paper Matters More Than You Think
Pastels need a surface with grip, and that texture has a proper name: the tooth of the paper.
Tooth is what catches the pigment and holds it in place. Without it, color skids across the page and refuses to build.
Smooth printer paper will frustrate you within minutes. Pastel paper is made with exactly the texture pastels crave.
Run your fingers over a sheet of pastel paper in the shop. You will feel the difference at once.
For ambitious layering, sanded pastel paper is a wonderful step up. Its fine grit grips pigment like a gentle magnet.
Sanded paper holds the most layers, which makes it ideal when you want deep, luminous passages of color.
Here is a beginner secret that saves hours: choose tinted paper. Mid-tone blues, warm grays, and soft browns are especially lovely.
Tinted paper makes pastel colors glow, because the mid-tone shows through the gaps between your strokes.
It is deeply forgiving as well. Small uneven areas read as part of the picture instead of shouting at you.
You may never cover the whole sheet, because the paper itself becomes part of your composition.
A quarter-sheet of pastel paper is the perfect size for a first study. Small pages feel manageable and finish quickly.
When a piece is done and you want to protect it, fixative spray is the artist's answer. A light mist guards against smudging.
If you are not ready to buy fixative, hairspray can stand in as a budget-friendly substitute. Test it on a practice piece first.
Four Core Techniques for Soft, Glowing Color
Every pastel painting, however complex, is built from a few simple movements. Master these four and you can paint almost anything.
Each one is gentle, forgiving, and easy to practice in short sessions stolen between the demands of the day.
Before your first subject, try a five-minute warm-up. Stroke two happy colors side by side, then blend the line where they meet.
Next, lay a light color over a dark one and watch it glow. This tiny sampler teaches more than an hour of theory.
Technique One: Layering
Layering is the very heart of pastel work, and it asks only for patience and a light hand.
Begin with broad, light strokes of color laid down loosely across the paper. The first pass does not need to be perfect.
Then add more layers on top, letting each previous layer peek through the one above it.
Soft pastel is meant to be built up gradually, in thin layers like powdered silk drifting onto the page.
Resist the urge to press hard or fill every gap at once. Light pressure keeps the tooth open for the layers still to come.
Rotate the stick as you work, so you always meet the paper with a fresh, clean edge.
Each new layer adds depth and glow. Flat color slowly becomes velvety, breathing color.
Technique Two: Blending with Your Fingers
Your fingers are the classic pastel tool. They are always warm, always with you, and completely free.
To blend, rest a clean fingertip where two colors meet and move it in a circular motion. The edges soften into a haze.
For broader washes, use a long, sweeping motion that pulls one color smoothly across its neighbor.
The natural warmth of your skin melts the pigment slightly, so the two colors truly marry on the paper.
Keep an old cloth or a pack of baby wipes beside you, and clean your finger between every blend.
A dirty fingertip is the fastest route to muddy color, so let cleaning become part of your working rhythm.
Blend, then step back and look. Often the softest result comes just before you think you are finished.
Technique Three: Blending Tools Beyond Fingers
Your fingers are wonderful, yet other tools create textures your hands cannot manage alone.
Tortillons, the slender paper stumps sold in art supply aisles, blend small areas with precision and keep your hands clean.
Cotton swabs reach into corners and soften tiny details, like the glow beside a highlight.
A soft cloth can sweep broad skies and backgrounds into cloud-like smoothness in just a few passes.
Makeup sponges, which many of us already own, are a quiet marvel for soft, even blending.
Each tool leaves its own texture behind. Discovering the voice of each one is half the fun.
Keep a little collection in a cup beside your paper, and let your hand choose whatever feels right.
Technique Four: Light over Dark, and the Joy of Scumbling
Pastels are opaque, and that one fact changes how you build light in a picture.
Because each layer covers the one beneath it, you can lay light colors over dark ones whenever you wish.
Watercolor artists must protect their whites from the start. Pastel artists simply add highlights at the very end.
A stroke of pale yellow or white laid over deep red becomes a glowing highlight on an apple or a petal.
This is the secret to luminous highlights, and it is wonderfully forgiving. Change your mind and simply add another layer.
Scumbling carries the idea further. It means laying light, loose, scribbly strokes of one color over another.
The strokes never fully cover the color beneath. They dance across it, leaving a broken-color shimmer.
Scumbling is how artists suggest sparkling water, hazy fields, and the warm breath of evening light.
It demands almost nothing of your skill and returns great delight. Scribble soft gold over blue and watch the paper glow.
Keeping It Clean as You Work
A few quiet habits will keep your picture and your workspace tidy, so you can relax into the process.
Work from the top of the page downward. Your hand then rests on paper you have not touched yet.
When you must reach over a finished area, lay a clean scrap of paper beneath your hand like a bridge.
This small shield keeps skin oils and loose dust away from the color you have carefully placed.
When pastel dust builds up, lift the paper and tap it gently over a bin. Blowing sends chalk dust across the whole room.
Better still, work over a tray or a sheet of old newspaper. Cleanup takes seconds and your table stays calm.
A soft, dry brush is lovely for dusting a work in progress without disturbing the pigment beneath.
Simple First Subjects to Try
You do not need a grand subject to practice blending. These four gentle ideas were made for first sessions.
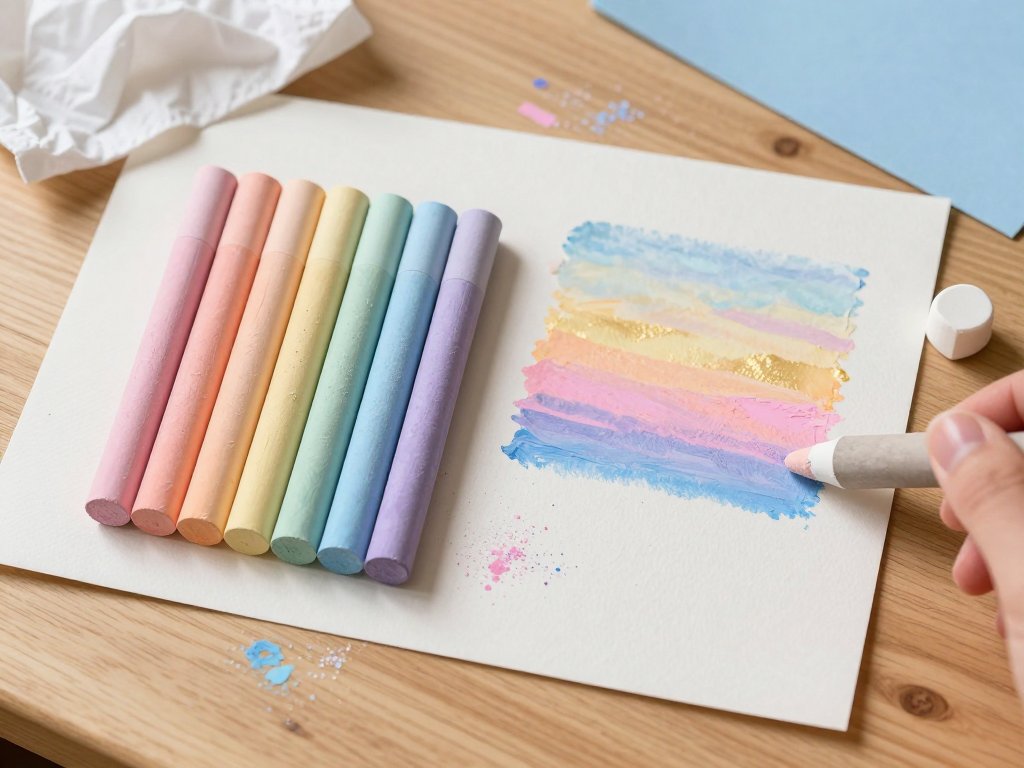
- A soft sunset sky: choose three or four bands of color, like gold, pink, lavender, and blue, and blend them where they meet.
- A single apple or pear: build the body in layers of color, then finish with one small, bright highlight.
- A fluffy cloud study: sketch soft white shapes over a blue sky and blur their edges with a fingertip or cloth.
- A calm ocean horizon: lay two bands of blue, add a lighter strip of sky, and soften the line where they meet.
Each of these can be finished in a single relaxed sitting, and each teaches the same gentle lesson: let color melt into color.
Choose the subject that makes you smile, and give yourself permission to make it imperfect.
Common Frustrations and Gentle Fixes
Every pastel beginner meets a few stumbling blocks. These are the ones we hear most often, with fixes that truly help.
- Colors look muddy: clean your finger or blending tool between colors, and work light to dark before adding your deepest tones.
- You cannot get the details you want: details come last, after the broad color is down. Use a pastel's edge or a sharpened stick for small marks.
- Dust gets everywhere: work over a tray or old newspaper, and tap the paper instead of blowing at it.
- Your fingers feel dry and rough: keep a little lotion or a damp cloth nearby, and rinse your hands gently when you pause.
- The picture does not match the vision in your head: set the vision aside and simply enjoy the color. Skill arrives one layer at a time.
Return to this list whenever frustration visits. Every one of these moments is a normal bend in the road, not a dead end.
A Gentle Place to Begin
This weekend, give yourself one relaxed twenty-minute practice session. No goals, no deadlines, no inner critic.
Set out your pastels, a sheet of tinted paper, and a cloth for your fingers. Make a warm drink if you like.
Choose one of the simple subjects above, or choose none at all and simply play with color.
Let colors meet and melt. Notice what happens when you layer gold over blue, or sweep a fingertip through two neighbors.
Perfection is not the goal. The joy lives in the softness, the glow, and the feeling of pigment melting under your hand.
Every pastel artist's first piece is a learning piece. Yours will be too, and that is exactly as it should be.
When you finish, sign your name in the corner like a real artist, even if all you painted is a sky.
Tuck the little study where you can see it. In a month, you will smile at how far you have come.
