Introduction
There is a particular kind of quiet that settles over a house in summer. The school year has loosened its grip, the mornings stretch long and golden, and the garden is doing its slow, generous work.
If you are anything like me, you look at that garden and feel a small pull — a wish to make something for it, to leave a little evidence that your family spent the season here.
That is where nature crafts come in. They ask very little of you: a walk to gather sticks, a pocketful of shells, stones that caught your eye.
They ask even less of your budget. And they reward you with the best kind of craft — the kind that lives outdoors, catches the light, and makes a sound.
Today I want to share six gentle projects for wind chimes and garden decor. Every one of them is beginner-friendly, most can be done in an afternoon, and all of them welcome children at whatever age they happen to be.
No perfection required. The chimes that wobble slightly are the ones with character. The rocks that are a little lopsided are the ones your kids will remember finding twenty years from now.
Why Nature Crafts Belong in Your Summer
There is something deeply satisfying about making art from things that were already there. A wind chime made from driftwood carries the memory of the beach.
A garden marker painted on a river stone holds the shape of the creek where you found it.
These objects have a story before they ever become a craft, and that story is exactly what makes them feel special hanging in your yard.
Nature crafts are also wonderfully forgiving. Unlike a knitted sweater or a careful watercolor, there is no wrong way to arrange a collection of sticks.
The materials themselves are irregular, so your finished piece is allowed to be irregular too.
For busy moms, that is a gift. You can start without a pattern, improvise as you go, and still end up with something genuinely lovely.
There is a practical side as well. Most of these projects cost almost nothing. A ball of twine, a little acrylic paint, some clear fishing line — that may be the entire shopping list.
If you already keep a modest craft bin, you may not need to buy anything at all.
On a summer budget that is already stretched by camps, swim lessons, and ice cream outings, that counts for a lot.
Gathering Your Materials
Before you begin, take a slow walk. This is half the fun, so do not rush it. Bring a small basket or a canvas tote, and let the kids lead. You are looking for:
- Sticks and twigs of varying thickness, preferably straight-ish and dry
- Driftwood, if you are lucky enough to live near water
- Smooth stones in a range of sizes, flat ones are best for painting
- Seashells, acorn caps, seed pods, or pinecones — anything with a hole or a pleasing shape
- A few interesting leaves or flowers you can press later, if you like
Please gather only what has already fallen. Leave living branches and moss-covered logs where they are — the garden insects and birds rely on them, and there is plenty of treasure on the ground.
Once home, let everything dry thoroughly. Sticks that still hold moisture can warp or grow moldy over a damp summer week. A sunny windowsill for a day or two usually does the trick.
For tools, keep it simple: sharp scissors or garden snips, a small hand drill or a hammer and nail for making holes, strong twine or clear fishing line, acrylic craft paint, and a basic paintbrush set. That is genuinely all you need for every project in this article.
Project One: The Stick and Shell Wind Chime
This is the classic starter chime, and it is the one I recommend making first because it teaches every skill you will reuse in the other projects.
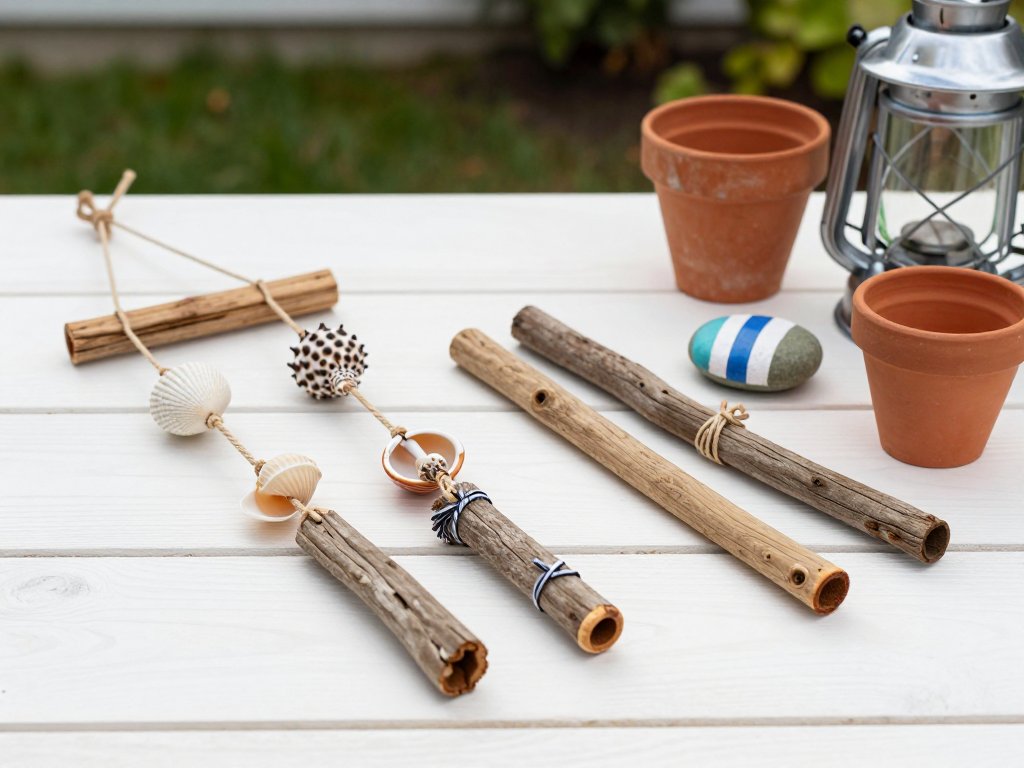
Begin with one sturdy stick, about twelve inches long, to serve as the top bar.
Tie a loop of twine around each end so the chime will hang level. Then cut five or six lengths of fishing line, each about twenty inches long.
Tie one end of each line to the top bar, spacing them evenly. Now comes the fun part: thread shells, seed pods, and small beads onto each line.
Knot the line below each item so nothing slides off, and leave a couple of inches of line at the bottom so the pieces can swing freely.
If you are using shells, a tiny drill bit makes clean holes. For acorn caps and pinecones, you can often push a thin nail through and wiggle it gently to widen the hole.
For a truly child-friendly version, skip the drilling entirely and tie each shell in a little twine netting — wrap twine around the shell a few times, knot it securely, and attach the netting to the main line.
Hang your chime from a porch hook or a low tree branch, somewhere the breeze can reach it.
Then listen. The sound of shells clicking against one another is softer and warmer than metal chimes — more like the beach than the bell tower.
That is the whole point of a nature chime: it brings the place you love into your own yard.
Project Two: The Painted Terracotta Chime
If you have a few small terracotta pots gathering dust in the garage, this project will delight you. Terracotta has a beautiful warm tone that catches the late-afternoon sun, and it makes a surprisingly pleasant clinking sound when tapped together.
You will need three or four small pots — the two-inch and three-inch sizes work best.
Turn each pot upside down and paint the outside with acrylic craft paint. Soft sage, dusty blue, cream, and terracotta's natural rust all look lovely together.
Let the paint dry, then add simple designs: dots, stripes, a little sun, or just leave them plain and let the clay speak.
Once the paint is dry, drill a small hole through the center of each pot's base.
Thread a length of fishing line through the hole, knot it on the inside of the pot so it cannot pull back through, and attach the pots to a top ring or a short stick at staggered heights.
Staggering is important — pots hanging at different lengths will swing into each other more easily and make that gentle clay click.
One tip from years of hanging things in my own garden: use a strong knot and check it after the first windy day.
A double knot with a small bead threaded above it keeps the line from slipping through the hole.
And if a pot chips in the wind, do not be sad. Chipped terracotta looks like it has been loved, and you can always paint the chip to match.
Project Three: The Tin Can Lantern
This one is a family favorite in our house, and it is the perfect project for an evening when you want something quick and satisfying.
Clean a few empty tin cans thoroughly and remove the labels. Fill each can with water and freeze it overnight — the ice keeps the metal from buckling while you work.
The next day, set the frozen can on a folded towel and hammer a nail through it in a pattern.
Simple dots in rings, a star, or your child's initial all work beautifully. The key is patience: tap the nail gently, move it a quarter inch, tap again.
If the can thaws and starts to buckle, pop it back in the freezer for an hour.
Once the holes are made, let the ice melt and dry the can completely. Paint the outside if you like, or leave the silver shine.
Then drop a tea light or a small LED candle inside and set the can along a garden path or on the porch steps.
As dusk falls, the holes throw little stars of light onto the ground. It is pure magic, and it costs about nothing.
Please use LED candles rather than real flames, especially anywhere near dry grass or little hands. The effect is identical, and you will sleep better.
Project Four: Painted Stone Garden Markers
If you grow vegetables or herbs, you already know the summer struggle of trying to remember which seedling is the basil and which is the cilantro. These painted stone markers solve it beautifully, and they double as garden art long after the harvest.
Choose flat, smooth stones about the size of your palm. Wash them well and let them dry.
Then paint each one with the name of a plant — tomato, basil, mint, zucchini — using acrylic paint and a fine brush.
If lettering feels intimidating, paint a simple picture instead: a little tomato, a leaf, a carrot.
Both are equally effective, and the pictures are often more charming.
Seal the finished stones with a clear acrylic sealer so the rain does not wash your work away.
A spray sealer is easiest; just follow the directions on the can and let them dry outdoors.
Then set each stone at the foot of its plant, nestled into the soil so just the painted face shows.
This is one of those projects that keeps giving. Every time you step into the garden, you see your own handiwork doing a quiet job.
And at the end of the season, you can wash the stones and store them for next year — they become a little family tradition, painted fresh each spring.
Project Five: The Twig Trellis and Climbing Frame
For a slightly bigger weekend project, gather a bundle of sturdy, straight sticks — about half an inch thick and three to four feet long. You will use them to build a simple teepee trellis that gives your beans or sweet peas something to climb.
Lay four or five sticks on the ground in a fan shape, then tie them together at the top with sturdy twine, wrapping several times and knotting firmly.
Stand the bundle up and spread the legs into a teepee. Weave a few thinner, flexible twigs horizontally around the outside, tying them at each crossing, to create a lattice for the vines to grip.
Push the base of each leg firmly into the soil, and if the ground is loose, anchor the teepee with a few stones.
Plant your climbing seeds at the base of each leg, water them well, and let the sticks do the rest.
Within a few weeks the vines will be winding up the lattice, and your children will check on their progress every single day.
There is a wonderful lesson tucked inside this project about how plants grow and what they need — but honestly, the best part is just watching a teepee of plain sticks turn into a leafy green tent by August.
If you want to make it even more special, tie a few ribbons or painted wooden beads into the lattice before the vines cover them.
It is a small secret only your family will know.
Project Six: The Suncatcher Mobile
Last but not least is the project that catches the light. Collect a few clear glass beads, old buttons, small mirrors, or pieces of broken costume jewelry — anything that sparkles.
You will also want a ring-shaped base: an old embroidery hoop, a wire wreath form, or a circle of bent branch all work.
Tie six to eight strands of fishing line around the ring, and thread your sparkly treasures onto each strand, knotting below each piece.
Vary the lengths so the mobile has a pleasing cascade. Hang it where the afternoon sun hits it directly — a porch corner, a garden arch, or in front of a sunny window visible from the yard.
When the light catches those beads and mirrors, the mobile scatters little flashes across the lawn and the porch floor. On a breezy day it turns slowly, and the whole garden seems to shimmer. Children are mesmerized by it, and honestly, so am I.
If you use an embroidery hoop as your base, you can also weave ribbons or fabric scraps around the outer ring for a softer, more whimsical look.
Match the colors to your garden flowers — pinks for the coneflowers, blues for the hydrangeas — and the mobile will feel like it grew there.
Crafting with Little Helpers
If you are making these with children, let me reassure you: the mess is manageable, and the memories are not.
Give each child a specific job, even the littlest ones. A two-year-old can sort shells into piles.
A four-year-old can paint a rock with complete confidence and zero regard for the lines.
A six-year-old can tie knots with patient supervision. Everyone contributes, everyone is proud.
Choose projects to match the day. Quick projects like the tin can lanterns are perfect for a restless afternoon.
The stick and shell chime rewards a slow morning after a beach trip. The twig trellis turns a gardening chore into an adventure.
Let the children's energy guide you, and do not plan more than one or two projects in a single day.
And when something goes sideways — a knot slips, a stone cracks, a can buckles — say the words out loud: "That is how we learn." Then show them how to fix it, or how to turn it into something else.
A cracked stone becomes a garden mosaic piece. A buckled can becomes a planter for a single succulent.
There is no waste in a nature craft, only transformation.
Making It Yours
All of these projects are really just starting points. Once you have made a stick chime, you will start noticing chime ideas everywhere — a row of old silver spoons, a collection of keys, the pretty bottle caps you have been saving.
The same is true for every project here. The natural world is endlessly generous with materials, and your imagination will catch up quickly.
Consider making a set of projects as a gift. A painted stone marker, a tiny tin can lantern, and a small stick chime arranged in a basket make a lovely hostess gift or a thank-you for a neighbor.
Wrap them in brown paper and twine, and you have given something handmade that no store could match.
Garden-loving grandparents especially adore receiving things the grandkids helped create.
One of my favorite summer traditions is to make a new garden decoration each July and hang it in a spot I pass every day.
By the end of the season, the yard tells the story of our summer — the shells from our beach day, the stones from the creek, the lanterns made on a quiet Tuesday evening.
It is like a scrapbook, but it lives outdoors, and it sings in the wind.
Conclusion
The best crafts are the ones that make your everyday life a little more beautiful, and these nature projects do exactly that.
They cost almost nothing, they welcome children of every age, and they turn your garden into a place that feels unmistakably yours.
No special talent is required — only a walk outside, a basket of treasures, and a quiet afternoon.
So this week, take the walk. Gather the sticks and the shells. Make something imperfect and wonderful, and hang it where the breeze will find it.
When you hear that first soft clink of shell against shell, you will know exactly what I mean.
Your summer has just become a little more musical.
And when you are ready for the next project, the garden is full of them. Painted stepping stones, a birdbath mosaic, pressed flower frames for the porch — the season is long, and there is always room for one more handmade thing.