Introduction
There is a moment in every beginner potter's life when the mug comes out of the kiln and looks... plain. The shape is honest, but the surface asks for nothing and gives back nothing.
A plain surface hides nothing; a textured one catches the light in a hundred small ways, so the piece shifts as you turn it in your hands.
That single shift — from flat to textured — turns beginner-looking pottery into work that reads as artisan. One pressed leaf or one confident incised line makes the same mug look considered.
None of it requires a pottery wheel, and none of it requires expensive glazes. You need clay, a few humble tools, and your own two hands.
Textured pottery rewards patience more than natural skill. We will cover the basics of clay stamping and carving clay by hand: tools, preparation, techniques, and finishing.
Materials and Tools to Begin
You likely own more texture-making tools than you realize. Before buying anything, look through the kitchen, the garden, and the sewing basket.
Ready-Made Clay Stamps
Clay stamps are small blocks carved with a raised design. Pressed into soft clay, they leave a clean, repeatable impression, ideal for borders and patterns.
Most craft and pottery suppliers carry them inexpensively. Choose wooden, ceramic, or rubber stamps with bold, simple shapes.
A single small stamp, one you genuinely love, is enough to begin. You can build an entire vocabulary of texture around one motif.
Making Your Own Stamps
Handmade stamps carry a special intimacy, because no one else will ever own that exact mark. Polymer clay is the friendliest material to start with.
Sculpt a small shape — a petal, a crescent, a spiral — press it onto a smooth base, and bake it according to the package directions. Glue the finished stamp to a wooden bead or short dowel for a handle.
You can also carve a wooden dowel stamp. Cut a clean, flat end, then carve a simple shape into it with a craft knife.
Keep designs bold. Fine details fill with clay and vanish after a few presses.
Found Objects Worth Pressing
Nature and the home supply an endless cabinet of stamps. Leaves with pronounced veins are the classic choice; oak, maple, and rose leaves all press beautifully.
Lace and doilies transfer their geometry onto clay with startling fidelity. Textured fabrics such as burlap and linen work the same way.
Shells, buttons, keys, corks, and bottle caps each leave a signature. A fork drawn across soft clay makes the tidy parallel lines that beginners adore.
Test every found object on a scrap of clay first. You will quickly learn which textures read clearly and which collapse into mush.
Keep discoveries in a small box near your work table. Half the pleasure of textured pottery is the hunt.
Carving Tools
Where stamps add texture, carving tools remove clay. The two approaches feel completely different, and you will likely fall in love with one.
A loop tool is a loop of fine wire in a handle, made for scooping clay away in smooth, controlled strokes. It is the workhorse of relief carving.
A needle tool is a long, sharp needle in a wooden handle. It draws fine lines and scratches through slip with real precision.
Ribbon tools cut clean channels at a consistent depth, and dental tools, sold inexpensively at craft stores, excel at delicate detail.
You do not need every tool on day one. One loop tool and one needle tool will carry you through most of your first year.
Kitchen and Desk Stand-Ins
Before you spend a cent, try what is already in the drawer. A wooden skewer makes a serviceable needle tool, and a toothpick draws soft lines or stipples dots.
A bent paper clip scratches fine marks into leather-hard clay. These stand-ins teach a valuable lesson: the tool matters less than the steadiness of your hand.
Preparing Your Clay
Texture work begins before the first stamp touches the surface, because texture magnifies every flaw in your clay. A thin patch or lump will show up in your stamping like a crack in a mirror.
Wedging
Wedging is the potter's kneading. You push and fold the clay to drive out air pockets and even out its moisture.
Air pockets are the quiet enemy; they expand in the kiln and can crack a piece from within. Spend five honest minutes wedging before every session.
Clay is ready when it feels uniform, smooth, and slightly springy, with no stiff lumps and no dry crumbles.
Rolling a Consistent Slab
Most surface texture happens on slabs, so even thickness matters. Two guide sticks of equal size, placed on either side of the clay, let your rolling pin ride at a consistent height.
A quarter to three-eighths of an inch suits tiles and mugs well. Thinner slabs warp and crack under the pressure of stamping.
Roll from the center outward, turning the clay a quarter turn between passes. Lift the slab now and then so it does not stick.
Keeping Clay Workable
Clay dries from the moment you unwrap it, and dry clay is brittle clay. Cover unused portions with plastic wrap or a damp cloth whenever you pause.
If a slab stiffens at the edges, mist it lightly with water and fold it onto itself for a few minutes. Work in small batches; a single covered slab is kinder to a beginner than a table of drying chaos.
Soft, Leather-Hard, and Bone Dry
Every technique here depends on catching the clay at the right moment. As it dries, clay passes through three stages, and each welcomes different tools.
Soft clay is fresh from the bag: pliable and slightly sticky. It is ideal for stamping, because the clay flows around the stamp and holds the mark.
Leather-hard clay feels cool and firm, no longer sticky, and holds its shape without slumping. It is ideal for carving, because cut lines stay crisp instead of closing over.
Bone-dry clay is pale and fragile; carving now would crumble the surface. At this stage you simply wait for the kiln.
Reading these stages by touch is one of the quiet skills of textured pottery, and you will learn it faster than you expect.
Five Surface Techniques to Make Your Own
The five techniques below are five complete worlds. Try them all once, then follow the one that calls to you.
Technique One: Stamping Impressions
Stamping is the friendliest entry into textured pottery. Press a stamp into soft-to-leather-hard clay, lift it away, and the design remains — crisp and entirely yours.
Press straight down with even, firm pressure. Do not rock the stamp side to side, which blurs the impression like a double exposure.
Support is everything. When stamping a curved pot, cradle the inside wall with your free hand so the form does not distort under pressure.
For the cleanest results, stamp flat slabs before assembly. A tile stamped while flat keeps its geometry, and a mug panel stamped flat becomes a mug that already wears its design.
Depth is a matter of taste. Shallow impressions stay subtle; deeper ones catch shadows and feel deliberate. Consistency across a row matters most.
Technique Two: Incised Line Work
Incised carving means drawing into leather-hard clay with a needle tool or loop tool, removing a fine line as you travel. Think of a pencil that erases as it writes.
Wait for the leather-hard stage. On soft clay the tool drags and the line closes behind itself; on leather-hard clay the line stays open and true.
Hold the tool like a pencil and let its weight do the work. Aim for a steady depth, because a wavering line catches the light unevenly.
You need no complex drawing. A single spiral or a border of dots can carry an entire piece, since lines cast shadows and shadows are the essence of texture.
Practice on a spare tile first. Ten minutes of warm-up lines will make your final piece immeasurably more confident.
Technique Three: Sgraffito
Sgraffito — from the Italian for "to scratch" — is scratching through a layer of colored slip to reveal the clay body beneath. It is one of the oldest surface techniques in ceramics.
Slip is simply liquid clay, thinned to the consistency of heavy cream. You can color it with underglaze or mason stains, or buy it ready-made.
Paint a smooth layer of colored slip over your leather-hard piece, and let it set until dry to the touch but not cracked — often about twenty minutes.
Then draw through the slip with a needle tool. Wherever the needle passes, the clay body shows through, giving you a two-tone drawing in a single pass.
White slip over terracotta is the classic pairing; dark slip over pale clay feels modern and graphic. Either way, the contrast is what sings.
Work with clean, dry tools. A crumb of dried slip dragged across your drawing leaves a scar you cannot unmake.
Technique Four: Relief Carving
Relief carving inverts the logic of sgraffito. Instead of drawing lines, you remove the background so the design stands proud of the surface, like a cameo.
Begin on leather-hard clay. Sketch the design lightly with a needle tool, then clear the background with a loop tool in shallow, overlapping scoops.
Go slowly, one layer at a time. Removing too much clay in a single pass gouges the surface and leaves an uneven field.
Leave the recessed background smooth, or stipple it gently with a needle tool. That quiet contrast gives relief work its depth.
This technique rewards bold, simple shapes. A leaf or a crescent moon carved in relief becomes a small sculpture you can hold.
Technique Five: Rolling Texture into Slabs
The fifth technique covers whole surfaces at once. Roll texture into an entire slab, build your piece from that patterned clay, or stamp one motif on top as a focal point.
Lay a piece of textured fabric — burlap, lace, a linen napkin — flat on your table and place a slab of clay over it. Roll firmly, and the fabric imprints itself into the clay.
Corrugated cardboard, doilies, and woven placemats all yield beautiful, repeatable texture. A textured rolling pin imprints as it rolls.
Roll once, evenly, and stop. Over-rolling smears the pattern and compresses the slab unevenly.
A whole field of texture can overwhelm a small piece. Pair it with one clean stamp — texture as background, motif as punctuation.
Project: A Stamped Leaf Tile or Mug
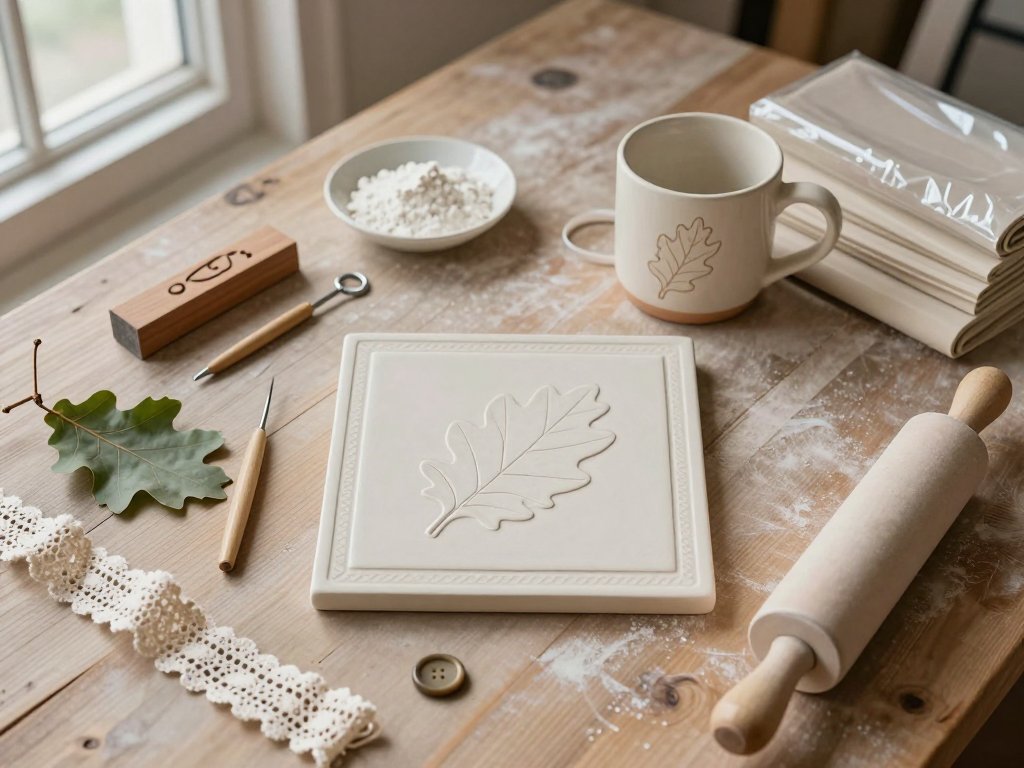
Let us bring the techniques together in one weekend project. A stamped leaf tile is forgiving, useful, and quietly beautiful — a trivet, a wall hanging, or a gift.
You will need about a pound of clay, a rolling pin with guide sticks, a leaf or leaf-shaped stamp, a needle tool, and a butter knife. Read through the steps once before you begin.
- Wedge your clay and roll a slab about a quarter-inch thick. Cut it into a square or rectangle near the size of a small trivet; six inches across works beautifully.
- While the slab is still soft, press your leaf into the center. Press evenly and firmly, keeping the slab flat on the table so it cannot distort.
- Let the tile rest until it firms to leather-hard, usually an hour or two. It should feel cool and hold its shape without flexing.
- Now carve. With the needle tool, draw a fine border line around the tile and add veins to the leaf in light, steady strokes.
- Smooth the cut edges with a damp sponge and bevel them slightly so the tile feels gentle in the hand. Wipe away every crumb of clay dust.
- Let the tile dry slowly to bone dry, loosely covered for the first day and then open to the air. Slow drying prevents warping.
- Bisque fire the tile, finish it with underglaze and clear glaze or an oxide wash, and fire it a second time.
Prefer a mug? Roll a larger slab, stamp the leaf off-center, and assemble the cylinder while the clay is still soft. Drying and firing follow the same patient rhythm.
Troubleshooting Common Beginner Problems
Every texture problem you meet has a cause and a cure. These are the ones beginners encounter most often.
- Cracks around your stamping. Pressing too hard into thin or uneven clay overworks it and opens fissures. Press more gently, keep slabs uniform, and smooth small cracks with a damp finger while the clay is soft.
- Distorted walls after stamping. The pot was not supported from inside while you pressed. Cradle the opposite wall with your free hand, or stamp flat slabs before assembly.
- Ragged carving edges. The clay was too wet, so it dragged instead of cutting, or your tool has dulled. Let the piece firm to leather-hard and refresh or replace the tool.
- Dust and crumbs ruining a clean line. Dry crumbs act like tiny erasers dragged across your work. Cover pieces between sessions, brush the surface before carving, and wipe your tools often.
- Stamp sticking to the clay. Moisture and suction bind the stamp to the surface. Dip it briefly in water and shake off the excess, or dust it with cornstarch, and it will release cleanly.
Notice a theme: most problems come from rushing. Clay rewards the unhurried hand, and every mistake teaches your fingers something they will remember tomorrow.
Finishing: Firing, Color, and the Oxide Wash
Texture becomes permanent only after the kiln does its work. Firing fixes your surface in place, and the right finish makes every ridge and hollow glow.
The Bisque Fire
Bisque fire every piece before adding color. This first firing hardens the clay and leaves it porous enough to accept glazes and underglazes without warping.
Handle bisque ware gently, since carved edges can chip if knocked. Dust the piece with a soft brush before any color goes on.
Route One: Underglaze and Clear Glaze
The simplest finish is underglaze, a ceramic color that behaves like matte paint. Brush it over your texture, or paint it carefully into the carved lines.
You can also wipe the surface with a damp sponge, removing underglaze from the high points and leaving color pooled in the recesses. Then add a clear glaze over the whole piece.
Clear glaze adds a glossy, protective skin and deepens whatever color lies beneath. One or two even coats are plenty.
Route Two: The Oxide Wash
An oxide wash is the potter's secret for making texture sing. Dilute a little mason stain or iron oxide in water until it resembles weak tea, then brush it generously over the bisque piece.
Before it dries, wipe the surface back with a damp sponge. The pigment settles into the carved valleys and stamped hollows while the high points return to bare clay.
This is why texture pops with a wash: gravity does the painting for you. Color gathers low, light stays high, and your design reads like a relief map.
An iron oxide wash over cream or terracotta clay gives an earthy, antique feel; a dark wash over white clay feels crisp and modern. The wash is inexpensive, and you see the result at once.
Whichever route you choose, the glaze firing seals your work forever. When the kiln cools, lift out a piece that carries your handprint in every line.
A Closing Word
Your first textured piece will not be perfect. There may be a crooked border or a stamp that slipped. Keep it anyway; those marks are the map of your learning.
Texture work is a conversation between you and the clay, and the clay is patient. Every slab you roll makes the next piece easier.
Begin with one leaf, one tile, one quiet afternoon. Then ask yourself: what pattern would you press into clay if no one else had to approve it?
The kiln will be ready whenever you are.
