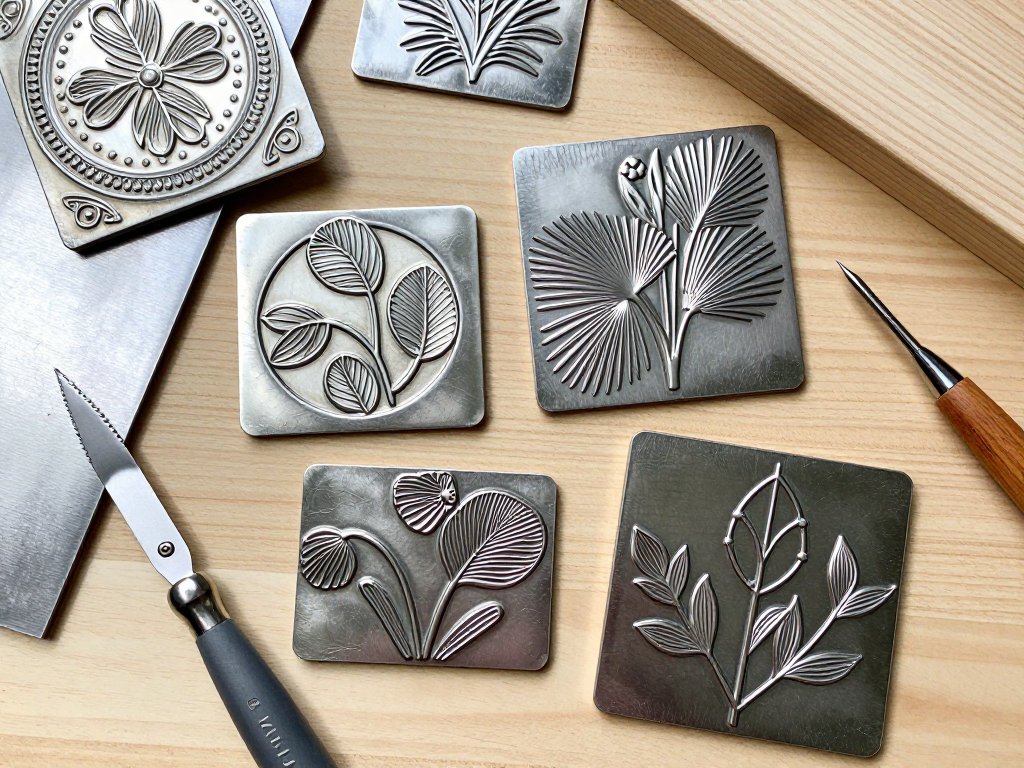
There is something deeply satisfying about transforming a flat, humble sheet of metal into a piece of dimensional art. Tin embossing — also called metal tooling or repoussé — dates back centuries, but it remains one of the most accessible and rewarding crafts for beginners today. Unlike welding, blacksmithing, or silversmithing, tin embossing requires no heat, no heavy equipment, and almost no startup cost. With a stylus in hand and a sheet of soft aluminum tooling foil on your workbench, you can create heirloom-quality pieces that look like they came out of a colonial-era workshop.
I have been teaching metal tooling workshops for over a decade, and I still get a thrill watching a first-timer's face light up when they flip their foil over and see the raised design catch the light. This guide is written with the absolute beginner in mind. Whether you want to craft handmade Christmas ornaments for your tree, personalized bookmarks for your book club, or dimensional wall art for your living room, the techniques are fundamentally the same. By the time you finish reading, you will know exactly which materials to buy, how to transfer any design onto metal, and how to finish your piece so it lasts for generations.
What Is Tin Embossing?
Tin embossing is the art of creating raised relief patterns on thin, malleable metal sheets by pushing the metal outward from the back side. The technique is often called "repoussé" (French for "pushed up") when done from the back and "chasing" when worked from the front. In practical terms, you draw or trace a design onto a piece of foil, then use a stylus or ball tool to depress the metal along your lines. The metal responds plastically — meaning it holds the shape you give it — which allows you to build up surprisingly deep, intricate reliefs.
Historically, craftspeople used copper, brass, and even silver for repoussé work. Modern hobbyists almost always use aluminum tooling foil, sometimes sold as "craft metal" or "embossing foil." It is softer than copper, cheaper than brass, and does not tarnish or corrode. A single sheet costs about a dollar and yields enough material for several small projects. For the purposes of this article, I will use "tin embossing" as a catch-all term for the modern craft, even though we are typically working with aluminum rather than actual tin.
Materials and Tools
One of the best things about tin embossing is how short the shopping list is. You can start with fewer than six items, many of which you may already have around the house.
Aluminum Tooling Foil (the Metal)
This is your primary material. Aluminum tooling foil comes in rolls or precut sheets and is typically 36-gauge (about 0.005 inches thick). That thickness is a sweet spot: thin enough to emboss by hand with moderate pressure, but thick enough to hold a crisp, permanent impression. For comparison, standard kitchen aluminum foil is around 62-gauge and far too thin — you will tear it the moment you apply any meaningful pressure. Look for products labeled "tooling foil," "craft metal," or "embossing foil" at craft stores like Michaels, Joann, or Hobby Lobby. Online retailers like Dick Blick and Amazon sell 12-by-12-inch packs of 36-gauge sheets in rolls of ten or twenty. If you want to experiment with actual tin (tin-plated steel), you can find it in the roofing or flashing section of a hardware store, but it is significantly harder to emboss and requires more arm strength. Stick with aluminum for your first dozen projects.
Embossing Tools and Styluses
You need something harder than the metal to push it with. The two most common stylus tip shapes are ball and loop.
Ball stylus: A metal rod with a small, round ball at the tip, typically 1 mm to 3 mm in diameter. The ball glides smoothly over the foil and produces a clean, rounded groove. I recommend starting with a 2 mm ball stylus — it is versatile enough for both fine detail and broader contour work. Ball styluses are sold singly or in sets of three with different ball sizes.
Loop stylus (spoon tool): Also called a "spoon tool" or "teardrop tool," this has a smooth, teardrop-shaped metal loop set into a wooden handle. The rounded edge of the loop moves across the foil with less friction than a ball tool, making it ideal for filling in large background areas. You can also use the pointed tip of the loop for fine lines. Most beginners eventually own both a ball stylus and a loop tool.
If you do not want to buy specialized tools right away, you can improvise with a dried-out ballpoint pen (the metal tip works surprisingly well), a knitting needle, a blunt pencil, a chopstick, or even a plastic cuticle pusher from a nail kit. The key is that the tip must be smooth and rounded so it does not puncture the foil.
Pattern Templates
You do not need to be a freehand artist to create beautiful embossed pieces. Print a line-art design onto regular printer paper, and you can trace it directly onto the foil. Look for coloring-book pages, mandala patterns, Celtic knotwork, or simple floral motifs. The best designs for beginners have bold, continuous outlines and moderate detail — think a single oak leaf rather than an entire tree. You can also draw your own template with a permanent marker on tracing paper. The template will be taped to the foil and traced over, so any design that fits within your foil sheet is fair game.
Masking Tape
Standard beige masking tape (not painter's tape, which is too low-tack) works well for securing your template to the foil and for holding the foil down to your backing material. Avoid clear cellophane tape — it leaves a sticky residue that can be difficult to remove without damaging the embossed surface.
Cardboard Backing / Work Surface
You need a soft, slightly cushioned surface beneath your foil so the metal has somewhere to go when you press it. A stack of 4 to 6 sheets of newspaper, a magazine, a few layers of felt, or a thick piece of corrugated cardboard all work well. My personal favorite is a 1/4-inch-thick piece of craft foam (sometimes called "fun foam") sold in sheets at dollar stores. It gives just enough give without being too squishy. Never work directly on a hard tabletop — the metal will not emboss properly because there is no room for it to deform downward.
Markers, Inks, and Patina
Raw aluminum is a bright silver-gray, which is lovely but can feel a bit plain. Adding color to the recessed or raised areas dramatically increases the visual impact of your piece. Here are the common finishing options:
- Permanent markers: The simplest approach. Color the recessed (depressed) areas with a dark marker like black, deep blue, or burgundy, then immediately wipe the raised areas with a soft cloth. The marker stays in the grooves and the raised areas wipe clean, creating a high-contrast look. Sharpie works well.
- Acrylic paint wash: Thin dark acrylic paint with water (about 1:3 paint to water) and brush it over the entire piece. Wipe the raised areas with a paper towel before the paint dries. The thinned paint settles into the recesses and leaves the highlights metallic.
- Alcohol inks: These produce vibrant, translucent color on aluminum. Drop them onto the surface and watch them spread organically. They are more expensive but create beautiful, unpredictable effects.
- Rub-on patina: Sold as "metal patina solutions" or "oxidizing gels," these chemicals darken the metal permanently. They are primarily intended for copper and brass but some formulations work on aluminum. Always test on a scrap piece first.
Scissors and Trimming Tools
Regular household scissors will cut aluminum tooling foil, but they will dull faster than they would cutting paper. Dedicate an old pair of scissors to your metal work, or invest in a pair of craft snips (tin snips). For straight cuts, a utility knife and a metal ruler work well — score the foil three or four times along the ruler, then bend along the score line to snap it cleanly.
Optional: Frame, Ribbon, Adhesive
For finished pieces you intend to hang or display, you will need a small shadow box frame or a simple wooden embroidery hoop to stretch the foil taut. Double-sided tape, craft glue, or spray adhesive mounts the foil to a backing board. For ornaments, a hole punch and a length of ribbon or metallic thread complete the piece.
Step-by-Step Techniques
Now that you have your materials assembled, let us walk through the process from start to finish. I recommend making a small practice piece first — a 4-by-4-inch square with a simple star or heart — so you can get a feel for how much pressure to apply before committing to a larger project.
Step 1: Design Transfer
Cut your aluminum tooling foil to the desired size using scissors or a utility knife. Make the foil about 1 inch larger than your finished piece on all sides — you will trim it down later, and the extra border gives you room to tape it down without damaging the design area.
Place your foil on top of your cushioned work surface. Lay your printed template (pattern side up) on top of the foil and secure all four corners with masking tape. The tape should hold the template firmly so it does not shift while you trace, but not so aggressively that you tear the foil when removing it later.
Take your ball stylus and begin tracing the outlines of your design. Apply firm, steady pressure — you want to feel the stylus tip pressing the foil into the cushion below. Move slowly; it is better to trace a line twice for depth than to rush and slip outside the design. When you finish tracing every line in the template, carefully peel off the tape and remove the paper. You will see a faint, depressed outline of your design on the front of the foil.
Step 2: Tracing Technique and Deepening
Flip the foil over so the back side faces up. Now trace the same lines again on the back. This is where the magic happens: pushing the metal outward from the back creates raised ridges on the front. The deeper you press, the higher the relief. Go over each line two or three times with increasing pressure. Rotate the foil as needed so you are always pulling the stylus toward your body — pulling gives you much more control than pushing.
For large open areas — a leaf interior, the body of an animal, a background field — use the loop tool to stipple or cross-hatch. Stippling means making a series of small dots close together. Cross-hatching means making parallel rows of lines in different directions. Both techniques create texture and visual depth. You can also use the broad side of the loop tool to gently push down entire background sections, which makes the main design pop forward even more.
Step 3: Embossing from the Back versus the Front
Understanding when to work from the back versus the front is the skill that separates mediocre embossing from truly dimensional work. Here is the rule: work the design elements from the back to push them up (repoussé), and work the background from the front to push it down (chasing). In practice, this means you trace your outlines on the front side first (step 1), then flip to the back side for most of the volume-building (step 2). At the end, you may flip back to the front for fine details — sharpening a line, adding a dot pattern, or defining a narrow passage. The contrast between raised elements and recessed background creates the illusion of carved metal.
A common beginner mistake is working exclusively from the front. This produces shallow grooves rather than true raised relief. Always spend at least twice as much time on the back as on the front. Your patience will be rewarded with pieces that have real dimensionality and catch the light from any angle.
Step 4: The Paper Towel Layering Technique
Here is a pro trick you will not find in most beginner tutorials. Place two or three layers of paper towel beneath your foil when you do the final deepening passes on the back side. The paper towels are softer than cardboard or craft foam, which allows the metal to stretch further without tearing. The fibers of the paper towel also create a subtle, random stipple texture on the raised areas — an effect that mimics the look of hand-hammered pewter or aged silver. Replace the paper towels when they become heavily creased. This single technique will elevate the quality of your embossing more than any fancy tool ever could.
Step 5: Adding Color and Patina
Once you are satisfied with the relief, trim the foil to its final size. Remove any tape residue with a dab of rubbing alcohol on a cotton ball.
For a marker finish: Color the entire recessed area of the design with a black or dark blue permanent marker. Let it sit for 30 seconds, then buff the raised areas firmly with a dry paper towel. The marker will remain in the grooves, creating a sharp two-tone effect. You can repeat this process with a second color on specific sections for a multi-toned look.
For an acrylic wash: Mix one part dark acrylic paint with three parts water. Brush the mixture over the entire front surface, working it into all the crevices. Before it dries, wipe across the raised areas with a damp paper towel, leaving the paint in the depressions. Let the piece dry completely (about 30 minutes), then spray with a clear acrylic sealer to prevent the paint from flaking.
For an alcohol ink finish: Drop two or three colors of alcohol ink onto different areas of the foil. Tilt the piece to let the colors blend and flow. The ink dries in minutes and bonds permanently to the aluminum. Seal with a clear UV-resistant spray if the piece will be displayed in direct sunlight.
Step 6: Framing and Display
An embossed foil piece is delicate — it can be bent or dented if handled carelessly. Mounting it on a rigid backing solves this problem. Cut a piece of stiff cardboard or foam core to the same dimensions as your foil. Apply a thin layer of craft glue or double-sided tape to the cardboard and carefully press the foil onto it, smoothing from the center outward to avoid trapping air bubbles. Insert the mounted piece into a shadow box frame (a frame with depth, typically 1 to 2 inches deep) so the foil does not press against the glass. For an alternative display, stretch the foil inside a wooden embroidery hoop — the hoop presses the edges against the inner ring and holds the foil drum-tight with no glue needed.
Three Project Ideas for Beginners
Project 1: Embossed Holiday Ornament
Cut a 5-by-5-inch square of 36-gauge aluminum tooling foil. Download a simple snowflake or star template from any free coloring page website. Trace and emboss following the steps above. After finishing, use a 1/8-inch hole punch to create a hole near the top edge. Thread a 6-inch piece of metallic gold or silver cord through the hole and tie a knot. For the back, cut a square of heavy cardstock the same size, write the year and your initials on it, and glue it to the back of the foil with the writing facing outward. This seals the sharp edges and creates a finished back. These ornaments make exceptional handmade gifts — your friends and family will remember them long after the store-bought decorations are forgotten.
Project 2: Personalized Bookmark
Cut your foil to 2.5 by 7.5 inches. Choose a template with an elongated shape — a Celtic knot, a vine with leaves, or a simple geometric border. Emboss the design along the bottom two-thirds of the strip, leaving the top third for the recipient's initial or name. You can freehand a monogram with a ball stylus or print a letter template and trace it. To finish, round the bottom corners with scissors (trace around a coin for a perfect curve), apply a dark acrylic wash, and seal with clear spray. These bookmarks are thin enough to slide between pages without damaging the spine, and the metallic sheen makes them feel luxurious. Make a set of four as a hostess gift.
Project 3: 5-by-7-Inch Wall Art
This is your first large-scale piece. Use a full 5-by-7-inch sheet of tooling foil and a design with strong positive and negative space — a tree silhouette, a sailing ship, a compass rose, or a large single flower like a sunflower or lotus. Spend extra time on the background treatment: use the loop tool to stipple the entire area around the main design, pushing the background down evenly so the central image stands tall. Finish with an alcohol ink patina — try copper and teal for a modern look, or amber and burgundy for a vintage feel. Mount on foam core and place in a 5-by-7-inch shadow box frame. Hang it in a grouping of three for a gallery wall statement, or give it as a housewarming gift that looks far more expensive than the few dollars in materials it cost to make.
Tips for Success
- Start small: A 3-by-3-inch practice piece is the best teacher. You will learn how the metal responds to different pressures and tool angles without wasting material.
- Work in good light: Embossing is a tactile craft, but you still need to see the faint lines you are creating. Position a desk lamp so it casts a raking light across your foil — the shadows make the relief visible.
- Let the metal breathe: If you work the same spot repeatedly without letting up, the aluminum can work-harden and crack. Take breaks, and if you feel resistance increasing, move to a different area and come back.
- Save every scrap: Offcuts of tooling foil are perfect for practice, small pendants, gift tags, or testing color combinations before committing them to a finished piece.
- Use a lubricant for deep work: A tiny dab of hand lotion or petroleum jelly on the back of the foil reduces friction when you are doing heavy deepening passes. Wipe it off thoroughly before adding color.
- Label your templates: Once you have a design traced and embossed successfully, store the template in a clear sleeve in a three-ring binder. You can reuse it for years.
- Wear cotton gloves: The oils from your fingers can leave permanent marks on the foil, especially after the surface has been textured. White cotton inspection gloves cost pennies and prevent smudging.
- Embrace imperfections: Embossed metal is never perfectly symmetrical or mathematically precise. Those small wobbles and variations are what give handcrafted metal art its warmth and character. Do not chase machine perfection — chase artistry.
Variations to Explore
Once you have mastered the basic technique, the creative possibilities multiply quickly:
- Color layering: Apply a light-colored alcohol ink first, let it dry, then add a darker ink to the recessed areas only. The light color peeks through on the raised portions for a beautiful depth effect.
- Mixed media: Combine embossed metal with other craft materials. Mount it on patterned scrapbook paper, wrap it with natural twine, or attach it to a piece of driftwood for a rustic look.
- Embossed greeting cards: Emboss a small 2-by-3-inch metal piece and glue it to the front of a folded card. Add a handwritten message inside. Your recipients will keep these cards forever.
- Foil and resin: Pour a thin layer of UV-curing resin over an embossed piece. The resin fills the recesses and creates a glossy, glass-like finish that magnifies the depth of the relief.
- Mold making: Press polymer clay or air-dry clay onto your finished embossed piece to create a negative mold. You can then cast multiples in resin, wax, or even chocolate for truly unique applications.
- Jewelry: Use a 1-inch circle punch to cut embossed circles, then attach pin backs, earring posts, or keychain rings. Seal with multiple coats of clear nail polish to protect against wear.
- Copper and brass: When you are ready for a challenge, upgrade to 36-gauge copper or brass sheets. These metals are harder than aluminum and require more pressure, but they accept patina chemicals beautifully and produce a genuinely antique look.
Conclusion
Tin embossing is one of those rare crafts that delivers professional-looking results with beginner-level equipment. A few dollars worth of foil, a stylus, and some tape are all you need to start creating dimensional metal art that looks like it took hours of training in a metalsmith's workshop. The techniques are forgiving, the materials are inexpensive, and each piece you make is genuinely one of a kind — no two embossed designs ever come out exactly the same, no matter how carefully you follow the template.
I have seen students who walked into my workshop insisting they had "no artistic talent" produce absolutely stunning pieces within their first hour. The reason is simple: embossing does not require you to draw. It requires you to trace, to press, and to pay attention to how the metal responds to your touch. Those are skills anyone can learn, and they improve quickly with practice. By your third or fourth project, you will develop an intuitive sense of how deep to press, which tool to reach for, and exactly where to add that extra detail that takes the piece from good to extraordinary.
I encourage you to start with the ornament or bookmark project this weekend. Gather your materials, print a simple template, and give yourself an uninterrupted hour to focus on the process. Feel the stylus glide across the foil, listen to the faint crinkle of the metal as it stretches, and watch your design emerge in three dimensions under your hands. There is a quiet, meditative quality to this work that is increasingly rare in our digital world. It is just you, the metal, and the design — and the result is something you will be proud to hang on your wall, give as a gift, or pass down to the next generation.
Now clear your worktable, cut a piece of foil, and start pressing. Your first heirloom is waiting.